Table of Contents
Advertisement
Advertisement
Table of Contents
Troubleshooting

Related Manuals for Soehnle 6958


Summary of Contents for Soehnle 6958
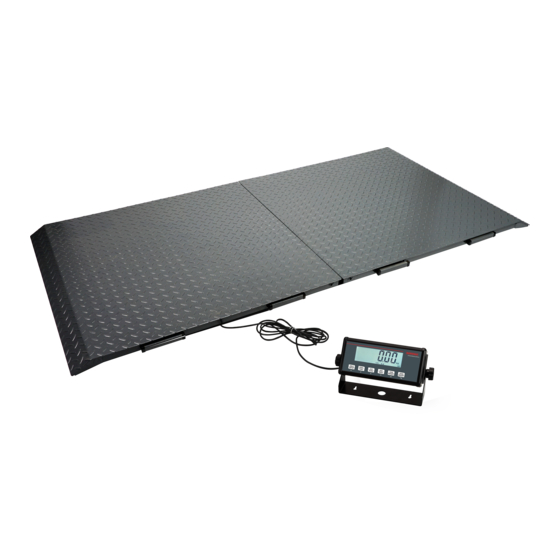
- Page 1 Animal scale User manual 6958 www.soehnle-professional.com...
- Page 2 Thank you for choosing this Soehnle Professional product. Soehnle Professional is a brand of Soehnle Industrial Solutions GmbH. This product is equipped with all features of the latest technology. If you have any questions or if you have problems with your device that are not covered in the operating instructions, please contact your Soehnle Industrial Solutions service centre or our customer service.
-
Page 3: Table Of Contents
Content 1. Scope of delivery ............4 2. Warnings ..............4 3. General information ............5 3.1 Technical Data .........5 3.2 Connection types ........6 4. Installation ..............7 4.1 Unpacking and installation .......7 5. Controls and functions ..........9 5.1 Display unit and key descriptions ....9 5.2 Display character definitions ....10 5.3 Terminal display........11 5.4 Meaning of symbols on faceplate .....11... -
Page 4: Scope Of Delivery
1. Scope of delivery Terminal Platform Power supply User manual 2. Warnings Verify that the input voltage range printed on the data label matches the local AC power to be used. Make sure that the power cord does not pose a potential obstacle or tripping hazard. -
Page 5: General Information
3. General information 3.1 Technical data Max. display range -999,999 to 999,999 Max. display resolution 1:100,000 (primary unit) 1:125,000 (second unit) Max. approved resolution 1:5,000 Division 0.0001, 0.0002, 0.0005 to 10, 20 ,50 Calibration unit kg or lb Weighing units g, lb, lb:oz, g, oz, pcs, % Display 6-digit, 7-segment, 25 mm height LCD with blue backlight Accuracy ≤ 0.01 % Power supply 4x AA batteries or AC adapter: 9V DC / 600 mA with central positive Work current ≤ 15 mA (backlight off, no load cells) -
Page 6: Connection Types
3. General information 3.2 Connection types 7-pins socket, assigned as follows: Pin 1: Excitation + - Pin 2: Sense + Pin 3: Signal + Pin 4: Excitation - Pin 5: Sense - Pin 6: Signal - Pin 7: Shield 7 holes socket (Terminal) 7 pins socket (Base) -
Page 7: Installation
4. Installation 4.1 Unpacking and installation Caution: Do not pull on the load cell cable and connectors during installation, as this may damage the parts. 1. Remove the two platforms 1 & 2 with the same serial number from the boxes and align them as shown below. - Page 8 4. Installation 3. Mount the mounting brackets as shown in the picture below to align two platforms. Note: It is necessary that the two platforms are loosely connected. 4. Plug the connection cable of platform 1 into the connection socket on the display.
-
Page 9: Controls And Functions
5. Controls and functions 5.1 Display unit and key descriptions Mode Description < 3 seconds Enters or exits HOLD mode Weighing, counting or percent mode > 3 seconds Enters SETUP mode HOLD/ < 3 seconds Returns to last sub-menu SETUP Input data mode >... -
Page 10: Display Character Definitions
5. Controls and functions 5.2 Display character definitions... -
Page 11: Terminal Display
5. Controls and functions 5.3 Terminal display 5.4 Meaning of symbols on faceplate Scale is zeroed, gross weight is 0, tare is 0 Scale is stable Display reading is net weight; tare is not 0 Total Display data is accumulated total times, weight, pieces, or percentage Hold Scale is in dynamic weighing mode - Hold flashes - actual fluctuating weight is displayed... -
Page 12: Operation
6. Operation 6.1 Normal weighing mode Note: During key operation, please note to use the second function of one key need pressing the key over 3 seconds. To input data or select menu, use arrow keys to process Power on/off terminal: Power on: When terminal is off, press [ZERO/ON/OFF] key short to turn on. - Page 13 6. Operation Change weight unit: Press [UNIT/DATA] key short, to select the units kg, lb, lb:oz, g or oz. Note: Under some conditions, the units g and lb:oz are not available Check weight in weighing mode: (1) To make weight compare function be available, CONFIG-FUNC-COMPAR item should set to YES, and high and low limitation of weight should be set correctly according to following steps: (2) In weighing mode, press [UNIT/DATA] key for more than 3 seconds to input compare data of high and low.
-
Page 14: Count Weighing Mode
6. Operation 6.2 Count weighing mode In this mode, scale will weigh goods weight on scale, calculate and display its counts after the piece weight of goods is obtained. To make counting function be available, CONFIG-FUNC-COUNT item should be set to YES in CONFIG menu. Enter counting working mode: In normal weighing or percent-weighing mode, press [PRINT/FUNC] key long. -
Page 15: Percent Weighing Mode
6. Operation Check Counts (counts compare) in Counting mode: (1) To make counts compare function be available, CONFIG-FUNC-COMPAR item should set to YES, and high and low limitation of pieces should be set correctly according to following steps: (2) In counting working mode, press [UNIT/DATA] key for more than 3 secondsto input compare data of high and low. - Page 16 6. Operation Input weight and its percentage from keypad, and calculate unit-percentage-weight: in percent weighing mode, press [UNIT/DATA] key, When InP.Pct is shown, press [TARE/PRESET] key to enter this mode: (1) Before input weight, use [PRINT/FUNC] or [ACC/TOTAL] key to select the percentage from 1%, 2%, 5%, 10%, 20%, 50% and 100%, this percentage is corresponding to the weight you will input in the following steps (2) When UNIT.KG is shown, use [PRINT/FUNC] or [ACC/TOTAL] key to select the unit of input weight,...
-
Page 17: Bmi Working Mode
6. Operation 6.4 BMI working mode To make BMI working Mode be available, CONFIG-FUNC-BMI menu item should be set to YES and factory setting should be also enable this function. To enter BMI working mode: When CONFIG-FUNC-ACCUMU=Yes: If In normal weighing mode, percent weighing mode, or counting mode, press [PRINT/FUNC] key long, then WEIGH or COUNT or PERCEN will be shown, use [ACC/TOTAL] or [PRINT/FUNC] key to select BMI, then press [TARE/PRESET] to confirm go to BMI mode. -
Page 18: Hold Function
6. Operation 6.5 HOLD function HOLD function can be used to freeze display number. In this mode, the scale can catch a dynamic number, hold a stable number, or average a unstable number, then HOLD (freeze) this number temporary for user to watch or record. This function can be used in normal weighing mode, counting mode and percent weighing mode. -
Page 19: Accumulation
6. Operation Average HOLD: When USER-HOLD-HLD.MOD is set to AVERAG, the hold mode is average hold mode. After entering this working mode, scale will freeze and display number if scale is stable. If scale is not stable, but the variation is less than USER-HOLD-DYN.RNG, scale will average data in USER-HOLD-AVG.TIM, then freeze and display the number. -
Page 20: Weight Fine-Tuning
6. Operation 6.7 Weight fine-tuning With this function, the user can adjust the displayed weight a little. There is no need for a standard weight. This adjustment can only be done in the weighing mode. Note: (1) The scale must have been calibrated before this adjustment (2) The range of adjustment is “(current displayed weight) x (0.9-1.1)”. -
Page 21: Explanation Of Symbols & Troubleshooting
7. Explanation of symbols & Troubleshooting 7.1 Explanation of symbols Zero is over the setting range ---- Zero point is below the setting range ____ Signal to ADC is over max. range ---- Signal to ADC is below min. range ____ Weight is over upper limitation, or display data is over limitation ----... -
Page 22: Troubleshooting
7. Explanation of symbols and Troubleshooting 7.2 Troubleshooting Problem Probable cause Remedy Load cell wires to indicator are incorrectly Make sure wires are ok and correctly connected. connected, or shorted, or opened; or ADC, load Replace load cell or ADC chip. Service is required. Ad___ cell are damaged Make sure scale platform is empty. - Page 23 Notes...
- Page 24 All rights reserved. © Soehnle Industrial Solutions GmbH, Publication, duplication, or any form of commercialization of such material beyond the scope of the copyright law shall require the prior written consent of Soehnle Industrial Solutions GmbH. Subject to technical modifications.
Need help?
Do you have a question about the 6958 and is the answer not in the manual?
Questions and answers