Advertisement
Table of Contents
- 1 Table of Contents
- 2 Unpacking and Inspection
- 3 Dimensions/Specifications
- 4 Wiring Schematic
- 5 Safety Guides
- 6 Water Conditioning Information
- 7 Assembly
- 8 Planning Installation
- 9 Installation
- 10 Programming the Faceplate Timer
- 11 Customizing Features/Options
- 12 Routine Maintenance
- 13 Troubleshooting Guide
- 14 Repair Parts
- Download this manual
Advertisement
Table of Contents

Subscribe to Our Youtube Channel
Related Manuals for EcoWater ESM11CE


Summary of Contents for EcoWater ESM11CE
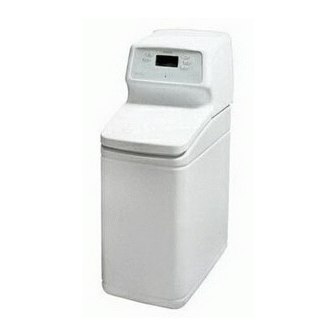
- Page 1 OWNERS MANUAL How to maintain and operate your EcoWater digital demand water system EcoWater Digital Demand MODELS ESM11CE ESM15CE Ver sion 02 - - 2005 (4/20/04)
-
Page 2: Table Of Contents
ECOWATER Unpacking Y S T The parts required to assemble and install the unit are included in a parts bag. Thoroughly check the unit for possible shipping damage and parts loss. Also inspect and note any damage to the shipping carton. -
Page 3: Dimensions/Specifications
ECOWATER Dimensions / Specifications Y S T 43.2 8.6 cm 32.4 cm IN --- OUT MODEL NOMINAL RESIN TANK SIZE ESM11CE 8” DIA. X 19” 54 cm 41.4 cm 66.8 cm ESM15CE 8” DIA. X 25” 70 cm 58.4 cm 83.8 cm... - Page 4 ECOWATER Service Information Y S T MODEL CODE ESM11CE ESM15CE MODEL CODE FILL CYCLE ¡ TIME 1.0---4.0 1.7---9.3 © FLOW 0.3 gpm (1.1 l/min) 0.3 gpm (1.1 l/min) BRINE CYCLE ¢ TIME 64---67 60---77 £ FLOW 0.15 gpm (0.57 l/min) 0.15 gpm (0.57 l/min)
-
Page 5: Safety Guides
ECOWATER Safety Guides Y S T Follow the installation instructions carefully. (Failure to install the unit properly voids the warranty.) Before you begin installation, read this entire manual. Then, obtain all the materials and tools you will need to make the installation. - Page 6 ECOWATER Water, and Water Conditioning Y S T 2. IRON in water is measured in parts per million (ppm). The total* ppm of iron, and type or types*, is determined by chemical analysis. Four different types of iron in water are: ¡...
-
Page 7: Assembly
ECOWATER Assembly Y S T 1. Water softeners are factory assembled. During installation, remove the Salt Hole Cover. Set aside to prevent damage. Check the brinewell to be sure it is secured and vertical (see Figure 1). Slide Faceplate Cover forward to expose back valve assembly. -
Page 8: Planning Installation
ECOWATER Planning Installation Y S T Inlet - - Outlet Plumbing Options • ALWAYS INSTALL either a single bypass valve (not included) or a 3 valve bypass system (not included). Bypass valves allow you to turn off water to the softener for repairs if needed, but still have water in house pipes. - Page 9 ECOWATER Planning Installation Y S T Other Requirements • A 220V--50Hz, grounded electrical outlet (continuously ‘‘live’’) is needed within 2 meters of the unit. • A drain is needed for regeneration discharge water. A floor drain, close to the unit, is preferred. A laundry tub, standpipe, etc., are other drain options.
- Page 10 ECOWATER Planning Installation Y S T 1/4” NPT #7024160 Barbs for 3/8” I.D. tubing Clip 1/4” NPT Threads Comp Fitting 1/4 NPT x 1/2” O.D. Tube Barbs (Not Furnished) 1/2” Outside Diameter Copper Tube (Not Furnished) Cut Barbs from Drain Fitting (Pull...
-
Page 11: Installation
ECOWATER Planning Installation Y S T Optional Weather Protection If installing the unit in an outside location, be sure to provide protection from the elements, contamination, vandalism, and direct sunlight. An optional Weather Cover is available for outdoor installations by contacting your local dealer. - Page 12 ECOWATER Installation Y S T Visually check and remove any foreign materials from the valve inlet and outlet ports. If not already done, put a light coating of silicone grease or Vaseline on the bypass valve o-rings. Push the bypass valve into the softener valve as far as it will go. Snap the two large holding clips into place, from the top down as shown in Figure 8.
- Page 13 ECOWATER Installation Y S T Step 5. Cold Water Pipe Grounding WARNING: The house cold water pipe (metal only) is often used as a ground for the house electrical system. The 3-valve bypass type of installation, shown in Figure 2, will maintain ground continuity. If you use a plastic bypass valve at the unit, continuity is broken.
- Page 14 ECOWATER Installation Y S T Step 8. Pressure Testing for Leaks To prevent excessive air pressure in the unit and plumbing system, do the following steps EXACTLY in order. 1. Fully open two or more softened cold water faucets nearby the unit.
- Page 15 ECOWATER Installation Y S T 3. This process will flush out all sanitizing solution and condition the unit. Step 11. Connect Transformer 1. Connect the power cable leads to the two terminals on the transformer. NOTE: Check to be sure all leadwire connectors are secure on the back of the timer.
-
Page 16: Programming The Faceplate Timer
ECOWATER Programming the Digital Demand Faceplate Controller Y S T Display RECHARGE Keypad UP Keypad SALT LEVEL Keypad SELECT/EXIT Keypad SALT LEVEL RECHARGE Digital Demand DOWN Keypad Figure 12 THE FOLLOWING STEPS ARE FOR FIRST TIME SET UP ONLY. When the transformer is plugged in, a ‘‘beep’’ will sound, followed by the factory set model code display and soft- ware version for a few seconds. - Page 17 The controller is factory set to 2:00 AM. At this setting, the EcoWater conditioner begins recharge, or regeneration, ending no later than 5:30 AM. This is a good time in most households because water is not being used. If hot water is used while the unit is regenerating, the water heater will refill with hard water.
-
Page 18: Customizing Features/Options
PROGRAM MEMORY: If electrical power to the EcoWater conditioner goes off, the display is blank, but the face- plate controller keeps the correct time for at least two days. When electrical power comes on again, you have to verify clock time is correct. - Page 19 Recharge Tonight. Press SELECT/EXIT keypad to return to Normal Screen Views. When this feature is set, the EcoWater conditioner will regenerate at the next programmed start time. This feature is beneficial to assure a sufficient supply of conditioned water for an expected heavy water usage the next day.
- Page 20 ECOWATER Faceplate Controller, Features/Options Y S T Primary Menu, continued Water Flow Rate: Enter Primary Menu. Press the (↑) or (↓) keypads until cursor is next to Water Flow Rate. Press the SELECT/EXIT (↵ ) keypad. When se- lected, this screen will show the water flow rate in liters per minute (LPM) or gal- lons per minute (GPM) with the moving bar graph at the bottom of the display.
- Page 21 ECOWATER Faceplate Controller, Features/Options Y S T Primary Menu, continued Send E.A.S.E. Message: Enter Primary Menu. Press the (↑) or (↓) key- pads until cursor is next to Send E.A.S.E. Message. Press the SELECT/ EXIT ( ↵ ) keypad. The unit will automatically start sending E.A.S.E. mes- sage and show a progress bar on the display.
- Page 22 ECOWATER Faceplate Controller, Features/Options Y S T The following is a description of the options in the Advanced/Service Menu. To enter any of the following menus, press SELECT/EXIT (↵) to enter Primary Menu. Press the (↑) or (↓) keypads until cursor is next to Advanced/Ser- vice.
- Page 23 ECOWATER Faceplate Controller, Features/Options Y S T Advanced/Service Menu, continued Efficiency Mode: Press the (↑) or (↓) keypads until cursor is next to Efficiency Mode and press SELECT/EXIT ( ↵ ). Default is Auto Adjusting which has a minimum efficiency of 3350 grains/lb of salt ( = 48.2 _Fm#/kg of salt). Use the (↑) or (↓) keypads to change to either High Capacity which sets the regeneration...
- Page 24 2) Use the (↑) or (↓) keypads to change to new model code. Be sure to set the correct code, or the EcoWater conditioner will operate on incorrect timing. NOTE: If this feature is changed, it will delete all information stored in the control- ler (Hardness, Recharge time will have to be reset.
-
Page 25: Routine Maintenance
ECOWATER Routine Maintenance Y S T Refilling With Salt Remove the Salt Storage Tank Front Cover and check the salt storage level frequently. If the conditioner uses all the salt before you refill it, you will get hard water. Until you have established a refilling routine, check the salt every two or three weeks. - Page 26 ECOWATER Routine Maintenance Y S T Cleaning the Nozzle and Venturi A clean nozzle and venturi (see Figure 14) is a must for the conditioner to work properly. This small unit creates the suction to move brine from the brine tank, into the resin tank. If it should become plugged with sand, silt, dirt, etc., the conditioner will not work, and you will get hard water.
-
Page 27: Troubleshooting Guide
ECOWATER Troubleshooting Guide Y S T Tools Needed For Most Repairs: 5/16 Hex Driver, Phillips Screwdriver, Needle---nose Pliers REPAIR KIT(S) NEEDED PROBLEM CAUSE SOLUTION No Soft Water 1. No salt in the storage tank a. Refill with salt (see page 25) None b. - Page 28 ECOWATER Service Information Y S T Automatic Electronic Diagnostics The faceplate computer has a self--diagnostic function for the electrical system (except input power and water meter). The computer monitors electronic compo- nents and circuits for correct operation. If a malfunction occurs, the computer at- tempts to self correct, displaying ADJUST VALVE in the Normal View Screen.
- Page 29 1. Press the RECHARGE keypad. Move cursor down to Start Rchg Now and press SELECT/EXIT (↵) to start a recharge. As the EcoWater conditioner enters the fill cycle of regeneration, remove the brinewell cover and, using a flashlight, observe fill water entering the tank.
-
Page 30: Repair Parts
ECOWATER Repair Parts Y S T... - Page 31 Repl. Bottom Distributor 7113016 Tubing Assembly 7264037 Resin Tank, 8 in. dia x 25 in., ESM15CE 7131365 Screen 7256377 Resin Tank, 8 in. dia x 19 in., ESM11CE 7080653 Clip 7088033 Clamp Retainer, 2 req’d 7092252 Brine Valve Body 7176292 Clamp Section, 2 req’d...
- Page 32 ECOWATER Repair Parts Y S T...
- Page 33 Flow Plug, Backwash / F. Rinse control & ESM15CE 7113927 Cam and Gear 7190547 Gasket (only) 0503288 Bearing 1148800 Fill Flow Plug, .3 gpm, ESM11CE & 7231385 Motor Plate ESM15C 0900857 Screw, #6 --- 20 x 3/8 in. (2) 1202600 Nut---Ferrule 7250622 Motor --- Includes Key No.
Need help?
Do you have a question about the ESM11CE and is the answer not in the manual?
Questions and answers