Table of Contents
Advertisement
Quick Links
Advertisement
Table of Contents

Summary of Contents for ReActiveMicro MicroDrive Turbo
- Page 1 MicroDrive Owner’s Manual...
- Page 2 MicroDrive...
- Page 3 Customer Satisfaction The MicroDrive Turbo Expansion Card comes with a lifetime warranty to you the original purchaser. Limitation on Warranties and Liability Even though ReActiveMicro.com has tested the hardware described in this manual and reviewed its contents, neither ReActiveMicro.com nor its...
-
Page 5: Table Of Contents
Copy a File to the ⇒ CF Card ........17 Copy a File from the ⇐ CF Card ....... 18 Technical Support ............. 19 Uthernet/ADTPro with MicroDrive Turbo ..... 19 Copy Protected Software ........19 Self-Powered IDE to CF Adapters ......20 IDE Pin 20 Power Mods .......... - Page 6 The Evolution of IDE (ATA): ........43 Compact Flash Overview .......... 44 What is a CF Storage Card? ........44 CF Card Internal Diagram .......... 44 MicroDrive Turbo Revision History ......45 First DMA IDE Controller........45 Card Revisions ............45 Online Review ............. 45...
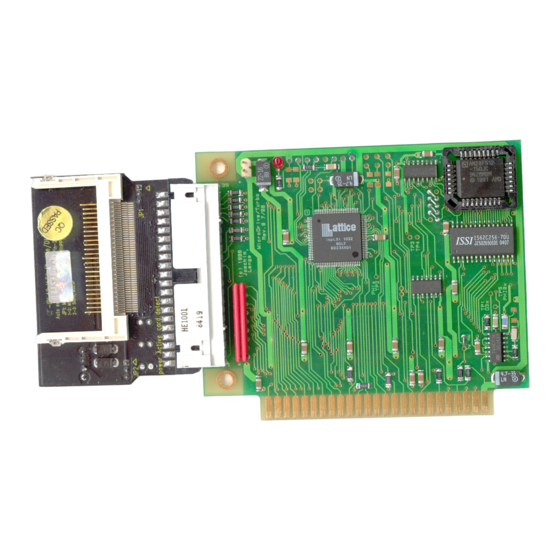
- Page 7 The hardware is the most sensitive part; an improperly-performed hardware installation could damage the MicroDrive Turbo and the Apple Computer. The MicroDrive Turbo is an Apple II Expansion Card that gives the Apple II the Apple IIe Enhanced Personal Computer a complete Solid State Storage Solution.
-
Page 8: Microdrive Turbo
Up to 8 partitions on one CF Card, 16 partitions on two CF Cards. Fully compatible with all hardware such as: TransWarp , ZIP GSX, PC Transporter, RAM Cards from Apple, Applied Engineering, CV-Tech, Harris, Q-Labs, Sequential Systems etc. MicroDrive Turbo Expansion Card 1 MicroDrive Turbo ReActiveMicro... -
Page 9: Advanced Features
Standard IDE Interface The 40 Pin IDE interface on the MicroDrive Turbo is a standard 16-bit IDE port. It is capable of addressing Primary and Secondary (Master/Slave) IDE storage. IDE to Dual CF Adapter The MicroDrive Turbo comes standard with a 40 Pin IDE to Dual CF Adapter. - Page 10 By default, Volume 1 is set to boot. However, when setting up a New CF Card the user sets which Volume they desire to boot. Or on an existing CF Card the Setup utility can modify the default boot Volume. The MicroDrive Turbo also offers a temporary option to boot to ANY volume.
-
Page 11: Setup Utility
Setup Utility Make a Backup Copy Before using your MicroDrive Turbo, make a backup of the MicroDrive Turbo Setup Utility. Without this Utility you will be unable to re-setup the CF Card(s) should your run into problems or accidentally format the original copy. -
Page 12: Installation
flexibility when it comes to booting. You will need to decide however what is the best to meet your needs. If not installing the MicroDrive Turbo in Slot 7, then we usually recommend Slot 2. By default, the II is set to use Slot 2 for a Modem. Since most users no longer use a Modem, Slot 2 is a good choice. - Page 13 Your Card. There is also no need to change the Startup Option if it is set to Slot 7 or Scan. If, however you want to use the MicroDrive Turbo in Slot 2 you will need to change the Slot setting to Your Card.
-
Page 14: Apple Iie Enhanced
Apple IIe Enhanced When installing the MicroDrive Turbo in your Apple IIe a few things need to first be taken into consideration. For example, will you want to primary boot the MicroDrive Turbo, your Floppy Drives, or other bootable devices installed in your system? For most installations users will want to boot primary to the MicroDrive Turbo. -
Page 15: Cf Backup & Restore
CF Backup & Restore One important feature of the MicroDrive Turbo the ability to remove the CF Card(s) and use CiderPress to back up the Volumes on it. To do this you will need the following: ✔ CiderPress installed on your PC or Mac Computer. - Page 16 Setup Utility: Be sure to back-up the MicroDrive Turbo Setup utility to floppy! This disk will be for backup purposes or if you need to setup a New CF Card. Upon booting the MicroDrive Turbo you will be taken to Volume which holds the ProDOS 8 utilities.
- Page 17 Usually there isn't any issue, however you can experience data corruption or loss if the setting is not correct. Upon booting the MicroDrive Turbo you will be taken to Volume 1 which holds the ProDOS 8 utilities. You will see a folder named MICRODRIVE.
- Page 18 Boot to Other Volumes: The MicroDrive Turbo comes set to boot to Volume 1 by default. You can however temporary boot to other Volumes on the CF Card. Hold down the key when powering on the Apple II. This will pause the MicroDrive Turbo's splash screen.
- Page 19 Adding Volumes to CF Card: To add more Volumes to your CF Card. Upon booting the MicroDrive Turbo you will be taken to Volume 1 which holds the ProDOS 8 utilities. You will see a folder named MICRODRIVE. Using the Arrow keys to highlight the folder and press . You will now see a file called MICRODRV.SETUP...
- Page 20 PC) you must first partition it. However, if you do not have an existing bootable CF Card or a backup of the MicroDrive Turbo Setup Utility on Floppy Disk then you will need to contact ReActiveMicro support in order to obtain a new CF Card which is preloaded, or a Diskette with the Setup Utility.
-
Page 21: Ciderpress - Backup & Restore
CiderPress will now start to read the Volume and save it to your PC. When it is done the popup progress window will close. Optional: You can now select other Volumes to backup if desired. ✓ Done! MicroDrive Turbo ReActiveMicro... -
Page 22: Restoring The Cf Card
CiderPress will prompt you to make sure you want to overwrite a Volume if there is data there, and you need to confirm OK to continue. If it is blank it will start loading the image. You can load multiple images if you wish. ✓ Done! MicroDrive Turbo ReActiveMicro... -
Page 23: Raw Disk Copier
Card as it will copy the Partition information unlike CiderPress. So you do not need to run the MicroDrive Turbo Setup Utility before restoring the HDD Raw Copy Image. This could be a useful backup method should the Setup Utility backup disk you made see Backing Up - Setup Utility above ever becomes damaged, lost, or unusable. -
Page 24: Ciderpress - Copying Files
Right click on the location, then select Add Files... Browse to the file's location, select any desired options, then click the OK button. You will now see the file located on the CF Card. Repeat as desired to add more files. ✓ Done! MicroDrive Turbo ReActiveMicro... -
Page 25: Copy A File From The ⇐ Cf Card
Browse to the location you wish to copy the file to, select any desired options, then click the OK button. You will now see the file located where you selected. Repeat as desired to copy more files. ✓ Done! MicroDrive Turbo ReActiveMicro... -
Page 26: Technical Support
Uthernet initialization interferes with the operation of the MicroDrive Turbo running firmware. To be specific, if the MicroDrive Turbo is in a slot number lower than the Uthernet or Uthernet II, ADTPro will not start. Even if you create and save an ADTPro Uthernet configuration to specify an Uthernet slot using a different computer, the... -
Page 27: Self-Powered Ide To Cf Adapters
Self-Powered IDE to CF Adapters The MicroDrive Turbo comes with a self-powered IDE to CF Adapter with a pre-setup CF Card. Self-powered refers to the IDE to CF Adapter which uses power supplied on Pin 20 of the IDE connector and does not require an external power source. This means the Apple II Computer can supply power to the CF Card and no other power source is needed. -
Page 28: The Hfs File System
The HFS File System HFS (MAC) File System ☹ The MicroDrive Turbo Card does not allow partitions greater than 32MB, this is the upper limit for the ProDOS File System. The only reason to open the 32MB limit would be using HFS partitions. -
Page 29: Firmware
The IIe Firmware ROM is marked with a label that displays IIe. If the label has been removed or fallen off. Try the MicroDrive Turbo in an Enhanced IIe, if the computer operated correctly then the IIe Firmware is installed. - Page 30 MicroDrive Turbo ReActiveMicro...
-
Page 31: Mechanical Hard Disk Drive Setup
Drives, this section of the Manual should be overlooked. Setup First, remove the IDE to CF Adapter from the MicroDrive Turbo. The unit should just slide off when pulled. Be careful to not bend any pins on the IDE male header. -
Page 32: Ide 40-Pin Interface Connector
MicroDrive Connector IDE Cable Colors □ The Blue Connector attaches to the MicroDrive Turbo Card, be sure not to bend any of the pins, it should slide on without force. □ The Grey Connector attaches to an optional Secondary Hard Disk Drive which is referred to as a Slave drive. -
Page 33: Powering The Hard Disk Drives
Without this the MicroDrive Turbo may not see the Hard Disk Drive(s). Powering the Hard Disk Drives External hard drives attached to the MicroDrive Turbo Card must be supplied by an external power supply. The MicroDrive Turbo Card was intentionally designed to not supplying power for the disk drives. -
Page 34: Typical Ide Hard Drive Connectors
Black (GND) Yellow (+12V) Preparing Your Hard Disk Drive Starting from Scratch MicroDrive Turbo Make a copy of the Card Utilities Disk. Use this copy now (we will call it the Installation Disk). Copy the GS/OS driver from the installation disk to your GS/OS boot volume hard disk. - Page 35 Reboot your Apple II (this is required before the IDE drive(s) can be recognized by the MicroDrive Turbo Card). At this time, trying to boot from the MicroDrive Turbo Card ends in the message Volume not formatted or Unable to load ProDOS. This is OK. So you will still have to boot from another System volume such as a System Disk or another hard disk.
-
Page 36: Changing Hard Drive Configuration
Card. If you want to use two drives with your MicroDrive Turbo Card, you must repeat those steps listed before for your second drive. Just boot the MicroDrive Installer Program and press after highlighting menu item DRIVE CHANGE. After this, continue setting up the partition map and repeat the other steps. -
Page 37: Modifying Partitions
ProDOS 8 or GS/OS without the need of any further accessories. The MICRO.INSTALLER can be launched from any environment without the need of BASIC.SYSTEM. It even can be launched directly by booting the MicroDrive Turbo Installation Disk. The MICRO.INSTALLER also can be run from any program launcher that supports launching SYS files (for example the built-in PRODOS 8 launcher or the GS/OS Finder). -
Page 38: New Hard Disk Setup
Several additional options for setting up operating parameters can be found in this program. The functions are not implemented yet and won't be of any use for correct hard disk operation. These options will be added in a later revision of the card's software. MicroDrive Turbo ReActiveMicro... -
Page 39: Installing The Gs/Os Driver
GS/OS driver on your System volume (the floppy disk or the hard disk partition you boot from). If you don't install the driver, your MicroDrive Turbo Card won't give you the fastest speed you could expect. However, the card also works fine with no GS/OS driver installed. -
Page 40: Using Two Hard Disk Drives
Using Two Hard Disk Drives The MicroDrive Turbo Card supports the connection of two IDE drives. Drive one is called the MASTER drive, and drive two is also called the SLAVE drive. The Master/Slave condition is determined by the hard disk's jumper setting. There is no difference in connecting the hard disk to the IDE interface - same cable, same plug. -
Page 41: Booting From A Different Volume
(this could also be your second drive). Note: One of the handiest features of the MicroDrive Turbo is the ability to select the volume from which you would like to Temporally Boot. -
Page 42: Ae Vulcan Upgrade
Setting Up the Hard Drive After you have made the necessary backups and the MicroDrive Turbo Card is connected to your Vulcan, you can run the program MICRO.INSTALLER on the MicroDrive Turbo Card Utilities Disk. Refer to... -
Page 43: Error Messages At Boot Time
Drive 1, regardless of the volume number you may want to boot from. If an error occurs during the very first part of the boot process, the MicroDrive Turbo Card informs you about the error by displaying one of the following error messages and gives you control over your computer at the Applesoft Basic prompt. -
Page 44: Volume Not Formatted
This error message is related to the volume you want to boot from. The MicroDrive Turbo Card could load a configuration, but it could not find anything that looks like a PRODOS boot sector. This sector is usually present after a volume has been high-level formatted by a system utility like the Finder etc. -
Page 45: Problematic Hard Disk Drives
It is recommended that you use only WD drives manufactured in 1994 or later. WD Caviar Series If you want to use a WD Caviar Series Hard Disk Drives with the MicroDrive Turbo Card, you will have problems with the original MicroDrive Turbo software (this is the firmware marked Apple II Rev. -
Page 46: Hd Installation
2. Launch the installer program from disk. Use the latest installer you can find on the MicroDrive Turbo installation disk (a suitable version is included with this folder). The installer will start to scan your drive for hard drive parameters and display the information it has found. - Page 47 MicroDrive Turbo ReActiveMicro...
-
Page 48: Ide Interface Overview
The resulting drive and controller combinations can offer higher performance than earlier standalone controller and drive setups. IDE drives sometimes are called drives with embedded controllers. MicroDrive Turbo ReActiveMicro... -
Page 49: Ide Origins
CAM ATA (Common Access Method AT Attachment) interface. The CAM Committee was formed in October 1988, and the first working document of the AT Attachment interface was introduced in March 1989. MicroDrive Turbo ReActiveMicro... -
Page 50: The Evolution Of Ide (Ata)
The Evolution of IDE (ATA): ATA-1 (1986–1994) ATA-2 (1996) EIDE ATA-3 (1997) ATA-4 (1998) Ultra-ATA/33 ATA-5 (1999) Ultra-ATA/66 ATA-6 (2000) Ultra-ATA/100 Each version of ATA was backward compatible with the previous versions. MicroDrive Turbo ReActiveMicro... -
Page 51: Compact Flash Overview
Error Correcting Code (ECC), defect handling and diagnostics, power management and clock control. Once the CompactFlash Storage Card has been configured by the MicroDrive Turbo, it appears as a standard ATA (IDE) disk drive. -
Page 52: Microdrive Turbo Revision History
The MicroDrive Turbo was originally designed by Joachim Lange of ///SHH Systeme - Germany and released in 1996. First DMA IDE Controller After its release the MicroDrive Turbo was the first Apple II IDE Controller that offered DMA capability, true performance was finally realized for Apple II Computer Systems. - Page 53 Apple, the Apple logo, are trademarks of Apple Inc., registered in the U.S. and other countries.
- Page 55 www.reactivemicro.com...
Need help?
Do you have a question about the MicroDrive Turbo and is the answer not in the manual?
Questions and answers