
Subscribe to Our Youtube Channel
Related Manuals for Bras Maestrale Jolly 12


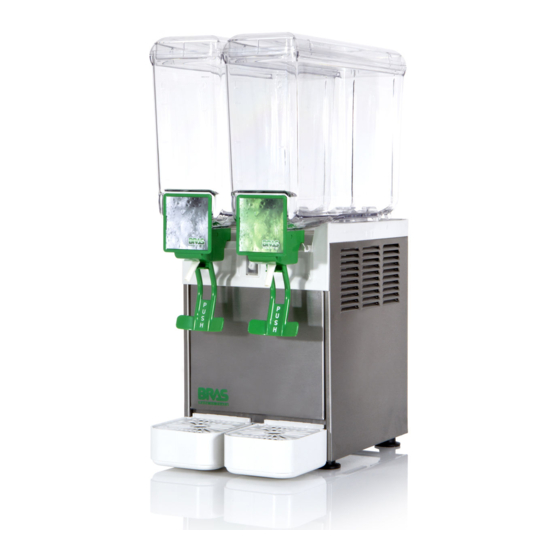
Summary of Contents for Bras Maestrale Jolly 12
- Page 1 MAESTRALE JOLLY 12/20 MANUALE D’ISTRUZIONI OPERATOR’S MANUAL CARNET D’INSTRUCTIONS GEBRAUCHSANWEISUNG MANUAL DE INSTRUCCIONES...
-
Page 2: Dichiarazione Di Conformità Ce
DISTRIBUTORE DI BEVANDE FREDDE - Marca: BRAS INTERNAZIONALE S.p.A. - Fabbricante: BRAS INTERNAZIONALE S.p.A. - Modelli: MAESTRALE JOLLY 12.1 - 12.2 - 12.3 - 12.4 - 20.1 - 20.2 - 20.3 - 20.4 230V 50Hz sono conformi alle seguenti Normative: EN ISO 12100-1 (2010) EN62233:2008-11;... -
Page 3: Garanzia
Bras Internazionale s.p.a., un 2. Per garanzia si intende la sostituzione o riparazione gratuita delle parti compo- esborso superiore al prezzo versato dall'acquirente per l'acquisto del prodotto. -
Page 4: Caratteristiche Tecniche
I T A L I A N O M A E S T R A L E J O L L Y 1 2 - 2 0 1 CARATTERISTICHE TECNICHE Controllare che il distributore non abbia subito danni da tra- sporto. -
Page 5: Descrizione Dei Comandi
4 PER UN FUNZIONAMENTO SICURO E consigliabile filtrarle onde evitare che le parti solide in esse contenute possano ostruire il passaggio dal rubinetto. CORRETTO Montare i coperchi sopra i contenitori accertandosi che que- sti siano posizionati correttamente Non usare il distributore prima di aver letto il presente Agire sugli interruttori (vedere capitolo 5.1 DESCRIZIONE libretto d’istruzioni. - Page 6 I T A L I A N O M A E S T R A L E J O L L Y 1 2 - 2 0 Per evitare rischi di cadute le parti intorno alla macchina Rubinetto a gommino: premere (1) la leva comando rubi- netto e sfilare (2) il gommino dal foro d’uscita del contenitore deve essere mantenute asciutte.
- Page 7 diluita può non detergere a sufficienza. Non usare detersivi Rubinetto a gravità: montare la leva di comando rubinetto e quindi infilare il pistone dotato della propria guarnizione abrasivi. (vedere figura 6). IMPORTANTE Al fine di evitare danni al distributore utilizzare solo detersivi compatibili con le parti in plastica.
-
Page 8: Manutenzione
I T A L I A N O M A E S T R A L E J O L L Y 1 2 - 2 0 Preparare in una bacinella una soluzione di acqua e pro- dotto sanitizzante approvato dalle autorità del vostro paese rispettando le specifiche del produttore. -
Page 9: Technical Characteristics
1 TECHNICAL CHARACTERISTICS Inspect the uncrated unit for any possible damage. If damage is found, call the delivering carrier immediately to file a claim. Install the unit on a counter top that will support the 12.1 12.2 12.3 12.4 combined weight of dispenser and product bearing in mind 20.1 20.2 20.3... -
Page 10: Operating Procedures
EN GLIS H M A E S T R A L E J O L L Y 1 2 - 2 0 grounded. bowl. Do not use extension cords to connect the dispenser. Do not operate the dispenser unless all panels are restrained with screws. - Page 11 5. 3. 1 DISASSEMBLY 5. 3. 2 CLEANING ATTENTION ATTENTION Before any disassembly and/or cleaning procedure make Before any disassembly and/or cleaning procedure make sure that the dispenser is disconnected from its power sure that the dispenser is disconnected from its power source by unplugging it.
-
Page 12: In-Place Sanitization
EN GLIS H M A E S T R A L E J O L L Y 1 2 - 2 0 5. 3. 4 ASSEMBLY Use fresh product to chase any remaining sanitizer from the bowl(s). Drain this solution. Do not rinse out the machine. Slide the drip tray into place. -
Page 13: Caracteristiques Techniques
1 CARACTERISTIQUES TECHNIQUES Contrôler que le distributeur n'eit pas été endommagé pendant le transport. Si c'est le cas, faire immédiatement une réclamation au transporteur. Placer le distributeur sur un comptoir en mesure d'en 12.1 12.2 12.3 12.4 supporter le poids, y compris à pleine charge, en tenant 20.1 20.2 20.3... -
Page 14: Description Des Commandes
F R A N C A I S M A E S T R A L E J O L L Y 1 2 - 2 0 Ne pas faire obstacle au flux d'air de refroidissement; Pour garantir une bonne conservation de la boisson, le laisser un espace libre d'au moins 15 cm autour du distributeur. - Page 15 5. 3 NETTOYAGE Robinet en inox à gravité: défiler le piston et démonter le levier de débit robinet (voir figure 4). Le nettoyage et le lavage sont fondamentaux pour garantir la parfaite conservation du goût de la boisson et l'efficacité maximale de votre distributeur.
- Page 16 F R A N C A I S M A E S T R A L E J O L L Y 1 2 - 2 0 5. 3. 3 DESINFECTION DU Replacer le joint du réservoir sur l’évaporateur, en laissant DISTRIBUTEUR DEMONTE la couronne plus épaisse en contact avec le plan égouttoir (voir figure 7).
-
Page 17: Entretien
Essuyer l'intérieur des réservoirs avec une serviette en papier jetable. Ne pas procéder à d'autres opérations de rinçage. 6 ENTRETIEN Quotidiennement: contrôler le distributeur et vérifier qu'il n'y a pas de fuites de produit au niveau des joints. En cas de fuites, contrôler avant tout que le distributeur est monté... -
Page 18: Technische Daten
D E U T S C H M A E S T R A L E J O L L Y 1 2 - 2 0 1 TECHNISCHE DATEN Verpackung für eventuellen späteren Bedarf aufbewahren. 12.1 12.2 12.3 12.4 20.1 20.2 20.3 20.4... - Page 19 +32°C betrieben werden. Bei der Handhabe und Zubereitung von Lebensmitteln müssen adäquate Handschuhe getragen werden. Keine explosive Substanzen wie Aerosoldosen mit entzündlichem Treibmittel in diesem Gerät verwenden. Diese Gerät ist für die Verwendung im Haushalt oder ähnliche Verwendungszwecke bestimmt. ACHTUNG Die Bedienung der Maschine ist beschränkt auf die Per- sonen, die das Wissen und die praktische Erfahrung Bild 1...
- Page 20 D E U T S C H M A E S T R A L E J O L L Y 1 2 - 2 0 5. 1 BESCHREIBUNG DER 5. 3. 1 DEMONTAGE BETRIEBSSCHALTER Der Dispenser ist nur mit dem Hauptschalter versehen. Indem ACHTUNG man ihn auf Position I schaltet, funktionieren sowohl die Rührvorrichtungen als auch das Kühlaggregat.
-
Page 21: Montage
5. 3. 2 WASCHEN Falls kein spezifisches Desinfektionsmittel erhältlich ist, eine Lösung aus Wasser und Natriumhypochlorit (Chlorbleichlauge) zubereiten, im Verhältnis von 1 Eßlöffel Natriumhypochlorit pro 2 Liter Wasser. WICHTIG Alle zu desinfizierenden Teile in die Lösung tauchen. Dabei die vom Hersteller angegebene Zeit einhalten Keine Teile des Gerätes in der Geschirrspülmachine waschen. - Page 22 D E U T S C H M A E S T R A L E J O L L Y 1 2 - 2 0 Tauwasserschale (Bild 7). Keine weiteren Spülungen vornehmen. 6 INSTANDHALTUNG Täglich: Den Dispenser kontrollieren und sicherstellen, daß bei den Dichtungen keine Produktverluste vorliegen.
-
Page 23: Caracteristicas Tecnicas
1 CARACTERISTICAS TECNICAS 3 INSTALACION Quitar el distribuidor del embalaje: guardar este último por 12.1 12.2 12.3 12.4 20.1 20.2 20.3 20.4 si hubiera cualquier eventualidad. Contenedores transparentes desmontables Capacidad de cada contenedor, aproximada IMPORTANTE Dimensiones: En la operación de transporte o levantamiento no se ancho debe coger nunca el distribuidor por sus contenedores largo... -
Page 24: Descripcion De Los Mandos
ES PAÑ OL M A E S T R A L E J O L L Y 1 2 - 2 0 siguiendo cuanto dicho en las presentes instrucciones del Si se quiere distribuir productos concentrados a diluirse con capítulo 5.3 LIMPIEZA. agua, verter en los contenedores el agua agregando a El aparato tiene que instalarse donde pueda estar continuación la cantidad necesaria de producto concentrado,... - Page 25 producto dentro de los contenedores está frio, es señal de que Grifo con tubo de goma: empujar la palanca mando grifo todo funciona bien y que el calor producido no es alarmante. (1) y sacar (2) el tubo goma de salida desde su situación vertical en el fondo del contenedor (ver figura 3).
-
Page 26: Higienizacion Del Distribuidor Desmontado
ES PAÑ OL M A E S T R A L E J O L L Y 1 2 - 2 0 en las partes a lavar, en vez una solución demasiado diluida abajo la extremidad del tubo de goma hasta ajustarlo puede no limpiar bastante. -
Page 27: Manutencion (Solamente Por El Servicio Postventa)
figura 8). gastadas, si es así reemplazarlas con recambios originales del fabricante. IMPORTANTE Para el mantenimiento del producto, el personal técnico tiene que utilizar guantes que dispongan por lo menos de un grado de clasificación PL 0-4 (EN388). 6. 1 MANUTENCION (SOLAMENTE POR EL SERVICIO POSTVENTA) Cada mes: eliminar el polvo que se acumula sobre el figura 8... - Page 28 M A E S T R A L E J O L L Y 1 2 - 2 0 2455_99 V 1.8 14I22 I T A L I A N O ELENCO RICAMBI EN GLIS H SPARE PARTS LIST F R A N C A I S LISTE DES PIECES DE RECHANGE D E U T S C H ERSATZTEILLISTE...
- Page 29 1 22900-00100 Coperchio contenit. 20 It. 20 It bowl cover Couvercle réservoir 20 It Behälterdeckel 20 It Tapa contenedor 20 It 2 22900-00100 Coperchio contenit. 12 It. 12 It bowl cover Couvercle réservoir 12 It Behälterdeckel 12 It Tapa contenedor 12 It 3 22900-00010 Contenitore 12 It.
- Page 30 M A E S T R A L E J O L L Y 1 2 - 2 0 I T A L I A N O SCHEMA ELETTRICO EN GLIS H WIRING DIAGRAM F R A N C A I S SCHEMA ELECTRIQUE D E U T S C H SCHALTSCHEMA...
- Page 31 NOTE - NOTES- NOTES - ANMERKUNGEN - NOTAS:...
- Page 32 02455-00099 V 3.8 15E13...
Need help?
Do you have a question about the Maestrale Jolly 12 and is the answer not in the manual?
Questions and answers