Table of Contents
Advertisement
Quick Links
Advertisement
Table of Contents

Subscribe to Our Youtube Channel
Related Manuals for DeLonghi CKM1641D


Summary of Contents for DeLonghi CKM1641D
- Page 1 www.delonghi.com...
- Page 2 CKM1641D PRECISION MULTI COOKER Instructions for use Keep these instructions Mode d’ e mploi Conservez cette notice Instrucciones para el uso Repase y guarde estas instrucciones Lea cuidadosamente este instructivo antes de usar su aparato. ELECTRIC CHARACTERISTICS / CARACTÉRISTIQUES ÉLECTRIQUES /...
- Page 3 page 10 page 28 pág. 53...
-
Page 5: Table Of Contents
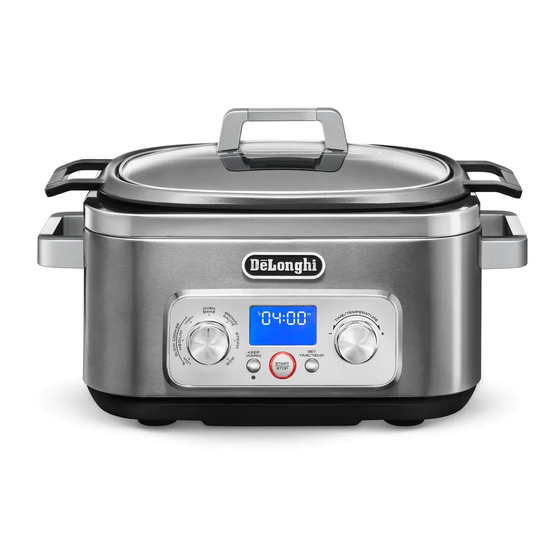
CONTENTS ELECTRICAL CONNECTION Only use a 120 Volt - 60 Hz power supply outlet ELECTRICAL CONNECTION ............4 IMPORTANT SAFEGUARDS ............5 NOTICE TECHNICAL SPECIFICATION .............6 This appliance has a polarized plug (one prong is wider DESCRIPTION OF THE APPLIANCE ...........6 than the other). ASSEMBLY INSTRUCTIONS ............6 As a safety feature, this plug will fit into a polarized outlet OPERATION ................6... -
Page 6: Important Safeguards
IMPORTANT cidentally pulled off work area, which could result in damage to the multi cooker or personal injury, do not SAFEGUARDS let cord hang over edge of table or counter top. 15. To avoid damage to cord and possible fire or electro- When using an electrical appliance, basic safety precau- cution hazard, do not let cord contact hot surfaces, tions should always be followed:... -
Page 7: Technical Specification
slamming or knocking the lid. Do not pour cold liquid NOTE • The U.S. Department of Agriculture (USDA) recommends onto the glass while the appliance is hot. that when cooking anything containing meat in a slow WARNING: The accessories for cooking of this appliance cooker mode, the meat should reach 140°F within 2 hours. -
Page 8: Cooking Guidelines
COOKING GUIDELINES SLOW COOKER MODE FUNCTION SETTING DESCRIPTION RECIPES TIMER KEEP WARM TEMPERATURE Baked egg based puddings Beef roast Good for slow Beef rolls Default time is cooking recipes or Beef short ribs h10:00m Automatically set less tender cuts of Chicken/turkey pieces Adjustable from 15 at end of cooking... -
Page 9: Oven/Bake
MULTI COOKER MODE FUNCTION SETTING DESCRIPTION RECIPES TIMER KEEP WARM TEMPERATURE Default time is Try using this set- Great for cakes and breads. h00:30m From 300°F to OVEN/ ting for recipes Also ideal for roasting Adjustable 400°F, in incre- BAKE that are typically meats, such as beef roast or from 5 minutes to... -
Page 10: Cooking With Low Function
Keep Warm red light (F) will illuminate, the red light (E) around COOKING WITH LOW FUNCTION Start/Stop button will light on , dots start flashing. 1. Place the unit on a clean, dry counter. Once Keep Warm function timing is elapsed, the control will turn off 2. -
Page 11: Cooking With High Function
While “End” is flashing you can reset the control by pressing Start/ Stop button (D). The control goes into stand-by mode. If no any further action is taken after 5 minutes of “End” flashing, the control will automatically switch to Keep Warm function. Keep Warm red light (F) will illuminate, the red light (E) around Start/Stop button will illuminate, dots start flashing. -
Page 12: Cooking With Oven/Bake Function
(F) will be turn off and the control will go into active mode , showing Now the lower display is switched off , and upper display will alter- default condition for each function for 20 seconds. nately show the message “PRE” and “HEAT” cycling. After this time the display backlight is reduced to Stand-By mode. -
Page 13: Cooking With Steam Function
minute, for a maximum set time of h01:00m. Turning counterclockwise the dial will decrease the time in incre- ments of 1 minute, till h00:01m. When adjusting the timer by turning Time/Temperature dial (C), the display will stop flashing. Pressing Set Time/Temperature button (G), the upper display will stop flashing, and lower display show temperature setting of 400°F When “End”... - Page 14 You can refill the pot with water and restart the cooking process by It is possible to stop the function anytime by pressing Start/Stop pressing Start/Stop button (D). button (D). The red light (E) around Start/Stop button will shut off, Once pressed Start/Stop button (D) the triangle Warning symbol the display will go to stand-by mode.
-
Page 15: Cooking With Rice Function
Start/Stop button will illuminate , timer will restart from h00:00m. COOKING WITH RICE FUNCTION Once Keep Warm function timing is elapsed , the control will turn off 1. Place the unit on a clean, dry counter. and will go in stand-by mode. 2. - Page 16 RECAP COOKING DIRECTION CHART STILL IN PROGRESS RICE TYPE RICE AMOUNT WATER AMOUNT 1 CUP 1 ¾ CUP 2 CUP 3 CUP Long grain white rice 3 CUP 4 ¼ CUP 4 CUP 6 CUP 1 CUP 1 ½ CUP Medium grain white rice 2 CUP 2 ½...
-
Page 17: Change Function During Cooking Process Already Running
CHANGE FUNCTION DURING COOKING PROCESS AL- Time/Temperature dial (C). As first moving step of Time/Temperature dial (C), the display will READY RUNNING start to flash showing actual time. During each cooking function already in progress , you can turn the If no further selection of Time/Temperature dial (C), after 3 seconds Function Selector Dial (A), changing the cooking function. -
Page 18: Cleaning And Maintenance
CLEANING AND MAINTENANCE Check that the power plug is prop- Here are a few simple tips to assure your slow cooker gives you years erly inserted into wall outlet of service. Insert the power plug into a differ- Pot and lid are dishwasher safe , however De’Longhi recommends ent outlet hand washing the pot to ensure longer life of the non-stick coating. -
Page 19: Recipe
RECIPES Pulled Chicken Tacos Serves 6 (Yield: 6 cups) Country-Style Short Ribs Horseradish Cream Prep: 15 min Cook: 40 min Makes 4 servings Total time: 55 min Prep: 15 Min Cook: 3 Hr 10 Min Ingredients: Total time: 3 Hr 25 Min 1 ¾... - Page 20 ¾ cup dry red wine Turn the function dial to Medium on the Slow Cooker function. 1 (10-oz) package cremini mushrooms, halved Set the timer for 5 hours. Cover and cook until the beans are 2 cups frozen white pearl onions (from a 14.4-oz package) fork-tender.
Need help?
Do you have a question about the CKM1641D and is the answer not in the manual?
Questions and answers