Table of Contents
Advertisement
Quick Links
Advertisement
Table of Contents
Troubleshooting

Related Manuals for Plustek MobileOffice


Summary of Contents for Plustek MobileOffice
- Page 1 Installation Usage & Maintenance Troubleshooting...
- Page 2 Trademarks © 2017. All rights are reserved. No portion of this document may be reproduced without permission. All trademarks and brand names mentioned in this publication are property of their respective owners. Liability While all efforts have been made to ensure the accuracy of all contents in this manual, we assume no liability for errors or omissions or by statements of any kind in this manual, whether such errors are omissions or statements resulting from negligence, accidents, or any other cause.
-
Page 3: Table Of Contents
Table of Contents ....................1 NTRODUCTION How to Use This Guide....................1 A Note about Icons ..................... 2 Safety Precautions...................... 2 System Requirements ....................3 Box Contents ......................3 Scanner Overview ...................... 4 I. I ..............5 HAPTER NSTALLING THE CANNER Software Installation Requirements ................5 Hardware Requirements ..................... -
Page 4: Introduction
Introduction Welcome to the world of Plustek scanners – the ultimate in computer imaging. Your new scanner will improve the professionalism of your day-to-day computing tasks by allowing you to input images and electronic text into your computer system. Like all of our products, your new scanner is thoroughly tested and backed by our reputation for unsurpassed dependability and customer satisfaction. -
Page 5: A Note About Icons
A Note about Icons This guide uses the following icons to point out information that deserves special attention. A procedure that must be followed carefully to prevent injury, or accidents. Warning Instructions that are important to remember and may prevent mistakes. -
Page 6: System Requirements
System Requirements Windows/Intel Compatible Personal Computer Intel Core 2 Duo 1 GHz processor or higher DVD-ROM Drive 2 GB RAM 2 GB Free Hard Disk Space USB 2.0 Port Microsoft™ Windows 7 / 8 / 10 Video card that supports 16-bit color or greater Box Contents 1. -
Page 7: Scanner Overview
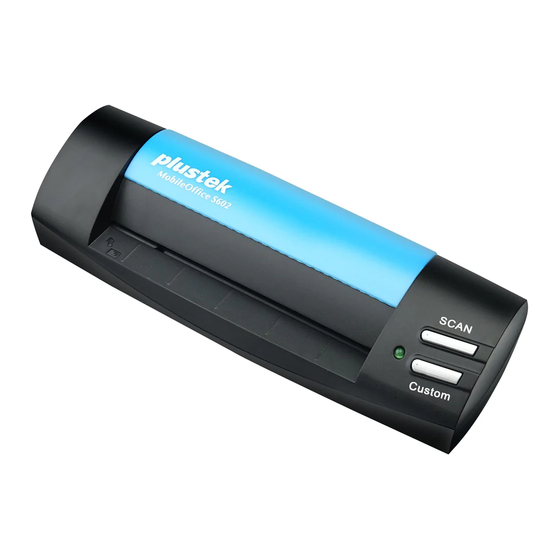
Scanner Overview 1. USB port: It connects the scanner to a USB port on your computer by the included USB cable. 2. Page feed slot: Feed the document into the scanner from this direction. You can feel the document being grabbed by the scanner. 3. -
Page 8: Chapter I. Installing The Scanner
Chapter I. Installing the Scanner Before installing your scanner, please verify that you have all of the proper components. A list of the package contents is provided in the Box Contents section of this guide. Software Installation Requirements Your scanner comes with the OCR software (ABBYY FineReader Sprint), business card recognition software (NewSoft Presto! BizCard), the scanner’s driver and DocAction. -
Page 9: Installing And Setting Up The Scanner
Installing and Setting up the Scanner Please follow the step-by-step procedures described below to install the Plustek scanner. Step 1. Connecting the Scanner to Your Computer 1. Plug the square end of the included USB cable to the USB port of the scanner. - Page 10 2. For Windows 7: When the Setup/Application DVD is for several scanner models a. Insert the Setup/Application DVD-ROM, included with your scanner, into your DVD-ROM drive. Click Run install.exe in the AutoPlay window. b. Click on the Yes button if the User Account Control dialog pops up. Follow the instructions in the pop-up installation message.
-
Page 11: Step 3. Testing The Scanner
6. Insert the special calibration sheet, included with the scanner, face up into the page feed of the scanner. 7. Follow the on-screen instructions to complete the scanner calibration. 8. After the installation is complete, close all open applications and click on the “Finish”... -
Page 12: Software Setup Troubleshooting
3. Clicking the Custom icon on the left pane in the Button Configuration window displays its current button settings on the right pane. In the Button Configuration window, choose from the dropdown list of Button Template to select “File Utility”, and keep in mind the default saving folder show in the “Saving folder”... -
Page 13: Chapter Ii. Usage And Maintenance
Chapter II. Usage and Maintenance Operating the Scanner Your scanner accepts documents as small as business cards and as large as 4”x6” photographs. However, some software programs have limitations as to the information they can handle. The capacity of the computer’s memory and free space on your hard drive can also limit the physical size of the document that you scan. -
Page 14: Using The Scanner Buttons
The DocAction program, seamlessly integrating the operation of your scanner with your computer and other peripherals, provides a quick and convenient way to perform various scanning functions. With DocAction, you don't need to adjust settings every time you scan. Simply press any button on the scanner's front panel or click any scanning menu item of DocAction on the screen. -
Page 15: Scanning Methods
3. Press the SCAN button on the scanner. The scanning starts immediately. 4. If you have the “Continuous Scan” option checked, follow the on-screen instructions to insert another document or image until you have scanned all. 5. When the scan completes, the scanned images will be save to the defined file path as separate image files and sent to the assigned post-processing software. - Page 16 Scan within Newsoft Presto! BizCard: 1. Click the Windows Start button to launch Presto! BizCard. (For Windows 8.1 users: Point your mouse cursor to the upper or lower right corner of your screen to open the Charm bar. Click on the Start charm, then click on the downwards arrow button in the lower left corner of the screen.
-
Page 17: Scanning From The Scanner's Panel Or On-Screen Docaction's Execute Menu
5. Load one business card. 6. Click the Scan button. 7. The scanned images are displayed in the Presto! BizCard main window, and you may proceed OCR to convert images into editable text formats. Click the Help button within the TWAIN window for more information about the settings. -
Page 18: Status Indicator
Press the button from the scanner's panel. Right-click the icon in the Windows system tray, and then choose Execute in the pop-up menu that opens. Click the Scan button function item in the pop-up menu. The scanner starts to scan immediately and carry out the corresponding action according to the settings you have set up in the Button Configuration window. -
Page 19: Maintenance
Maintenance Calibrating the Scanner Calibrate the scanner if colors appear in areas that should be white, or colors of the scanned image and the original vary a lot. This allows you to adjust and compensate for variations which can occur in the optical component over time by its nature. The following describes how to calibrate the scanner: 1. -
Page 20: Cleaning The Scanner
Cleaning the Scanner When you use this scanner for the very first time after installation, you are suggested to clean the scanner before use. If unusual dots or lines are found in your scanned image, it is very likely that dust particles or other foreign objects have been brought inside the scanner. -
Page 21: Usage & Maintenance Tips
Usage & Maintenance Tips To keep your scanner working smoothly, take a moment to review the following usage & maintenance tips. Avoid using the scanner in a dusty environment. Dust particles and other foreign objects may damage the unit. Do not insert any document into the scanner with small objects such as paper clips, pins, staples or any other fasteners attached. -
Page 22: Appendix A: Troubleshooting
Appendix A: Troubleshooting Scanning Problems Most problems are easily solved, and some of the most common questions and their recommended solutions are listed below. Symptom: After following the installation instructions, my computer cannot find the scanner. Cause 1: Your software may have not been successfully installed. Solution 1: Please insert the DVD-ROM and reinstall the scanner software. - Page 23 Symptom: The scanner scans very slowly. Cause 1: You are running other applications in the background. Solution1: Close all the other applications that are running in the background. Cause 2: You are scanning at a high resolution (DPI). Solution 2: Reduce the resolution.
- Page 24 Solution 2: Try sending the message at a later time. Symptom: The image that I sent through email looks good in my computer but it looks dark in the recipient computer. Solution: The Monitor gamma settings should be approximately the same in your and the recipient computer.
- Page 25 Cause: The document or photo was not correctly inserted into the scanner. Solution: Grab the jammed paper and pull it through the scanner. Try to avoid creasing, wrinkling or tearing the paper.
-
Page 26: Appendix B: Specifications
Appendix B: Specifications Light Source Image Sensor Optical 1200 dpi Resolution Hardware 1200 x 1200 dpi Resolution Color: 48-bit Input; 24/48-bit Output Scan Modes Grayscale: 16-bit Input; 8/16-bit Output B/W: 1-bit Scanning 5.5 Seconds (Color Mode, 300 dpi, A6) Speed Maximum: 104.9 x 500 mm (4.13"... -
Page 27: Appendix C: Customer Service And Warranty
If you encounter problems with your scanner, please review the installation instructions and troubleshooting suggestions contained in this guide. Visit our website www.plustek.com for more customer service information. For further assistance call our customer support phone number listed on the website. One... -
Page 28: Statement Of Limited Warranty
If you want to disposals the product and/or an accessory, please ask local distributors and suppliers to get the contact information of nearest disposal manufactures. If you have any maintenance inquiry, please ask local distributors and suppliers to get the contact information of nearest maintenance center in order to extend the product usage life time. -
Page 29: Fcc Radio Frequency Statement
THIS LIMITED WARRANTY REPLACES ALL OTHER WARRANTIES, EXPRESS OR IMPLIED, INCLUDING, BUT NOT LIMITED TO, THE IMPLIED WARRANTIES OF MERCHANTABLITY AND FITNESS FOR A PARTICULAR PURPOSE. HOWEVER, SOME LAWS DO NOT ALLOW THE EXCLUSION OF IMPLIED WARRANTIES. IF THESE LAWS APPLY, THEN ALL EXPRESS AND IMPLIED WARRANTIES ARE LIMITED IN DURATION TO THE WARRANTY PERIOD. - Page 30 Changes or modifications not expressly approved by the manufacturer or authorized service center could void the user’s authority to operate this equipment.
Need help?
Do you have a question about the MobileOffice and is the answer not in the manual?
Questions and answers