Table of Contents
Advertisement
Advertisement
Table of Contents

Related Manuals for Plustek MobileOffice D430


Summary of Contents for Plustek MobileOffice D430
- Page 1 Installation Usage & Maintenance...
- Page 2 Trademarks © 2017 Plustek Inc. All rights are reserved. No portion of this document may be reproduced without permission. All trademarks and brand names mentioned in this publication are property of their respective owners. Liability While all efforts have been made to ensure the accuracy of all contents in this...
-
Page 3: Table Of Contents
Table of Contents ....................1 NTRODUCTION How to Use This Guide....................1 A Note about Icons ....................... 2 Safety Precautions...................... 2 System Requirements ....................3 Box Contents ......................3 Scanner Overview ...................... 4 I. I ..............5 HAPTER NSTALLING THE CANNER Software Installation Requirements ................5 Hardware Requirements ..................... -
Page 4: Introduction
Introduction Thank you for choosing us as your scanner supplier. Your new scanner will improve the professionalism of your day-to-day computing tasks by allowing you to input images and electronic text into your computer system. Like all of our products, your new scanner is thoroughly tested and backed by our reputation for unsurpassed dependability and customer satisfaction. -
Page 5: A Note About Icons
A Note about Icons This guide uses the following icons to point out information that deserves special attention. A procedure that must be followed carefully to prevent injury, or accidents. Warning Instructions that are important to remember and may prevent mistakes. -
Page 6: System Requirements
System Requirements ® PC with Intel Pentium IV 2GHz processor or compatible 512 MB RAM Available USB 2.0 port DVD-ROM Drive 800 MB Free Hard Disk Space (1GB Recommended) Operating System: Windows XP / Vista / 7 / 8 / 10 Box Contents 1. -
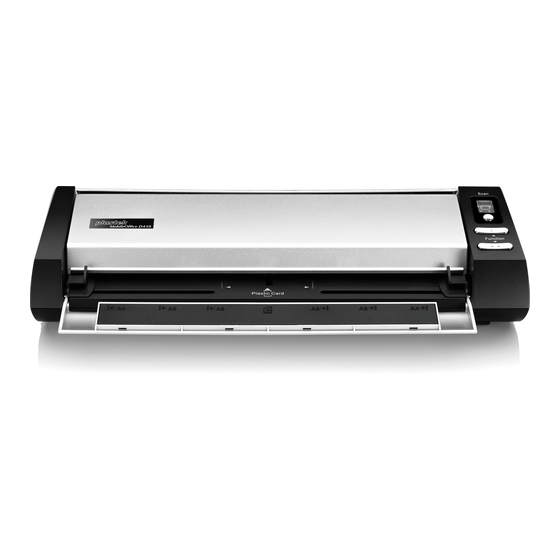
Page 7: Scanner Overview
Scanner Overview 1. Power Receptor: It connects the scanner to a standard AC power outlet by the included power adapter. 2. USB Port: It connects the scanner to a USB port on your computer by the included USB cable. 3. Guide Paper Return: Adjust the orientation cover up or down, you can choose the horizontal or vertical paper output as desired. -
Page 8: Chapter I. Installing The Scanner
Chapter I. Installing the Scanner Before installing your scanner, please verify that you have all of the proper components. A list of the package contents is provided in the Box Contents section of this guide. Software Installation Requirements Your scanner comes with the OCR software (ABBYY FineReader Sprint), business card recognition software (NewSoft Presto! BizCard), the scanner’s driver and DocAction. -
Page 9: Installing And Setting Up The Scanner
Installing and Setting up the Scanner Please follow the step-by-step procedures described below to install the Plustek scanner. Step 1. Connecting the Scanner to Your Computer Please make sure the scanner is turned OFF before you plug or unplug the scanner power adapter. -
Page 10: Step 2. Installing The Software
Step 2. Installing the Software 1. Switch on the scanner power from the side of the scanner. 2. If the USB components on your computer are functioning correctly, they will automatically detect the scanner causing the “Add New Hardware Wizard” or “Found New Hardware Wizard”... - Page 11 procedure 9. When the Setup/Application DVD is for one scanner model a. Insert the Setup/Application DVD-ROM, included with your scanner, into your DVD-ROM drive. Click Run install.exe in the ”AutoPlay” window. b. Click on the “Yes” button if the “User Account Control” dialog pops up. Afterwards, please skip to procedure 9.
-
Page 12: Step 3. Testing The Scanner
Alternatively you may also use any plain white sheet of paper sized in Letter/A4 instead; however, the calibration effect may be less good than the special calibration sheet. Save the Setup/Application DVD in case you Attention need to reinstall the driver and software in the future. -
Page 13: Installing Additional Software
Adjust the scanning settings (Paper Size: Automatic Size, Resolution: 300). 6. Click the Scan button. 7. If an image appears on your screen, your scanner is working properly. Installing Additional Software Your scanner is TWAIN compliant and functions with virtually any available TWAIN compatible software. -
Page 14: Chapter Ii. Scanning
Chapter II. Scanning Your scanner needs to be driven by certain type of software program. Since all documents or images (whether text or pictures) that are acquired from the scanner are treated by your computer as images, most scanning will probably be done from an image-editing program where you can view, edit, save and output the scanned images. -
Page 15: Card Scanning
Card Scanning This is the special design for plastic card scan. Besides documents, you can insert up to 1.2 mm thickness plastic card for scanning. Plastic cards include: emboss/credit card, driver license, ID card, medic-care or any membership cards. Plastic card scanning The plastic card can be embossed credit card, driver license, ID card, insurance card, medic-care card or any membership card. -
Page 16: Document Scanning
Business card scanning To scan the business card, please follow the steps: 1. Please change the button setting from the DocAction window, and then vertically load the business cards, insert the card toward the center of the scanner until the card being grabbed by the scanner. 2. -
Page 17: Paper Output
Paper Output The scanner has offered a unique and compact paper output design, horizontal and vertical output; this compact design can easy to place the scanner in a narrow or corner spot. Make the scanning process more friendly and enjoyable! a. - Page 18 familiar with the scanning, you may alternatively use other TWAIN compatible scanning program or image-editing application to do your scanning projects. Scan within NewSoft Presto! BizCard: 1. Click the Windows Start button to launch Presto! BizCard. (For Windows 8.1 users: Point your mouse cursor to the upper or lower right corner of your screen to open the Charm bar.
-
Page 19: Scanning From The Scanner's Panel Or On-Screen Docaction's Execute Menu
4. Adjust the scanning settings (Paper Size: Automatic Size, Resolution: 300). For Sheet Feeder (Duplex) scan, you can tailor settings individually for front and rear sides of the business cards. Click Front Side button to adjust the scanning settings of front side and then click Rear Side button to adjust the scanning settings of rear side. -
Page 20: Scanning From The Icon In The Left Side Of The Docaction Window
It’s optional for you to write down the customized button number settings on the included memo label and place this memo Information anywhere on the scanner. Click the Help button within the Button Configuration window for more information about the settings. View Button Settings There are three ways to view the button settings: Double-click the icon... - Page 21 1. Insert the document face up into the scanner. Adjust the paper width slider for the paper size you are using. 2. Check current button settings by viewing the Button Configuration window. If needed, you may also modify settings to meet your current needs. 3.
-
Page 22: Chapter Iii. Clean And Maintenance
Chapter III. Clean and Maintenance Your scanner is designed to be maintenance-free. However, constant care and maintenance can keep your scanner working smoothly. Clean the Scanner Paper powder, dust, ink and toner from paper being scanned may make the inner scanner dirty, which leads to poor image quality or document-feeding errors. -
Page 23: Clean Feed Roller And Glass
Clean Feed Roller and Glass 1. Open the scanner cover gently. 2. Wipe the Feed Roller from side to side and then roll it. 3. Clean the glass side to side. Repeat this until its entire surface is cleaned. Do not spray cleaner directly onto the scanner glass. -
Page 24: Calibrating The Scanner
Calibrating the Scanner Calibrate the scanner if colors appear in areas that should be white, or colors of the scanned image and the original vary a lot. This allows you to adjust and compensate for variations that can occur in the optical component over time by its nature. -
Page 25: Power Save
Power Save To save power consumption, when the scanning process is finished, the scanner light source will turn itself off and the scanner will enter a lower-power mode without delay time. Usage & Maintenance Tips To keep your scanner working smoothly, take a moment to review the following usage &... -
Page 26: Chapter Iv. Troubleshooting
Chapter IV. Troubleshooting If you encounter problems with your scanner, please review the installation and scanning instructions contained in this guide. Before you ask for customer service or repair, please refer to the information in this chapter and consult our FAQ (Frequently Asked Questions) in which you can find useful self troubleshooting information. -
Page 27: Appendix A: Specifications
Appendix A: Specifications Plustek MobileOffice D430 Image Sensor CIS x 2 Optical Resolution 600 dpi Hardware Resolution 600 x 600 dpi Color: 48-bit Input; 24-bit Output Scan Modes Grayscale: 16-bit Input; 8-bit Output B/W: 1-bit Simplex: 1.8 sec (Grayscale Mode, 200 dpi, A4) Scanning Speed Duplex: 2.4 sec (Grayscale Mode, 200 dpi, A4) -
Page 28: Appendix B: Customer Service And Warranty
If you encounter problems with your scanner, please review the installation instructions and troubleshooting suggestions contained in this guide. Visit our website www.plustek.com for more customer service information. For further assistance call our customer support phone number listed on the website. One... -
Page 29: Statement Of Limited Warranty
Statement of Limited Warranty This Statement of Limited Warranty applies only to the options you originally purchase for your use, and not for resale, from an authorized reseller. The manufacturer warranty includes all parts and labor, and is not valid without the receipt of original purchase. -
Page 30: Fcc Radio Frequency Statement
Some jurisdictions do not allow the exclusion or limitations of incidental or consequential damages, so the above limitation or exclusion may not apply to you. This Limited Warranty gives you specific legal rights, and you may also have other rights that vary from jurisdiction to jurisdiction. FCC Radio Frequency Statement This equipment has been tested and found to comply with the limits for a Class B digital device, pursuant to part 15 of the FCC rules.
Need help?
Do you have a question about the MobileOffice D430 and is the answer not in the manual?
Questions and answers
need calibration sheet for the D430 Scanner
Need calibration sheet for the Plustek D430 scanner
The calibration sheet for the Plustek MobileOffice D430 scanner is included in the package. It is recommended to keep the calibration sheet in case you need to calibrate the scanner in the future.
This answer is automatically generated