
Related Manuals for Plustek MobileOffice D600 Series


Summary of Contents for Plustek MobileOffice D600 Series
- Page 1 ID (Identifications) Application with MobileOffice D600 Series User’s Guide ...
- Page 2 Trademarks © 2021 Plustek Inc. All rights are reserved. No portion of this document may be reproduced without permission. All trademarks and brand names mentioned in this publication are property of their respective owners. Liability While all efforts have been made to ensure the accuracy of all contents in this manual, we assume no liability for errors or omissions or by statements of any kind in this manual, ...
-
Page 3: Table Of Contents
Table of Contents ......................1 NTRODUCTION How to Use This Guide....................1 Conventions of This Guide ......................1 A Note about Icons ........................2 Safety Precautions......................2 System Requirements ....................3 Box Contents ........................ 3 Scanner Overview ......................4 ................5 I. I HAPTER NSTALLING THE CANNER Software Installation Requirements ................5 Hardware Requirements ....................5 Installing and Setting up the Scanner ................6 Step 1. Connecting the Scanner to Your Computer..............6 Step 2. Installing the Software ....................7 ................9 II. S HAPTER ... -
Page 4: Introduction
Introduction Welcome to the world of Plustek scanners – the ultimate in computer imaging. Your new scanner will improve the professionalism of your day‐to‐day computing tasks by allowing you to input images and electronic text into your computer system. Like all of our products, your new scanner is thoroughly tested and backed by our reputation for unsurpassed dependability and customer satisfaction. Thank you for choosing us as your scanner supplier. We hope you will continue to turn to us for additional quality products as your computing needs and interests grow. How to Use This Guide This User’s Guide provides instructions and illustrations on how to install and operate ... -
Page 5: A Note About Icons
A Note about Icons This guide uses the following icons to point out information that deserves special attention. A procedure that must be followed carefully to prevent injury, or accidents. Warning Instructions that are important to remember and may prevent mistakes. Attention ... -
Page 6: System Requirements
System Requirements PC with Intel Pentium® IV 2.4GHz processor or compatible 1 GB RAM (2 GB or higher recommended) Available USB 2.0 port 2 GB Free Hard Disk Space (3 GB or larger recommended) Operating System: Windows 7 / 8 / 10 Box Contents 1. Scanner 2. USB Cable 3. Power Adapter (Except D620) 4. Calibration Sheet 5. Cleansing cloth 6. Quick Guide 7. Setup/Application USB Flash Drive Higher requirements might be needed when scanning or editing a large quantity of image data. The system requirements here are only a guideline, as in general the better the computer (motherboard, processor, hard disk, RAM, video graphic card), the better the results. Save the box and packing materials in case you need to transport this scanner in the future. The product packaging can be recycled. -
Page 7: Scanner Overview
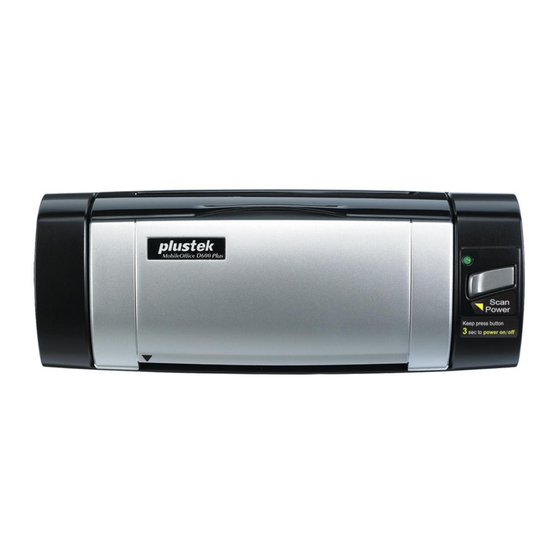
Scanner Overview 1. Power Receptor: Connects the scanner to a standard AC power outlet by the included AC adapter. (Except D620) 2. USB Port: It connects the scanner to a USB port on your computer by the included USB cable. 3. Alignment Mark: Always align the edges of your documents to this arrow sign. 4. Page Feed Slot: Feed the document into the scanner from this slot. You can feel the document being grabbed by the scanner. 5. Scan Button: Press to perform a predefined scanning task. 6. Power LED: Indicates the scanner status. Light Status On The scanner is turned on, ready to scan images. The scanner is off, either because the power is not turned on, or because the Off AC adapter is not properly plugged into an AC power outlet. ... -
Page 8: Chapter I. Installing The Scanner
Chapter I. Installing the Scanner Before installing your scanner, please verify that you have all of the proper components. A list of the package contents is provided in the Box Contents section of this guide. Software Installation Requirements Your scanner comes with ID recognition software (iKnow) and the scanner’s driver. All of these software applications use approximately 800 megabytes of hard disk space after they are installed into your computer. To ensure ample room for the installation, as well as for scanning and saving images, a minimum of 1 gigabyte of hard disk space is recommended. The USB scanner can only operate under the Microsoft Windows 7 / 8 / 10 operating system. Hardware Requirements This scanner connects to your computer through the Universal Serial Bus (USB), which supports hot swap. To determine whether your computer is USB‐capable, you must check the rear of your PC to locate a USB jack that looks the same as the one pictured below. Note ... -
Page 9: Installing And Setting Up The Scanner
Installing and Setting up the Scanner Please follow the step‐by‐step procedures described below to install the Plustek scanner. Step 1. Connecting the Scanner to Your Computer D600 Plus Please make sure the scanner is turned OFF before you plug or unplug the scanner power adapter. Attention 1. Plug the AC adapter into the scanner’s power receptor. 2. Plug the other end of the AC adapter into a standard AC power outlet. 3. Plug the square end of the included USB cable to the USB port of the scanner. 4. Plug the rectangular end of the USB cable to the USB port on the back of your computer. Note: If there is another USB device connected to the computer, connect the scanner to an available USB port. 5. If you plan to connect your scanner to a USB hub , make sure that the hub is connected to the USB port in your computer. Next, connect the scanner to the USB hub. Note: If you do not have a USB port available, you might need to buy a USB port. The USB hub is not included with the scanner. If using a hub, you are recommended to use a hub with its own external power adapter. 6 ... -
Page 10: Step 2. Installing The Software
D620 1. Plug the square end of the included USB cable to the USB port of the scanner. 2. Plug the rectangular end of the USB cable to the USB port of your computer. Note: If there is another USB device connected to the computer, connect the scanner to an available USB port. 3. If you plan to connect your scanner to a USB hub , make sure that the hub is connected to the USB port in your computer. Next, connect the scanner to the USB hub. Note: If you do not have a USB port available, you might need to buy a USB port. Step 2. Installing the Software 1. Insert the Setup / Application USB Flash Drive into your computer. The USB hub is not included with the scanner. If using a hub, you are recommended to use a hub with its own external power adapter. 7 ... - Page 11 2. Click Setup.exe under Plustek Hotel PMS Solution to install the scanner. 3. After the installation is complete, close all open applications and restart your computer. Save the Setup/Application USB Flash Drive in case you need to reinstall the driver and software in the future. Save the Calibration Sheet in case you need to calibrate the scanner in Attention the future. 8 ...
-
Page 12: Chapter Ii. Scanning With I Know
Chapter II. Scanning with iKnow This application is intended to be used in a lawful manner. Certain uses of the identification data may be prohibited by local laws in some countries of states. If you have any question about whether a proposed use of identification data is lawful, you should consult a local legal authority before proceeding. Please connect your scanner or capture device to your PC first before launching the iKnow application. Attention Registration Please make sure there is an active Internet connection. Attention Launch the iKnow program from Windows Start menu. The following dialog popups. Click OK then launch the iKnow program again, the registration is completed. ... - Page 13 Shown connected Toolbar device Scanned image Recognize Image zoom in/out data/information Records View past records Scroll down to locate ‘Save’ button. (displayed in sets of 10) ‘Save’ changes made to the data/information fields The toolbar button functions are as following: Import: Click this button to import CSV file. Export: Click this button to export the identification information or/and the scanned images to your specific folder, according to your configurations in Setting>Export dialog. Save: Click this button to save your modifications of identification information. Delete: Select desired item from the list under the scanned image, and click Delete button to delete the selected item. ...
- Page 14 Export: You may tick the checkbox before the desired item to display the information in the main window, and use the Up and Down arrow button to adjust display order. Select the desired saving folder on the right hand side. And you may tick the checkbox of the desired options: Export to Excel: Select this option to export the identification information to excel file. Export only with date: Select this option to export file only with date information. (Without the time information.) Field Name synchronize with UI language: Select this option to export file that the column name language is the same as the UI language. 11 ...
- Page 15 Export with image: Select this option to export file with scanned image, you may select the output image color. Watermark: Select this option to upload desired watermark image, and adjust the watermark position and transparency. The watermark will apply to the scanned images automatically. 12 ...
- Page 16 Upload: Enter necessary information of desired FTP server and select desired encryption method to upload the file to the specific folder. Advance: Saving recognize failed data: Select this option to save unrecognized images. Under the age of XX: Select this option to notice the identification information that is under certain age. First Data: Click this button to display the first identification data. Previous Data: Click this button to display the previous identification data. Next Data: Click this button to display the next identification data. Last Data: Click this button to display the last identification data. 13 ...
- Page 17 Upload: Click this button to upload the identification information to the specific FTP folder, according to your configurations in Setting > Upload dialog. Copy: Click this button to copy the selected identification information. Filter: Click this button to open the Filter dialog. You may select the desired condition to find the desired identification information. Search: Enter the keyword and click this button to search desired identification information. Calibration: Click this button to calibrate the scanner. Registration: Click this button to register/unregister the license. Delete All: Click this button to delete all data. About: Click this button to display software information. Identification image toolbar button functions are as following: Zoom in: Click this button to enlarge the scanned image. Zoom out: Click this button to shrink the scanned image. ...
-
Page 18: Hapter Iii. Clean And Maintenance
Chapter III. Clean and Maintenance Your scanner is designed to be maintenance‐free. However, constant care and maintenance can keep your scanner working smoothly. Clean the Scanner Paper powder, dust, ink and toner from paper being scanned may make the inner scanner dirty, which leads to poor image quality or document‐feeding errors. Often clean your scanner could ensure your scanning better efficiency. ... -
Page 19: Calibrating The Scanner
3. Clean the glass side to side. Repeat this until its entire surface is cleaned. Do not spray cleaner directly onto the scanner glass. Excess liquid residue may fog or damage the scanner. Attention 4. Wait for cleaned areas to dry completely. 5. Press down the revolt bracket until it snaps back into place. Calibrating the Scanner Calibrate the scanner if colors appear in areas that should be white, or colors of the scanned image and the original vary a lot. This allows you to adjust and compensate for variations that can occur in the optical component over time by its nature. ... - Page 20 Please insert the special calibration sheet included with the scanner. Alternatively you may also use any plain white sheet of paper sized in A6 (105 x 148 mm) instead; however, the calibration effect may be less good Attention than the special calibration sheet. 2. Click Start > All Programs > Your scanner model name > Calibration Wizard. (For Windows 8.1 users: Point your mouse cursor to the upper or lower right corner of ...
-
Page 21: Appendix A: Specifications
Appendix A: Specifications Plustek MobileOffice D600 Plus Image Sensor CIS x 2 Optical Resolution 600 dpi Hardware Resolution 600 x 600 dpi Color: 48‐bit Input; 24‐bit Output Scan Modes Grayscale: 16‐bit Input; 8‐bit Output B/W: 1‐bit Simplex: 2.2 sec (Grayscale, 300 dpi, A6) Scanning Speed Duplex: 2.5 sec (Grayscale, 300 dpi, A6) Max: 101.6 x 593.3 mm (4" x 23.36") Scanning Area (W x L) Min: 40 x 45 mm (1.57" x 1.77") Max: 107 x 593.3 mm (4.21" x 23.36") Acceptable Paper Sizes (W x L) Min: 40 x 45 mm (1.57" x 1.77") Paper: 50 g/㎡ to 120 g/㎡ Acceptable Paper Weight Plastic card: Non‐Embossed up to 1.1 mm & Embossed (Thickness) up to 1.2 mm Action Button Scan & Power Power Supply AC Power: 24V / 0.75A Interface USB 2.0 Net Weight 0.45 Kgs (1 Lbs) Dimensions (W x D x H) 194 x 75 x 55 mm (7.63" x 2.95" x 2.17") Protocol TWAIN Compliant ... - Page 22 Plustek MobileOffice D620 Image Sensor CIS x 2 Optical Resolution 600 dpi Hardware Resolution 600 x 600 dpi Color: 48‐bit Input; 24‐bit Output Scan Modes Grayscale: 16‐bit Input; 8‐bit Output B/W: 1‐bit Simplex: 7 sec (Color, 300 dpi, A6) Scanning Speed Duplex: 14 sec (Color, 300 dpi, A6) Max: 104.9 x 593.3 mm (4.13" x 23.36") Scanning Area (W x L) Min: 40 x 45 mm (1.57" x 1.77") Max: 107 x 593.3 mm (4.21" x 23.36") Acceptable Paper Sizes (W x L) Min: 40 x 45 mm (1.57" x 1.77") Paper: 50 g/㎡ to 120 g/㎡ Acceptable Paper Weight Plastic card: Non‐Embossed up to 1 mm & Embossed (Thickness) up to 1.24 mm Action Button Scan Power Supply 5 Vdc / 0.5 A Interface USB 2.0 Net Weight 0.45 Kgs (1 lbs) Dimensions (W x D x H) 194 x 75 x 55 mm (7.63" x 2.95"x 2.17") Protocol TWAIN Compliant 19 ...
-
Page 23: Appendix B: Customer Service And Warranty
Appendix B: Customer Service and Warranty If you encounter problems with your scanner, please review the installation instructions and troubleshooting suggestions contained in this guide. Visit our website www.plustek.com for more customer service information. To avoid delays, please have the following information available: Scanner name and model number Scanner serial number (Located at the bottom of the scanner) A detailed description of the problem Your computer manufacturer and its model number The speed of your CPU (Pentium 133, etc.) Your current operating system and BIOS (optional) Name of software package(s), version or release number and manufacturer of the software Other USB devices installed Service & Support Information (For EU country only) Where appropriate, the period of availability of spare parts and the possibilities of ... -
Page 24: Statement Of Limited Warranty
Statement of Limited Warranty This Statement of Limited Warranty applies only to the options you originally purchase for your use, and not for resale, from an authorized reseller. The manufacturer warranty includes all parts and labor, and is not valid without the receipt of original purchase. To obtain warranty service, you may contact the authorized dealer or distributor, or visit our website to check out the available service information, or send a request via E‐mail for further help. If you transfer this product to another user, warranty service is available to that user for the remainder of the warranty period. You should give your proof of purchase and this statement to that user. ... -
Page 25: Fcc Radio Frequency Statement
Some jurisdictions do not allow the exclusion or limitations of incidental or consequential damages, so the above limitation or exclusion may not apply to you. This Limited Warranty gives you specific legal rights, and you may also have other rights that vary from jurisdiction to jurisdiction. FCC Radio Frequency Statement This equipment has been tested and found to comply with the limits for a Class B digital device, pursuant to part 15 of the FCC rules. These limits are designed to provide reasonable protection against harmful interference in a residential installation. This equipment generates, uses and can radiate radio frequency energy and, if not installed and used in accordance with the instructions, may cause harmful interference to radio communications. However, there is no guarantee that interference will not occur in a ... - Page 26 Plustek Inc. www.plustek.com All rights reserved. The information and specifications contain in this document are subject to change without notice. For further details, please consult your local distributors or email us at sales@plustek.com 23 ...
Need help?
Do you have a question about the MobileOffice D600 Series and is the answer not in the manual?
Questions and answers