Table of Contents
Advertisement
Quick Links
OM-CX1ZZZ-CEE-02
Original Instruction
/005
This equipment should not be installed,operated or
maintained by any person who has not read and
understood all the contents of this manual. Failure to
read and comply with the contents of this manual can
result in serious bodily injury or death, and/or property
damage.
Issued August, 2011. Revised November, 2019 (Revision 05)
Advertisement
Chapters
Table of Contents

Related Manuals for KITO CX005


Summary of Contents for KITO CX005
- Page 1 OM-CX1ZZZ-CEE-02 Original Instruction /005 This equipment should not be installed,operated or maintained by any person who has not read and understood all the contents of this manual. Failure to read and comply with the contents of this manual can result in serious bodily injury or death, and/or property damage.
- Page 2 Chapter 3 Troubleshooting ................33 WARRANTY ...................... 40 Introduction This Instruction Manual is intended for those operating the KITO model CX chain hoist. Separate document; Disassembly/Reassembly Manual is also available for the relevant person (Note). Please contact KITO or your dealer for the material.
- Page 3 - KITO shall not be liable for any incidental damage incurred, due to the use or inability to use this product (loss of business profit, interruption of business, and damage to the lifted load).
- Page 4 Mandatory - Carry out daily inspection before operation. - Request the competent person to carry out periodic inspection (monthly, annually), or ask KITO. - Keep the record of the periodic inspections. - When not in use of the chain hoist, store it at any place where appropriate for the weight and size.
-
Page 5: Table Of Contents
Chapter 1 Operation Table of Contents Safety precautions .................... 6 Unpacking ......................10 Main parts......................10 Specifications ....................11 Operating environmental conditions ............. 11 Installation ......................11 Preoperational check ..................11 Operation ......................12 Maintenance and storage ................13 Inspection classification ................. 14 Daily inspection .................... -
Page 6: Safety Precautions
- Install the chain hoist to avoid impeding the hoist. - Install the Load Chain with sufficient length for lifting work. - If the adjustment of the bottom of the hand chain between 500 mm and 1000 mm from the ground is required, consult KITO. Lift Before use Before moving the load, warn all the surrounding people. - Page 7 - In the situation where the chain hoist is to be used as a sling by connecting it to a crane, be certain to convey the fact of this intended usage to KITO beforehand to confirm whether this type of use is possible.
- Page 8 - When lifting a load with two hoists, choose each hoist whose lifting capacity exceeds the load and operate the respective chain hoist to keep the load lifted horizontal. - There are risks of overheating of the braking system during prolonged lowering of loads. If you are considering of the use under such condition, consult KITO.
- Page 9 - When replacing a part, use only an authorized part for the KITO model CX chain hoist. Even though the part is an authorized one for KITO chain hoist, it may not be used for different model. - Wear protection equipment such as protection goggles and gloves depending on the work contents. Especially, wear helmet and safety belt when carrying the high lift work.
-
Page 10: Unpacking
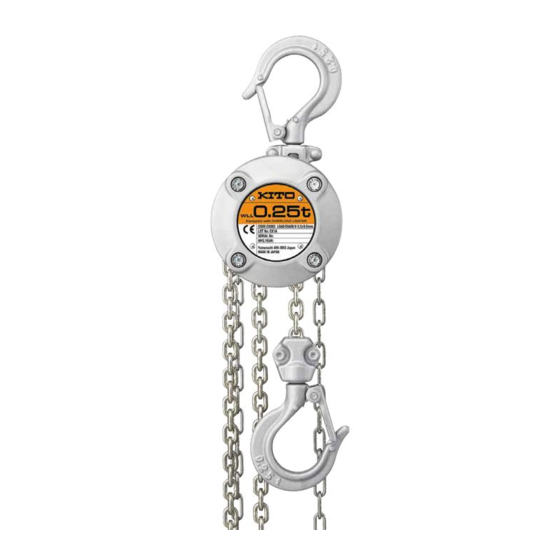
Dimension c Main parts Top hook Hook latch Nameplate Wheel cover (rating / warning) Body Rated load (ex. of CX005) Hand wheel Equipped with OVERLOAD LIMITER Over load limiter (OLL) CODE: LOAD CHAIN: LOT No. LOT No: CX1A built-in SERIAL No: MFG.YEAR:... -
Page 11: Specifications
Install a stopper at both ends of the traversing rail for the trolley. - If the adjustment of the bottom of the hand chain between 500 mm and 1000 mm from the ground is required, consult KITO. Note: KITO TS trolley (Models TSP005) can be connected to this hoist. When using the CX003 by connecting to a trolley, change the capacity on the trolley nameplate to 250kg, corresponding to CX003. -
Page 12: Operation
This product is designed for a rated load to be hoisted by pulling the hand chain with a force shown in the "Pull to lift load" table below or less. If an excessive load is applied, the overload limiter will operate. In this situation, immediately stop the operation and lighten the load. Pull to lift load: CX003 147 N (15kgf) CX005 187 N (19kgf) -
Page 13: Maintenance And Storage
Overload limiter (OLL) Do not adjust or disassemble Overload Limiter (OLL). Failure to comply with these instructions may result in death or serious injury. This product is equipped with an overload limiter (OLL: a device to prevent an excessive overload) as standard. An excessive overload via the hand chain activates OLL which slips the hand wheel to prevent damage to the product. -
Page 14: Inspection Classification
Inspection Classification To maintain continuous and satisfactory operation, a regular inspection procedure must be initiated to replace worn or damaged parts before they become unsafe. INSPECTION Classification Inspection intervals must be determined by individual application and are based on the type of service to which the hoist will be subjected and the degree of exposure to wear, deterioration or malfunction of the critical components. -
Page 15: Daily Inspection
- Be sure to carry out these inspections in order to use the chain hoist safely. - Separate document; Disassembly/Reassembly Manual is also available for the competent person. Please contact KITO or your dealer for the material. -
Page 16: Parts List
Parts List CX005 Part code Part code Parts Parts Fig. Fig. No. Part No. Part Name No. Part No. Part Name CX003 CX005 CX003 CX005 Hoist Hoist 1001 Top hook Set Pinion L1XA003-1001 L1XA005-1001 C1XA003-9111 C1XA005-9111 071 Hook latch Assembly... - Page 17 Chapter 2 Inspection Table of Contents Safety precautions ..................18 Recommendation for Inspection ..............20 Inspection Standard ..................20 Frequent Inspection .................. 21 Periodic Inspection ..................24 Preoperational Test ................... 29 Inspection Check Sheet .................. 30...
-
Page 18: Safety Precautions
Do not use parts beyond their discard limit or criteria and unauthorized parts for KITO Chain Hoist Model CX003/005. Even though the part is an authorized part for KITO Chain Hoist, it may not be used for a different model. Prohibited Use parts correctly in accordance with the Disassembly/reassembly Manual. - Page 19 When any defect is observed during inspection, stop using the Chain Hoist, indicate Failure/Inspection underway and consult with the competent person, KITO or your dealer for inspection and repair.
-
Page 20: Recommendation For Inspection
- This chapter is composed of frequent and periodic inspection items (About each classification, refer to page 14). - Inspection shall be performed by a competent person (with expertise), or consult with KITO. - Inspection items are specified based on standard environment and conditions. Consult with KITO when using the Chain Hoist under special environment or conditions. -
Page 21: Frequent Inspection
Frequent Inspection NOTE Check the Chain Hoist under the installation state or Check the following items in addition to the daily inspection items. on the workbench. Before a frequent inspection, perform the daily inspection. Item Method Discard limit or criteria Action Suspend a light load and lift/ •... - Page 22 Item Method Discard limit or criteria Action Check the deformation of the • The neck should not be deformed or twisted Replace the Top Hook Top and Hook neck visually. beyond the discard limit. Set or the Bottom Hook Bottom Complete Set.
- Page 23 Item Method Discard limit or criteria Action Visually ensure the Load • Should be free of excessive corrosion (rust). Replace the Bottom Load Chain is free of corrosion Hook Complete Set. Chain (rust). NOTE - When abrasion of Load Chain is observed, also check the Load Sheave for safety's sake.
-
Page 24: Periodic Inspection
• A point caliper is needed to measure the abrasion (of chain diameter). CX003 Worn position • For CX005, the diameter (d) of the chain pin hole should not excess the limit below. Chain pin hole diameter (mm) Standard 10.3... - Page 25 Item Method Discard limit or criteria Action Visually check the braking Replace the scarred or Braking surface to ensure no worn parts. mecha- Do not lubricate the Friction abrasions or flaws. nism Plate. T he Fric tion Plate is a dry type brake. Lubricating the Friction Plate may result in death or severe injury due to insufficient braking.
- Page 26 Item Method Discard limit or criteria Action Measure the abrasion of the Replace the Ratchet Braking Dimension D (mm) Rated load (t) Ratchet Disc with a vernier Disc. mecha- Standard Limit caliper. nism 0.25 33.8 32.4 44.3 42.9 One point Two-point contact contact...
- Page 27 Item Method Discard limit or criteria Action Visually check the abrasion • Should be free of abrasion in the Pocket Replace the Load Lifting and flaw of the Load Sheave. or run-on flaws on the Tooth of the Load Sheave. mecha- Sheave.
- Page 28 Item Method Discard limit or criteria Action Visually check the Pawl Shaft. • Pawl shaft should be secured to Body. Replace the Body Body Assembly. Pawl Shaft Visually check and measure • Should be free of substantial deformations Replace the Frame A or the bearing hole of Frames or flaws.
-
Page 29: Preoperational Test
Item Method Discard limit or criteria Action Visually check the • Should be free of crushed grooves, Replace the Chain Others deformation of the Chain deformations or cracks. Guide. Guide. Chain Guide Visually check and measure • The End Pin should be free of significant Replace the End Pin. -
Page 30: Inspection Check Sheet
KITO Chain Hoist Model CX Inspection Check Sheet (for Model CX003/005) Type Rated Load Lot No. Control No. Date of Installation Installed Place Check mark example: ○= Good, △= To be replaced (adjusted) at next inspection, × = Defective. To be replaced (adjusted) - Page 31 Category Check Item Deformation of hole to combine the Top Yoke Top/Bottom Deformation of Bottom hook connection hole (for CX005 only) Hook Abrasion of the first link of Chain at the load end. Abrasion and flaw on the braking surface...
- Page 33 Chapter 3 Troubleshooting Table of Contents Introduction ...................... 34 Safety Precautions ..................34 Troubleshooting ....................35 Lifting up failure ..................35 Lowering failure ..................37...
-
Page 34: Introduction
When replacing parts, only use parts authorized by KITO for use in the CX003/005 Chain Hoist Models. Even if the part is an authorized part for the KITO Chain Hoist, it may not be used for a different model. Mandatory Use parts correctly in accordance with the Disassembly/reassembly Manual. -
Page 35: Troubleshooting
Troubleshooting Lifting up failure Checking sounds from the hoist is a critical inspection point. Note the operating sound of the Chain Hoist. For lifting, the Chain Hoist makes clicking sounds. • For lowering, the Chain Hoist does not make clicking sounds. •... - Page 36 Symptom Cause Action Pawl sounds weak. • Pawl Spring Assembly lacks spring, or Replace Pawl Spring Assembly. Pawl sounds irregularly. breaks. Perform disassembly inspection regularly. • Pawl does not return to original position due to accumulated rust (corrosion). • Missing Pawl Spring Assembly causes Reassemble the hoist correctly.
-
Page 37: Lowering Failure
Lowering failure Do not lubricate the Friction Plate. Lowering failure is mainly due to a deficiency of the brake. The Friction Plate is of the dry type. Lubricating the Friction Plate may result in death or severe injury due to insufficient braking. Symptom Cause Action... - Page 38 Symptom Cause Action • Mis-assembly causes Load Chain to Assemble Load Chain correctly in accordance Scarred or deformed twist. with the Disassembly/reassembly Manual. Load Chain. • Load Chain is entangled with Hand Before use, be sure to check that the Load Chain.
- Page 39 Symptom Cause Action • Overload. Replace the Hook. Stretched Hook. The Hook is to open gradually under more than double the rated load. Hook opening indicates overload. Do not lift the load beyond the rated load. Lifting a load beyond the rated load may result in death or severe injury.
- Page 40 KITO warrants that KITO’s Products, when shipped, shall be free from defects in workmanship and/or materials under normal use and service and KITO shall, at the election of KITO, repair or replace free of charge any parts or items which are proven to have said defects, provided that all claims for defects under this warranty shall be made in writing immediately upon discovery and, if there is anything within one (1) year from the date of purchase of KITO’s Products...
- Page 41 < Memo >...
- Page 42 < Memo >...
- Page 43 EN 818-7:2002+A1+2008 Short link chain for lifting purposes, increased quality, grade V, certified by Fachausschuss Metall und Oberflächenbehandlung EN 13157:2004+A1+2009 Hand powered cranes Authorized representative for the arrangement of the technical documents: Udo Kleinevoß Technical manager Kito Europe GmbH. 40549 Düsseldorf...
- Page 44 KITO Europe GmbH Heerdter Lohweg 93, D-40549 Düsseldorf, Germany TEL: +49-(0)211-528009-0 FAX: +49-(0)211-528009-59 E-mail: info@kito.net URL: http://www.kito.net/ KITO corporation Tokyo Head Office: SHINJUKU NS Building 9F, 2-4-1, Nishi-Shinjuku, Shinjuku-ku, Tokyo 163-0809, Japan http://www.kito.com Head Office & Factory: 2000 Tsuijiarai Showa-Cho, Nakakoma-Gun, Yamanashi 409-3853, Japan...
Need help?
Do you have a question about the CX005 and is the answer not in the manual?
Questions and answers