Advertisement
Quick Links
INSTALLATION
INSTRUCTIONS
PARTS LIST
Roof box
4
Brackets A
4
Brackets B
9
Plates
4
Knobs
8
Bolts
8
Washers
2
Straps
Seal
2
Keys
© 2017 American Honda Motor Co., Inc. – All Rights Reserved.
Accessory
ROOF BOX (SHORT)
P/N 08L20-TAI-200
4
4
TOOLS AND SUPPLIES REQUIRED
Isopropyl alcohol
Shop towel
INSTALLATION
NOTE:
• Be careful not to damage the finished surfaces of the
body when installing the roof box.
• An Acura roof rack is required to install the roof box.
• The maximum load capacity for roof racks vary from
model to model. Check the vehicle owner's manual, the
roof rack installation instructions, or the load label on
the rack for the roof rack load capacity.
• The maximum load capacity for the roof box is 110lb
(50kg): approximate roof box weight is 29lb (13kg).
• Do not allow the combined weight of the roof box and
cargo to exceed the carrying capacity of the roof rack.
1.
BII07186-13 (1709)
Application
2018 MDX
Large pads
Small pads
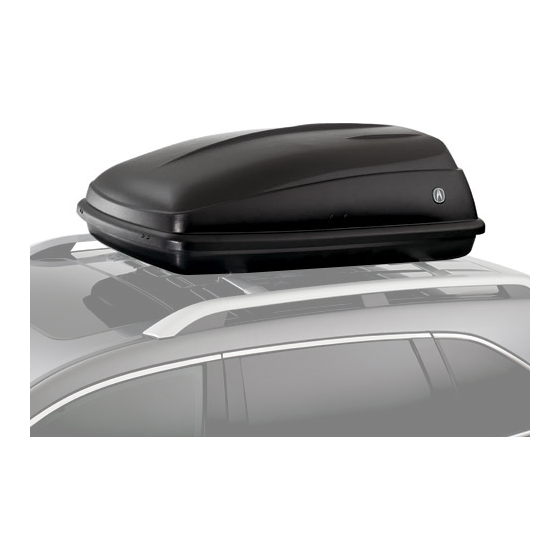
With the help of an assistant, carefully place the box
on the crossbars. Open the tailgate to make sure the
box will not interfere with the tailgate when it is open.
Check that the box
is not interfering
with the tailgate.
ROOF BOX
CROSSBARS
Publications No.
VERSION 1
Issue Date
SEP 2017
2802030M
TAILGATE
1 of 4
08L20-TAI-2000-91
Advertisement

Related Manuals for Acura ROOF BOX


Summary of Contents for Acura ROOF BOX
-
Page 1: Installation Instructions
• Be careful not to damage the finished surfaces of the body when installing the roof box. • An Acura roof rack is required to install the roof box. • The maximum load capacity for roof racks vary from Knobs model to model. - Page 2 Open the roof box. Slide the plates to line up the Using isopropyl alcohol on a shop towel, clean four holes in the plates with the mounting location at the brackets B where the small pads will attach. Remove front crossbar.
- Page 3 B, through the plate, and into the predrilled on the crossbars. Be aware of the hardware hanging hole in the bottom of the roof box. Make sure the from the bottom of the box. pads on the plate and bracket B face each other.
- Page 4 Locking: Press down on the lid. There should be an audible click. Be sure the lid is latched by attempting to lift the lid. Turn the key clockwise to lock the roof box. Remove the key while not in use. Be sure the straps are not outside the roof box.
Need help?
Do you have a question about the ROOF BOX and is the answer not in the manual?
Questions and answers