
Subscribe to Our Youtube Channel
Related Manuals for EUTHANEX SMARTBOX PRODIGY EA-3300TS


Summary of Contents for EUTHANEX SMARTBOX PRODIGY EA-3300TS
- Page 1 Auto CO System PRODIGY EA‐3300TS 877‐559‐0159 Toll Free E‐Z Systems /Euthanex Corp. 610‐882‐3800 Phone P.O. Box 3544 610‐882‐3801 Fax Palmer, PA 18043 www.euthanex.com info@euthanex.com ...
- Page 2 TABLE OF CONTENTS Disclaimer ____________________________________ 3 System Overview _______________________________ 4 Safety________________________________________ 5 System Setup __________________________________ 6 Operating the System ___________________________ 9 Administrator Instructions _______________________ 13 Troubleshooting _______________________________ 23 EMC / EMI. This equipment has been tested and found to comply with the limits for a Class A Equipment, pursuant to part 15 of the FCC rules.
- Page 3 DISCLAIMER: THIS MANUAL MUST BE READ BEFORE SETTING UP AND OPERATING THE SMARTBOX AUTO CO SYSTEM. The user should be thoroughly familiar with the contents of this manual prior to using the system with animals. Only technicians that are properly trained should operate the system. The user/owner of this equipment shall have the sole responsibility for any damage or injury resulting from operation that is not in accordance with the authorized instructions. This includes, but is not limited to, operating the equipment outside of recommended safety levels, variation from specified operating instructions, and not following standard laboratory safety procedures when working with anesthetic agents and volatile compressed gases. The system and its components must only be modified or repaired by Euthanex® authorized service technicians. Improper modification or repair may result in danger to personnel, harm or death to animal, and/or equipment damage. The user/owner of this equipment shall have the sole responsibility for any damage or injury resulting from improper maintenance and repair that is not done by authorized maintenance and repair personnel. Parts that have failed, in whole or in part, exhibit excessive wear, are contaminated or are otherwise at the end of their useful life, should not be used and should be replaced with parts supplied by Euthanex Corporation. Tampering with the main control unit by unauthorized personnel automatically voids all warranties and specifications. The manufacturer assumes no responsibility for any malfunction or failure of the unit if tampering is suspected. ...
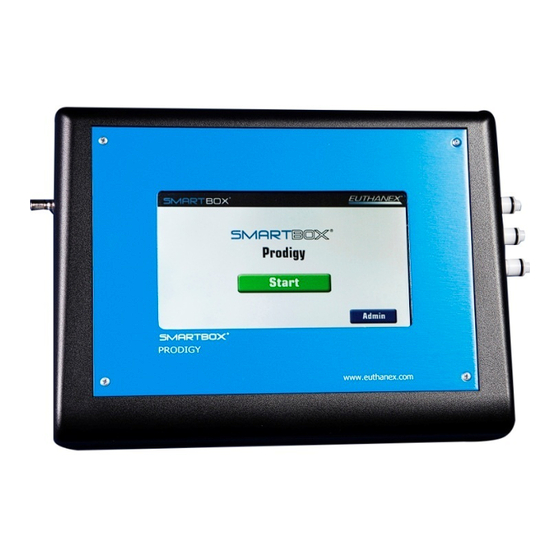
- Page 4 OVERVIEW: The SMARTBOX® Prodigy allows administrators to program an unlimited number of cages and sizes. The administrator only needs to select the flow rate percentage. The EA‐33000TS will automatically calculate the required flow rate. An unlimited number of password‐protected users adds even more flexibility. Each user can only see the cages authorized by the administrator. The user can connect up to 3 cages at one time. The Touch Screen display shows the cycle, cycle time, and total time remaining. Please refer to the “Flow Rate & Preset Times” section to derive the AVMA recommended flow rate. POWER DC SWITCH POWER GAS IN GAS OUTLETS TO CAGES ...
- Page 5 The e exclamation poin nt within an equi ilateral triangle i he lightning flas sh with an arrow head intend ded to alert the u user to the presen nce of important ymbol within an equilateral trian ngle, is opera ating and mainten nance (servicing g) instructions in...
- Page 6 . Check the F Flow Rate Gui ide to determ mine the corre ect PSI setting gs. 3. Connec ct the supplie d cage hose f from the outp put of the Pro odigy (located d on the right t side) to the input valve on t the Euthanex Lid. The unit t will support t operation of f 3 cages in a cycle. GAS W WILL NOT FLO W INTO LID I F THE COUPL LER IS NOT PR ROPERLY ATTA ACHED. WARNING G ‐ A minimum m of one cage e must be con nnected. All q quick disconn nect fittings a...
- Page 7 4. Place the Euthanex Lid on the cage. To properly make the connection, pull back the coupler and slide it over the male stem. The coupler will snap back into place and secure the connection. The system is ready for operation. The image cannot be display ed. Your computer may not hav e enough memory to open the image, or the image may hav e been corrupted. Restart y our computer, and then open the file again. If the red x still appears, y ou may hav e to delete the image and then insert it again.
- Page 8 OPER RATING THE SY YSTEM: 1) Press the On switc ch in the back k of the unit. The unit will boot and com me to the hom me screen rea ady for us se. If this is th he first time u using the syst tem the opera ating parame eters must be setup prior t to runni ng any cycles s (see adminis strator instruc ctions pg 13) . 2) Ensur re the lid(s) ha as been place ed on the cag e(s) and hose es are correct tly attached t o the unit. ank Pressure G Gauge ...
- Page 9 5) From the Home Screen press "Start". Power Shutdown Button If passwords are activated the next screen will be password enter. 6) Select the cage type by touching the screen on the cage desired . If there is a large amount of registered cages, you will need to scroll through a list to find your desired selection. Then hit next. ...
- Page 10 7) Next you will need to confirm the hose connection message, then select the number of cages to be used in the cycle. NOTE: The system supports up to 13 lpm @ 20 PSI. If multiple large volume cages are selected and the flow rate is exceeded, the system will automatically adjust the cage number for the allowable amount of connected cages. 8) The system will cycle through two stages: Stage 1 Charge: Gas flows to the cages, fully charging them with CO . Stage 2 Dwell: Gas flow stops and the cages remains fully charged with CO . Option: If programmed, the system will perform a second CO charge and dwell cycle. ...
- Page 11 9) The red emergency “STOP” icon may be pressed at any time to stop the euthanasia cycle. A password may be required to engage the stop (admin setting). Gas flow will immediately cease. NOTE: If there is no gas pressure on the inlet of the unit due to the hose not being connected or the supply has run out, the below screen will appear. ...
- Page 12 Default flow rates and times were chosen to comply with the latest guidelines of the AVMA Panel on Euthanasia and through extensive testing performed by Euthanex. Flow rates and times are programmable and may be changed by a designated administrator. Flow rates and times are password protected for security.
- Page 13 1. From the Home Screen press "Admin". 2. Enter the Administrator 4 digit password (default is 7777 and can be changed once in the admin settings screen) and press Next. ...
- Page 14 3. The Admin Options Screen will appear. a. Add New Cage i. Use this to add new Cage types for cycle. This includes setting the cage size and desired flow rate percentage. b. Edit Existing Cage (Will display current settings) i. Use to change operating parameters of defined cages that are already in the system. c. Change System Parameters i. Use to change basic system settings. d. Add New User i. Setup new user name and password. e. Edit User i. Change user names or passwords that are already in the system. Change Admin Password g. The down arrow will take you out of the software to the desktop to allow for remote service connection. Please contact support. ...
- Page 15 4. To Add New Cage, select from admin screen a. The add new cage screen will be displayed. b. Type in the label of the cage that you want to add, then hit next. c. The cage dimensions or total volume must be entered on this screen. The system will calculate your cage volume based on the dimensions specified. d. When input is complete press "Next". ...
- Page 16 e. The desired flow rate percentage needs to be set for the new cage type. Use the +/‐ to adjust the flow percentage you would like. The unit calculates your flow rate based on the cage dimensions that were entered on the previous screen. Press "Next" when set. f. Now the times need to be set for the new cage. Use the + and – next to the times to be adjusted. g. If a second charge is needed, Use the + and – next to the times to be adjusted for second charge input times. h. Once the setting are correct press" Save", and it will return to the Admin screen. 5. To Edit Cage, select from Admin screen a. Select the cages that you would like to edit from the pop‐up menu, then hit ok. ...
- Page 17 b. The current parameters for the selected cage will be displayed. c. To make changes select "Edit", and follow the instructions for adding a new cage. ...
- Page 18 6. C hange System m Parameters s, select from admin scree n a. Select if the system m will require a password f or user opera ation. A If thi is is tuned off f then Set lan nguage, used d to choose de esired interfa ace language. A C D F E b. Screen nsaver time o out setting. B c. Elimin ates the gas c connection w warning on cyc cle run. C d. Gas wa arning On, th is adjusts the e time to activ...
- Page 19 7. Add New User a. Type in the user name that you wish to add. b. Set the user password. i. Select if the user will have Emergency Stop button during the cycle. ii. Select if it will require an admin password to engage. If you select to use system password, this opens the option of limiting the cages that a user may select or operation iii. Once complete hit Save. c. The "Require Admin Password for emergency stop" flag if checked will require the Administrator password to be entered to stop a cycle. If no check is made the user will be allowed to invoke the stop with no password during a cycle. NOTE: A user can not be saved without selecting cages and cage quantities for the user. ...
- Page 20 d. Cages can be activated per user, hit the "Cages" icon. e. To activate a cage, place a check next to all the cages that the user will have access to when logged in. Hit "OK" to save. The quantity of cages that can be selected by this user can be limited by selecting the g. "Quantity" button. ...
- Page 21 h. To activate the quantity, place a check next to the maximum number that the user will have access to when logged in. Hit "OK", to Save. 8. Edit User a. Select the user that you wish to edit from the list, then hit "OK". b. Change User settings as desired. The user can be deactivated by touching the "Delete" box. Hit save when complete. c. Cages can be activated per user, hit the "Cages" icon. ...
- Page 22 d. To activate a cage, place a check next to all the cages that the user will have access to when logged in. Hit "Done" to save. e. The quantity of cages that can be selected by this user can be limited by selecting the "Quantity" button. To activate the quantity, place a check next to the maximum number that the user will have access to when logged in. Hit "Done" to save. 9. Change Admin Password a. Input current Admin password, change to new password and hit "Save". ...
-
Page 23: Troubleshooting
TROUBLESHOOTING: Before any service is done that would require opening the unit it must be disconnected from the power source. If your location has lockout-tag out protocols, please follow them. System will not turn on: 1) Make sure power cord is properly plugged in. 2) Make sure the power switch on the back of the unit is turned in the “ON” position. Before Checking the circuit breaker located in the Prodigy, disconnect the supply power to the unit by unplugging power cord. ... - Page 24 Nut "B" Nut "A" Not all animals are being euthanized after the completion of gas cycle: 1) Check that all connections in the entire system are properly attached. 2) Check that your gas supply has not run out. 3) Check that the regulator is set to 20 PSI. 4) It may be necessary to revise settings for the particular species that you are having difficulties with. Contact Euthanex for information on this. System not responsive: 1) Screen Saver doesn’t disappear when screen is touched. In the above please power off system at master power switch located on back of the Prodigy. Allow power to be off for at least 1 min. System not booting: 1) Damage may have occurred to the program flash card. If you think this has happened please contact our technical support department for help with this. ...
- Page 25 If this troubleshooting guide does not resolve your problem, contact Euthanex Tech Support at info@euthanex.com 1-877-559-0159, or 877‐559‐0159 Toll Free E‐Z Systems /Euthanex Corp. 610‐882‐3800 Phone P.O. Box 3544 610‐882‐3801 Fax Palmer, PA 18043 www.euthanex.com info@euthanex.com ...
Need help?
Do you have a question about the SMARTBOX PRODIGY EA-3300TS and is the answer not in the manual?
Questions and answers