
Subscribe to Our Youtube Channel
Related Manuals for Beninca KMB24


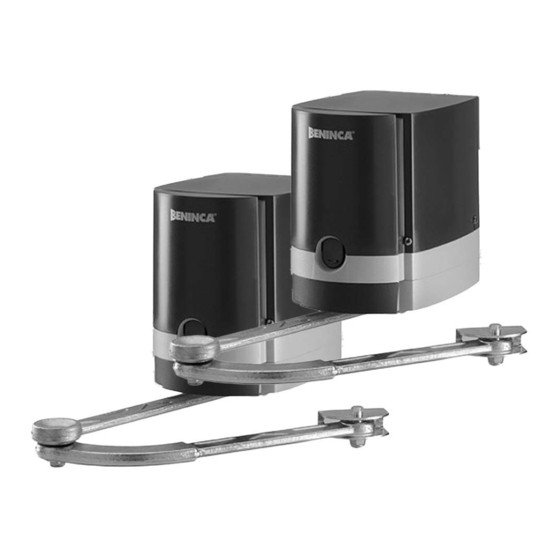
Summary of Contents for Beninca KMB24
- Page 1 L8542881 02/2016 rev 4 KMB24 UNIONE NAZIONALE COSTRUTTORI AUTOMATISMI PER CANCELLI, PORTE SERRANDE ED AFFINI...
- Page 3 WARNING The product shall not be used for purposes or in ways other than those for which the product is intended for and as described in this manual. Incorrect uses can damage the product and cause injuries and damages. The company shall not be deemed responsible for the non-compliance with a good manufacture technique of gates as well as for any deformation, which might occur during use.
- Page 4 WARNING: Important safety instructions. Follow all instructions since incorrect installation can lead to severe injury. If this is the first time you realise an automation for swing gates with KMB24, we recommend that you read this manual carefully as it contains important advice and information for the realisation of the plant in safe conditions.
- Page 5 Door leaf max. rotation α° (mm) (mm) (mm) (mm) (mm) 90° 90° 90° 90° 90° 90° 110° 105°...
- Page 7 Articulated bracket Bracket YES! Fixing bracket Screw M8x65 Self locking nut M8...
- Page 8 see label manual relase Customized key C Lever L SWC2 (17) SWO2 (16) COM (13) M2 (3,4) Cavi Cables MBE24V MB24V...
- Page 9 Upper cam Lower cam Open. Open. Microswitch Upper cam Lower cam Close. Close. Upper cam Lower cam MB24 MBE24 Inside. Open. Open. Left Right...
- Page 10 F2:1.6AT (230V) F2:3.2AT (115V) II°CH/SERL 24Vac SWC2 (17) SWO2 (16) COM (13) M2 (3,4) Code _ _ _ _ J1 DAS Close DAS 8K2 J1 DAS Open DAS N.C. 1 2 3 4 5 6 7 8 9 10 11 12 13 14 15 16 17 18 19 20 21 22 23 24 25 26 24Vac/dc PHOTO LAMP...
- Page 11 PHOT C PHOT PHOTOCELLS ACTIVE IN OPENING AND CLOSING PHOTOCELLS ACTIVE IN OPENING AND CLOSING PHOTOTEST PHOTOTEST test1:on test2:ON 24Vac PHOT 24Vac PHOT-C 9 10 11 12 9 10 24Vac NC NO 24Vac 24Vac NC NO 24Vac SERVICE/ZONE LIGHT Service Light AUX1:2 AUX1:0 Service/Zone...
- Page 12 Display OFF Power ON Firmware Ver. (3s) v1. 0 5 8888 Diagnostic IBCA tped pmo1 pmc1 pmo2 blco pmc2 blcc tdmo soft tdmc ltca tloc imot sld1 cvar sld2 mloc spd1 spd2 pso1 tst1 psc1 tst2 pso2 tstm psc2 seau radi sear tinc...
- Page 13 RADI PUSH PUSH PUSH PUSH Nman 0012 3456 MACI 2 Cycle AUTO PUSH OPEN/CLOSE RE-ENTER CODE 0000 9000 9C5a conf CODE Display OFF Legenda Press key (-) Press key (+) Press key (PG) Press simultaneously keys (+) and (-) Increase/decrease the value with keys (+) and (-) Press the transmitter key, which is to be assigned to function...
-
Page 14: Table Of Contents
INDEX 1) LIMITS FOR USE....................................... 15 2) OVERALL DIMENSION (FIG.1) ..................................15 3) INSTALLATION DIMENSIONS (FIG.2) ................................15 4) TOOLS AND MATERIALS ................................... 15 5) STANDARD INSTALLATION (FIG.3)................................15 6) ANCHORING OF BRACKETS (FIG.6-7) ................................ 15 7) POSITIONING THE GEARED MOTOR (FIG.10) ............................. 15 8) POSITIONING THE ARTICULATED ARM BA (FIG.11) ............................ -
Page 15: Limits For Use
1) LIMITS FOR USE Do not use the automation on leaves with dimensions / weights above the values indicated in the below enclosed table chart: Door leaf width Door leaf weight (kg) 2) OVERALL DIMENSION (FIG.1) On Fig 1 main overvall dimensions are indicated, value to be in millimiters. 3) INSTALLATION DIMENSIONS (FIG.2) On Fig. -
Page 16: Manual And Emergency Operation (Fig.12)
9) MANUAL AND EMERGENCY OPERATION (FIG.12) To manually open or close the door in case of power failure or faults, two solutions are possible: • Built-in release Introduce the customized key C, turn it clockwise and pull lever L. At this point the geared motor is released and the gate can be manually pushed. -
Page 17: Check Motor And Limit Switches Connections
12.2) CHECK MOTOR AND LIMIT SWITCHES CONNECTIONS 1) Cut-off power supply. 2) Manually release the wings, move them to approx. half-stroke and lock them again. 3) Restore power supply. 4) Send a step-by-step control signal by pressing the <-> push-button. 5) The leeaves must move in OPENING. -
Page 18: Wire Diagram
14.2) WIRE DIAGRAM Wire connections shown in Fig. 18 are described hereunder: Terminal No. Function Description Motor 1 Connection, motor 1: 24VDC PRE-WIRED Motor 2 Connection, motor 2: 24VDC MB24 Flashing light Connection, flashing light 24VDC 15W max. Lock Output, 12Vdc/10W power supply for electric lock (7:0V, 8:+12V) Contact free from N.O. -
Page 19: Programming
15) PROGRAMMING The programming of the various functions of the control unit is carried out using the LCD display on the control unit and setting the desired values in the programming menus described below. The parameters menu allows you to assign a numerical value to a function, in the same way as a regulating trimmer. The logic menu allows you to activate or deactivate a function, in the same way as setting a dip-switch. -
Page 20: Logic (Log)
Adjusts motor 2 speed during slowing phases. SLD2 30-70 (50%) This value is expressed in percentage. Adjusts motor 1 speed during normal speed phase. SpD1 30-99 (99%) Value expressed in percentage. Adjusts motor 2 speed during normal speed phase. SpD2 30-99 (99%) Value expressed in percentage. - Page 21 Enables or disables start at decreased speed. On: Executes start ups at decreased speed for 2 seconds to then shift to normal SOFT (OFF) speed. Off: Start at decreased speed not active. Selects the operating mode of the blinking light during the time TCA LTCA On: Blinking light on during TCA (OFF)
-
Page 22: Radio (Rad)
16.3) RADIO (RAD) MENU FUNCTION By selecting this function, the receiver goes in waiting (Push) for a transmitter code to assign to the step-step function. Press the key of the transmitter to assign to this function. If the code is valid, it is memorised and the message OK is displayed If the code is not valid, the message Err is displayed By selecting this function, the receiver goes into waiting (Push) for a transmitter code to assign to the second radio channel. -
Page 23: Protection Code (Code)
16.8) PROTECTION CODE (CODE) It allows to type in an access protection code to the programming of the control unit. A four-character alphanumeric code can be typed in by using the numbers from 0 to 9 and the letters A-B-C-D-E-F. The default value is 0000 (four zeros) and shows the absence of a protection code. -
Page 24: Error Messages
21) ERROR MESSAGES Some messages that are displayed in case of function anomalies are listed as follows: Obstacle error motor 1/anti-crushing Check presence of obstacles on motor 1 leaf run Amp1 Obstacle error motor 2/anti-crushing Check presence of obstacles on motor 2 leaf run Amp2 Motor 1 circuit checking error Check motor 1 connections... - Page 25 KMB24 USER GUIDE KEEP THIS GUIDE AND MAKE IT AVAILABLE TO ALL USERS OF THE AUTOMATION. SAFETY STANDARDS WARNING: Important safety instructions. It is important for the safety of persons to follow these instructions. Save these instructions. Do not stand in the movement area of the door.
- Page 26 Pos. Description Cod. 9686930 Cover 9686811 Motor 9686326 Screw 9686934 Limit stop 9686935 Microswitches 9686936 Shaft 9686937 Output shaft 9686812 Transformer 9686927 Control unit 9686944 Gasket 9686941 Release lever 9686942 Cover 9686943 Cover...
- Page 27 The certificate of conformity in this document corresponds to the last review available at the time of printing and could differ for editorial requirements from the original available from the manufacturer. The most recent and complete certificate of conformity is available consulting the site: www.beninca.com or can be requested from: Automatismi Benincà SpA - Sandrigo VI - ITALY.
- Page 28 AUTOMATISMI BENINCÀ SpA - Via Capitello, 45 - 36066 Sandrigo (VI) - Tel. 0444 751030 r.a. - Fax 0444 759728...
Need help?
Do you have a question about the KMB24 and is the answer not in the manual?
Questions and answers