SCIEX P/ACE MDQ Plus System Overview Manual
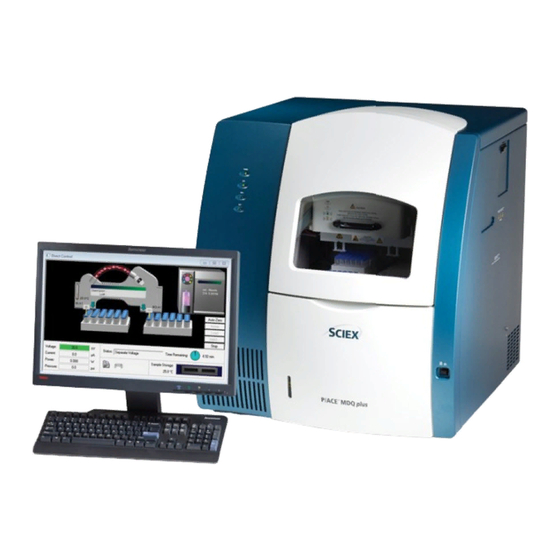
Capillary electrophoresis system
Hide thumbs
Also See for P/ACE MDQ Plus:
- Site planning manual (18 pages) ,
- System maintenance manual (88 pages)

Related Manuals for SCIEX P/ACE MDQ Plus


Summary of Contents for SCIEX P/ACE MDQ Plus
- Page 1 P/ACE™ MDQ Plus Capillary Electrophoresis System System Overview Guide RUO-IDV-05-4901-A January 2019...
- Page 2 This document is provided to customers who have purchased SCIEX equipment to use in the operation of such SCIEX equipment. This document is copyright protected and any reproduction of this document or any part of this document is strictly prohibited, except as SCIEX may authorize in writing.
-
Page 3: Table Of Contents
Contents Chapter 1 Safety, Notices and Labels ........7 Overview. - Page 4 RoHS 通知 ............22 中国...
- Page 5 SCIEX Support ........
- Page 6 P/ACE™ MDQ Plus Capillary Electrophoresis System System Overview Guide 6 / 76 RUO-IDV-05-4901-A | B54952AB...
-
Page 7: Chapter 1 Safety, Notices And Labels
Safety, Notices and Labels Overview A description of the symbols and labels that are used on the SCIEX P/ACE™ MDQ Plus Capillary Electrophoresis System, or that are shown in this manual, can be found in this section. Do not attempt to perform any procedure before carefully reading all instructions. If in doubt as to how to proceed in any situation, contact your SCIEX representative. -
Page 8: Alerts For Warning, Caution, Important, And Note
Alerts for Warning, Caution, Important, and Note All Warnings and Cautions in this document include an exclamation point, framed within a triangle. The exclamation point symbol is an international symbol which serves as a reminder that all safety instructions should be read and understood before installation, use, maintenance, and servicing are attempted. -
Page 9: Instrument Safety Precautions
• This equipment is used in a manner other than specified. Operate the instrument as instructed in the product manuals. • You introduce software that is not authorized by SCIEX into your computer. Only operate your system’s computer with software authorized by SCIEX. -
Page 10: Moving Parts Or Sharp Objects
Electrical Safety To prevent electrically related injuries and property damage, properly inspect all electrical equipment prior to use and immediately report any electrical deficiencies. Contact a SCIEX representative for any servicing of equipment requiring the removal of covers or panels. -
Page 11: Class 1 Laser Caution Label
Class 1 Laser Caution Label If the instrument contains a laser system, a label reading “THIS PRODUCT CONFORMS TO APPLICABLE REQUIREMENTS OF 21 CFR 1040 AT THE DATE OF MANUFACTURE” is found near the Name Rating tag. The laser light beam is not visible. CLASS 1 LASER PRODUCT THIS PRODUCT CONFORMS TO APPLICABLE REQUIREMENTS OF... -
Page 12: Safety Symbols And Labels
Safety Symbols and Labels High Voltage Electric Shock Risk Symbol This symbol indicates that there is high voltage and there is a risk of electric shock, and the operator should use care when accessing this area. Attention Safety Symbol This symbol calls attention to important information to read, or is accompanied by another symbol indicating a particular safety hazard. -
Page 13: Fuse Warning Symbol
Fuse Warning Symbol This symbol indicates that the instrument fuse may be replaced only with the specified type and rating. Cancer and Reproductive Harm Label This label indicates there is risk of cancer and reproductive harm to the operator. This warning is called for by the California Safe Drinking Water and Toxic Enforcement Act of 1986, commonly referred to as Proposition 65, enacted by the State of California. -
Page 14: Other Instrument Labels
Other Instrument Labels This section provides information for some labels and symbols appearing on the P/ACE™ MDQ Plus instrument housing. These labels and symbols may be associated with user-serviceable procedures. Individual hazards associated with a specific procedure in this manual may use these labels and symbols, and are included in Warnings or Cautions within the procedures for that task. -
Page 15: Ce Mark Label
CE Mark Label A “CE” mark indicates that a product has been assessed before being placed on the market, and has been found to meet European Union safety, health, and/or environmental protection requirements. RCM Mark Label The RCM mark is intended for use on products that comply with Australian communications Media Authority (ACMA) EMC Requirements. - Page 16 P/ACE™ MDQ Plus Capillary Electrophoresis System System Overview Guide 16 / 76 RUO-IDV-05-4901-A | B54952AB...
-
Page 17: Chapter 2 安全、通知和标签
章 2 安全、通知和标签 综述 用于 SCIEX P/ACE™ MDQ Plus Capillary Electrophoresis System 高性能分离系统或在本手册中 显示的符号和标签的描述可在本节中找到。 仔细阅读所有说明之前,请勿尝试执行任何操作。在任何情况下如果不知如何处理,请 与您的 SCIEX 代表联系。 SCIEX 强烈要求其客户和员工遵守所有国家健康和安全标准,如防护的使用。此标准包 括但不限于下列事项:操作或维护本仪器或任何其他实验室自动仪器时,请佩戴防护眼 镜、手套和合适的实验室装备。 警告 如果设备的使用未能按照 SCIEX 公司所指定的方式进行,该设备所具备的保 护性能可能受损。 System Overview Guide P/ACE™ MDQ Plus Capillary Electrophoresis System RUO-IDV-05-4901-A | B54952AB 17 / 76... -
Page 18: 警告、注意、重要事项以及注释的提示
警告、注意、重要事项以及注释的提示 本文档中的所有警告与注意都包含感叹号,设在三角形中。 感叹号符号是国际通用符号,用于提示在安装、使用、维护和维修前应阅读并理解所有 的安全说明。 警告 “警告”指可能的有害情况,若未加以避免,则会导致死亡或严重伤害。也可用 它来说明有可能出现可能导致错误诊断的错误数据。还可用它来说明仪器严重 损坏的可能性。 注意 “小心”是指如果未能避免可能导致轻微或中度伤害的潜在危险情况。可用于警 示不安全操作。可能用于说明有可能出现可能导致错误诊断的错误数据。 重要 用于对正在执行的步骤或程序进行有价值的备注。遵循“重要事项”中的建议有助于改善某 件设备或某个程序的性能。 注释 用于提醒在设备安装、使用、或维修过程中应遵照的重要信息。 P/ACE™ MDQ Plus Capillary Electrophoresis System System Overview Guide 18 / 76 RUO-IDV-05-4901-A | B54952AB... -
Page 19: 仪器安全防护措施
以下情况会破坏系统完整性并可能导致操作失败: • 未按操作要求使用本设备。请按照“产品手册”中说明的方式操作仪器。 • 在计算机中安装了未经 SCIEX 授权的软件。请在系统的计算机上仅运行 SCIEX 授权的软件。 • 安装的软件并非是具有原始版权的版本。请仅使用具有原始版权的软件, 以防止病毒感染。 注意 如果是从 SCIEX 或 SCIEX 授权分销商之外的另一方购买的本产品,同时目前 也不在 SCIEX 服务维护协议的范围内,则 SCIEX 不能担保该产品具有最新的 强制性工艺修订,也不能担保用户可获得有关该产品的最新信息公告。如果您 从第三方购买了此产品且想要了解这方面的更多信息,请联系您的 SCIEX 代 表。 System Overview Guide P/ACE™ MDQ Plus Capillary Electrophoresis System RUO-IDV-05-4901-A | B54952AB... -
Page 20: 活动部件或尖锐物
活动部件或尖锐物 警告 可能导致人身伤害。为避免遭到活动部件的伤害,请遵守以下操作提示: • 仪器运转时,请勿调换实验室器具、试剂或工具。 • 不得手动限制仪器上任何组件的运动。 • 保持仪器工作区清空,以防限制组件的活动。 电气安全 为避免电气相关的伤害和财产损失,使用前请正确检查所有的电气设备并及时报告所有 的电气缺陷。维修设备时如需拆除盖板或面板,请联系 SCIEX 代表。 激光安全 (适用于可选激光设备) 警告 此产品可能包含一个激光模块。激光 (可选)指定为“3B 类”。“3B”类表明“ 直视此类型激光会造成人身伤害”。 激光装置由激光和其它构成部分组成,储备在一个密封的外壳里。激光装置没 有用户维修的部件,维修服务仅限于合格的SCIEX维修员工。 系统正常操作情况下,用户不会接触到激光。因此,CE 仪器的整体激光分类 属于“1 类”,定义为“合理且可预测操作情况下的安全激光”。 为了避免用户受到可能的激光伤害,请遵守安全警告,并且注意任何情况下不 能移除激光装置的外壳。 重要 上述激光标识会根据设备的类型存在差异,因此将会在模块提供的文档中对激光进行描述。 1 类激光小心标签 (1 级激光警告标签 ) 如果仪器包含激光系统, 应该能够在名称评级标签附近找到一个标签:此产品生产时符合 21 CFR 1040 的适用要求。激光束 不可见。... -
Page 21: 化学品注意事项
化学品注意事项 • 在维修和定期维护前,首先确定系统中已经使用了哪些化学品, 然后请参阅化学品安 全技术说明书实施有关健康和安全预防的措施。 • 在通风良好的区域工作。 • 一定要穿戴指定的个人防护设备,包括无粉氯丁橡胶或丁腈手套、防护眼镜和实验 室外套。 • 遵循所要求的电气安全工作实践。 • 当工作中用到易燃材料,如异丙醇、甲醇和其他易燃溶剂时,请避免火源。 • 要小心地使用和处置任何化学品。 如果不遵循处理和处置化学品的适当程序,就会存 在人身伤害的潜在风险。 • 清洗过程中应避免皮肤接触化学品,使用后洗手。 • 请遵守关于生物危害性、有毒或放射性物质的存储、处理和处置的所有当地法规。 • 此产品的灯含汞。 请勿混入垃圾。 请遵照当地、州/省或联邦法律进行回收或处置。 安全符号和标签 高压电击危险符号 此符号表示存在高电压和电击危险,并且操作员进入此区域时应小心操作。 注意安全符号 此符号提示您注意阅读重要信息,或者与另一符号结合表明存在特定的安全隐患。信息 位于符号标签上,或者在 P/ACE™ MDQ Plus 文档中。 System Overview Guide P/ACE™ MDQ Plus Capillary Electrophoresis System RUO-IDV-05-4901-A | B54952AB 21 / 76... -
Page 22: 尖锐物标签
尖锐物标签 此符号表示存在尖锐物,并且操作员进入此区域时应小心操作。 保险丝警告符号 此符号表示只能使用特定类型和等级的保险丝更换仪器的保险丝。 致癌和生殖危害标签 此标签表示对操作员存在致癌和生殖危害风险。此项警告由 1986 年的 《加州安全饮用水 和有毒物质强制法令》(California Safe Drinking Water and Toxic Enforcement Act) 提出(通常 称为 65 号提案 (Proposition 65),加利福尼亚州颁布) 。有害化学物质的完整列表请访问: www.P65Warnings.ca.gov. RoHS 通知 这些标签和材料声明表 (有害物质的名称和含量表)必须符合中华人民共和国电子行业 标准 SJ/T11364-2006 《电子信息产品污染控制标识要求》中的要求。 P/ACE™ MDQ Plus Capillary Electrophoresis System System Overview Guide 22 / 76 RUO-IDV-05-4901-A | B54952AB... -
Page 23: 中国 Rohs 警告标签
中国 RoHS 警告标签 该标签表示电子信息产品包含某些有毒或有害物质。中间数字为环保使用期限 (EFUP) 日 期,表示产品可运行的年数。EFUP 到期后,必须立即回收产品。环形箭头表示产品可回 收。标签或产品上的日期代码为制造日期。 其他仪器标签 本节提供了出现在 P/ACE™ MDQ Plus 仪器外罩上的一些标签和符号信息。这些标签和符 号可能与用户自行执行的操作过程有关。本手册中,与特定操作过程相关的各种风险可 能使用这些标签和符号,详见该任务操作过程中的“警告”或“注意”部分。 环保标签 (WEEE) 按照欧盟报废电子电气设备 (WEEE) 指令要求,产品上必须标有带叉的有轮垃圾桶符号。 产品上出现该标志,说明: • 该设备是在 2005 年 8 月 13 日以后投放欧洲市场的,并且 • 设备将不通过欧盟的任何成员国的市政废物收集系统进行处置。 遵循当地城市废物法规条例中的合适处理规定,减少 WEEE (废电子电机设备)对环境 的影响。 为了安全地处理设备,请联系当地的客户服务部进行免费的仪器上门回收。 System Overview Guide P/ACE™... -
Page 24: 处理包含加汞组件的设备
处理包含加汞组件的设备 此产品中可能包含加汞组件。应依据当地/国家的或联邦法律循环使用或处理。您理解并 遵守对含加汞组件 (开关、灯、电池、继电器或电极)设备的安全正确处理规定至关重 要。加汞组件指示器标签可能发生变化,具体取决于设备的类型。 CE 标志标签 标志– “CE”标志表示产品上市前经过评估,并已被认定符合欧盟安全、健康和/或环境保 护要求。 RCM 标志标签 RCM 标 记用于符合澳大利亚通信媒体管理局 (ACMA) EMC 要求。 CSA 标识标签 P/ACE™ MDQ Plus 仪器上的 CSA 符号表明, 该仪器被国家认可测试实验室 (NRTL) 认证为 符合适用的美国和加拿大实验室设备安全标准。 P/ACE™ MDQ Plus Capillary Electrophoresis System System Overview Guide 24 / 76 RUO-IDV-05-4901-A | B54952AB... -
Page 25: Chapter 3 Sécurité, Consignes Et Étiquettes
Présentation Dans cette section, il est possible de trouver une description des symboles et des étiquettes utilisés sur le Module de séparations hautes performances SCIEX P/ACE™ MDQ Plus, ou qui sont indiqués dans ce manuel. N’essayez pas d’exécuter une procédure avant d'avoir lu attentivement toutes les instructions. En cas de doute sur la manière de procéder dans une situation donnée, contactez votre représentant... -
Page 26: Alertes « Avertissement, Mise En Garde, Important Et Remarque
Alertes « Avertissement, Mise en garde, Important et Remarque » Tous les Avertissements et Mises en garde de ce document comprennent un point d'exclamation entouré d'un triangle. Le point d'exclamation est le symbole international qui permet de rappeler que toute consigne de sécurité... -
Page 27: Précautions De Sécurité Pour L'instrument
• Cet équipement est utilisé d’une manière autre que celle spécifiée Utilisez cet instrument conformément aux instructions des manuels du produit. • Vous installez un logiciel non autorisé par SCIEX sur votre ordinateur. N’utilisez l’ordinateur de votre système qu’avec des logiciels agréés par SCIEX. -
Page 28: Pièces Mobiles Ou Objets Tranchants
ATTENTION Si vous avez acheté ce produit ailleurs que chez SCIEX ou un distributeur SCIEX autorisé, et s’il ne fait pas l’objet d’un contrat de maintenance SCIEX, SCIEX ne peut garantir que le produit a bénéficié des toutes dernières révisions techniques obligatoires ou que vous recevrez les bulletins d’information les plus récents... -
Page 29: Sécurité Laser (Pour Les Appareils Avec Laser En Option)
étanche dont l’ensemble constitue le bloc laser. Le bloc laser ne contient aucune pièce dont l'entretien peut être effectué par l’utilisateur. Les procédures d'entretien du bloc laser sont limitées aux employés de terrain qualifié de SCIEX. La lumière laser n’est pas accessible à l'utilisateur au cours du fonctionnement normal du système. -
Page 30: Précautions Chimiques
Précautions chimiques • Déterminez quels sont les produits chimiques qui peuvent avoir été utilisés dans le système avant sa mise en service et son entretien régulier. Consultez les fiches de données de sécurité pour les précautions d'hygiène et de sécurité qui doivent être suivies avec les produits chimiques. -
Page 31: Symbole De Sécurité Attention
Symbole de sécurité Attention Ce symbole attire l'attention sur des informations importantes à lire, ou est accompagné d'un autre symbole indiquant un danger particulier pour la sécurité. Les informations se trouvent soit sur l'étiquette avec le symbole ou dans la documentation du P/ACE™ MDQ Plus. Étiquette Objet tranchant Ce symbole indique la présence d'objets tranchants et l'opération doit faire preuve de précautions lors de l'accès à... -
Page 32: Consignes Rohs
appelé Proposition 65. La liste des produits chimiques dangereux est disponible sur www.P65Warnings.ca.gov. Consignes RoHS Ces étiquettes et ce tableau de déclaration des matériaux (Tableau des noms et des concentrations des produits dangereux) répondent aux exigences de la norme de l'industrie électronique de la République populaire de Chine SJ/T11364-2006 «... -
Page 33: Étiquette De Recyclage (Weee)
Étiquette de recyclage (WEEE) Le symbole représentant une poubelle barrée sur le produit est obligatoire conformément à la directive Déchets d'équipements électriques et électroniques (DEEE) de l'Union européenne. La présence de ce symbole sur le produit indique que : • l'appareil a été mis sur le marché européen après le 13 août 2005, et que •... -
Page 34: Étiquette Marque Mrc
Étiquette marque MRC Le marquage MRC est destiné aux produits conformes aux exigences de l’ACMA (organisme national australien chargé de la réglementation des télécommunications) en matière de compatibilité électromagnétique. Étiquette marque CSA Le symbole CSA sur l’instrument P/ACE™ MDQ Plus indique que l’instrument a été certifié par l’organisme Nationally Recognized Testing laboratory (NRTL - laboratoire national d’essai reconnu) aux Normes sur la sécurité... -
Page 35: Chapter 4 System Overview
System Overview Instrument The main components of the SCIEX P/ACE™ MDQ Plus Capillary Electrophoresis System include trays that hold vials of sample, buffer, and other solutions, an interface block, a high- voltage power supply and electrodes, a source optics module and detector, temperature control... - Page 36 Figure 4.1 P/ACE™ MDQ Plus Instrument–Front View 1. Outer Door (open position) 4. Clamp Bar and Cable Connection 2. UV Detector 5. Capillary Cartridge 3. Two-ended Fiber Optic Cable 6. Interface Block P/ACE™ MDQ Plus Capillary Electrophoresis System System Overview Guide 36 / 76 RUO-IDV-05-4901-A | B54952AB...
- Page 37 Figure 4.2 P/ACE™ MDQ Plus Instrument–Side View 1. Outer Door or Sample Cover (open) 5. Sample Trays 2. Inner Door or Cartridge Cover (open) 6. Buffer Trays 3. Indicators 7. Fluid Bubble Indicator 4. Fluid Fill Port 8. Convenience Switch The convenience switch is on the lower-right side of the front of the instrument.
-
Page 38: Sample Handling System
Sample Handling System The sample handling system holds four trays; two sample trays (inlet and outlet), and two buffer trays (inlet and outlet). The sample trays are primarily used for samples; the buffer trays hold the buffer and rinse solutions required for electrophoresis. The trays are on two parallel tracks. Under normal operating conditions, the trays on the left are inlet trays for sample and buffer;... - Page 39 Figure 4.4 Sample and Buffer Trays 1. Buffer Tray 3. 96-Position Sample Tray 2. 48-Vial Sample Tray for universal vials. Universal vials can also be used as a holder for micro vials containing samples. WARNING The P/ACE™ MDQ Plus instrument is not intended to accommodate volatile materials in 96-well plates.
-
Page 40: Capillary Cartridge
damage before use. Do not use any vial that appears cracked or damaged in any way. Capillary Cartridge The separation capillary is installed in a cartridge. The cartridge design protects the capillary, supplies a path for liquid coolant, simplifies installation into the instrument, and aligns the detection window in the optics. -
Page 41: Fluid Delivery, Power Supply, And Interlock
The capillary temperature is controlled with an inert liquid that circulates through the cartridge. The temperature is controlled in a range from 10 °C below ambient (with a minimum of 15 °C) to 60 °C. Coolant flows through the cartridge through two openings in the bottom of the housing (found between the ends of the capillary). -
Page 42: Uv Detector Optics
Opening the cartridge cover: • Turns off the high voltage if it is on. • Turns off the pump that circulates the capillary coolant. • Moves the detector filter wheel to the closed position. UV Detector Optics The UV optics include an ultraviolet light source, wavelength filters, aperture, capillary, and a photodiode detector, as shown in Figure 4.6. -
Page 43: The Photo Diode Array (Pda) Detector (Optional)
Figure 4.6 UV Optics Layout 1. Capillary Aperture 7. Motor 2. Lenses 8. Position Filter Wheel 3. Deuterium Lamp 9. Filter Position (for example, 214 nm) 4. Lamp Power Supply 10. Fiber Optic Cable 5. Photodiode 11. Fiber Optic Connector 6. - Page 44 The PDA detector is calibrated using discrete emission wavelength bands generated by a mercury lamp. The mercury lamp is an important part of the detector system. When requested by the user, the calibration is performed automatically. WARNING Do not put the mercury lamp into the regular trash. Mercury is a hazardous material and must be disposed of in accordance with local, state, and federal laws.
-
Page 45: The Laser Induced Fluorescence (Lif) Detector (Optional)
For more information on the LIF system, refer to the System Maintenance Guide. The initial installation of the LIF detector is performed by a SCIEX Field Service Employee (FSE). The P/ACE™ MDQ Plus instrument can easily be changed between UV and the optional LIF and PDA modes because the detector components are modular. - Page 46 Laser Module (Optional) The following section describes the 488 nm laser module and how it interfaces with the P/ACE™ MDQ Plus instrument and the LIF detector. WARNING During normal operation of the LIF detector, laser light is not accessible to the user. To prevent potentially harmful laser light from being emitted from the end of the fiber cable, an interlock mechanism turns off the laser if the laser fiber optic cable is disconnected from the interconnect module or if the cartridge cover is opened.
-
Page 47: Chapter 5 System Procedures And Training Guide
CHAPTER 5 System Procedures and Training Guide Controller and Instrument Start Up Controller/Network Logon The P/ACE™ MDQ Plus software, which includes the 32 Karat software, runs on a Windows 10 controller. If the instrument is installed on a network, the user name and password will be supplied by the network administrator. -
Page 48: P/Ace™ Mdq Plus Software
Windows desktop. The 32 Karat Software Enterprise window is displayed. Enterprise Window Click View > Hierarchy Pane. In the left pane, the group P/ACE MDQ plus appears. Select this group to display the available instruments in the right pane (Figure 5.1). -
Page 49: System Administration
and pressure systems initialize. The instrument is now ready for you to control using the P/ACE™ MDQ Plus software. System Administration System administration is a feature used to control access to the software. Access to the P/ACE™ MDQ Plus instrument and the 32 Karat software can be restricted by user, instrument, or project. At installation, system administration is enabled. - Page 50 Figure 5.3 Enterprise Tab in the Options Dialog When a user is added as a system user, the access for this user is customized using the System Administration wizard. To access the system administration wizard, click Tools > System Administration Wizard. A project is a set of folders for file types commonly used in P/ACE™...
-
Page 51: Configuration
Figure 5.4 File > Project Users can lock the Instrument window for security if they step away from the instrument. To lock or unlock the window, select lock from the Window menu. Another advantage of using the system administration features is that it stores your customized settings for each instrument. -
Page 52: How To Load The Cartridge And Samples
Figure 5.5 Instrument Wizard The Instrument window normally starts in a small window. Select the square box button in the top-right corner of this window to display the Instrument window in full-screen view. How to Load the Cartridge and Samples With the instrument and controller initialized, it is good practice to perform some quick checks on the system to make sure performance is correct. - Page 53 Click Direct Control (Figure 5.7). Figure 5.7 Control > Direct Control The Direct Control window allows manual control and reports the status of the instrument functions. Icons that confirm the status of the sample cover and cartridge are located in the lower part of the window (Figure 5.8).
-
Page 54: How To Run A Method
Figure 5.8 Direct Control Window Click Load to move the trays to the front of the sample compartment. Inspect the interface block by using an angled mirror and penlight. Clean the interface block as required using the procedure in the System Maintenance Guide. Before you run any application, the correct capillary and vials must be installed in the instrument. - Page 55 Click Single Run or Control > Single Run on the Instrument window (Figure 5.10). Figure 5.9 Single Run Icon Figure 5.10 Control > Single Run The Single Run Acquisition dialog appears (Figure 5.11). Click the folder icon on the right of the Method field and select a method.
- Page 56 The instrument runs the selected method. It is not necessary to wait for the method to complete before you start another run. Use the same steps to start a single run. When the run is submitted, it is added to the run queue (Figure 5.12).
-
Page 57: Analysis
Analysis After the data is created using a method, it must be analyzed. Click File > Data > Open. Open the data file collected with the method that was run as described in the previous section. Click the Window menu at the top of the Instrument window. At the bottom of the Window menu, the available data channel views appear. - Page 58 NOTE An electropherogram is a plot with migration time on the X axis and absorbance data plotted on the Y axis. These plots generally have long sections of relatively flat detector response known as baseline. If a compound is detected, a large deflection is shown from the baseline, known as peaks.
- Page 59 Figure 5.17 UV - 214nm Window and Integration Events Table, Tiled There are four parameters that require defaults for integration to work: • Width–Adjusts how sensitive peak-detection is for changes in the baseline. Should be set to the width of the smallest peak in the electropherogram. The default value is 0.2. •...
-
Page 60: Area Calculation
Area Calculation In addition to the calculation of baseline, peak start, peak apex, and peak stop, the integration algorithm is responsible for calculating the area under the peak. The area calculation is a simple numeric calculation. The area under the peak is calculated for each data point. All of the areas for the data points of a peak are added together to calculate the area of the peak. -
Page 61: Annotations
Capillary condition or temperature also affects these parameters. A cooler temperature causes the viscosity of the solutions to change. This in turn causes a change in injection volume and the parameters change as previously described. In these two examples, the performance of the instrument is responsible for the change. -
Page 62: Peak Identity
By default, the Baseline and Show undetected named peaks options are selected. The Available Annotations option contains parameters that can be displayed for each peak. Click Peak # and Name using the green arrow to move them to the right pane (Figure 5.19) and then click Apply. - Page 63 Click the sequence. In Run range, specify whether to process the complete sequence (All), or only a number of runs (select Range). To specify a number of runs, type the sequence line numbers in the Range text box. Separate ranges by using dashes and commas. For example, to run lines 2, 3, 4, and 6, type the Range as 2-4, 6.
- Page 64 Figure 5.22 Sample Run Type(s) Dialog Reprocess the sequence. Select Reports. All available sequence reports display. The example sequence only has one report specified, open the displayed report (Figure 5.23). Figure 5.23 Reports > View > Sequence Report When a sequence is created for acquisition, the Sequence wizard provides more options. Use the Sequence wizard to create a sequence for acquisition with the same method, instead of selecting data files from a directory, give a data file name.
- Page 65 Figure 5.24 Sequence Wizard–Data Path Menu In the Vials window, the positions of the sample vials are specified. Vials can be incremented by row or by column (Figure 5.25). Click Next. Figure 5.25 Sequence Wizard–Vials System Overview Guide P/ACE™ MDQ Plus Capillary Electrophoresis System RUO-IDV-05-4901-A | B54952AB 65 / 76...
-
Page 66: Viewing Reports
Viewing Reports Standard Reports Each project contains certain default method reports. After each data analysis, parameters for certain peaks will be reported. For the area% report, all detected peaks are included. For ESTD, ISTD, and normalization reports, only detected peaks included in the peak table are reported. These reports cannot be edited. -
Page 67: Suitability Reports
Click Sequence Summary Table and then click Next. A list of peak parameters appears. To obtain a sequence summary of Area and Migration Time, select those parameters and click Add to add them to the right panel of the window. For this example, click Area and Migration Time. -
Page 68: Viewing And Printing Reports
Viewing and Printing Reports To view or print a report, click Reports on the Instrument window. If the Print Reports option is selected on the Run window, method or sequence reports are automatically printed. Maintenance Refer to the System Maintenance Guide for the following procedures. •... -
Page 69: Appendix A Specifications
APPENDIX A Specifications P/ACE™ MDQ Plus System Table A.1 System Specifications Item Description Dimensions (H x W x D) 99.1 cm (cover open), 73.7 cm (cover closed) × 63.5 cm × 72.4 cm (39 inches (cover open), 29 inches (cover closed) × 25 inches × 28.5 inches) Weight 85.3 kg (188 lbs) Electrical... -
Page 70: Validated Controller Configuration
• 2 serial ports • 2 Ethernet ports • 8 USB ports NOTE SCIEX fully validates and supports the controllers supplied with the system. Only limited support is available for customer-supplied computers. NOTE Specifications are subject to change without notice. -
Page 71: Pressure And Vacuum System
Specifications Table A.3 Capillary Temperature Control Specifications (Continued) Specification Type Description Temperature Stability ±1 °C at 25 °C Temperature Accuracy ±1 °C within a range of ±1 °C from ambient ±2 °C outside a range of ±5 °C from ambient Pressure and Vacuum System Table A.4 Pressure and Vacuum System Specifications Specification Type... -
Page 72: Laser Induced Fluorescence (Lif) Detector (Optional)
Specifications Laser Induced Fluorescence (LIF) Detector (Optional) Table A.6 LIF Detector Specifications Specification Type Description Wavelength Range (for Excitation: 300 nm to 700 nm optics) Emission: 350 nm to 750 nm Solid State Laser Laser output delivered to the capillary: 2.5 ±0.5 mW Laser wavelength 488 nm nominal Sensitivity Minimum signal/peak-peak noise ratio of 10,000:1 for 50 nM sodium... - Page 73 Specifications Table A.7 PDA Detector Specifications (Continued) Specification Type Description Analog Output Output 1 is Data Channel 1 Output 2 is Data Channel 2 Full scale output is 1.0 AU/V. Multipliers of 1.0, 0.5, 0.2, 0.05, 0.02, and 0.01 to provide lower AU/V values can be set in the software.
- Page 74 P/ACE™ MDQ Plus Capillary Electrophoresis System System Overview Guide 74 / 76 RUO-IDV-05-4901-A | B54952AB...
-
Page 75: Contact Us
SCIEXUniversity SCIEX Support SCIEX and its representatives maintain a staff of fully-trained service and technical specialists located throughout the world. They can answer questions about the system or any technical issues that might arise. For more information, visit the SCIEX website at sciex.com... -
Page 76: Documentation
Documentation for the hardware products can be found on the Customer Reference DVD that comes with the system or component. For the latest versions of the documentation, visit the SCIEX website at sciex.com. NOTE To request a free, printed version of this document, contact sciex.com/contact-us.
Need help?
Do you have a question about the P/ACE MDQ Plus and is the answer not in the manual?
Questions and answers