Advertisement
Quick Links
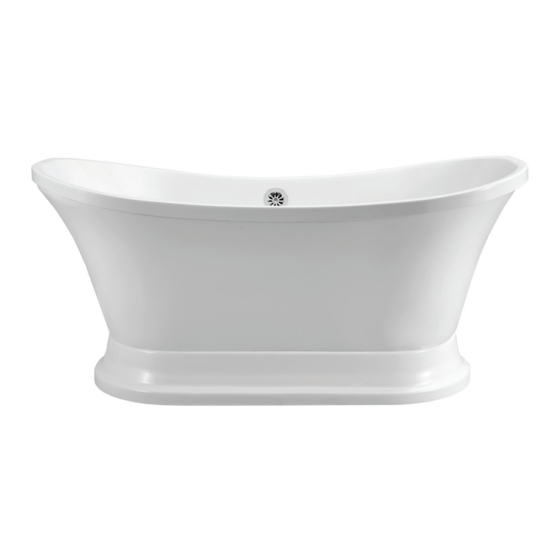
PEDESTAL BATHTUB SERIES
OWNER'S MANUAL &
INSTALLATION GUIDE
READ ENTIRE INSTALLATION GUIDE
PRIOR TO INSTALLING THE BATHTUB
THIS BATHTUB SHOULD ONLY BE
INSTALLED BY A CERTIFIED PLUMBER
CAUTION!
TWO PEOPLE ARE REQUIRED
TO LIFT THE BATHTUB
QUESTIONS ON PRODUCT, INSTALLATION, RETURNS? PLEASE CONTACT
support@streamlinebath.com
1 (323)-612-8011
streamlinebath.com
Advertisement

Related Manuals for Streamline N-120-60FSWH-DM


Summary of Contents for Streamline N-120-60FSWH-DM
- Page 1 PEDESTAL BATHTUB SERIES OWNER'S MANUAL & INSTALLATION GUIDE READ ENTIRE INSTALLATION GUIDE PRIOR TO INSTALLING THE BATHTUB THIS BATHTUB SHOULD ONLY BE INSTALLED BY A CERTIFIED PLUMBER CAUTION! TWO PEOPLE ARE REQUIRED TO LIFT THE BATHTUB QUESTIONS ON PRODUCT, INSTALLATION, RETURNS? PLEASE CONTACT support@streamlinebath.com 1 (323)-612-8011 streamlinebath.com...
-
Page 2: Warranty
RETURNS INCORRECTLY SHIPPED ITEMS We thank you for your purchase. Here at Streamline®, our goal is to provide customers If the item received was incorrectly shipped or missing any component parts, please with exceptional bathroom and kitchen products. We understand that things sometimes contact us immediately at support@streamlinebath.com... -
Page 3: Prior To Installing
Building and plumbing codes may vary state-to-state. Streamline shall not be held liable for any and all incidental damages or flood caused due to use of this product. Streamline shall not be held liable for any and all fees stemming from cost of installation, re-installation, removal, subsequent damage, or transportation in a case of a product defect. - Page 4 DRAIN MODEL COMPATIBILITY FREESTANDING BATHTUB N-120-60FSWH-DM N-121-60FSWH-DM N-DWF-CH N-DWF-GLD N-200-60FSWH-FM N-180-60FSWH-DM N-201-68FSWH-FM N-960-60FSPRWH-DM N-1140-60FSWH-FM N-961-68FSBL-DM N-1141-68FSBL-FM...
- Page 5 DRAIN DIAGRAMS ITEM Cover Cover gasket Cartridge Strainer Waste upper gasket Waste lower gasket Connector Coupling nut Washer Pipe Model: N-DWF-GLD Overflow body Model: N-DWF-CH Tapered rubber gasket Overflow upper gasket Overflow plate Pin Bolt Taic piece Flange...
- Page 6 BATHTUB INSTALLATION Ensure that the floor at the installation site has sufficient floor support and is level. Waterproofing the floor is highly recommended. Determine the location of the drainpipe on the floor by taking measurements of the drain and waste location underneath the unit.
- Page 7 Gently place the bathtub in the upside-down position on a tarp or cardboard sheet in order to avoid contact with any rough surface. Loosen the nuts & washers from the metal frame. Adjust the leveling feet to align with the bathtub’ s bottom as well as the floor and then tighten the washer and nuts.
- Page 8 Take the strainer, place silicone sealant around it, and then place it into the drain hole ensuring a tight connection with the drain ell & gasket. Use silicone sealant. DO NOT use plumbers putty to seal. Silicone Sealant Strainer Gasket Drain Ell Insert the tailpiece into the trap inlet using the O-ring, coupling nut, &...
- Page 9 11 . Attach the tapered rubber gasket to the overflow ell. Align the overflow ell with the overflow hole & secure the drain to the tub with overflow plate and screw provided. Tapered Rubber Gasket Over ow Plate 12 . Make sure a watertight seal exists on all bath drain connections.
- Page 10 PEDESTAL INSTALLATION AND REPLACEMENT All parts of the pedestal have already been installed by the manufacturer prior to shipment. Below instructions are demonstrating how to replace them if repair is needed. ITEM Qty. Self tapping screw Adjustable leg Bolt Metal plate Bathtub is pictured upside down...
- Page 11 DECK MOUNT CAPABLE N-120-60FSWH-DM N-180-60FSWH-FM N-960-60FSPRWH-DM N-961-68FSBL-DM...
Need help?
Do you have a question about the N-120-60FSWH-DM and is the answer not in the manual?
Questions and answers