Advertisement
Quick Links
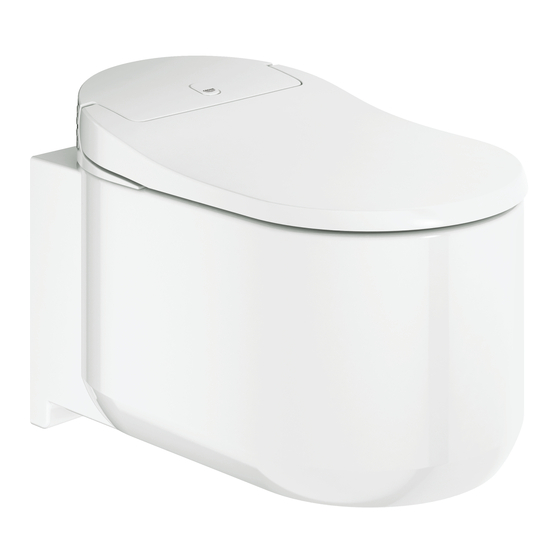
Sensia
ARENA
®
DESIGN + ENGINEERING
GROHE GERMANY
99.0537.231/ÄM 239494/01.17
www.grohe.com
39354SH0
39414SH0
18801SH0
600
68
375
180
116
465
330
230
INSTALLATIONSANLEITUNG
INSTALLATION MANUAL
MANUEL D'INSTALLATION
MANUAL DE INSTALACIÓN
MANUALE DI INSTALLAZIONE
INSTALLATIEHANDLEIDING
INSTALLATIONSHANDBOK
MONTERINGSVEJLEDNING
INSTALLASJONSHÅNDBOK
ASENNUSOPAS
INSTRUKCJA MONTAŻU
ΕΓΧΕΙΡΙΔΙΟ ΕΓΚΑΤΑΣΤΑΣΗΣ
INSTALAČNÍ PŘÍRUČKA
FELSZERELÉSI ÚTMUTATÓ
MANUAL DE INSTALAÇÃO
KURULUM KILAVUZU
NÁVOD NA INŠTALÁCIU
NAVODILO ZA NAMESTITEV
PRIRUČNIK ZA POSTAVLJANJE
РЪКОВОДСТВО ЗА МОНТАЖ
PAIGALDUSJUHEND
UZSTĀDĪŠANAS INSTRUKCIJA
MONTAVIMO VADOVAS
459
MANUAL DE INSTALARE
0.00
安装手册
ІНСТРУКЦІЯ З МОНТАЖУ
РУКОВОДСТВО ПО УСТАНОВКЕ
......2
......8
....14
....20
....26
....32
....38
....44
....50
....56
....62
ﺩﻟﻳﻝ ﺍﻟﺗﺭﻛﻳﺏ
....73
....74
....80
....86
....92
....98
..104
..110
..116
..122
..128
..134
..140
..146
..152
..158
..164
..170
Advertisement

Related Manuals for Grohe Sensia ARENA Series


Summary of Contents for Grohe Sensia ARENA Series
- Page 1 Sensia ARENA ® DESIGN + ENGINEERING GROHE GERMANY 99.0537.231/ÄM 239494/01.17 www.grohe.com 39354SH0 39414SH0 INSTALLATIONSANLEITUNG ..2 18801SH0 INSTALLATION MANUAL ..8 MANUEL D’INSTALLATION ..14 MANUAL DE INSTALACIÓN ..20 MANUALE DI INSTALLAZIONE ..26 INSTALLATIEHANDLEIDING ..32 INSTALLATIONSHANDBOK ..38 MONTERINGSVEJLEDNING ..44 INSTALLASJONSHÅNDBOK ..50 ASENNUSOPAS ..56 INSTRUKCJA MONTAŻU...
-
Page 2: Safety Precautions
WARNING Follow the instructions described in Safety Precautions this manual, and install the product properly. For safe installation and use of the product, Failure to do so may cause electric please read the precautions thoroughly shock, fire, injury, water leakage, before installing the product. - Page 3 Do not damage, bend, modify, CAUTION excessively twist, bind, sandwich, or Install a high-sensitivity, high-speed place heavy objects on the power ground fault circuit interrupter (with cord. rated current value of 15 mA or There is a danger of fire or electric below) on the primary side of the shock due to the cord becoming power supply.
- Page 4 • Electrical installation work must only be performed plate underneath the actuator plate. by a qualified electrician. This work must be carried • The 46944000 fittings can only be installed for Grohe out in accordance with the regulations according to flush systems with GD2 cisterns.
-
Page 5: Supplied Items
Supplied Items Preparations E-bidet (Seat Unit) Turn off the power breaker. Water Supply Hose and Clip (Standard For the GROHE water supply tank 39354SH0/39414SH0 model only) Remove the pipe cover. Corporation Cock (Standard 39354SH0/39414SH0 For other water supply tanks model only) Cut out the wall. - Page 6 Store the power cord in the groove on the underside of the bowl. Open the water shutoff valve. For GROHE tank, adjust the amount of flushing water. Then reattach the actuation plate. Turn on the power breaker.
-
Page 7: Installing The Remote Control
Installing the Remote Control Remove the remote control from the holder. Insert the batteries. Note • Vertical lines may appear on the screen when the batteries are removed. This is not a malfunction. These vertical lines will disappear when batteries are inserted into the remote control.