Table of Contents
Advertisement
Advertisement
Table of Contents

Related Manuals for Ford Transit 1-Way Tipper


Summary of Contents for Ford Transit 1-Way Tipper
- Page 1 1 Way Hand Book Nov'14:11-12 Seat Transit 28/11/14 11:13 Page 1...
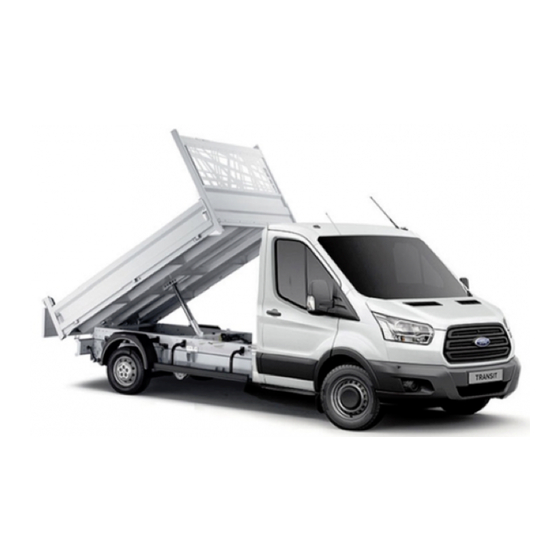
- Page 2 1 Way Hand Book Nov'14:11-12 Seat Transit 28/11/14 11:13 Page 2 Supplementary Owner's Handbook Ford Transit 1 Way Tipper December 2014 on...
- Page 3 1 Way Hand Book Nov'14:11-12 Seat Transit 28/11/14 11:13 Page 3 The illustrations, technical information, data and descriptions contained in this publication, were correct at the time of going to print. VFS (Southampton) Ltd reserve the right to make any changes necessary in line with continuous development and improvement.
-
Page 4: Table Of Contents
1 Way Hand Book Nov'14:11-12 Seat Transit 28/11/14 11:13 Page 4 Table of Contents Table of Contents Introduction Maintenance Daily Driver Checks ... . .35 About this Handbook ... .2 Monthly Maintenance Checks . -
Page 5: Introduction
1 Way Hand Book Nov'14:11-12 Seat Transit 28/11/14 11:13 Page 5 Introduction ABOUT THIS HANDBOOK This supplementary Owners Handbook must be referred to in addition to the standard Transit Owner’s Handbook. Read and understand both manuals and familiarise yourself with the vehicle before operating the vehicle on the road. Note: This handbook only details the features on the Transit 1 Way Tipper that are not covered in the standard Transit Owners Handbook, therefore it is imperative that this supplementary handbook is kept with the standard Transit... -
Page 6: Parts And Accessories
1 Way Hand Book Nov'14:11-12 Seat Transit 28/11/14 11:13 Page 6 Introduction PARTS AND ACCESSORIES Spare parts and Accessories are available from: VFS (Southampton) Ltd, Unit 8, Barton Park Industrial Estate, Chickenhall Lane, Eastleigh SO50 6RR Tel: 023 8065 1704 • Fax: 023 8062 0999 • Email: parts@vfs.co.uk Detailed information can be found in the Spare Parts and Accessories catalogue. -
Page 7: Warranty
1 Way Hand Book Nov'14:11-12 Seat Transit 28/11/14 11:13 Page 7 Introduction WARRANTY Full warranty exists on all parts and workmanship associated with the Tipper body conversion for 3 years / 100,000 miles. Warranty is only valid if the Tipper is operated in accordance with the Supplementary Owner’s Handbook and current Road Traffic Act Legislation. -
Page 8: Quick Start
1 Way Hand Book Nov'14:11-12 Seat Transit 28/11/14 11:13 Page 8 QUICK START This quick start guide is intended to refresh operators of the control layout, operation and loading of the vehicle only after the entire handbook has been read and understood. WARNING Tipping is a potentially hazardous operation. - Page 9 1 Way Hand Book Nov'14:11-12 Seat Transit 28/11/14 11:13 Page 9 QUICK START Controls Layout Body...
- Page 10 1 Way Hand Book Nov'14:11-12 Seat Transit 28/11/14 11:13 Page 10 QUICK START Loading The Tipper WARNING Ensure the load is uniformly distributed across the Tipper bed. All loads must be secured and restrained before operating the vehicle on the public highway. Failure to adequately restrain the payload present a hazard to other road users and is in contravention of the UK Construction and Use Regulations.
- Page 11 WARNING Refer to decal on cab protector for load anchorage ratings. Do not exceed the maximum Gross Vehicle Mass (GVM) or individual front and rear axle capacities. Refer to the Vehicle identification section in the Ford Transit Owner’s Handbook.
- Page 12 1 Way Hand Book Nov'14:11-12 Seat Transit 28/11/14 11:13 Page 12 QUICK START Load Sheeting – Sheeting Hooks It is recommended that all 'Fluid' loads for example Sand, Gravel, Soil, Wood Chippings etc, are sheeted to prevent a hazard to other road users. WARNING Refer to decal on cab protector for load anchorage ratings.
- Page 13 1 Way Hand Book Nov'14:11-12 Seat Transit 28/11/14 11:13 Page 13 QUICK START Rear Tailboard configuration – establish correct mode before attempting to tip: Dependent upon the type of load being tipped the dual mode tailboard can be configured to open in one of two ways: 1) Top Hinged (Tip Thru) –...
- Page 14 1 Way Hand Book Nov'14:11-12 Seat Transit 28/11/14 11:13 Page 14 QUICK START Tipping Preparation: • Apply handbrake and switch on hazard warning lights. • Ensure the ground bearing the weight of the vehicle is level and is firm. • Check that the area surrounding the vehicle is free from personnel, equipment and livestock, except for an assistant specifically tasked to guide you to the area where the load is to be tipped.
-
Page 15: Tipper Controls
1 Way Hand Book Nov'14:11-12 Seat Transit 28/11/14 11:13 Page 15 Tipper Controls Dual Mode Tailboard: Tip thru/Tip over CAUTION A warning triangle or similar devices are permitted to be placed in the road to warn of a temporary obstruction. WARNINGS Ensure Tailboard is closed and locked before driving the vehicle. - Page 16 1 Way Hand Book Nov'14:11-12 Seat Transit 28/11/14 11:13 Page 16 Tipper Controls Top Hinged or Tip Thru: Recommended for 'Fluid' loads: • Sand • Gravel • Crushed concrete • Type 1 aggregate • Dry topsoil • Wood shavings Bottom Hinged or Tip Over: Recommended for loads consisting of one or more large individual items: •...
- Page 17 1 Way Hand Book Nov'14:11-12 Seat Transit 28/11/14 11:13 Page 17 Tipper Controls Dual Mode Tailboard continued… Use: Tip Thru mode: To open tailboard: • Locate the yellow remote operating handle, pull outwards and forwards in an arc until it stops. To close tailboard: •...
- Page 18 1 Way Hand Book Nov'14:11-12 Seat Transit 28/11/14 11:13 Page 18 Tipper Controls Use: Tip over mode: To open tailboard: • Push against the top of the tailboard with one hand, with the other hand use an index finger or forefinger to release the latch, by first pulling up to approximately 90 degrees from the vertical.
-
Page 19: Sideboards
1 Way Hand Book Nov'14:11-12 Seat Transit 28/11/14 11:13 Page 19 Tipper Controls Sideboards Description: The sideboards are made from tough lightweight extruded aluminium held in place by two latches per side, locking the sideboard to the headboard and rear corner pillars. - Page 20 1 Way Hand Book Nov'14:11-12 Seat Transit 28/11/14 11:13 Page 20 Tipper Controls To close sideboard: • Brush away all debris between the sideboard and the edge of the Tipper bed, including the vertical faces at the headboard and rear corner pillar. If any resistance to closing the board is felt, lower the board and remove the debris –...
-
Page 21: Tipper Control Station
1 Way Hand Book Nov'14:11-12 Seat Transit 28/11/14 11:13 Page 21 Tipper Controls Tipper Control Station Description: The station provides all the controls necessary to operate the tipper functions into consolidated location. following controls are located in this station. • Power on button •... -
Page 22: Isolation Switch
1 Way Hand Book Nov'14:11-12 Seat Transit 28/11/14 11:13 Page 22 Tipper Controls Isolation Switch WARNING Do not drive the vehicle with the Tipper Isolation Switch in the ‘ON’ position. Description: The Tipper Isolation Switch isolates the tipping gear powerpack from the vehicle electrical supply, preventing the system from operating, also providing a safe condition for vehicle maintenance. - Page 23 1 Way Hand Book Nov'14:11-12 Seat Transit 28/11/14 11:13 Page 23 Tipper Controls To Raise Body… • Release Tailboard. (Refer to pages 13 15) • Lift Joystick to raise body. The external sounder will operate when body is raising, continue lifting Joystick until body is fully raised or load is deployed •...
-
Page 24: Emergency Stop Switch
1 Way Hand Book Nov'14:11-12 Seat Transit 28/11/14 11:13 Page 24 Tipper Controls Emergency Stop Switch Description: The Emergency Stop Button ceases all Tipper operations Location: The Emergency Stop Button is located on the upper front face of the Tipper Control Station. -
Page 25: Warning Led
1 Way Hand Book Nov'14:11-12 Seat Transit 28/11/14 11:13 Page 25 Tipper Controls Power ‘ON’ / Reset Button Description: The power ‘ON’ Reset button switches the control system to an ‘active’ state. Location: The power ‘ON’ Reset button is located on the front face of the Tipper Control Station below the Emergency Stop Switch Purpose:... -
Page 26: Buzzers
1 Way Hand Book Nov'14:11-12 Seat Transit 28/11/14 11:13 Page 26 Tipper Controls Warning Buzzers Description: The Warning Buzzers provide an audible warning when the Tipper is being raised or lowered. The warning buzzers also warn of the following: • The Handbrake has been released with the Isolator switched on. - Page 27 1 Way Hand Book Nov'14:11-12 Seat Transit 28/11/14 11:13 Page 27 Tipper Controls Internal Warning Buzzer: The Internal Cab Warning Buzzer sounds intermittently to advise the operator that the handbrake is not engaged or has been released during the tipping operation, or the vehicle is being driven with the isolation switch 'on'.
-
Page 28: Body Prop
1 Way Hand Book Nov'14:11-12 Seat Transit 28/11/14 11:13 Page 28 Tipper Controls Body Prop Description: A Body Prop is a safety device that is provided to ensure the safety of personnel carrying out routine checks and maintenance of components and structures underneath the body. - Page 29 1 Way Hand Book Nov'14:11-12 Seat Transit 28/11/14 11:13 Page 29 Tipper Controls Body Prop How to deploy the Body Prop: • Park the vehicle on a firm level surface and apply the handbrake. • Raise the Tipper bed. • Raise the Body Prop by pulling up on the handle.
-
Page 30: Manual Lowering Valve
1 Way Hand Book Nov'14:11-12 Seat Transit 28/11/14 11:13 Page 30 Tipper Controls Manual Lowering Valve Description: The Manual Lowering Valve provides a method of lowering the Tipper body in the event of an electrical or mechanical component failure. Location: The Valve is located on the underside of the hydraulic power pack. -
Page 31: Load Carrying
1 Way Hand Book Nov'14:11-12 Seat Transit 28/11/14 11:13 Page 31 Load Carrying General Information WARNING All loads must be secured and restrained before operation on the public highway. Failure to adequately restrain the payload will present a hazard to other road users and is in contravention of the UK Construction and Use Regulations. -
Page 32: Load Distribution
1 Way Hand Book Nov'14:11-12 Seat Transit 28/11/14 11:13 Page 32 Load Carrying Load Distribution CORRECT LOAD INCORRECT LOAD DISTRIBUTION DISTRIBUTION Load Retention and Sheeting The method of load retention will depend on the type of load being carried: Fluid loads: Sheeting the load with a high strength waterproof Tarpaulin is the best form of retention especially for a dry powdery load. -
Page 33: Load Retention And Sheeting
Load Lashing Points will lay flat on bed floor when not in use. To use push up from below. WARNING Do not exceed the maximum front and rear axle loads for your vehicle. Refer to the Vehicle identification section in the Ford Transit Owner’s Handbook. -
Page 34: Tipping
1 Way Hand Book Nov'14:11-12 Seat Transit 28/11/14 11:13 Page 34 Tipping Tipping – General Practice WARNING Tipping is a potentially hazardous operation. It is essential that all operators fully understand the procedures detailed in this handbook and are aware of the Tipper controls on the vehicle. Health and Safety legislation must be strictly applied. - Page 35 1 Way Hand Book Nov'14:11-12 Seat Transit 28/11/14 11:13 Page 35 Tipping During the Tipping operation: • Be vigilant and observe the operation closely. • Never try to shake a stuck load free, lower body fully to manually remove all or part of the load. Do not restart tipping until all personnel are clear from the vehicle.
- Page 36 1 Way Hand Book Nov'14:11-12 Seat Transit 28/11/14 11:13 Page 36 Tipping Tipping Method: • Reverse vehicle to the position where you want to tip the load. • Establish which tailboard mode will be used, refer to the Controls section of this handbook, ensure there is no load pressing against the tailboard.
- Page 37 1 Way Hand Book Nov'14:11-12 Seat Transit 28/11/14 11:13 Page 37 Tipping • Switch the Isolation Switch to the ‘ON’ position. • Control the tip using the Tipper Controls as described in the controls section of this manual. • Ideally a visible assistant should be made available to indicate progress of the load being tipped.
-
Page 38: Maintenance
1 Way Hand Book Nov'14:11-12 Seat Transit 28/11/14 11:13 Page 38 Maintenance Driver Checks and Maintenance Items: CAUTION It is imperative that the recommended Driver Checks and Maintenance be carried out to ensure the safe and efficient operation of the Tipper. WARNING Any maintenance carried out under the load bed must only be performed when the body is securely propped, with ignition keys... -
Page 39: Monthly Maintenance Checks
1 Way Hand Book Nov'14:11-12 Seat Transit 28/11/14 11:13 Page 39 Maintenance Monthly Maintenance Checks: • Check operation of warning buzzers and LED’s. • Check the hydraulic lines for signs of fluid leaks. • Check all safety signs are present, and ensure they are legible and not damaged. -
Page 40: Annual Maintenance Checks
1 Way Hand Book Nov'14:11-12 Seat Transit 28/11/14 11:13 Page 40 Maintenance Annual Maintenance Checks: In addition to the Monthly Maintenance, the items detailed below should be checked and adjusted as necessary. • Check the hydraulic reservoir oil level and top up if required with hydraulic oil ISO 32. -
Page 41: Hydraulic Oil Level Check
1 Way Hand Book Nov'14:11-12 Seat Transit 28/11/14 11:13 Page 41 Maintenance Checking the Hydraulic Oil Level WARNING Ensure body prop is correctly deployed, with ignition keys removed and vehicle doors locked, before attempting to check the hydraulic reservoir oil level. •... -
Page 42: Hydraulic Body Latch Check
1 Way Hand Book Nov'14:11-12 Seat Transit 28/11/14 11:13 Page 42 Maintenance Checking Hydraulic Body Latch operation: WARNING Do not enter area beneath bed whilst bed is raising or lowering. Observations should be made from outside area of bed. The Hydraulic Body Latch is designed to prevent the load bed from being raised by any means other than correct operation of the Tipper control system. - Page 43 1 Way Hand Book Nov'14:11-12 Seat Transit 28/11/14 11:13 Page 43 Maintenance Checking the Latch fully returns after lowering bed. • With body raised, deploy the body prop by pulling on the handle and rotate it until it stops. • Lower the body until it stops.
- Page 44 1 Way Hand Book Nov'14:11-12 Seat Transit 28/11/14 11:13 Page 44 Maintenance Checking the Latch has correctly engaged with the load bed from beneath vehicle. Ensure the vehicle is parked and Handbrake applied with Ignition Key removed. From beneath the vehicle, check the latch has engaged with its Keeper on the underside of the bed.
-
Page 45: Electrical
Primary Fuse: The Primary Fuses are located in the vehicle Pre fuse Box F12, F13 & F14. The fuses are 60A midi type. Refer to the Ford Transit Owner's Manual Pages 141, 148 & 149. The Primary Fuse (total 180A) supplies feed to a secondary fuse of 150A. -
Page 46: Fuse Replacement
1 Way Hand Book Nov'14:11-12 Seat Transit 28/11/14 11:13 Page 46 Electrical Control Circuit Fuse: The Control Circuit Fuse is located on the side of the Tipper Control Station. The fuse is a 5A blade type. Fuse Replacement WARNING Do not modify the electrical system of your vehicle in any way. Have repairs to the electrical system and the replacement of fuses carried out by properly trained technicians. -
Page 47: Vehicle Care
You should repair paintwork damage caused by stones from the road or minor scratches as soon as possible. A choice of products are available from your Ford Dealer. Read and follow the manufacturer’s instructions. CAUTION Remove apparently harmless looking substances from the paintwork immediately (e.g. -
Page 48: Towing
Do not exceed the maximum vehicle and trailer weight stated on the vehicle identification plate. Refer to the Vehicle identification section in the Ford Transit Owner’s Handbook CAUTION If a tow bar has been fitted ensure that the tailboard has been installed with a protective guide to prevent it from jamming on the tow bar/ball/clevis. -
Page 49: Lighting
1 Way Hand Book Nov'14:11-12 Seat Transit 28/11/14 11:13 Page 49 Lighting Marker Lamps Side Marker and End Outline Marker Lamps: • Side and End Outline Marker Lamps are LED type and non servicable. Replacement lamps can be obtained from VFS (Southampton) Ltd WARNING Before changing lamps switch the lights and the ignition off. -
Page 50: Emergency Equipment
1 Way Hand Book Nov'14:11-12 Seat Transit 28/11/14 11:13 Page 50 Emergency Equipment Reflective Warning Triangle Your vehicle has been supplied with a Reflective Warning Triangle. You should be aware that in reduced daylight when the tailboard is lowered, your rear lights may be obscured. -
Page 51: Vehicle Identification
1 Way Hand Book Nov'14:11-12 Seat Transit 28/11/14 11:13 Page 51 Vehicle Identification Tipper Body Type and Serial Number: The Tipper Body Type and Serial Number information is stamped on the Tipper ID plate, this is riveted to the left hand side subframe member. Location of ID plate on subframe... - Page 52 1 Way Hand Book Nov'14:11-12 Seat Transit 28/11/14 11:13 Page 52...
-
Page 53: Index
1 Way Hand Book Nov'14:11-12 Seat Transit 28/11/14 11:13 Page 53 Index Description Page About this handbook Accessories Annual maintenance checks Body prop Buzzers Body latch operation / Checking Changing a fuse Checking the hydraulic oil level Checking hydraulic latch operation Cleaning the exterior Common procedures for tipping 10, 31... - Page 54 1 Way Hand Book Nov'14:11-12 Seat Transit 28/11/14 11:13 Page 54 Index Description Page Incorrect load distribution 7, 29 Introduction Isolation switch 5, 19 Lighting Loading Load carrying Load distribution Load retention and sheeting 8, 29 M Maintenance Marker Lamps Manual lowering valve Monthly maintenance checks Non fluid loads...
- Page 55 1 Way Hand Book Nov'14:11-12 Seat Transit 28/11/14 11:13 Page 55 Index Description Page Tailboard 10, 12, 14 Tailboard protection Tipper controls 5, 12 Tipper control station Tipper isolation switch Tipping 11, 31 Tipping general Tip over mode 10, 12, 15, 33 Tip thru mode 10, 12, 14, 33 Torque figures...
-
Page 56: Notes
1 Way Hand Book Nov'14:11-12 Seat Transit 28/11/14 11:13 Page 56 Notes...
Need help?
Do you have a question about the Transit 1-Way Tipper and is the answer not in the manual?
Questions and answers