Table of Contents
Advertisement
Available languages
Available languages
Advertisement
Table of Contents

Related Manuals for Oster GCSTAE6501


Summary of Contents for Oster GCSTAE6501
- Page 1 MODELOS - MODELS GCSTAE6501 - GCSTAE6502 Manual de Instrucciones PLANCHA DE VAPOR LEA TODAS LAS INSTRUCCIONES ANTES DE USAR ESTE APARATO Instruction Manual STEAM IRON READ ALL INSTRUCTIONS BEFORE USING THIS APPLIANCE...
-
Page 2: Precauciones Importantes
10. No opere la plancha si el cordón está dañado o si la plancha se ha caído o está dañada. Para evitar el riesgo de shock eléctrico, no desarme la plancha, llévela a un Centro de Servicio Oster Autorizado para evaluación o reparo. Si la plancha es ®... - Page 3 17. Siempre desconecte la plancha del tomacorriente cuando se llene o se bote el agua. 18. Evite sobrellenar el tanque de agua, nunca llene más arriba del nivel máximo de agua. 19. Para evitar sobrecargar los circuitos, nunca use otro artefacto de alta potencia (watts) en el mismo circuito.
-
Page 4: Descripción Del Artefacto
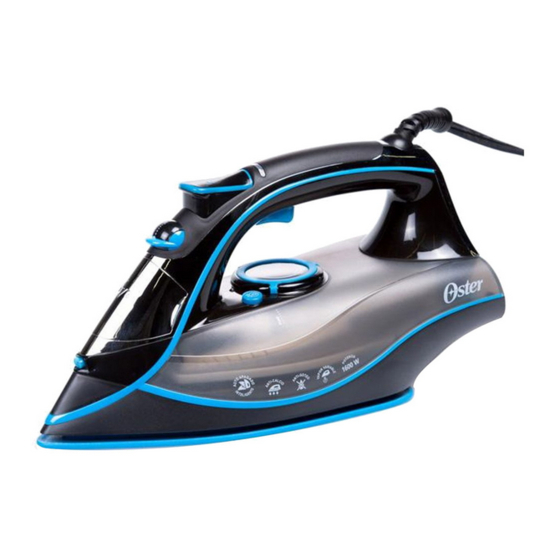
DESCRIPCIÓN DEL ARTEFACTO GCSTAE6501 - GCSTAE6502 1. Boquilla de Rociado Fino 8. Cable Giratório de 360º 2. Tapa del tanque de agua 9. Ventana visora del tanque de agua 3. Disco selector de temperatura 10. Botón de limpieza automática 4. Luz indicadora 11. -
Page 5: Planchando En Seco
PLANCHANDO EN SECO 1. Asegúrese de que el selector de vapor esté en la posición (Seco). 2. Enchufe el cable en un tomacorriente de 120 voltios CA. La luz roja indicadora de “Espera” se iluminará si la plancha no ha alcanzado la temperatura ajustada. 3. -
Page 6: Planchando Al Vapor
PLANCHANDO AL VAPOR 1. Siga las instrucciones para el “Llenado del Tanque de Agua“. 2. Llene el depósito de agua y enchufe el cable en un tomacorriente de 120 voltios CA. 3. Gire el Disco Selector de Tela al ajuste deseado. Permita que la plancha se caliente sobre su apoyo de descanso sobre una superficie estable y protegida, hasta que la luz indicadora de “Ready”... -
Page 7: Funciones Especiales
FUNCIONES ESPECIALES Función de Rocio Fino es un poderoso rocío de agua que humedece la tela para ayudar a eliminar arrugas en telas gruesas y a definir pliegues. Presionar con firmeza el gatillo atomizador. PARA USARLA: Golpe de Vapor proporciona un golpe de vapor adicional que penetra profundamente en las arrugas más difíciles. -
Page 8: Sistema Antigoteo
FUNCIÓN DE APAGADO AUTOMÁTICO DE TRES POSICIONES Esta función apaga automáticamente la plancha si se deja en una posición demasiado tiempo para evitar accidentes. SI DEJA LA PLANCHA ENCENDIDA: • En posición horizontal sin moverla, o la vuelca accidentalmente, dejará de calentarse automáticamente después de 30 segundos. - Page 9 CUIDADO DE LA PLANCHA DESPUÉS DE USARLA mueva la palanca de vapor hacia la posición (Seco) y PARA APAGAR LA PLANCHA: gire el dial de selección del tipo de tela a la posición de apagado. Desenchufe la plancha. tire del cable de alimentación para desenchufar la plancha ADVERTENCIA: JAMÁS ya que esto puede dañar el cable.
-
Page 10: Mantenimiento Y Limpieza
• La plancha no necesita ningún otro mantenimiento que no sea el recomendado en las instrucciones de este manual. Si por cualquier razón su plancha de vapor requiere reparación, no intente repararla. Llevelá a un Centro de Servicio Oster Autorizado. USO DE LA FUNCIÓN DE AUTO LIMPIEZA 1. - Page 11 SISTEMA ANTISARRO La función de antisarro previene la acumulación de depósitos minerales en su plancha. Esto prolonga la vida de la plancha y mejora su desempeño. CONSEJOS PRÁCTICOS PARA PLANCHAR • Antes de planchar, verifique la etiqueta de la prenda de vestir y siga las instrucciones del fabricante.
- Page 12 PLANCHADO DE CAMISAS • Comience por el cuello y avance hacia el centro desde los bordes exteriores. Planche a lo largo, no en círculos. • Coloque el hombro sobre el extremo más angosto de la tabla de planchar y planche uno de los lados del frente.
-
Page 13: Localización Y Solución De Fallas
LOCALIZACIÓN Y SOLUCIÓN DE FALLAS PROBLEMA CAUSA/SOLUCIÓN La luz indicadora de “Red “ • La luz parpadea para indicar que se ha activado la está haciendo destellos función de apagado automático de la plancha. • Para dejar de hacer destellos y reiniciar, mueva la plancha hacia atrás y hacia adelante y deje que vuelva a recalentarse hasta la luz indicadora de “Ready”... -
Page 14: Important Safeguards
Authorized ® Service Center for examination and repair. Incorrect reassembly Oster can cause a risk of electric shock when the Iron is used. 11. Do not use it outdoors. 12. Do not let the Power Cord come in contact with hot surfaces. - Page 15 19. In order to avoid overloading the circuits, never use another appliance with high wattage on the same circuit. 20. The manufacturer is not liable for any damages, which are caused by using the appliance incorrectly or for any other purpose than that intended. 21.
-
Page 16: Description Of The Appliance
DESCRIPTION OF THE APPLIANCE GCSTAE6501 - GCSTAE6502 1. SPRAY MIST Nozzle 8. 360° Swivel Cord 2. Water Reservoir Lid 9. See Through Water Window 3. Temperature Control Dial 10. Self Clean Button 4. Indicator Light 11. Ceramic Soleplate with Dimpling and Channeling 5. -
Page 17: Dry Ironing
DRY IRONING 1. Ensure Steam Select Switch is turned to the (Dry) setting. 2. Plug the cord into a 120-Volt AC outlet. The red “Wait” indicator light will be illuminated if the iron has not reached its set temperature. 3. Turn Temperature Control Dial to desired setting. Allow iron to heat on its heel rest on a stable and protected surface, until the “Ready”... -
Page 18: Temperature Setting Table
TEMPERATURE SETTING TABLE Kind of Textile Fiber Material Acrylic, modacryl polypropylene, polyurethane synthetic acetate, triacetate metalized, cupro, polyamide (nylon), polyester silk silk wool STEAM cotton linen on the label means: This article cannot be ironed (e.g. chlorofiber, elastodiene) SPECIAL FEATURES Spray Mist Function is a powerful water spray mist that dampens the fabric to aid in removing wrinkles from heavy fabrics and for setting creases. -
Page 19: Auto-Off Feature
3-WAY AUTO-OFF FEATURE This feature automatically turns the iron off if left in one position too long to avoid ac- cidents. IF YOU LEAVE IRON ON: • Horizontally without moving it, or accidentally tip the iron over, it will automatically stop heating after 30 seconds. -
Page 20: Caring For Your Iron After Use
CARING FOR YOUR IRON AFTER USE Turn Steam Select Switch to (Dry) and Temperature Control Dial TURNING OFF IRON: to Off. Unplug. NEVER yank power cord when unplugging iron. This can damage the cord. WARNING: Empty water reservoir completely after each use. STORING YOUR IRON 1. -
Page 21: Maintenance And Cleaning
• Other than the recommended cleaning, no further user maintenance should be neces- sary. If for any reason your Steam Iron should require repairs, do not try to fix it yourself. Send it to an Oster Authorized Service Center. TO USE THE SELF-CLEANING FEATURE: 1. -
Page 22: Anti-Calc System
ANTI-CALC SYSTEM The anti-calc feature helps prevent the build up of mineral deposits in your iron. This prolongs its life and improves the iron’s performance. IRONING TIPS • Before ironing, check the garment label and follow manufacturer’s instructions. If no instructions, start with a low-heat setting and test by ironing a small area, and gradually increase heat. - Page 23 (continued) IRONING TIPS IRONING PANTS • Begin with the waistband and inseam area, then pockets and cuffs. • Pull waistband on pointy end of the board, as if you’re “dressing” the ironing board. Iron upper-front part of the pants, including the waistband. •...
-
Page 24: Troubleshooting
TROUBLE SHOOTING PROBLEM CAUSE/SOLUTION “Red” indicator light is blink- • The light blinks to indicate that the iron auto-off function has been activated. • To stop blinking and reset, move the iron back and forth and allow to re-heat until the “Ready” indicator light turns green. - Page 25 XX where X is any number between 0 and 9 or any letter between A and Z. La siguiente información es para México solamente. The following information is intended for Mexico only. PLANCHA DE VAPOR OSTER ® MODELOS: GCSTAE6501-013 GCSTAE6502-013 IMPORTADOR: SUNBEAM MEXICANA, S.A.
Need help?
Do you have a question about the GCSTAE6501 and is the answer not in the manual?
Questions and answers