
Subscribe to Our Youtube Channel
Related Manuals for Flybox Eclipse


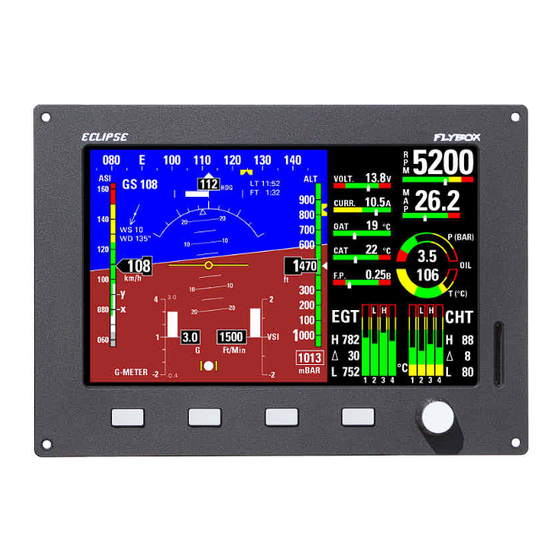
Summary of Contents for Flybox Eclipse
- Page 1 ECLIPSE Installation and operating manual Document release 3.1, 2/12/2016 For software version: CORE 7.12M...
-
Page 2: Table Of Contents
1 - Important notices and warnings ..............1.1 – Primary actions after installation ..............PART I – INSTALLATION MANUAL 2 - Dimensions ....................Panel cut-out …....................Notes on installing ECLIPSE ................3 - Backpanel instrument connections ..............CON1 connections …..................CON2 connections …..................CON3 connections ….................. - Page 3 7.2 – Fuel flow transducer calibration ..............7.3 – Fuel level sensors calibration ..............7.3.1 – Fuel level sensors checking ............... 8 - Using the ECLIPSE IFIS, PFD or EIS ............... 8.1 – EIS Section ..................Readings section …................Battery voltage …...............
- Page 4 10.3.4 – Post-installation checks …............ 10.4 – Indicators and commands of the ACU control unit …......10.4.1 – Remote disengage button …..........10.5 – Autopilot system configuration …............10.5.0 – Servo/s calibration …............10.5.1 – Communication checks …............ 10.5.2 – Remote button operation check …........10.5.3 –...
-
Page 5: Important Notices And Warnings
The verification can be done in any moment, for example by simply checking the quantity put to fill the tank: if you know that the tank filled contain 40 liters and the Eclipse indicate as remaining quantity 10.0 liter, you know that to fill the tank you must put approximately 30 liters. -
Page 6: Part I - Installation Manual
ECLIPSE PART I - INSTALLATION... -
Page 7: Dimensions
2. Dimensions... -
Page 8: Panel Cut-Out
Panel cut-out All dimensions are in millimeters. Notes on installing ECLIPSE Leave at least two centimeter of free space around the instrument for heatsink. Specially on the upper and lower part of the • instruments leave as much space as possible. -
Page 9: Backpanel Instrument Connections
- Do not solder thermocouple wires terminations. If it is necessary to split in separable harnesses the thermocouples connections you must use proper cables and connectors, available also from Flybox® (see “4.1 - Separable connectors for thermocouples”). - Insert a 3-Amperes circuit breaker to the power lead (+12V). -
Page 10: Con1 Connections
5 GND for GPS serial input (connect to copper shield of Flybox® GPS cable) 6 TX signal of external GPS (RS232 level and polarity) 7 CAN0 H signal for connection with ECLIPSE MFD (connect to pin#7 of MFD) 8 Not used/Reserved 9 CAN1 L signal for connection with ACU (see chap. - Page 11 The external GPS connection to pin#6 is used for “RESERVE” indication of Fuel Computer and for the NAV function if you have installed also the Flybox® ACU autopilot control unit. To enable the external GPS enter in the menu-->Fuel Computer and set the “Ext. GPS for reserve indication” to “YES”.
-
Page 12: Con2 Connections
CON2 connections TABLE2 CON2 CONNECTIONS Pin # Description 1 +12 V for current sensor 2 Current sensor signal input 3 GND for fuel flow sensor 4 +12V for fuel pressure sensor 5 Fuel pressure sensor input 6 LEFT Televel input 7 GND 8 MAIN Televel input 9 GND... - Page 13 CON2 connections CON2 connections (37-pin d-sub receptacle, view from wiring side) NOTES: It is not necessary to connect the low-level audio output connections (pin #12 and #30) if you have already connected the high- level audio output (as explained in “CON1 connections”). The low-level output require more accurate wiring because is more susceptible to electric noise (use shielded wire and keep away from source of electric noise like, for example, radio antenna or wirings).
-
Page 14: Con3 Connections
CON3 connections TABLE3 CON3 CONNECTIONS Pin # Description 1 CHT1 thermocouple - (not used for other sensors type) 2 CHT2 thermocouple - (not used for other sensors type) 3 CHT3 thermocouple - (not used for other sensors type) 4 CHT4 thermocouple - (not used for other sensors type) 5 CHT5 thermocouple - (not used for other sensors type) 6 CHT6 thermocouple –... -
Page 15: Sensors And Input/Output Installation
• connect only EGT1 and EGT2 inputs, for 4 sensors installation connect inputs EGT1-EGT2-EGT3-EGT4). Flybox® EGT thermocouples Flybox® EGT thermocouples are K-type; positive wire is RED, negative is GREEN. INSTALLATION NOTES: • - Drill a 6 mm diameter hole in the exhaust manifold (at the position indicated by the engine's manufacturer) and weld the furnished probe coupling. -
Page 16: Oil Temperature Sensors
- PT1000 resistive sensors: Connect one wire to pin #11 of CON2 connector and the other wire to aircraft ground. Flybox® OAT sensor: Flybox® OAT sensor is a PT1000 and can be fixed with a 5 mm countersunk screw. For optimal outside temperature indication it must not be installed in direct sunlight locations or near heat sources. -
Page 17: Current Sensor
To obtain maximum accuracy in the current indicator it's possible to perform current sensor calibration in this way: • 1 - Connect only the 3 wire from current sensor to the ECLIPSE and leave disconnected the 2 battery cable inputs (that is, “A+” and “A-” in figure above). -
Page 18: Fuel Flow Sensor
Fuel flow sensor The TFTHP flowmeter is developed to measure low range (3.6~120 l/hour) of fuel flow with high resolution output. It has high chemical resistance and it is suitable for aggressive liquids. The case can be opened for periodic monitoring and eventual replacement of the tube. -
Page 19: Fuel Level Sensors
ECLIPSE will display inaccurate readings. For example (pic.1) if a fuel sensor cannot measure the lowest part of the tank that contains 7 liters, ECLIPSE will display “0” (zero) for fuel level of 7 liters and below. -
Page 20: Video Inputs
Altitude serial out for transponder connection If you use a transponder with serial input for receiving the altitude data, it can be connected to the Eclipse by following this steps: - Ensure there is a shared ground between the Eclipse and the transponder. -
Page 21: Separable Connectors For Thermocouples
Separable connectors for thermocouples CONNECT TO PIN# OF CON3 CONNECTOR: THERMOCOUPLES: NOTE: Wires' color are referred to Flybox® supplied thermocouples, other thermocouples may have different colors coding. In case of wrong wiring the temperature indication will not be correct. -
Page 22: Part Ii - Operating Manual
ECLIPSE PART II - OPERATING MANUAL... -
Page 23: Display Cleaning
To clean the display use the supplied smooth cloth, slightly moistened with alcohol. Do not use other cleaners that may • damage the display anti-reflective coating. 5.2 Panel indicators and commands ECLIPSE have 4 buttons, that in this manual are indicated with the labels P1-P2-P3-P4 and a knob with pushbutton. -
Page 24: Using The Menus
The menus and functions available are dynamic and depends on the screen currently displayed, on the ECLIPSE model and on the sensors/functions enabled; on each section of this manual it's explained all the menus and functions available. -
Page 25: Instrument Configuration
6. Instrument configuration Before using your ECLIPSE you need to configure it; read completely this chapter and follow step by step the sections to completely configure all the sensors, alarms and preferences. Note that this manual relate to ECLIPSE IFIS (complete version of ECLIPSE), your instrument may not have all the functions indicated below. -
Page 26: Gauge Setup Menu
NO: no OAT sensor installed NOTE: If you use original Flybox® OAT sensors select “P1K” type. : YES/NO. Select whether you installed or not the Flybox® fuel pressure sensor. FP sensor : YES/NO. Select whether you installed or not the Flybox® current sensor. -
Page 27: Egt Gauge Setup
: set the top limit of the CHT gauges. : set the transition temperature from high yellow to red zone of CHT gauges. High : set the transition temperature from green to high yellow zone of CHT gauges. : set the transition temperature from low yellow to green zone of CHT gauges. MidLow : set the bottom limit of the CHT gauges. -
Page 28: Oil Pressure Gauge Setup
OIL PRESSURE GAUGE SETUP • High Zero : set the top limit of the oil pressure gauge. : set the transition pressure from yellow to high red zone of the oil pressure gauge. High : set the transition pressure from green to yellow zone of the oil pressure gauge. : set the transition pressure from low red to green zone of the oil pressure gauge. -
Page 29: Fuel Pressure Gauge Setup
FUEL PRESSURE GAUGE SETUP • High : set the top limit of the fuel pressure gauge. : set the transition pressure from green to high red zone of the fuel pressure gauge. High : set the transition pressure from low red to green zone of the fuel pressure gauge. : set the bottom limit of the fuel pressure gauge. -
Page 30: Alt Gauge Setup
Balance warning : quantity of fuel. If the “Balance” alarm are enabled, Eclipse will activate an alarm every time the quantity of fuel used equals this value, showing “TANK BALANCE” on the display. To disable this function set the value to zero. -
Page 31: Fuel Level Setup Menu
This menu contains the settings related to fuel level. The fuel level indications are obtained by reading the fuel level sensors installed in your aircraft and connected to ECLIPSE. The indications are approximated, do not solely rely on the ECLIPSE to determine the fuel available in the tanks but always refer to primary instrument installed in your aircraft. -
Page 32: Filter Setup Menu
6.1.5 Filter setup menu Scroll down to the second page with the knob to see all the available parameters. • This parameters affect the readings and the gauges displayed: a low value means that the readings will be more fast and unfiltered (but subject to fluctuations), an high value means that the readings will be more slow and stable. -
Page 33: Alarm Menu
6.1.7 Alarm menu The alarm setup permits to enable/disable and configure all the alerts that ECLIPSE can activate when a dangerous condition is detected. Each possible alarm can be set and enabled/disabled within its submenu, for example the first “CHT” submenu is relative to the cylinder head temperature alarms. -
Page 34: Warm-Up Alarm Setup
Set the showing time, in seconds, of the Fuel Computer and hourmeter window (only for Fuel/Timer panel auto-return delay: ECLIPSE IFIS, see chap.8.3). After this time it return automatically to show the engine data window (set to zero to disable the automatic return to engine data window). - Page 35 Now your ECLIPSE is correctly upgraded. Turn off the instrument and remove the SD card. (*) It's also possible at any time to make a firmware update for changing the language of the vocal alerts furnished by ECLIPSE on the audio output; to do this simply rotate the knob and select your preferred language, for example to switch from italian to...
-
Page 36: Password Menu
(on the ground). - Turn on all the electric load usually used in flight. - On the ECLIPSE enter in the setup menu, go in “Password” and insert the password “ 2 4 0 0 ”. - Press the “START ” button. -
Page 37: Fuel Flow Transducer Calibration
To increase accuracy in the fuel flow measurement you must calibrate the transducer following this steps; it's recommended to execute the calibration right after installing the ECLIPSE and to repeat it once a year. 1- With the aircraft in level attitude, fill the tank/s of fuel; note that in the step #4 it's required to refill the tank/s at the exact level reached here. -
Page 38: Fuel Level Sensors Calibration
7.3 Fuel level sensors calibration Before using the fuel level indications it's necessary to calibrate all the aircraft fuel tanks, following the procedure explained in this chapter. The calibration is divided in more calibration steps, in each step you will fill the tanks with predetermined fuel quantity. The calibration end when the tank is completely filled. -
Page 39: Fuel Level Sensors Checking
- As you drain fuel to a filled tank it takes a certain amount of fuel before the fuel sensor start to move from the top. If one of this conditions occur during calibration the ECLIPSE notice that the fuel sensor doesn't produce an electrical change and ask the user if fuel was already added for that calibration step: If you are sure to have already added the fuel click on “YES”... -
Page 40: Using The Eclipse Ifis, Pfd Or Eis
8. Using the ECLIPSE IFIS, PFD or EIS ECLIPSE IFIS is organized in 3 monitoring pages: EIS (engine data), PFD (flight data) and IFIS (engine + flight data). If you have ECLIPSE EIS model, refer only to “EIS SECTION” •... -
Page 41: Readings Section
The second line can shows the following indications: “WARMUP” : This word, in red color, is showed before the take-off if the ECLIPSE notice that not all the main measures are in the green zones. The measures checked are: CAT, fuel pressure, oil pressure and temperature, all the CHTs. When all the measures becomes in its green zone ECLIPSE will show the word “READY”, that disappear 30 seconds after take-off and is replaced by the... -
Page 42: Fuel Flow
- Set the K-factor. The K-factor of a fuel flow transducer is the number of electric pulses for 1 gallon of fuel consumption (if you have K-factor in liters you must moltiply this value by 3.78 before set k-factor in the ECLIPSE). If you use Flybox®... -
Page 43: Pfd Section
FUNCTIONS MENU AVAILABLE (press any key to display the menu): - IFIS: to switch to the IFIS page (only for ECLIPSE IFIS) - DIMMER: display brightness adjustment (1=min. brightness, 10=max. brightness) - CAMERAS: to switch to video/cameras page (see chap.8.4 “Video/cameras section”). -
Page 44: Turn Rate
continuous and fluid indication. Provided that GPS receiver have a good satellites reception, the tracking indication (also called as Course) is very accurate and compensated from wind. NOTE: The GPS tracking is not valid when stationary or for speed below 20 km/h, in this case the indication remains fixed to the last valid received data. -
Page 45: Slip Indicator
The second line can shows the following indications: “WARMUP” : This word, in red color, is showed before the take-off if the ECLIPSE notice that not all the main measures are in the green zones. The measures checked are: CAT, fuel pressure, oil pressure and temperature, all the CHTs. When all the measures becomes in its green zone ECLIPSE will show the word “READY”, that disappear 30 seconds after take-off and is replaced by the... -
Page 46: Ifis Section (For Eclipse Ifis Only)
“Datalogger”) - SYSTEM SETUP: Press P1 + P4 for 2 seconds. 8.3 IFIS Section (for ECLIPSE IFIS only) This is a mixed screen organized in two windows: On the left are shown all the flight data (after instrument turn on wait 10 seconds before moving your aircraft, to allow the •... -
Page 47: Video/Cameras Section
(filename: dtlmm001.csv). SD: Save all recordings to the SD card. Save full log to mode: Select the file format between .CSV (default, clear data) or .FBX (Flybox® proprietary format). File... - Page 48 (it will be stored also on the .KML file for Google Earth). To store a new mark during a flight, select the “Log Mark” item from the menu bar. Graphics are available for all data measured by the ECLIPSE, so depending on the version and assuming you installed all the...
-
Page 49: Download Recordings On A Sd Card
- ECLIPSE EIS: CHT / EGT / OIL PRESSURE / OIL TEMP. / CAT / OAT / VOLTAGE / CURRENT / MAP / RPM / FUEL PRESSURE / FUEL FLOW. - ECLIPSE PFD: PITCH / ROLL / G-METER / SLIP INDICATOR / ALTITUDE / ALTITUDE FROM GPS / VARIOMETER / BAROMETER / AIRSPEED / GPS SPEED / WIND SPEED / QNH SET / FUEL FROM FUEL LEVEL SENSORS / REMAINING FUEL CALCULATED BY THE FUEL COMPUTER / BURNED FUEL CALCULATED BY THE FUEL COMPUTER / SERVO POSITION (if installed). -
Page 50: Alarms
8.7 Error messages Similar to the alarm conditions of the previous chapter, various error messages can be shown by Eclipse, for example when it cannot find a sensor needed for a measurement: in this case the relative indication start blinking in red with the word “ERR” and for CHT and EGT also the graphic bars become blinking red. -
Page 51: Using The Eclipse Mfd
ECLIPSE MFD, connected to a main ECLIPSE unit (EIS, PFD or IFIS) permits showing all data on the copilot side. This version has the same design of the other 3 ECLIPSE models but it does not have any sensors integrated: it shows all data available on the main ECLIPSE to which is connected. - Page 52 25-pin D-sub plug, view from wiring side The wiring required are only +12V, GND and 2 connections to the main ECLIPSE unit, as follows: TABLE 1 CON1 CONNECTIONS Pin # Description 1 +12V Main supply 2 GND Main supply 3 Not used...
-
Page 53: Use And Configuration
MFD are the same of the main ECLIPSE but only a part of all the items are available. After instrument turn-on if the ECLIPSE MFD is unable to communicate with the main unit (for example if the main unit is not... -
Page 54: Autopilot System
2) Mechanical installation of the instruments on the panel: Eclipse + Autopilot Control Unit ACU. 3) Electrical installation: wirings between Eclipse / ACU and between ACU / servos. -
Page 55: Mechanical Installation Of The Acu Control Unit
10.3.2 Mechanical installation of the autopilot control unit (Flybox® ACU) The ACU control unit is suited for ECLIPSE instruments so it has the same vertical dimension, for easily installing it on the left or right of the ECLIPSE unit. It's however possible to install the ACU horizontally: contact Flybox® to request the horizontal adhesive front panel. -
Page 56: Electrical Wirings Of The Acu Control Unit
7.5 Ampere breaker. - Wirings between ACU control unit and ECLIPSE: the ACU is connected to the Eclipse with a two-wires CAN bus communication line. Use a two-pole twisted cable or a two-pole with shield cable (shield connected to ground in one point only). - Page 57 CONNECTIONS DETAIL FOR ACU CON4P CONNECTOR • Pin # Description CAN bus communication line: CAN-H signal +12V main supply CAN bus communication line: CAN-L signal GND main supply CONNECTIONS DETAIL FOR ACU CON8P CONNECTOR • Pin # Description GND for Pitch Servo Not used GND for Roll Servo Not used...
-
Page 58: Post-Installation Checks
ELECTRICAL CONNECTIONS FOR AUTOPILOT SYSTEM 10.3.4 Post-installation checks DO NOT FLY THE AIRCRAFT UNTIL ALL THE CHECKS INDICATED BELOW HAVE BEEN PROPERLY COMPLETED AND CORRECT FUNCTIONS HAVE BEEN OBSERVED. Verify that no controls are bindings during any position of the flight controls. •... -
Page 59: Indicators And Commands Of The Acu Control Unit
10.4. Indicators and commands of the ACU control unit ON/OFF switch ON led indicator “HDG/TRK” button with led (led on when autopilot is engaged in HDG/TRK mode) HDG/TRK knob for heading/tracking “NAV” button with led setting (led on when autopilot is engaged in NAV mode) “ALT”... -
Page 60: Servo/S Calibration
10.5.0 Servo/s calibration (ground based) The calibration procedure is mandatory: if you try to engage the autopilot without first calibrate the servo, Eclipse will show the error message “AUTOPILOT DISENGAGE! ROLL/PITCH SERVO CALIB”. THE CALIBRATION MUST ALSO BE REPEATED IN THE EVENT OF ANY CHANGES TO MECHANICAL INSTALLATION OF THE SERVO/S. -
Page 61: Communication Checks
(check the message “AP:OFF” on display). - Engage the autopilot by pressing the “ALT” button on the ACU (check the message “AP:ALT” on Eclipse display). - Force the control stick to the forward or backward limit, so that you override the servo force and after 1 second the autopilot disengages automatically (check the message “AP:OFF”... -
Page 62: Autopilot Setup Menu
10.6. Autopilot setup menu All the parameters configuration that follows are made on the Eclipse instrument. During the configuration it's required to turn on also the ACU control unit but without engaging the autopilot (so on the ACU control unit turn on the ON/OFF switch and don't press any other button). -
Page 63: Pitch Servo Setup
“Max Roll Bank” parameter setting (ground based) Bank: This parameter specifies a maximum bank angle which the autopilot will not exceed during turns. Set Max Roll an appropriate bank limit, the min-max range is: 5~30 degrees. 10.6.3 Pitch servo setup From the previous menu (Autopilot setup) select with the knob the “Pitch servo setup”... -
Page 64: Flight Based Test And Configuration
10.7. Flight based test and configuration During this phase you calibrate the servo response to match your aircraft flight dynamics. Although flight testing may be carried out in different ways, it's recommended to follow the procedures indicated in the following chapters. Any test and configuration during flight must be executed in VFR conditions, with good weather and visibility conditions, at an adequate altitude and no traffic or obstacles in the flight path. -
Page 65: Autopilot Setup - Roll Axis (Flight Based)
10.7.1 Autopilot setup – Roll axis (flight based) Autopilot engage - “Gain” parameter set - Start the flight and when you are in safe condition (read chap.10.7) insert the autopilot by pressing the “HDG/TRK” button on the ACU control unit (the led will turn on as confirmation). Note that the autopilot will only hold the current heading by controlling the roll axis, so the pitch axis must be controlled by the pilot;... -
Page 66: Autopilot Setup - Pitch Axis (Flight Based)
10.7.2 Autopilot setup – Pitch axis (flight based) Autopilot engage - “Gain” parameter set - Start the flight and when you are in safe condition (read chap.10.7), at the desired altitude and trimmed for level flight, insert the autopilot by pressing the “ALT” button on the ACU control unit (the led will turn on as confirmation). -
Page 67: Autopilot Operation
The autopilot cannot be engaged if any of the following conditions occurs: ACU control unit is turned off. • Faulty communications between ECLIPSE and ACU or between ACU and servos. • The airspeed measured is out of the minimum/maximum range (“Min speed” and “max speed” parameters). -
Page 68: Details Of Operation
1- Move to its limits the flight controls (with autopilot disengaged) and check that full manual control is present. 2- Check servo direction: With Eclipse on the attitude indicator screen and ACU control unit turned on, insert the autopilot by pressing the “HDG/TRK” button on the ACU. Rotate clockwise the HDG/TRK knob (so that the heading bug is at the right of the actual heading) and check that the flight control move as to turn the aircraft right. - Page 69 ENGAGE AUTOPILOT IN “HDG/TRK” MODE (HEADING OR TRACKING HOLD/CHANGE) - Once in flight and with Eclipse already turned on, turn on the ACU control unit via the ON/OFF switch. - Choose between heading or tracking (on the Eclipse, from the attitude indicator screen, press any button to show up the menu bar and press P3 button to switch between heading or tracking).
-
Page 70: Autopilot Related Alarms
Autopilot operations should be verified for correctness before flight. After every software update of the Eclipse or a servo, check the correctness of the setup as explained in chap.10.8.3. The autopilot system require a correct measurement of the airspeed. Check that the speed indicated by the Eclipse instrument is correct. -
Page 71: Technical Specifications
Alarm out (open-collector, active low, max current 500mA) – GPS input: RS-232, data format: NMEA-0183 (4800bps), messages required: $GPRMC $GPRMB $GPGGA – EIS MODEL/SECTION: Current input from Flybox® sensor – Fuel flow from Flybox® transducer – Fuel pressure from Flybox® transducer –... -
Page 72: Contacts
Updated fuel level tanks setup with backup/restore options WARNING: All photos, data, drawings, instruments layouts, technical solutions and data representation you find in this document or watching at Flybox® instruments working and/or you can access by means of any other media, including web sites, are sole property of MICROEL SRL, cannot be copied or imitate without a written permission of MICROEL SRL itself and are protected by law, even by means of extended international copyright and/or specific patents deposited.
Need help?
Do you have a question about the Eclipse and is the answer not in the manual?
Questions and answers