Solid State Logic Nucleus User Manual
Hide thumbs
Also See for Nucleus:
- User manual (53 pages) ,
- Installation manual (52 pages) ,
- User manual (9 pages)
Table of Contents
Advertisement
Quick Links
Download this manual
See also:
Installation Manual
Advertisement
Table of Contents

Related Manuals for Solid State Logic Nucleus


Summary of Contents for Solid State Logic Nucleus
- Page 1 Nucleus User Guide Nucleus. This is SSL.
- Page 2 Document History November 2010 82BNUM01A Initial Release...
- Page 3 Table of Contents I I n n t t r r o o d d u u c c t t i i o o n n N N u u c c l l e e u u s s D D A A W W C C o o n n t t r r o o l l P P r r i i n n c c i i p p l l e e s s H H o o w w t t o o u u s s e e t t h h i i s s M M a a n n u u a a l l C C o o n n v v e e n n t t i i o o n n s s...
- Page 4 T T i i m m e e l l i i n n e e F F u u n n c c t t i i o o n n s s 2 2 4 4 T T r r a a n n s s p p o o r r t t M M a a s s t t e e r r 2 2 4 4 J J o o g g W W h h e e e e l l F F u u n n c c t t i i o o n n 2 2 4 4...
- Page 5 While the basic configurations created by SSL’s studio engineers allow you to get working with Nucleus straight out of the box, the functions assigned to much of the control surface can be adapted to suit the specifics of your working environment, as configured within the Nucleus Logictivity Remote software.
-
Page 6: How To Use This Manual
These switches are grouped together as ‘soft key sets’. USER The USER 1 and USER 2 switches located in the centre section area of Nucleus are used to apply soft key sets to the switches above and below the scribble strip displays. -
Page 7: Mode Switches
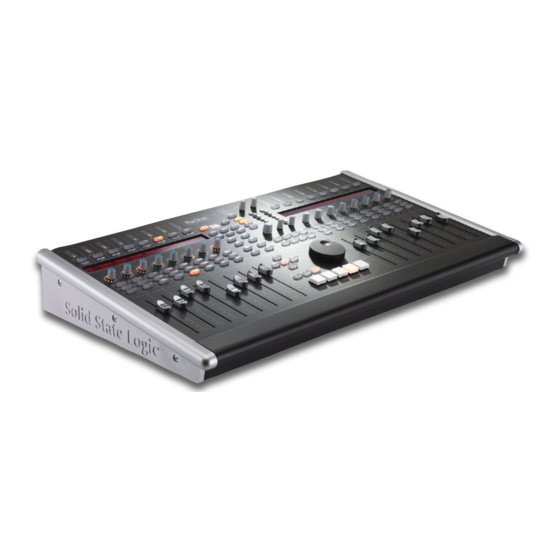
1. Nucleus Overview The diagrams below and overleaf provide an overview of the Nucleus control surface along with the main DAW screen of the Nucleus Remote. HANNEL TRIP AND WITCHES Mode Switches The Mode switches are not part of the channel in which they are located. -
Page 8: Analogue Control
Default functions are shown. UCLEUS EMOTE Defines which layer Select DAW to view is being edited or edit Nucleus setup in the Remote Defines default Defines the DAW function of Jog Wheel being controlled Enables single-letter Selects soft key sets... - Page 9 - audio connections – for recording sources and monitoring The way in which audio is sent between Nucleus and the host DAW computer is dependant on the connectivity options associated with the DAW(s) being used, as introduced below. The rest of this section of the manual describes the installation and connections involved in each option.
- Page 10 Using Nucleus’ Analogue IO For soundcards which don’t have digital IO, line-level analogue connections allow you still to make use of Nucleus’ SSL pre- amps. Nucleus PRE (pre-amp) outputs and EXTERNAL monitor inputs can be used to connect Nucleus to the soundcard inputs and outputs.
- Page 11 DAWs Without Proprietary Soundcards For software which can send and receive audio via any soundcard connected to the computer, Nucleus can be connected directly to the DAW using the USB connection. Monitoring Headphones Computer Recording Sources Ethernet (DAW control (Soundcard and...
-
Page 12: Multiple Daws
Multiple DAWs Up to three DAW applications on up to three computers can be connected to Nucleus simultaneously, as described on Page 14. This configuration requires both a Network Router and USB switcher. Computer Computer Computer Network Router switcher Ethernet... -
Page 13: Software Installation
3. Software Installation In order for Nucleus to integrate into your working environment, it will be necessary to install drivers and supporting software on your DAW computer(s) and/or studio computer(s). The following computers and operating systems are supported: Macintosh • Intel only, 1.2GHz or faster •... -
Page 14: Windows Installation
USB Soundcard installer. Follow the instructions in the installer (it should be safe to accept the defaults). 8. The USB Soundcard provides a stand-alone control panel – to install this, simply drag the Nucleus USB Control Panel icon to the Applications folder alias. -
Page 15: Connection And Software Configuration
In order to identify the keyboard type, the Macintosh then requires the key to right of the left Shift key to be pressed. Mode switch 16 on Nucleus (see Page 25), is assigned a ‘Keyboard ID’ command by default;... -
Page 16: Configuring Network Connections
UDP ports 21928 through 21947 which are used by ipMIDI and port 50081 which is used by the Nucleus Remote application. Note that it may be necessary to use a separate Ethernet switch in place of the integrated firewall router switch, as some of these can not support the high data transfer rate required. - Page 17 Direct Network Connection Configuration (Macintosh) Connect your Nucleus directly to the DAW computer using a standard network cable, and check that the IP address is set to Fixed in the Nucleus Remote (see previous page). OS X does not currently allow two ports to be used for IP traffic – your main network connection will become unavailable when using Nucleus.
- Page 18 Network To connect Nucleus to multiple DAW computers, you will probably need to connect the Nucleus and all the computers via a network switch or router with sufficient bandwidth to cope with the volume of data which is transferred to and from Nucleus.
-
Page 19: Midi Port Mapping
Ethernet and set the number of MIDI ports to 6 in the resulting pop-up. MIDI Port Mapping MIDI control for the three Nucleus Layers is split across the six ipMIDI ports which means that your DAW must be configured to match the following:... -
Page 20: Logic Pro
The DAW protocol used by Logic Pro 9 is the Mackie Control Unit (MCU) protocol. Therefore when a Logic Profile is assigned to a Nucleus DAW layer, in order for Nucleus to control Logic, a Mackie Control together with a Mackie Control Extender must be added to Logic Pro. - Page 21 To send your DAW outputs to the Nucleus analogue left, analogue right, digital left and digital right outputs, simply select the four level controllers which are green in the display above and turn their levels to maximum. Once you have completed this, close the window.
- Page 22 DeviceO to access the mixer control buttons. Note that the Nucleus USB Soundcard will be available for other music and audio software you may wish to run on the same computer. Click on the Playback Mixer button to open the pop-up shown here.
-
Page 23: Nucleus Remote
(in green) in the Status field, where SN nnnn is the ID of the Nucleus console selected. If this is the first time that you have run the Nucleus Remote – and it is unable to locate a Nucleus unit – the current status will be shown (in red) as ‘No Nucleus Selected –... -
Page 24: Remote Tabs
The row of tabs across the top of the window define what is displayed in the rest of the window. The ‘DAW’ Tab The DAW tab is where most of the action occurs and is used for configuring the selected Nucleus and its control protocol as described in this Section of the manual. -
Page 25: Remote Layer Selection
Appendix. All of the Profiles available to Nucleus are stored on the SD card in the card slot on the rear panel of the unit – if the card is not present no Profiles will be available; when a blank card is inserted the four default Profiles will be re-created and stored on the new card. -
Page 26: Selecting A Profile
If the Profile you select uses a different protocol than that currently assigned to the layer selected in the Remote, or if the layer previously contained no Profile, a pop-up will appear asking you to restart Nucleus – with a ‘Now’ or ‘Later’ option. Press OK to close the pop-up. -
Page 27: Managing Profiles
Managing Profiles The Profiles are all stored on the SD card plugged into the rear of Nucleus, not the computer the Remote is running on. Profiles are however easily copied, renamed, deleted and backed up using the browser as well as being physically transferable from one unit to another if required. - Page 28 Pro Tools Users. Note that the wheel does nothing in ‘Wheel’ mode until ‘Jog/Shuttle’ mode is activated – by default ‘Jog/Shuttle’ mode is assigned to the jog wheel switch adjacent to Nucleus’ jog wheel. This assignment is set via the Jog Wheel button in the Transport / Utility soft key set in the DAW tab.
-
Page 29: Soft Key Configuration
ONFIGURATION The functions assigned to almost half of the switches on Nucleus are ‘soft’ and can be altered. This is done in the Soft Key Setup area at the bottom of the Remote’s DAW tab. There are four Soft Key Setup pages, selected via the Soft Key Set buttons in the middle of the DAW tab –... - Page 30 The Transport / Utility soft key set comprises all of the assignable switches within the Nucleus centre section. All of these switches (with the exception of EQ and DYN) come pre-assigned to the functions printed on the Nucleus control surface.
-
Page 31: Daw Protocol Commands
Select the required command from the list, and its name will appear in the appropriate part of the Browser’s soft key display. Soft key assignments must be saved before they become active on Nucleus. If there are any unsaved changes when you try to exit the current Soft Key Set, a pop-up will appear inviting you to save your changes before exiting. -
Page 32: Daw Keyboard Shortcuts
Keyboard Shortcut Setup box. Soft key assignments must be saved before they become active on Nucleus. If there are any unsaved changes when you try to exit the current Soft Key Set, a pop-up will appear inviting you to save changes before exiting. Press No to exit without saving your changes, or Yes to save changes. -
Page 33: Soft Key Menus
Show Sub Keys box to return the window to normal operation. Soft key assignments must be saved before they become active on Nucleus. If there are any unsaved changes when you try to exit the current Soft Key Set, a pop-up will appear inviting you to save changes before exiting. - Page 34 Rename brings up the Keycap Name pop-up. Type the new name in the box provided (using a maximum of six characters) and press OK. Once the Soft Key Set has been saved, the new names will appear on the Nucleus control surface.
-
Page 35: Configuring Continuous Controller Layers
CC Displays When a Nucleus DAW Layer that is controlling a MIDI device is selected, the bottom row of the scribble strip displays the V-Pot CC Number or User label. When a fader or V-Pot is moved, the associated label switches to a momentary display of the value being altered. - Page 36 Blank page – well, nearly Page 32 Nucleus Owner’s Manual...
-
Page 37: Daw Operations
DAW. Note. Layers allow Nucleus to be connected to up to three DAWs, only one of which can be controlled by Nucleus at one time, though all transports can be controlled simultanueously from one transport master. -
Page 38: Channel Control
– this is determined by Show Auto Mode in the DAW tab of the Remote. Write modes are indicated by a flashing W W , read modes by a flashing R R , and Off is indicated by no flashing letter. See the Nucleus Remote Section for more information. - Page 39 The right-hand Mode switches are not available if User 1 or User 2 (user soft keys) are selected. Note also that the functions assigned to the Mode switches are programmed in the Nucleus Remote. See Section 5 for more information.
-
Page 40: Plug-In Control (Pro Tools Only)
Plug-in Control (Pro Tools Only) Nucleus is able to control plug-ins and their parameters using the standard HUI plug-in editor. This consists of four encoders with integral switches, a two-line 40-character parameter display, plus additional switches to assign and control the plug-ins within a Pro Tools channel strip. -
Page 41: Master Control
Note also that the EQ and DYN switches towards the top of the centre section are currently unassigned. MODE Display (MCU Only) The two digit MODE display beneath the Nucleus logo displays the ‘Mode’ number within protocols which support this. Nucleus Owner’s Manual... - Page 42 The two soft key sets are called User 1 and User 2, and are activated by pressing the User 1 or User 2 switch, below the Nucleus logo in the centre section. The top row of the scribble strip display indicates the Mode switch function, the bottom row the V-Sel function.
-
Page 43: Analogue Operations
OURCES The input section of Nucleus is located in the top right-hand corner of the centre section. There are two input channels, with insert circuits for introducing external processing to the signal. The inputs have ‘combi’ connectors for plugging in microphone XLRs or instrument jacks, and the inserts are on 1/4"... - Page 44 Mixdown Mode When mixing down, Nucleus can be used to insert external processing to the stereo master by pressing the MIXDOWN switch above the HP LEVEL control. In mixdown mode, the monitor inputs replace the input channels as the source for the channel insert sends.
- Page 45 FOOT 2 Record Foot Switch Record Foot Switch Record Foot Switch Note that all USB key commands listed refer to the Logic or Nuendo/Cubase default command key mappings; see your DAW User Guide for more details. Nucleus Owner’s Manual Page 41...
- Page 46 DAW P ROTOCOL OMMAND ABELLING The following list details the way in which each DAW protocol command is labelled when the command is assigned to a Nucleus soft key. Non-standard commands are asterisked (*): Pro Tools Function Soft Key Label Function...
- Page 47 VSel 4 User User VSel 5 VSel 5 Shift Shift VSel 6 VSel 6 Option Option VSel 7 VSel 7 Control Ctrl VSel 8 VSel 8 Play Foot Switch PlayFS Read Read Record Foot Switch RecFS Nucleus Owner’s Manual Page 43...
- Page 48 Stop Fader Group 5 FadGp5 Play Play Fader Group 6 FadGp6 Record Record Fader Group 7 FadGp7 Play Foot Switch PlayFS Fader Group 8 FadGp8 Record Foot Switch RecFS Undo Undo Scrub Scrub Redo Redo Page 44 Nucleus Owner’s Manual...
- Page 49 DAW CMDS DAW Keyboard Shortcuts Key assign DAW SOLO LED KeybID 11, 35 DAW tab KVM Hot Key DEFAULT Default Soft Keys Layer Selection (Nucleus) DHCP 12, 14 Layer Selection (Remote) DYN switch Layers Logic Pro ENTER Logictivity EQ switch...
- Page 50 Profiles Protocols REC switch Record Ready Recording Sources Remote Installation S/PDIF 5, 11 SAVE Scrolling (channels) SEL key SEND/RETURN Connections SHIFT Show Auto Mode Show Sub Keys Soft Key (Configuration) Soft Keys Software Versions SOLO Page 46 Nucleus Owner’s Manual...
- Page 51 Notes Nucleus Owner’s Manual Page 47...
- Page 52 No part of this publication may be reproduced in any form or by any means, whether mechanical or electronic, without the written permission of Solid State Logic, Oxford, OX5 1RU, England As research and development is a continual process, Solid State Logic reserves the right to change the features and specifications described herein without notice or obligation...
Need help?
Do you have a question about the Nucleus and is the answer not in the manual?
Questions and answers