Chamberlain T Installation Manual
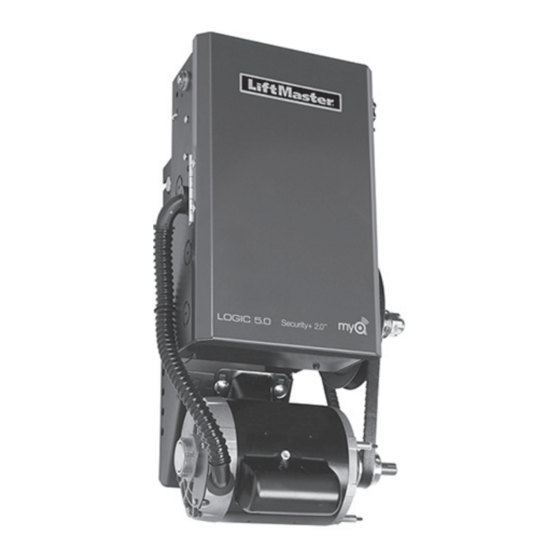
Logic control & power boards
Hide thumbs
Also See for T:
- Installation manual (108 pages) ,
- User manual (29 pages) ,
- Owner's manual (28 pages)
Table of Contents
Advertisement
Available languages
Available languages
Quick Links
This service kit provides all the necessary components to upgrade
Logic 5.0 operators to include current sensing technology. Not all
components are required for all applications.
INSTALLATION
FOR MODELS T, SD, GSD, GT, GH
& DAMP ENVIRONMENT (C-PREFIX)
NOT COMPATIBLE WITH N4/N4X MODELS
DO NOT connect the power or activate the operator until
instructed to do so.
REMOVE LOGIC CONTROL BOARD
NOTE: Label wires for reinstallation. See enclosed wiring diagram
for proper connections.
1. Disconnect power from the operator.
2. Disconnect all wires from the board:
• Control Wiring Terminal Block
• System Wiring Connector (J3)
• Coaxial Antenna
3. Remove option boards on slots 1 and/or 2 (if present) set aside.
4. Remove the logic control board from its four mounting posts
using needle nose pliers or a flathead screwdriver.
LOGIC 5.0 CONTROL BOARD OVERVIEW
Slots for option boards
Current Sense
Motor direction
jumper
Coaxial antenna
connecter
System wiring
connector (J3)
LOGIC 5.0 CONTROL & POWER BOARDS
WITH CURRENT SENSE FOR 3 PHASE OPERATORS
To reduce the risk of SERIOUS INJURY or DEATH:
• Disconnect electric power at the fuse box BEFORE proceeding.
• ALL electrical connections MUST be made by a qualified
individual.
• Upon completion of kit installation, the area MUST be cleared
and secured. At that time the unit may be returned to service.
INSTALL NEW LOGIC CONTROL BOARD
1. Install the logic control board into the operator. Position the
board onto mounting posts pressing firmly to ensure posts are
completely through mounting holes.
2. Reconnect all wires:
• Control Wiring Terminal Block
• System Wiring Connector (J3)
• Coaxial Antenna
3. Install option boards in slots 1 and/or 2 (if present).
4. Make sure the electrical box is clear of all debris and tools.
Proceed to remove L1, L2, & L3 terminal block & power board.
Control wiring
terminal block
Advertisement
Table of Contents

Related Manuals for Chamberlain T


Summary of Contents for Chamberlain T
- Page 1 INSTALLATION • ALL electrical connections MUST be made by a qualified individual. FOR MODELS T, SD, GSD, GT, GH & DAMP ENVIRONMENT (C-PREFIX) • Upon completion of kit installation, the area MUST be cleared and secured. At that time the unit may be returned to service.
- Page 2 BLACK T_COMM WHITE WHITE T_460V T_230V PURPLE or 575V GRAY PURPLE Modifications Bracket Black Wire 3 PHASE POWER BOARD Terminal Block Assembly Yellow Wires Models T, SD, GSD, GT, GH LOGIC 5.0 CONTROL BOARD & Damp Environment (C-Prefix)
-
Page 3: Installation
INSTALLATION FOR MODELS H AND J To reduce the risk of SERIOUS INJURY or DEATH: DO NOT connect the power or activate the operator until instructed • Disconnect electric power at the fuse box BEFORE proceeding. to do so. • ALL electrical connections MUST be made by a qualified REMOVE LOGIC CONTROL BOARD individual. - Page 4 INSTALL NEW POWER BOARD & TERMINAL BLOCK ASSEMBLY INSTALL NEW LOGIC CONTROL BOARD 1. Install the new power board into the operator. Position the 1. Install the logic control board into the operator. Position the board onto mounting posts pressing firmly to ensure posts are board onto mounting posts pressing firmly to ensure posts are completely through mounting holes.
- Page 5 PROGRAMMING SELECT THE PHASE AND WIRING TYPE NOTE: DO NOT activate the operator until the following steps have been completed. 1-PHASE: The new logic control board is shipped with the jumper in the Set to PROG 1-phase position. 3-PHASE: 1. Set the jumper for motor direction. 2.
-
Page 6: Programming Remote Controls
This function will work in the following modes: In B2 mode, operation is OPEN/STOP/CLOSE/REVERSE/STOP. In T and TS modes, operation is OPEN/STOP/CLOSE/REVERSE/ STOP and Timer-To-Close start/refresh. NOTE: If Car Dealer mode is enabled, SBC will be open only stopping at the Open Mid-Stop. - Page 7 THREE BUTTON REMOTE CONTROL PROGRAMMED FOR OPEN/ REMOTE CONTROL PROGRAMMING FEATURE CLOSE/STOP Program Remote Controls from the 3-button control station NOTE: The following programming requires a LiftMaster (3BCS). Monitored Entrapment Protection (LMEP) device. This feature allows the user to add additional remote controls ®...
-
Page 8: Maintenance Alert System (Mas)
® SETUP (OPTIONAL) To Erase All MyQ ® Devices: For Smartphone App, tablet or PC control, LiftMaster MyQ Internet 1. Press and release the RADIO button on the logic control board Gateway (model 828LM) is required. (the RADIO LED will light). 1. -
Page 9: Timer-To-Close
The STOP button WILL NOT deactivate the timer in the TS mode. To deactivate the timer for more than one cycle in T mode or in TS mode, attach a defeat switch to 11 Set to PROG and 12 (COMMON and TIMER DEFEAT). -
Page 10: Open Mid Stop
Car Dealer Mode is turned on.) 5. Push the TTC button and release. 6. Turn the SELECTOR DIAL to the desired wiring type (TS or T). NOTE: To disable the Dealer Mode follow steps 2 and 3, then press the MRT button and release. (The GREEN TIMER LED will... -
Page 11: Maximum Run Timer (Mrt)
MAXIMUM RUN TIMER (MRT) The operator can learn the time it takes to open or close the door plus and an additional 10 seconds. If the operator does not meet its open or close limit within the set time, it will stop, limiting damage to the door and operator. -
Page 12: Resetting Factory Defaults - Clearing Memory
RESET RESETTING FACTORY DEFAULTS - CLEARING MEMORY To reset most of the user installed settings back to factory defaults: 1. Turn the selector dial to DIAGNOSTIC. 2. Press and hold the STOP button for 5 seconds. The MAS LED will flash momentarily when the factory defaults have been Set to DIAG restored. - Page 13 4. Retirer la carte logique de ses quatre tiges de montage avec 4. S’assurer que le coffret électrique est libre de tous débris et des pinces à bec effilé ou un tournevis à tête plate. outils. Enlever le bornier L1, L2 et L3 et le tableau d’alimentation.
- Page 14 électrique de terre. l’actionneur. 3. Utiliser un tournevis à tête cruciforme pour enlever le bornier REMARQUE : Se servir des trous supérieurs sur le support de L1, L2 et L3. La borne existante et l’ensemble MOV ne seront bride pour les actionneurs en milieu humide (préfixe C), et...
- Page 15 4. Retirer la carte logique de ses quatre tiges de montage avec l’enlever et le mettre de côté. une pince à bec effilé ou un tournevis à tête plate. 2. Enlever les fils entrants des bornes L1, L2 et L3 et la borne de terre.
- Page 16 INSTALLER L’ENSEMBLE NEUF DE TABLEAU D’ALIMENTATION INSTALLATION DU NOUVEAU TABLEAU ET BORNIER 1. Placer le nouveau tableau dans l’actionneur. Positionner le 1. Installer le tableau d’alimentation neuf dans l’actionneur. tableau sur ses montants en exerçant une pression ferme de Positionner le tableau sur ses montants en exerçant une manière à...
- Page 17 TLSCARD est utilisée (voir le manuel TLSCARD pour les Si le cadran de réglage est en position DIAG, OPTN, ou PROG, le instructions) MAS ne fournira pas ce code. Après que le code ait été fourni, la DEL MAS s’éteindra. BOUTON-POUSSOIRS DE LA CARTE LOGIQUE (OPEN (OUVRIR),CLOSE (FERMER), STOP (ARRÊT))
-
Page 18: Programmation Des Télécommandes
RADIO sur la carte logique (la DEL RADIO s’allume). n’est décelée. 2. Appuyer et tenir le bouton de la télécommande jusqu’à ce que REMARQUE : La télécommande à un bouton n’est pas supportée la DEL RADIO clignote rapidement, puis relâcher la bouton de la avec les mode de câblage D1 et E2. - Page 19 STOP (arrêt). canaux sur le récepteur radio.) 2. Tout en tenant STOP (arrêt), appuyer et tenir CLOSE (fermer). 3. Pour programmer le bouton CLOSE (fermer) à une 3. Tout en tenant STOP (arrêt) et CLOSE (fermer), appuyer et télécommande, appuyer et relâcher le bouton CLOSE (fermer)
-
Page 20: Système D'alerte D'entretien (Mas)
STATION À 3 BOUTONS de routine est dû, la DEL MAS peut être fois où le MAS été programmé, régler le cadran de réglage à DIAG utilisée pour dépanner certaines problèmes et appuyer sur le bouton MAS. Appuyer sur le bouton OPEN de l’ouvre-porte. -
Page 21: Minuterie De Fermeture
à PROG, appuyer et relâcher le bouton TTC s’allume.) (minuterie), appuyer et relâcher le bouton STOP (arrêt) pour vider 7. Ramener le cadran de réglage au type de câblage désiré (T, TS la minuterie, appuyer et relâcher le bouton CLOSE (fermer) quatre ou FSTS) fois pour 60 secondes et appuyer et relâcher le bouton OPEN... -
Page 22: Ouverture À Mi-Course
Protection contre le piégeage avec surveillance LiftMaster (LMEP) doit être installé (se référer à la manual d’installation). Le type de câblage doit être configuré à TS ou T. Pour programmer : 1. Commencer avec la porte en position fermée. -
Page 23: Minuterie De Fonctionnement Maximal (Mrt)
• Déconnecter l'alimentation électrique AVANT d'effectuer TOUT moment où il a été installé. Cette caractéristiques peut aider à ajustement ou entretien. déterminer depuis combien de temps l’ouvre-porte a été en •... -
Page 24: Restauration Des Valeurs D'usine Par Défaut - Effacement De La Mémoire
Pour restaurer la plupart des configurations installées par l’utilisateur aux valeurs d’usine par défaut : 1. Tourner le cadran de réglage à DIAG. 2. Appuyer et tenir le bouton STOP (arrêt) durant 5 secondes. La Réglé au DIAG Set to DIAG DEL MAS clignotera un instant puis les valeurs d’usine par... - Page 25 INSTALLATION • TODAS las conexiones eléctricas DEBEN ser realizadas por un técnico capacitado. PARA MODELOS T, SD, GSD, GT, GH • Al finalizar la instalación del juego, limpiar y despejar el lugar. Y CONDICIONES HÚMEDAS DE SERVICIO Entonces la unidad podrá ponerse en servicio.
- Page 26 WHITE WHITE T_460V T_230V PURPLE or 575V GRAY PURPLE Soporte de modificaciones Cable negro TARJETA DE ALIMENTACIÓN TRIFÁSICA Bornera completa Modelos T, SD, GSD, GT, GH y Cable amarillo TARJETA DE CONTROL LOGIC 5.0 condiciones húmedas de servicio (prefijo C)
-
Page 27: Instalación
ANTES de proceder. QUITAR LA TARJETA LÓGICA DE CONTROL • TODAS las conexiones eléctricas DEBEN ser realizadas por un técnico capacitado. NOTA: Marcar los cables para volver a conectarlos correctamente. Consultar el esquema de conexiones adjuntos. • Al finalizar la instalación del juego, limpiar y despejar el lugar. - Page 28 INSTALAR LA NUEVA TARJETA DE ALIMENTACIÓN Y LA INSTALAR LA NUEVA TARJETA LÓGICA DE CONTROL BORNERA 1. Instalar la nueva tarjeta lógica de control en el operador. Presionar la tarjeta en los soportes de montaje hasta que los 1. Instalar la nueva tarjeta de alimentación en el operador. mismos atraviesen los orificios de montaje.
- Page 29 PROGRAMACIÓN SELECCIONAR LA FASE Y EL TIPO DE CONEXIÓN NOTA: NO activar el operador antes de realizar los siguientes pasos: MONOFÁSICO: La nueva tarjeta lógica de control se entrega con el puente Gire a PROG Set to PROG colocado para funcionamiento monofásico. TRIFÁSICO: 1.
- Page 30 Esta función trabajará en los siguientes modos: En modo B2, la operación es ABRIR/PARAR/CERRAR/INVERTIR/ PARAR. En los modos T y TS, la operación es ABRIR/PARAR/CERRAR/ INVERTIR/PARAR y empezar/actualizar el temporizador de cierre. NOTA: Si está permitido el modo Concesionario de autos, el SBC se abrirá...
- Page 31 CONTROL REMOTO DE TRES BOTONES PROGRAMADO PARA CARACTERÍSTICA DE PROGRAMACIÓN DEL CONTROL REMOTO ABRIR/CERRAR/PARAR Programe los controles remotos desde la estación de control de 3 botones (3BCS, por sus siglas en inglés). NOTA: La siguiente programación requiere un dispositivo de protección contra atrapamientos controlado por LiftMaster Esta función permite que el usuario agregue controles remotos (LMEP).
- Page 32 Para borrar todos los dispositivos MyQ: PROGRAMACIÓN DE DISPOSITIVOS MYQ ® (OPCIONAL) 1. Pulse y suelte el botón RADIO en la tarjeta lógica (se encenderá Para usar la aplicación de control con teléfono, tableta o el LED RADIO). computadora es necesario instalar el LiftMaster MyQ Internet Gateway (modelo 828LM).
- Page 33 CLOSE (cerrar) cuatro veces durante 60 segundos 7. Gire el disco selector al tipo de conexión deseado (TS, T o FSTS). y presione y suelte el botón OPEN (abrir) 10 veces durante 10 NOTA: Para volver a leer el ajuste del temporizador de cierre, gire el segundos.
- Page 34 SBC y se debe tener instalado al menos un dispositivo de protección contra atrapamientos controlado por LiftMaster (LMEP) (consultar el manual de instalación). El tipo de conexión debe estar establecido en TS o T. Para programar: 1. Comience con la puerta en posición cerrada.
-
Page 35: Mantenimiento
• TODO mantenimiento DEBE realizarlo un técnico de sistemas 1. Comience con la puerta en posición cerrada. de puertas capacitado. 2. Gire el DISCO SELECTOR a la posición DIAG (modo diagnóstico). - Page 36 REAJUSTE DE LAS CONFIGURACIONES REAJUSTE DE LAS CONFIGURACIONES DE FÁBRICA - BORRADO DE LA MEMORIA Para reajustar la mayoría de las configuraciones instaladas por el usuario nuevamente a las de fábrica: 1. Gire el disco selector a la posición DIAG. Set to DIAG Gire a DIAG 2.
Need help?
Do you have a question about the T and is the answer not in the manual?
Questions and answers