Table of Contents
Advertisement
Quick Links
5WSML-02C, 5WMED-04C
Instructions for Use - Opt-X
®
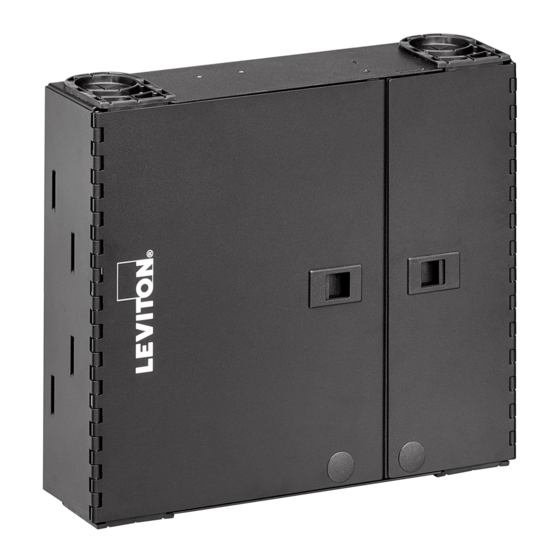
SDX Wallmount Enclosures
5WSML-02C
5WMED-04C
PK-A3188-10-00-0A
Page 1 of 11
Leviton Network Solutions, a division of Leviton Mfg. Co., Inc.
Tech Support: 1.800.824.3005 E-mail: appeng@leviton.com Web: www.leviton.com
Copyright © 2017 Leviton Manufacturing Co., Inc. All rights reserved. Subject to change without notice.
®
MTP
is a registered trademark of US Conec, Ltd.
Advertisement
Table of Contents

Related Manuals for Leviton Opt-X 5WSML-02C


Summary of Contents for Leviton Opt-X 5WSML-02C
- Page 1 Leviton Network Solutions, a division of Leviton Mfg. Co., Inc. Tech Support: 1.800.824.3005 E-mail: appeng@leviton.com Web: www.leviton.com Copyright © 2017 Leviton Manufacturing Co., Inc. All rights reserved. Subject to change without notice. ® is a registered trademark of US Conec, Ltd.
- Page 2 • QUICK START GUIDE ® The following instructions will help you quickly install your Leviton Opt-X Wallmount Enclosure for use in your equipment cabinet or rack. For detailed information on each step, go to the page number listed below. Safety Instructions Pg.
- Page 3 7. SDX Bulkhead 8. Grounding Stud 9. Service Door 10. Patch Door 11. Optional lock knockout blank 12. Optional Cable Clamp mounting point Pour les traductions en français, allez à: Para las traducciones en español, visite: www.leviton.com PK-A3188-10-00-0A Page 3 of 11...
-
Page 4: Standard Accessories
STANDARD ACCESSORIES Description Image Quantity in Quantity in Sm Kit Med Kit Port Identification Label Wire Management 7 Small 7 Medium Saddles Velcro 5" Grommets #10 Wood Screw Grounding Lug Blank Adapter Plate OPTIONAL ACCESORIES Lock and Key 5L000-LOK Universal Clamp Kit (single) 5RCMP-KIT Universal Clamp Kit (multi) 5RCMP-KT2... -
Page 5: Mounting Instructions
CONFIGURATIONS 1) Field or pre-terminated cabling used with SDX adapter plates 2) Pigtail splicing used with SDX adapter plates 3) Pigtail splicing used with Splice modules 4) Use with pre-terminated MTP cabling and SDX cassettes or SDX to HDX adapter brackets MOUNTING INSTRUCTIONS 1) Determine the location to mount the enclosure. - Page 6 Figure 2 Figure 3 Estimated Fill Ratios Cable Description Diameter in Diameter in Qty per Small Qty per Medium inches Grommet Grommet Micro Data Center 12s Plenum 0.16 4.06 Micro Data Center 24s Plenum 0.18 4.57 Micro Data Center 48s Plenum 0.231 5.87 Micro Data Center 72s Plenum...
-
Page 7: Cable Installation
CABLE INSTALLATION 1) Feed incoming cable(s) through the grommet opening. 2) Optional – Install Universal Trunk Clamp kit and secure cable to clamp. 3) Remove required outer cable jacket leaving jacket at the closest lance point. 4) Secure the cable to the lance point with Velcro or nylon tie wraps as appropriate. 5) If applicable, secure aramid yarn to lance point. - Page 8 ROUTING FOR PRE-TERMINATED CABLING – CASSETTES Figure 6 ROUTING FOR FIELD TERMINATED CABLING – FAN OUT Figure 7 ROUTING FOR SPLICE TERMINATION When performing splice terminations, it is recommended to pre-route and mark trunk and pigtail cabling prior to per- forming any trimming, termination or routing.
- Page 9 Figure 8 The Splice Tray Mounting Hardware Kit (SPLMT-HKT) is required for securing Splice trays to all Opt-X wall mount en- closures. Upon completion of splicing and routing, secure the splice trays to the enclosure base using the arrow lance points, appropriate threaded stud and wing nut from the Splice hardware kit.
- Page 10 Figure 10 5. Create a snug mating of the Velcro to the trays. (Figure 11). 6. Trim excess Velcro as necessary. Figure 11 OPTIONAL LOCK KIT A lock can be installed on the service door, patch door or both doors of each enclosure as required. If using the optional Lock kit #5L000-LOK Small and Medium 1.
- Page 11 Labeling within the slot position cells can be achieved with printed labels or via excel based spreadsheets available via download at www.leviton.com. NOTE: Ensure that the label surface area is clean of dirt, oil, and debris.
Need help?
Do you have a question about the Opt-X 5WSML-02C and is the answer not in the manual?
Questions and answers