Advertisement
Quick Links
Advertisement

Related Manuals for Wolf Pro Island


Summary of Contents for Wolf Pro Island
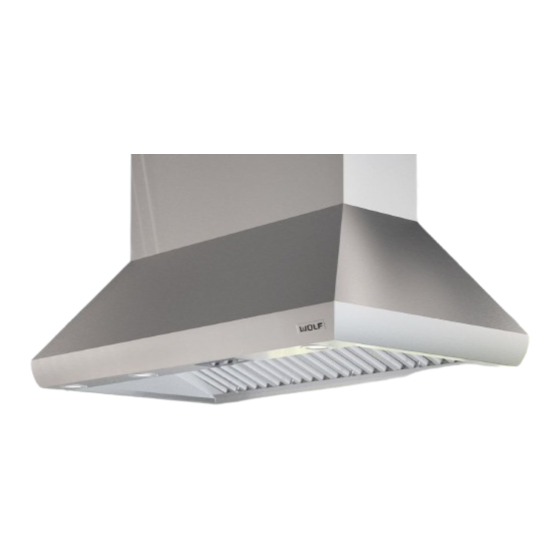
- Page 1 INSTALLATION GUIDE Pro Island Ventilation Hoods READ AND SAVE THESE INSTRUCTIONS...
-
Page 2: Table Of Contents
Pro Island Hood Specifications ....6 important. Pro Island Hood Installation ..... 8 CAUTION signals a situation where minor injury or product damage may occur if instructions are not followed. -
Page 3: Wolf Pro Island Ventilation Hoods
Wolf Pro Island Ventilation Hoods wolfappliance.com/specs Pro Island Hood Installation IMPORTANT NOTE: This installation must be completed Wolf Pro Island Hood by a qualified installer or Wolf authorized service center Model Number technician. Serial Number Read this entire installation guide prior to installation and save for the local inspector’s reference. -
Page 4: Safety Instructions
Install the pro ventilation hood only with a blower • C) Clean ventilation fans frequently. Grease should manufactured by Wolf. not be allowed to accumulate on fan or filter. When cutting or drilling into wall or ceiling, do not •... -
Page 5: Installation Considerations
Product failure due to improper installation is not surface, the volume of air that needs to be moved and the covered under the Wolf warranty. Refer to the Wolf pro length of the duct run. Refer to ventilation recommenda- ventilation hoods use & care guide for warranty details, tions in the Wolf design guide. -
Page 6: Pro Island Hood Specifications
Pro Island Hood Specifications Overall Dimensions PRO ISLAND HOODS 18" 13" WIDTH MINUS (457) (330) 18" (457) OVERALL HEIGHT 4" (102) 34" 36" , 42" , 54" (864) (914) (1067) (1372) 66" OVERALL DEPTH (1676) WIDTHS Installation Specifications PRO ISLAND HOODS... - Page 7 The illustration below provides dimensions critical for Wolf pro ventilation hoods require a separate, grounded proper installation of the pro island hood. Dimensions A 120 V AC, 60 Hz power supply. The service should have its and B in the illustration will vary with the width of the own 15 amp circuit breaker.
-
Page 8: Pro Island Hood Installation
Decide where the ductwork will run between the island (330) 18" (457) hood and the outside. Pro island hoods have a vertical HOOD HEIGHT discharge. A straight, short duct run will allow the ventila- tion hood to perform most efficiently. Limit the number of 4"... - Page 9 Pro Island Hood Installation wolfappliance.com/specs Ceiling Framing IMPORTANT NOTE: A minimum 10" (254) opening in the ceiling is required to accommodate the ductwork neces- Framing must be fastened together and to ceiling joists sary for proper ventilation. to provide enough structural strength to support the weight of the hood and internal blower, if applicable.
- Page 10 Duct Cover IMPORTANT NOTE: If an optional duct cover is to be used DUCT COVER INSTALLATION with the pro island hood, it must be attached before 1) Use the four " x 3" (76) lag screws and washers installing the hood.
- Page 11 Pro Island Hood Installation wolfappliance.com/specs Hood Preparation 1) Remove the filters of the pro island hood by pushing 4) The hood assembly is shipped with the transition each filter up at the angle it is placed in, and rotate the attached.
- Page 12 Pro Island Hood Installation Hood Installation INSTALLATION WITHOUT DUCT COVER 1) Lift the hood and align the hood mounting holes with Due to the weight of the hood, be sure to have the predrilled holes in the ceiling framing. Install the adequate assistance for installation.
- Page 13 1) Remove the hood electrical box cover. Run Romex ® able through your authorized Wolf dealer. For local dealer wire from a 120 V AC, 15 amp circuit to the hood information, visit the find a showroom section of our installation location.
- Page 14 Pro Island Hood Installation Internal Blower IMPORTANT NOTE: Refer to specific installation instruc- THREADED tions provided with each blower assembly for additional STUD mounting and wiring instructions. SLOT BLOWER INSTALLATION 1) Discard the hex nuts provided with the blower. 2) Lift the blower assembly into position inside the hood.
- Page 15 Pro Island Hood Installation wolfappliance.com/specs In-Line and Remote Blowers WIRING FOR IN-LINE OR REMOTE BLOWER 1) Remove the hood electrical box cover. Run Romex ® Before making electrical connections, make sure the wire from a 120 V AC, 15 amp circuit to the hood electrical power is turned off at the service panel.
- Page 16 Refer to the illustrations below for overall dimensions of Wolf in-line and remote blowers. Installation instructions Locate the blower so that the length of the duct run and shipped with each Wolf ventilation product provide number of elbows and transitions are kept to a minimum.
- Page 17 INSTALL FILTERS LOGO NAMEPLATE Reinstall the internal frame on the island hood. Refer to The Wolf logo nameplate does not come installed on the hood preparation on page 11. island hood since there are various locations that the nameplate can be attached.
-
Page 18: Service Information
• Verify that electrical power is being supplied to the ventilation hood. To obtain the name and number of a Wolf authorized service center, check the contact & support section of our • Check electrical connections to ensure that the website, wolfappliance.com or call Wolf customer service... - Page 19 Wolf Appliance, Inc. ©Wolf Appliance, Inc. all rights reserved. Wolf, Wolf & Design, Wolf Gourmet, W & Design and the color red as applied to knobs are registered trademarks and service marks of Wolf Appliance, Inc.
- Page 20 WOLF APPLIANCE, INC. P. O. BOX 44848 MADISON, WI 53744 WOLFAPPLIANCE.COM 800.332.9513 817001 REV-A 8/ 2010...
Need help?
Do you have a question about the Pro Island and is the answer not in the manual?
Questions and answers