
Subscribe to Our Youtube Channel
Related Manuals for Lennox ComfortSense 8500 Series


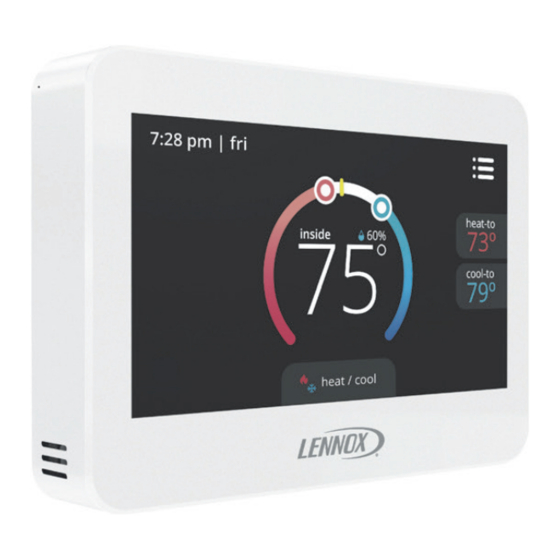
Summary of Contents for Lennox ComfortSense 8500 Series
- Page 1 Installation and Setup Guide ComfortSense 8500 Commercial ® Programmable Thermostat Series - 507611-03 7/2019 Supersedes 11/2018...
-
Page 2: Table Of Contents
Temperature Limits ...........14 Installing Indoor Temperature Sensors ......7 Menu ..............14 Installing Occupancy Sensor ......... 7 iCON™ by Lennox / L Connection Technician Settings ............14 Parameter Settings Based on System Configuration ... 15 Equipment ............8 Parameter Descriptions ..........16 Network Thermostat Control (NTC) Setup ..... -
Page 3: Shipping And Packing List
Screws (M3.5x24mm self-tapping) Lennox building-automation solution. ® Warranty • CO2 models can be used to control Lennox’ premium rooftop unit Demand Control Ventilation User guide features based on CO2 set points and conditions Setup and installation guide stored in the unit controller. -
Page 4: Product Dimensions
Transformer Wire Communication Wire Standard thermostat wire (one pair 20 AWG mini- Use one of the following Lennox communication ca- mum) may be used to wire the CS8500 to the op- bles (twisted pair with shield plenum): tional wall plug 24VAC transformer (18M13) or other field-provided 2VA minimum, 24VAC output trans- former. -
Page 5: Installation
• Hot or cold air from ducts. Installation • Radiant heat from sun or appliances. Unpacked the CS8500 and open the case • Concealed pipes and chimneys. with a thin-blade screwdriver (see “Figure 1. Removing Back Plate” on page 5). •... -
Page 6: Terminal Connections
g. Route the CS8500 and outdoor tempera- Terminal Connections ture sensor (optional) wiring from wall through center openings on wall plate (use External sensors use standard thermostat wiring; is optional) and back plate (see “Figure 3. and may be wired using two wires of a multiple wire Route Wiring”... -
Page 7: Wiring Cs8500 (With Or Without Co2 Sensor)
Wire external sensors as illustrated below. Up to • 24VAC in occupied mode. nine sensors may be used in averaging sensor • 0VAC in unoccupied mode. applications. Use Lennox catalog numbers 10kΏ (47W37) or 11kΏ (94L61). Sensors are not polarity sensitive. -
Page 8: Equipment
The following is an example on how to make connections for a occupancy sensor. Figure 7. Occupancy Sensor Connections and 24VAC Transformer Network Thermostat Control (NTC) Setup iCON / L Connection Equipment • NTC ECTO A4.07 is factory set to option 0 (local). -
Page 9: M1 / M2 Unit Controller Setup
M1 / M2 Unit Controller Setup • 3 = Zone sensor mode with return air sensor backup. From the main menu, perform the following naviga- M3 Unit Controller Setup tion through the menus to set the S-Bus address for L Connection. From the main menu, perform the following naviga- tion through the menus to set the S-Bus address for Go to:... -
Page 10: Cs8500 Setup
CS8500 Setup units using the Lennox proprietary S-Bus protocol. From the CS8500’s home screen, go to MENU > TECHNICIAN SETTINGS and enter 864 and CS8500 Set Point Change press OK to proceed. The BACnet front-end provides the occupied and Both the RTU and the CS8500 must be set to the same S-Bus address. -
Page 11: Cs8500 Occupancy Override
• When the timer expires, both the M3 unit controller and CS8500 reverts to the occupancy BACNET CONTROL status provided by BACnet. BACnet Canceling Override S-Bus S-Bus BACNET When the user changes the set point or occupancy mode at the CS8500, it puts the M3 unit controller into override mode. - Page 12 Go to Prodigy MAIN MENU > SETTINGS > 11. Go SETUP select NETWORK GENERAL and set CONFIGURATION ID1, INTEGRATION. position 5 to B. 12. Use the adjust and set values arrows to SETUP select NETWORK display BACNET and press the SAVE button INTEGRATION.
-
Page 13: Cs8500 Setup
CS8500 Setup Verify that the sensor data from the CS8500 display matches the Prodigy Unit Controller From the CS8500’s home screen, go to MENU display. > TECHNICIAN SETTINGS settings and enter 864 and press OK to proceed. For the M1 unit controller (IMC), use the IMC MODE TEMP switch to display the data. -
Page 14: M3 Unit Controller - Setting Return Air Temperature Limits
115 locally at the M3 unit controller which is located NOTE: Smart Hub reference is concerning Central inside the Lennox rooftop unit. • Adjusting parameter 113 enables return room • Edit Schedule (only available when “Local temperature limits. -
Page 15: Parameter Settings Based On System Configuration
Parameter Settings Based on System The second and third parameter is operation with Configuration smart hub and local scheduling. The first parameters (S-Bus Address) will always That option is either ON or OFF for both. Default need to be set. Available bus addresses are 1 is OFF for both. -
Page 16: Parameter Descriptions
Parameter Descriptions Display on Home Screen S-Bus Address Turn ON or OFF for the followings options. Factory default is set to OFF. Options are 1 through 31. Select address and press the set button to save the setting and • RTU Fan return to the technician setting screen. - Page 17 Press < in the upper left-hand corner of the Temperature Adjustment Range screen to return to the technician settings The adjustment range for screen unlock is 0 menu. to 10 degrees in increments of one degree. Smooth Setback Recovery (SSR) The default setting is 2.
- Page 18 The Technician Settings can allow a user to 14. Change Owner Pin disable the “Until Next Scheduled Period” This option is used to create or change option when unoccupied. This option applies to the owner pin number when screen lock is stand-alone mode.
-
Page 19: System Status Descriptions
System Status Descriptions ··· The system status screen icons can be access by pressing the (three dots) which is located on the left side of the home screen. Then press the view status option. Press the red toolbox to access the technician system status screen. Technician pin 864 is required to access that screen. - Page 20 Table 5. System Status Descriptions State (Icon) Icon Location Description When either of following error occur, this icon would be displayed. • Some RTU compr. Locked Home Screen • All RTU compr. Locked • RTU fault state - fault detected •...
- Page 21 Table 5. System Status Descriptions State (Icon) Icon Location Description Technician Status Fresh air tempering heating. Screen Technician Status Fresh air tempering cooling. Screen Technician Status Fresh air tempering dehumidifying. Screen Technician Status This status is displayed when the RTU compressor Screen has partially failed (or generates an error).
- Page 22 Table 5. System Status Descriptions State (Icon) Icon Location Description When the CS8500 (CS) has a fault state, this icon would be displayed. The following possible errors may have occurred which would generate this system status: • Local temperature sensor error Technician Status Screen •...
-
Page 23: Error Codes And Reminders
Error Codes and Reminders Any active history for notifications are listed under menu > notification. Press the down arrow icon next to the notification to expand the notification for further details. Press the contractor info option for assistance. Table 6. Error Codes and Reminders Action to Clear / Recovery Condition Issue Display... - Page 24 Table 6. Error Codes and Reminders Action to Clear / Recovery Condition Issue Display System Action Condition • System will restore all settings to factory default and resume EEPROM error Memory Contact service contractor operations. Critical (power-on) Error to replace the CS8500. •...
- Page 25 Table 6. Error Codes and Reminders Action to Clear / Recovery Condition Issue Display System Action Condition • The reading for CO is not valid. This message indicates • Contact service contractor to sensor is not replace the CS8500. Sensor error working correctly.
- Page 26 Table 6. Error Codes and Reminders Action to Clear / Recovery Condition Issue Display System Action Condition • User will have to contact the Service Contractor to have the This error is displayed system serviced. All RTU All RTU compressors in notification screen Critical compressors...
- Page 27 Table 6. Error Codes and Reminders Action to Clear / Recovery Condition Issue Display System Action Condition If measurement of the outdoor temperature sensor is out of specified range (including open Outdoor Temperature Outdoor / short detection, the alarm Displayed on Minor (RT17) Sensor Temp...
- Page 28 Table 6. Error Codes and Reminders Action to Clear / Recovery Condition Issue Display System Action Condition Outdoor Air Damper Economizer Displayed on During free cooling damper Minor Error (During Free Fault notification screen. is not modulating. Cooling) Not Economizing May be due to the damper Economizer Displayed on...
Need help?
Do you have a question about the ComfortSense 8500 Series and is the answer not in the manual?
Questions and answers