
Related Manuals for GRT Avionics Horizon 10.1


Summary of Contents for GRT Avionics Horizon 10.1
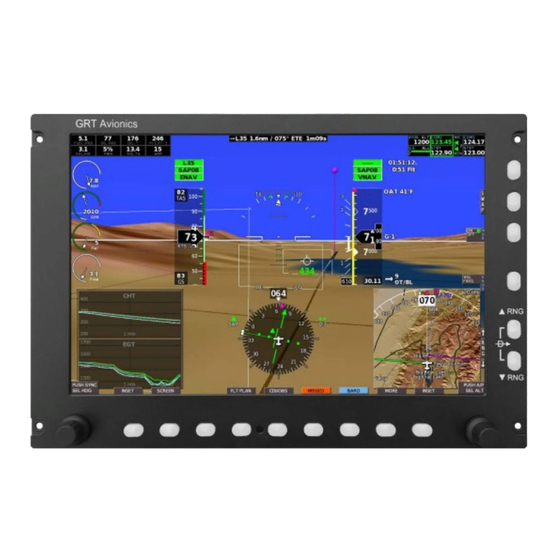
- Page 1 Sport/Horizon 10.1 User Manual Preliminary - September 2019 GRT Avionics, Inc. 3133 Madison Avenue SE Wyoming, MI 49548 616-245-7700 support@grtavionics.com www.grtavionics.com...
-
Page 2: Important Safety Information
1 FOREWORD Thank you for choosing the GRT EFIS! This manual describes the operation of a Horizon 10.1 and Sport 10.1 EFIS using the software version shown in the Record of Revisions. Some differences may be observed when comparing the information in this manual to other software versions. The Sport 10.1 EFIS may optionally be equipped with synthetic vision and vertical autopilot command capability. -
Page 3: Grt Avionics, Inc. September
*CAUTION*: Dual Nav radios tuned to Localizer frequencies with autopilot function ARM engaged will result in the EFIS Sport selecting either NAV radio to fly the Localizer. Sport/Horizon 10.1 Pilot’s Guide Rev. Preliminary... -
Page 4: Warranty And Return Policy
Please visit the Contact page of our website for up-to-date contact information for tech support via email. Check the home page of the GRT website often for new manual updates, video tutorials, and other instructional materials as we release them. Sport/Horizon 10.1 Pilot’s Guide Rev. Preliminary... -
Page 5: Record Of Revisions
GRT Avionics, Inc. September 2019 1.4 RECORD OF REVISIONS EFIS Revision Date Description SW Revision August 2019 3.00 Initial Release Sport/Horizon 10.1 Pilot’s Guide Rev. Preliminary... -
Page 6: Table Of Contents
Transition from Round Gauges to Glass Cockpit .............. 2 Feedback and Corrections ......................2 GENERAL SYSTEM INFORMATION ....................4 The Sport/Horizon 10.1 ......................4 AHRS and Air Data Computer ....................6 Adaptive AHRS Operation ....................6 AHRS/Air Data Computer Limitations ................7 Optional Components and Software .................. - Page 7 Primary Flight Instruments on the PFD ................36 Secondary Information on the PFD ..................37 PFD View ............................38 Overview ..........................38 Central Elements ......................... 39 Attitude Indicator/Artificial Horizon ................39 Attitude Reference Index ....................39 Sport/Horizon 10.1 Pilot’s Guide Rev. Preliminary...
- Page 8 Waypoint Balloons ......................62 Course Ribbons ........................63 Enroute Highway-in-the-Sky (HITS) ................63 Moving Map Description......................... 65 Moving Map Database ..................... 66 Map Screen Setup and Customization ............... 66 Flying with the Moving Map ..................70 Sport/Horizon 10.1 Pilot’s Guide Rev. Preliminary...
- Page 9 Selecting Autopilot Modes ....................105 Selecting Autopilot Targets ....................106 First Autopilot Menu .......................106 Second Autopilot Menu....................107 Engaging the Autopilot ......................107 Autopilot Shortcut Menu ....................107 Mode Display ..........................108 Lateral Autopilot Mode and Target Annunciation ..........109 Sport/Horizon 10.1 Pilot’s Guide VIII Rev. Preliminary...
- Page 10 Fuel Flow, Totalizer and Fuel Level Displays............127 Interval Alarm ........................130 Engine Efficiency Measurement Using SFC ............130 Percent Power .......................132 12 GPS/VOR/ILS APPROACHES ......................134 12.1 Displays During Approach ....................134 12.2 GPS Approach ........................136 Automatic Capture of GPS Approach Glideslope..........136 Sport/Horizon 10.1 Pilot’s Guide Rev. Preliminary...
- Page 11 Step-By-Step Synthetic Approach Activation ............150 Autopilot-Coupled Synthetic Approaches ............152 When is a Synthetic Approach Unavailable? ............155 Synthetic Approach During LOC/ILS Approaches ..........155 13 Checklists ............................156 13.1 Using the Checklist ......................156 13.2 Loading a Checklist ......................156 Sport/Horizon 10.1 Pilot’s Guide Rev. Preliminary...
- Page 12 Full Altimeter Calibration – Using Air Data Test Set ..........174 17 A Typical Flight EFIS (Read if you don’t like manuals!) ............176 17.1 Startup ............................176 17.2 Runup ............................176 17.3 Takeoff ............................177 17.4 Initial Climb ..........................177 17.5 Entering the Flight Plan? ....................178 Sport/Horizon 10.1 Pilot’s Guide Rev. Preliminary...
- Page 13 Cruise Checks .........................180 17.10 Checking Weather Enroute ....................180 17.11 You do use the Interval Timer, right? ................181 17.12 Planning for Landing ......................181 17.13 Descent ............................181 17.14 Landing ............................182 17.15 Take it home with you! .......................183 Sport/Horizon 10.1 Pilot’s Guide Rev. Preliminary...
-
Page 14: Introduction
Press MORE > Set Menu > Primary Flight Display Softkey labels are displayed with any button is pressed, but since the three left-most buttons can be configured to be active when the labels are not displayed, we suggest you Sport/Horizon 10.1 Pilot’s Guide Rev. Preliminary... -
Page 15: Electronic Manuals And Internet Links
If you notice any errors or would like a better explanation of something that relates to your EFIS system, please contact GRT tech support. We are always striving to make our customers’ lives easier. Sport/Horizon 10.1 Pilot’s Guide Rev. Preliminary... - Page 16 GRT Avionics, Inc. September 2019 Sport/Horizon 10.1 Pilot’s Guide Rev. Preliminary...
-
Page 17: General System Information
EFIS. Engine monitoring is also supported with a serial data connection to any model of the GRT Avionics EIS engine monitor. Sport/Horizon 10.1 Pilot’s Guide Rev. Preliminary... - Page 18 GRT Avionics, Inc. September 2019 The Sport/Horizon 10.1 supports basic single screen panels as well as multiple screen redundancy using any combination of GRT EFIS systems, AHRS, and sensors, making it easy to grow your panel with your budget. Multiple-screen integration shares pilot inputs between screens and data that is only connected to one screen.
-
Page 19: Ahrs And Air Data Computer
System (AHRS) to provide roll and pitch (attitude) reference and gyro heading slaved to magnetic heading (when a magnetometer is connected). The GRT Avionics AHRS features the ability to operate without external aiding from GPS or air data – a feature that preserves the integrity of this critical data even when air data or GPS is corrupted, and exclusive to GRT Avionics among experimental aircraft instrument manufacturers. -
Page 20: Ahrs/Air Data Computer Limitations
AHRS/Air Data Computer Range Limits Max. Angular Rate: 200-250°/s, All Axis Simultaneously Airspeed (Standard): 35-285 mph Airspeed (High-speed): 50-580 mph Altitude: -1,000 to 32,000 feet Voltage: 9-35VDC Operational Temperature: -13°F to 158°F (-25°C to 70°C) Sport/Horizon 10.1 Pilot’s Guide Rev. Preliminary... -
Page 21: Optional Components And Software
September 2019 4.3 Optional Components and Software EIS Engine Monitor The GRT Avionics EIS Engine Monitor provides all engine data to the EFIS. The Sport uses this data to drive its graphical engine display and compute additional engine performance information. The EIS is available with or without a display. -
Page 22: Gps Receiver Compatibility
September 2019 GPS Receiver Compatibility The Sport/Horizon 10.1 is intended to be used with an external GPS receiver. The EFIS supports two inputs for redundancy. The external GPS can be a remote unit (no display), or a stand-alone GPS navigator that does allow the pilot to enter a flight plan. Practially all GPS receivers provide a serial output that is compatible with the EFIS. -
Page 23: Operating The Efis
GRT system status. Check the navigation database date to make sure it is not more than 60 days old. New nav database updates are posted on the GRT Avionics website every 60 days. Instructions for updating it can be found in Section 10 of this manual. Press the Accept softkey to continue. -
Page 24: The Pilot's Controls
In most cases the shortcut feature will be displayed above the softkey label when it is depressed. The remote radio rack selector is an exception, as described below. Sport/Horizon 10.1 Pilot’s Guide Rev. Preliminary... -
Page 25: Knobs
PFD: The Autopilot/Flight Director Menu will appear when the right knob pressed. MAP: The softkeys become the shortcut menu, providing “Waypoint Details” (information about the current goto waypoint), direct-to waypoint selection, the nearest list, and waypoint creation. Sport/Horizon 10.1 Pilot’s Guide Rev. Preliminary... -
Page 26: Remote Radio Rack And Efis Shortcut Softkeys
Transponder shortcut – When com radio 1 is selected, a long-click of the device selector selects the transponder. EFIS Shortcut softkeys are provided instead of radio rack functions when the selector is not displayed. This is always the case when no radio rack devices are connected, or by Sport/Horizon 10.1 Pilot’s Guide Rev. Preliminary... - Page 27 Pressing the “KNOB” button selects the function for this knob, as shown in the next section. (The exact controls provided will vary with the capabilities of the remote radio you are Sport/Horizon 10.1 Pilot’s Guide Rev. Preliminary...
- Page 28 The knob function will return to normal (not volume or tuning) when the swap softkey is pressed or after a timeout period. This returns the right knob to the commonly used autopilot controls on the PFD, and Map options and shortcuts on the MAP page. Sport/Horizon 10.1 Pilot’s Guide Rev. Preliminary...
- Page 29 To force a re-boot, press and hold the outer left and outer right white softkeys at the same time to reboot the display unit. Since this action does not affect the Sport/Horizon 10.1 Pilot’s Guide Rev. Preliminary...
-
Page 30: The Settings Menu
A/P Maintenance menu page): • General Setup: Serial port assignments, units of measure, clock, data recording, etc… • Primary Flight Display: V-speed settings, PFD display preferences and G-meter settings. • Moving Map: Map symbol and features preferences. Sport/Horizon 10.1 Pilot’s Guide Rev. Preliminary... -
Page 31: Adjusting Individual Settings
2. Use either knob to scroll the cursor to the appropriate sub menu, and press the knob to select it and open the menu page. 3. Use the knob to scroll to the desired setting. Press the knob to select it. Sport/Horizon 10.1 Pilot’s Guide Rev. Preliminary... - Page 32 6. Press EXIT to exit the set menu page, CANCEL to abandon changes or MAIN to back up one menu. NOTE: In this and other GRT manuals, you will often see the above steps shortened and stylized, where > symbolizes a page, knob or softkey selection. Sport/Horizon 10.1 Pilot’s Guide Rev. Preliminary...
-
Page 33: Display
This is common with most softkeys, making it easy for new users to view selections without inadvertently altering the current EFIS settings. PFD and MAP options allow setting these views as desired. PFD Options Sport/Horizon 10.1 Pilot’s Guide Rev. Preliminary... - Page 34 • CHART – Chart type is set as follows: SEC (Sectionals), LO (Low Enroute Chart), HI (High Enroute Chart) • FIXES – Enables/Disable various fix types. See the “Moving Map Description” section below for more details. Sport/Horizon 10.1 Pilot’s Guide Rev. Preliminary...
-
Page 35: Split Screen Pfd View
Split-Screen PFD view includes map and engine data. It is commonly used in single-screen installations when map details are important, such as when navigating near airspace. Sport/Horizon 10.1 Pilot’s Guide Rev. Preliminary... -
Page 36: Full Screen Pfd View
An inset with map data is sufficient in most cases. The wide field-of-view provides a more natural “out the front window” sensation that many pilot find more comfortable. Sport/Horizon 10.1 Pilot’s Guide Rev. Preliminary... -
Page 37: Six Pack Pfd View
Here the background transparency is set to 10%, increasing the readability of the synthetic vision detail. This provides conventional instrumentation displays with the benefits of synthetic vision. Sport/Horizon 10.1 Pilot’s Guide Rev. Preliminary... - Page 38 DISPLAY (These settings are grouped together about 20 settings from the top of the menu.) When practice is completed, return these settings as desired. It is highly recommended that all PFD Set Menu items listed above be returned to “ON”, and synthetic vision be re-enabled. Sport/Horizon 10.1 Pilot’s Guide Rev. Preliminary...
-
Page 39: Full Screen Map View
Typically used in dual-screen installations, insets can be displayed on the map view if desired, as well as airspeed/altimeter tapes. A long click (holding the softkey for more than one second) of the “SCREEN” softkey easily swaps the view between the primary flight display and map view. Sport/Horizon 10.1 Pilot’s Guide Rev. Preliminary... -
Page 40: Map And Pfd Insets
Map range set using RNG softkeys . PFD Display – Allows for monitoring primary flight data from the moving map page. Runways and obstacles displayed (no terrain). Sport/Horizon 10.1 Pilot’s Guide Rev. Preliminary... - Page 41 Bar Graph A1-A6 on this set page. EGT/CHT HISTORY – Trends and unexpected changes are easy to observe. CHT time history shows if corrective actions to manage CHT on a climb are adequate. Sport/Horizon 10.1 Pilot’s Guide Rev. Preliminary...
- Page 42 ATC, tracking traffic nearby, and observing traffic before takeoff. Simple and clear. CHECKLIST – The “USE” softkey allows acknowledging the checklist items. This inset is one of the ENG/STAT options. Sport/Horizon 10.1 Pilot’s Guide Rev. Preliminary...
-
Page 43: Split Views Of Plates
GRT Avionics, Inc. September 2019 Split views of Plates Approach plates are displayed using the PFD/Plate or MAP/Plate selections. Sport/Horizon 10.1 Pilot’s Guide Rev. Preliminary... - Page 44 This provides softkeys to zoom in and out and rotate. The knobs allows moving the plate. Traffic may be overlaid on the plate. The “LIST” softkey selects the desired plate. Sport/Horizon 10.1 Pilot’s Guide Rev. Preliminary...
-
Page 45: Split Map/Engine View
EGT time history is shown in the engine strip along with traditional engine information. Although lacking redundancy for IFR flight, a single screen operated this way is an effective and efficient option. Sport/Horizon 10.1 Pilot’s Guide Rev. Preliminary... -
Page 46: Single Screen With An External Gps Navigator
Engine displays provided on the PFD, and via its insets (especially for EGT time history) make the engine displays on the map a pilot preference issue at most times. Sport/Horizon 10.1 Pilot’s Guide Rev. Preliminary... -
Page 47: Default Screen
In addition, the map becomes a source of conveniently extracting detailed information, such as frequencies and airport details, and ADS-B weather and traffic. Sport/Horizon 10.1 Pilot’s Guide Rev. Preliminary... - Page 48 This is why you will see EGT time history so prominent in our engine displays. Note: Cooling problems are not reflected in EGT data. CHT and oil temperature limits are effective tools to detecting over-heating conditions, as well a pilot observation of CHT trends during the climbs. Sport/Horizon 10.1 Pilot’s Guide Rev. Preliminary...
-
Page 49: Primary Flight Display Description
• Altimeter Tape with trend marker and sensitive baro setting. • Airspeed Tape with programmable V-speeds, color strips and trend marker. • Heading tape with heading bug. • Vertical Speed Indicator with programmable range, visual needle and digital readout. Sport/Horizon 10.1 Pilot’s Guide Rev. Preliminary... -
Page 50: Secondary Information On The Pfd
• Synthetic vision terrain, course ribbons and waypoint markers to make enroute navigation easy. • G-Meter programmable for individual aircraft limits. • Trim and flap indicators (optional trim/flap position sensor required). • Angle-of-Attack indicator. Sport/Horizon 10.1 Pilot’s Guide Rev. Preliminary... -
Page 51: Pfd View
GRT Avionics, Inc. September 2019 6.3 PFD View Overview Sport/Horizon 10.1 Pilot’s Guide Rev. Preliminary... -
Page 52: Central Elements
The traditional attitude “bars” or “wings” can be replaced by a “nose” indicator (shown on the following page). This small indicator allows slightly less obscuration of the synthetic vision terrain and is less prominent than the traditional bars. Sport/Horizon 10.1 Pilot’s Guide Rev. Preliminary... -
Page 53: Zenith And Nadir (+/- 90° Pitch Display)
During straight and level unaccelerated flight at the normal cruise power setting, the pitch ladder offset should be set so that the attitude reference index is aligned with the horizon line. This setting is made as follows: Sport/Horizon 10.1 Pilot’s Guide Rev. Preliminary... -
Page 54: Sky Pointer
Bank the airplane to align the Sky Pointer with the green triangle to maintain a standard- rate turn. Slip Indicator The slip indicator is an electronic version of the traditional ball inclinometer. It can be turned on and off under Set Menu > Primary Flight Display > Slip Indicator. Sport/Horizon 10.1 Pilot’s Guide Rev. Preliminary... -
Page 55: Flight Path Marker
The units of distance/speed are displayed below the digital readout. True airspeed (TAS) and GPS ground speed (GS) can be displayed within the empty areas of the airspeed tape using the “Show TAS in tape” and “Show GS in tape” in Sport/Horizon 10.1 Pilot’s Guide Rev. Preliminary... - Page 56 TAS limit as well. If a TAS Vne limit is provided, the EFIS can automatically display Vne as true airspeed by setting “Convert Vne from TAS to IAS” to YES on the PFD settings menu. Sport/Horizon 10.1 Pilot’s Guide Rev. Preliminary...
-
Page 57: Altimeter Tape
Altimeter Tape The Altimeter Tape displays altitude above mean sea level (MSL) in hundreds of feet or meters. Even thousands are depicted by a solid marker (either a circle, triangle or Sport/Horizon 10.1 Pilot’s Guide Rev. Preliminary... - Page 58 The difference should be used to alert you if you make a large error in the altimeter setting (for example, when off by a full inch of Hg), or when on the ground (where baro-alt and GPS elevation should be very close). Sport/Horizon 10.1 Pilot’s Guide Rev. Preliminary...
- Page 59 See Autopilot section of this manual for more information on coupled climbs and descents. 6.3.12.2 Altitude Deviation Alerts Sport/Horizon 10.1 Pilot’s Guide Rev. Preliminary...
-
Page 60: Vertical Speed Indicator
The top of the HSI will show “TRK” when it reverts to a ground track up mode. Track will be displayed when a magnetometer is not connected, or when the user setting, “Up-Reference,” is set to “Track.” Sport/Horizon 10.1 Pilot’s Guide Rev. Preliminary... - Page 61 CDI softkey on its first page of softkeys for selecting the navigation mode of the EFIS. Pressing this softkey will display all the available navigation sources. When a navigation source is selected, it will drive the HSI, selected track, and the appropriate cross-track Sport/Horizon 10.1 Pilot’s Guide Rev. Preliminary...
- Page 62 Most pilots find the flight director easier to use, with less workload and more precision when hand flying. For more information about the HSI, see “Horizontal Situation Indicator (HSI)” on page Sport/Horizon 10.1 Pilot’s Guide Rev. Preliminary...
-
Page 63: Gps Cross-Track Deviation Indicator (Cdi)
It consists of two main parts- a vector arrow with velocity and direction, and a headwind/crosswind component. At its simplest, it is an arrow with a velocity number next to it. The wind blows from tail to head. The velocity is given in the speed/distance units Sport/Horizon 10.1 Pilot’s Guide Rev. Preliminary... -
Page 64: G-Meter
G-Meter The G-meter measures the G-loading of the airplane based on forces measured by the accelerometers inside the AHRS. It is displayed to the right of the airspeed tape on the Sport/Horizon 10.1 Pilot’s Guide Rev. Preliminary... - Page 65 G-Meter Mode setting: a. Off: Does not display. Note that even when the G-Meter Mode is set to “OFF,” all G force data is recorded during data logging. b. On: Displays at all times. Sport/Horizon 10.1 Pilot’s Guide Rev. Preliminary...
- Page 66 G-Meter Caution specified by the airplane designer, use no more than Min/Max +2.5g, and no less than -1.0g (For example, use +2.0g and -0.8g). Auto-G-Meter Threshold +1.5g for maximum and -0.5g for minimum. Min/Max Sport/Horizon 10.1 Pilot’s Guide Rev. Preliminary...
-
Page 67: Flap And Trim Indicators
To change the direction of the Pitch Trim indication (UP on top or DOWN on top): 1. Press NEXT > Set Menu > General Setup. 2. Scroll to Elevator Trim Orientation and choose Down trim (D) at the top or UP trim (U) at the top. Sport/Horizon 10.1 Pilot’s Guide Rev. Preliminary... -
Page 68: Clock
The “measured” AOA source refers to use of the GRT AOA option with a dual port pitot probe. This method uses the two pressures from the pitot probe, and the static pressure, to measure the AOA. This method provides the most accurate and fastest responding AOA measurement. Sport/Horizon 10.1 Pilot’s Guide Rev. Preliminary... - Page 69 AOA indexer. The indexer will show a green circle, with no chevrons, when the angle-of-attack is in the optimal range for approach. The approach AOA indexer will not appear at low angles-of- attack. Sport/Horizon 10.1 Pilot’s Guide Rev. Preliminary...
- Page 70 3. Turn on the Pitch Limit Indicator if desired. NOTE: AOA must be calibrated before use. The AOA indexer and pitch limiter functions are inhibited until calibration has been performed, even if the EFIS Angle-of-Attack function has been enabled. Sport/Horizon 10.1 Pilot’s Guide Rev. Preliminary...
- Page 71 Calibration must be repeated if the AHRS mounting orientation is changed. 7. Enter Optimal AOA Multiplier value. The AOA indexer will show optimal AOA when the airplane’s speed is the multiplier value times the stall speed. A value of 1.4 is suggested. Sport/Horizon 10.1 Pilot’s Guide Rev. Preliminary...
-
Page 72: Synthetic Vision Features And Settings
The synthetic vision terrain database does NOT need to be periodically updated and is not downloadable from the GRT website. Contact GRT for support if you encounter any problems with the synthetic vision database or if you are flying in an area of the world Sport/Horizon 10.1 Pilot’s Guide Rev. Preliminary... -
Page 73: Terrain
• Press NEXT > SV > ON. Obstacles Towers and other obstacles in the 56-day Navigation Database are displayed on the PFD as either simple lines or chart-style graphic tower symbols. The same altitude color-coding as Terrain applies. Sport/Horizon 10.1 Pilot’s Guide Rev. Preliminary... -
Page 74: Runways
Although not recommended, the grid may be disabled. To disable the grid overlay (NOT recommended): 1. Press NEXT > Set Menu > Primary Flight Display. 2. Scroll to Synthetic Vision Grid Overlay and select OFF. Sport/Horizon 10.1 Pilot’s Guide Rev. Preliminary... -
Page 75: Traffic On Pfd View
Subsequent waypoint balloons in the flight plan are white. To turn on waypoint balloons: 1. Press NEXT > Set Menu > Primary Flight Display. 2. Scroll to Waypoint Balloons and select ON or OFF. Sport/Horizon 10.1 Pilot’s Guide Rev. Preliminary... -
Page 76: Course Ribbons
• Enroute HITS is turned ON in the Primary Flight Display set menu. • The airplane is on the active leg of a Sequence Mode flight plan with a defined beginning and ending waypoint. NOTE: The HITS boxes do not anticipate turns. Sport/Horizon 10.1 Pilot’s Guide Rev. Preliminary... - Page 77 Centerline course ribbons are shown here, along with enroute highway-in-the- sky boxes (SX software v. 10a and later). Note the traffic is still in view near the VSI, this time flying in the same direction. Sport/Horizon 10.1 Pilot’s Guide Rev. Preliminary...
-
Page 78: Moving Map Description
Magenta is the active leg; all others are white. See Flight Planning & Navigation. • Heading Bug Course Line: Green course line that appears when the EFIS is set to navigate in HDG mode. Sport/Horizon 10.1 Pilot’s Guide Rev. Preliminary... -
Page 79: Moving Map Database
(assuming magnetic heading is accurate). Sport/Horizon 10.1 Pilot’s Guide Rev. Preliminary... - Page 80 7.1.2.4 Recommended Range Settings The maximum range settings are made by accessing Set Menu > Moving Map. Sport/Horizon 10.1 Pilot’s Guide Rev. Preliminary...
- Page 81 Auto-declutter may not display nearby airports that could be important to be aware of in an emergency. For this reason, Auto-declutter should not be used unless another moving map is the primary source of navigation in the airplane. 7.1.2.6 Map Background Color Sport/Horizon 10.1 Pilot’s Guide Rev. Preliminary...
- Page 82 This setting colors the airport symbols of airports with METAR reports according to VFR, IFR and Marginal VFR flight conditions when there is an operating weather receiver on board and within data range. 7.1.2.8 Airplane Symbol Sport/Horizon 10.1 Pilot’s Guide Rev. Preliminary...
-
Page 83: Flying With The Moving Map
SCREEN > MAP OPTIONS > VIEW. Insets are selected via the inset softkey directly below them. Airspeed/Altimeter tapes are enabled/disabled on the SET MENU> MOVING MAP page. Arc View Arc View with insets on and airspeed/altimeter tapes on. Center View North-Up View Sport/Horizon 10.1 Pilot’s Guide Rev. Preliminary... -
Page 84: Grt Avionics, Inc. September
7.1.3.3 Showing Weather and Terrain The SHOW softkey lets the pilot choose one of several mapping data sets to display on the map. This setting affects all map screens, including those split with the PFD and engine pages. Sport/Horizon 10.1 Pilot’s Guide Rev. Preliminary... - Page 85 The SHADE option under the VIEW menu colors the map according to the terrain and the Topography Shading Color Key shown below. The base colors are enhanced by shadows in mountainous terrain to give the map texture and bring attention to the Sport/Horizon 10.1 Pilot’s Guide Rev. Preliminary...
- Page 86 In the screenshot on the previous page, the boundary of the Class D airport is yellow because the aircraft is on course to enter it. The dimensions of the airspace are noted inside the airspace boundary ring at the 2 O’Clock position. Sport/Horizon 10.1 Pilot’s Guide Rev. Preliminary...
- Page 87 Map details selection function (the right knob). 7.1.3.6 Map Symbology Symbols on the map other than airports and airspace are depicted in the following table. NOTE: U.S. state boundaries are thin white lines. Sport/Horizon 10.1 Pilot’s Guide Rev. Preliminary...
- Page 88 Only the portion of the runway usable for landing will be shown. Runways are shown with blue borders in their magnetic orientation. Hard surface runways are white and turf or soft runways are green. Sport/Horizon 10.1 Pilot’s Guide Rev. Preliminary...
- Page 89 The green line radiating eastward from the airplane symbol represents the heading bug, which was set up for a left base for Runway 36. Sport/Horizon 10.1 Pilot’s Guide Rev. Preliminary...
- Page 90 • Provide a continuous display of the range and bearing to points on the map, which is useful for position reports to ATC, when crossing bodies of water (use this to show the distance to point near the shore behind you), etc… Sport/Horizon 10.1 Pilot’s Guide Rev. Preliminary...
- Page 91 Map Shortcuts Pressing the right knob when on a full screen map page changes the softkeys to map shortcuts. This is an efficient way to do common map functions. There are two pages of shortcuts. Sport/Horizon 10.1 Pilot’s Guide Rev. Preliminary...
- Page 92 • By pressing WPT DETAILS softkey on the Map screen to see details about the active goto. This is an especially easy way to familiarize yourself with your destination waypoint when it is the direct-to or current goto. • From the nearest list by pressing the right knob. Sport/Horizon 10.1 Pilot’s Guide Rev. Preliminary...
- Page 93 Press the right knob to send the information shows up in the body of the Details page. frequency to a remotely-mounted radio or panel-mounted radio with serial input from the display unit. Sport/Horizon 10.1 Pilot’s Guide Rev. Preliminary...
- Page 94 GO TO or the softkey to create a Direct-To flight plan with the selected airport as the waypoint. 4. Press EXIT to exit the Flight Plan page and return to the PFD or Map screen. Sport/Horizon 10.1 Pilot’s Guide Rev. Preliminary...
- Page 95 Map Details Selector work just as they would on the normal Map screen. 7.1.3.15 Traffic Display The EFIS Map screen displays traffic targets if the aircraft is equipped to receive either TIS or ADS-B traffic information. Sport/Horizon 10.1 Pilot’s Guide Rev. Preliminary...
-
Page 96: Flight Planning And Navigation
Selection of the navigation mode is made on the first set of softkeys from either the PFD or Map pages by pressing the “CDI” softkey. The navigation mode selects the source of data that is used to provide steering information to the pilot on the PFD/Map pages, as Sport/Horizon 10.1 Pilot’s Guide Rev. Preliminary... - Page 97 If the EFIS is not configured for a second navigation radio (such as another SL30 or a GNS430), then the second VOR receiver within the SL30 is used to drive the VOR2 bearing pointer on the EHSI page. Sport/Horizon 10.1 Pilot’s Guide Rev. Preliminary...
-
Page 98: External Navigation Mode (Extern)
If a GPS nav mode is selected with no GPS flight plan specified by the GPS source, the GPS course may be set on the moving map page using the right knob. The EFIS will provide steering and autopilot/flight director commands to fly this ground track. Sport/Horizon 10.1 Pilot’s Guide Rev. Preliminary... -
Page 99: Loss Of Gps Position
Sport/Horizon 10.1 Pilot’s Guide Rev. Preliminary... - Page 100 If no GPS position is available, or no flight plan is provided by the selected GPS source, the EFIS will hold the airplane’s heading at the time of this loss and will annunciate the navigation mode as “GPS-HDG”, until the position or flight plan is restored. Sport/Horizon 10.1 Pilot’s Guide Rev. Preliminary...
-
Page 101: Internal Vs. External Flight Plans
(from the EFIS flight plan page), which will allow for the EFIS to control waypoint sequencing. Regardless of which flight plan is active, the moving map and PFD show the goto waypoint identifier, as well as range/bearing and time to this waypoint. Sport/Horizon 10.1 Pilot’s Guide Rev. Preliminary... -
Page 102: Flight Planning Terms
The GRT Remote app running on an android phone or tablet can be used to edit the sequence mode flight plan when connected to the EFIS. It may also be used to create Sport/Horizon 10.1 Pilot’s Guide Rev. Preliminary... -
Page 103: Direct-To Navigation
3. Press the right knob to select the “Details” page. 4. Press the softkey. 5. Press EXIT to go back to the Map screen. There should be a magenta line drawn from your present position to the new Direct-To waypoint. Sport/Horizon 10.1 Pilot’s Guide Rev. Preliminary... - Page 104 Press the right knob (“NEXT”) to move the cursor to the next letter in the identifier OR press the softkey under the next letter if it is in a different column to automatically move the cursor. Sport/Horizon 10.1 Pilot’s Guide Rev. Preliminary...
- Page 105 Often a flight plan will be created on the ground. Once in flight the pilot will wish to proceed to this waypoint starting from where they are now, not from where they were when the direct-to was selected on the ground. This is accomplished by resetting the direct-to. To accomplish this: Sport/Horizon 10.1 Pilot’s Guide Rev. Preliminary...
-
Page 106: Sequential Flight Plans
When the first waypoint in the flight plan is selected, the “Set Leg” selection will create a waypoint at the present position, and navigate from this origin to the first waypoint along this leg. Sport/Horizon 10.1 Pilot’s Guide Rev. Preliminary... - Page 107 (location where the Go Direct was selected) to the waypoint. The “Go Direct” is selected using the right knob by turning it to highlight “GO DIRECT” and pressing the knob. The origin can be reset by reselecting the “Go Direct.” Sport/Horizon 10.1 Pilot’s Guide Rev. Preliminary...
- Page 108 Copy: Overwrite current fli- before highlighted highlighted ght plan with external flight waypoint. leg. plan. Import: Import .GPX flight Switch to Exit screen Direct-To and activate plan from USB stick. flight plan. flight plan. Sport/Horizon 10.1 Pilot’s Guide Rev. Preliminary...
-
Page 109: External Flight Plans
The external GPS must be wired to the GRT Sport and designated as GPS1 or GPS2 when using an External Flight Plan source (Set Menu > General Setup page.) Copying the External Flight Plan into the Internal Flight Plan From the Flight Plan page: Sport/Horizon 10.1 Pilot’s Guide Rev. Preliminary... -
Page 110: Horizontal Situation Indicator (Hsi)
GPS, VOR or LOC. One or two bearing pointers are also included. A ground track indicator is included when GPS ground track is available to simplify compensation for cross-winds when following navigation radio sources. Sport/Horizon 10.1 Pilot’s Guide Rev. Preliminary... - Page 111 To view them as solid lines, go to Set Menu > Moving Map > Connect Bearing Pointers and select YES. To access the HSI from the Map page group: Press SCREEN > MAP OPTIONS and set the “SHOW” selection to HSI. Sport/Horizon 10.1 Pilot’s Guide Rev. Preliminary...
- Page 112 GRT Avionics, Inc. September 2019 Sport/Horizon 10.1 Pilot’s Guide Rev. Preliminary...
-
Page 113: Navigation Using Vor/Loc
• Turn the right knob on any MAP page, including the Map HSI page, to set the OBS course. Radios that use SL30 protocol can be set up so that the OBS knob on the radio face adjusts the OBS course on the EFIS. To set it up: Sport/Horizon 10.1 Pilot’s Guide Rev. Preliminary... -
Page 114: Vor/Loc Cdi Display Options On The Pfd
To setup: 1. Go to Set Menu > Primary Flight Display. “Scales” CDI presentation 2. Scroll to ILS Type and select “Needles” or “Scales.” Choose “Off” if deviation displays on the PFD are not desired. Sport/Horizon 10.1 Pilot’s Guide Rev. Preliminary... - Page 115 HITS boxes on the ILS, as shown here, scroll to ILS Inhibit of HITS and select “NO” (SAP must also be armed during ILS approach.) 4. See EFIS Setup Guide for more VOR/LOC CDI options. Sport/Horizon 10.1 Pilot’s Guide Rev. Preliminary...
-
Page 116: Autopilot, Flight Director And Navigation Mode Display
Autopilot/flight director modes are shown above the airspeed and altimeter tapes. If servos were installed, their status would be shown also. Sport/Horizon 10.1 Pilot’s Guide Rev. Preliminary... -
Page 117: Autopilot Mode And Target Selection
The autopilot controls shown here. The autopilot controls are displayed when the right knob is pressed from the PFD screen for all GRT EFIS models, allowing a mixture of GRT EFIS types while maintaining a common autopilot interface. Sport/Horizon 10.1 Pilot’s Guide Rev. Preliminary... -
Page 118: Selecting Autopilot Modes
LOC – Capture of the localizer will occur when valid and according to intercept angle LOC-REV – Capture of the localizer backcourse when valid and according to the intercept angle ILS – Capture of the glideslope will occur automatically after capture of the localizer. Sport/Horizon 10.1 Pilot’s Guide Rev. Preliminary... -
Page 119: Selecting Autopilot Targets
The right knob sets the selected altitude from the first autopilot menu. This altitude is also used for the altitude alerting function, and for display of the green arc on the map showing where you will be when you reach this altitude. Sport/Horizon 10.1 Pilot’s Guide Rev. Preliminary... -
Page 120: Second Autopilot Menu
The autopilot will immediately roll the airplane level and begin holding the current heading, while holding the current pitch attitude. This allows engaging the autopilot in a climb or descent. The autopilot shortcut menu is also displayed. Autopilot Shortcut Menu Sport/Horizon 10.1 Pilot’s Guide Rev. Preliminary... -
Page 121: Mode Display
Pending modes occur when the pilot has armed automatic capture of an approach, or when navigation data becomes unavailable, such as loss of VOR data when VOR mode has been selected. Sport/Horizon 10.1 Pilot’s Guide Rev. Preliminary... -
Page 122: Lateral Autopilot Mode And Target Annunciation
The EFIS maintained altitude hold and showed glideslope as pending. This technique for coupling to the glideslope is not recommended. The ARM feature should be used, or VNAV mode selected after the localizer is captured. Sport/Horizon 10.1 Pilot’s Guide Rev. Preliminary... -
Page 123: Color Coding
Cyan - Labels and bearing pointers associated with a secondary VHF radio if installed Black - Annunciator labels for items that are pending Magenta - Current GPS flight plan leg, steering bugs that are active based on the autopilot/flight director navigation mode, waypoint balloons Sport/Horizon 10.1 Pilot’s Guide Rev. Preliminary... -
Page 124: Remote Transponders
The transponder controls can be accessed by the radio rack selector, as described in section “5.2.4.1 Device Selector and its Shortcuts” on page 13. When the transponder is selected, its controls appear as shown below: Sport/Horizon 10.1 Pilot’s Guide Rev. Preliminary... - Page 125 • ON: The transponder will reply to radar interrogations but will not provide altitude encoding. • ALT: The transponder is active (will reply to radar interrogations) and will provide altitude encoding. Sport/Horizon 10.1 Pilot’s Guide Rev. Preliminary...
-
Page 126: Setting The Transponder Code
• 1200: Sets the squawk code to the VFR setting (this setting can be changed on the General Setup menu.) • IDENT: Activates the identification mode of the transponder. Setting the Transponder Code The transponder code is set by pressing the “CODE” softkey. The following menu will appear. Sport/Horizon 10.1 Pilot’s Guide Rev. Preliminary... -
Page 127: Transponder Display
When IDENT is active, the transponder mode will alternate between its mode and IDENT. If the transponder is not communicating with the EFIS, or indicating it has failed, the transponder display will be grayed out and overwritten with a red X. Sport/Horizon 10.1 Pilot’s Guide Rev. Preliminary... -
Page 128: Squawk And Mode Control From Multiple Display Units
• When a transponder’s RS-232 input is connected to two display units via a switch, the switch must be set to select the functioning display unit. • Redundant control of a transponder that uses RS-485 is not supported at this time. Sport/Horizon 10.1 Pilot’s Guide Rev. Preliminary... -
Page 129: Graphical Engine Monitoring
In addition to the typical engine monitoring functions, the EFIS includes several engine monitoring functions that are unique to GRT Avionics. These are based on our extensive experience in this area. They are described in the “Enhanced Engine Monitoring” functions section below. -
Page 130: Graphical Engine Monitoring Displays
Engine data is displayed in various forms on the full and split PFD pages, full map page, and the engine/map page as shown in the following figure. Insets may also be used to show specific groupings of engine data as described in “5.4.6 MAP and PFD Insets” on page 27. Sport/Horizon 10.1 Pilot’s Guide Rev. Preliminary... -
Page 131: Types Of Engine Displays
Strips – These provide a combination of data, including the databoxes, dials, and bar graphs, as well as some fixed displays. A vertical strip is available on the MAP page, and a horizonal on the PFD split page. Sport/Horizon 10.1 Pilot’s Guide Rev. Preliminary... - Page 132 Bar Graphs – Up to 12 bar graphs can be configured. Up to 4 databoxes are also definable for the PFD/Plate split page. These databoxes are configured via the SET MENU > Graphical Engine Monitoring > PFD/PLATE Box 1 thru PFD/PLAT Box 4 settings. Sport/Horizon 10.1 Pilot’s Guide Rev. Preliminary...
-
Page 133: Engine Monitoring Strip
(right to left, top to bottom) Bar Graphs A1-A6 Dials 1 thru 4 Status Box (replaced (top to bottom) by Bar Graphs B1-B6 if used) Statistics (Performance) data EGT/CHT Bar Graphs EGT Time History Sport/Horizon 10.1 Pilot’s Guide Rev. Preliminary... -
Page 134: Engine Display Elements
Set Menu > Graphical Engine Display page; they should be considered permanent mainstays of the Engine Page display. The Variable Group can be easily changed in flight by the pilot by pressing Next > Data. These pages are described in the previous sections. Sport/Horizon 10.1 Pilot’s Guide Rev. Preliminary... -
Page 135: Cht/Egt Tools
Something as subtle as a single spark plug failing in cruise (which results in only the slightest engine vibration) are easily discernable as that cylinder’s EGT increases as much as 50 degrees. In short, EGT/CHT time histories, exclusive to GRT Avionics, are the only practical way to detect a large variety of developing engine problems. - Page 136 EFIS for engine monitoring during the takeoff. In this screenshot all EGTs changed slightly about 1 minute ago. This was likely caused by pilot action, such as a small power change. Sport/Horizon 10.1 Pilot’s Guide Rev. Preliminary...
-
Page 137: Egt Increase And Decrease Alarms
We used and decrease limit of 20 degrees, but this is a tight limit that will result in false alarms when flying in turbulence where engine loads can fluctuate. Sport/Horizon 10.1 Pilot’s Guide Rev. Preliminary... -
Page 138: Fuel Efficiency And Management Tools
The goal of the configuring this dial is to scale it so that we can compare the totalizer and fuel levels easily. This is accomplished by first setting the “Fuel Flow MAX FUEL” setting to Sport/Horizon 10.1 Pilot’s Guide Rev. Preliminary... -
Page 139: Lean Assist
It then continually stores the highest EGT for each cylinder as the new peak EGT, and displays how far each cylinder is from this temperature. This is show as a negative number above each EGT bar graph. To use this function for leaning: Sport/Horizon 10.1 Pilot’s Guide Rev. Preliminary... -
Page 140: Fuel Flow, Totalizer And Fuel Level Displays
A manifold pressure is highly recommended to enable monitoring of percent power to ensure leaning is not attempted above 75% power, as most engine manufacturers warn against it. Fuel Flow, Totalizer and Fuel Level Displays Sport/Horizon 10.1 Pilot’s Guide Rev. Preliminary... - Page 141 The totalizer can be updated on the EIS engine monitor, or the EFIS display unit. If the EIS is mounted in the instrument panel, it should be used. This allows both the EIS and EFIS Sport/Horizon 10.1 Pilot’s Guide Rev. Preliminary...
- Page 142 Fuel level readings MUST BE USED by the pilot when managing fuel. Only when the totalizer and fuel levels agree should the pilot consider the totalizer’s estimate of fuel remaining when managing their fuel. Sport/Horizon 10.1 Pilot’s Guide Rev. Preliminary...
-
Page 143: Interval Alarm
We find the interval alarm essential for this purpose, and highly recommend use of this alarm. Engine Efficiency Measurement Using SFC Sport/Horizon 10.1 Pilot’s Guide Rev. Preliminary... - Page 144 Without the SFC being displayed, the only way to confirm that the engine is operating at max efficiency is to re-lean. With SFC, comparison of the SFC achieved after leaning to the current SFC indicates when re-leaning is necessary. With Fixed-Pitch Propellers: Sport/Horizon 10.1 Pilot’s Guide Rev. Preliminary...
-
Page 145: Percent Power
Entry of the Power Setting Table 1. Press NEXT > Set Menu > Engine Limits 2. Scroll to Engine Performance and press the knob to access the Engine Performance table. An example for a 180-horsepower Lycoming is shown below: Sport/Horizon 10.1 Pilot’s Guide Rev. Preliminary... - Page 146 This data is derived from the power setting chart.) Estimated horsepower value charts for common engines are also located on the GRT EIS Documentation web page. Use the engine manufacturer’s documentation whenever possible for the best accuracy. Sport/Horizon 10.1 Pilot’s Guide Rev. Preliminary...
-
Page 147: Gps/Vor/Ils Approaches
Use of the flight director during approach is recommended; it will force the “Scales” format for displaying raw lateral and vertical deviations from the VOR/ILS/GPS approach source. Sport/Horizon 10.1 Pilot’s Guide Rev. Preliminary... - Page 148 GRT Avionics, Inc. September 2019 Sport/Horizon 10.1 Pilot’s Guide Rev. Preliminary...
-
Page 149: Gps Approach
GPS can provide turn anticipation and guidance around course reversals. The approach GPS does not provide enough flight plan information to the EFIS to provide turn anticipation and course reversals. 12.3 NAV (Radio) Mode Sport/Horizon 10.1 Pilot’s Guide Rev. Preliminary... -
Page 150: Loc And Vor Course Pointer
The manual method requires the pilot to select the localizer navigation mode at the appropriate time and setting the autopilot/flight director mode. The localizer will be captured (if you are not already on it) in two different ways, depending on the autopilot mode. Sport/Horizon 10.1 Pilot’s Guide Rev. Preliminary... -
Page 151: Automatically Coupling To The Ils With The Arm Feature
The ARM function includes a "LOC-REV" selection. This selection is provided for flying outbound on the localizer front course or inbound on the localizer back course. The selection will reverse the sense of the LOC deviations displayed on the PFD/EHSI Sport/Horizon 10.1 Pilot’s Guide Rev. Preliminary... -
Page 152: Grt Avionics, Inc. September
Whether the course is set automatically or manually, the pilot should set the course 180° from the inbound front course. Sport/Horizon 10.1 Pilot’s Guide Rev. Preliminary... - Page 153 GPS, and the Lat A/P selection is “NAV”. ILS (or LOC) ARM will appear just below the navigation mode on the EFIS indicating localizer guidance will take over when suitable conditions exist. 12.3.5.1.1 Capturing the ILS with ARM Sport/Horizon 10.1 Pilot’s Guide Rev. Preliminary...
-
Page 154: Automatic Localizer Course Setting
50 nm from the present position, the EFIS will set the EHSI course to the inbound course for the closest localizer and generate the message “Course set to Localizer Inbound XXX.” Sport/Horizon 10.1 Pilot’s Guide Rev. Preliminary... -
Page 155: Vor Navigation Mode
45° until it is smoothly captured. Tracking of the radial will become somewhat unstable as the airplane nears, and then passes over, the VOR. When VOR data is lost, the autopilot will hold the last heading until VOR data returns. Sport/Horizon 10.1 Pilot’s Guide Rev. Preliminary... -
Page 156: Ils Approach Examples
GPS and engage the autopilot (the approach procedure will navigate the airplane to the localizer intercept). 2. Tune the ILS frequency on the nav receiver. 3. ARM “LOC” or “ILS.” Sport/Horizon 10.1 Pilot’s Guide Rev. Preliminary... -
Page 157: Vor Enroute To Localizer (Two Nav Receivers)
2. When near the localizer, set the Lat A/P mode to HDG. 3. Tune the localizer frequency. 4. Verify that the ILS inbound course is set correctly (the EFIS will attempt to set it for you). Manually set it on the EHSI page if necessary. Sport/Horizon 10.1 Pilot’s Guide Rev. Preliminary... -
Page 158: Back-Course With Loc-Rev Arm Feature
Unarmed ILS When the ILS has not been armed, the glideslope can be coupled by selecting a vertical autopilot mode of "VNAV." The EFIS will wait until the airplane is at or above the Sport/Horizon 10.1 Pilot’s Guide Rev. Preliminary... -
Page 159: Non-Precision Approaches-Stepping Down
• Redundant guidance during an ILS approach. The synthetic approach duplicates the ILS approach path using GPS and baro-altitude data. • Emergency backup to ILS receiver; the synthetic approach follows the same path as the ILS, which has assurances of obstacle clearance. Sport/Horizon 10.1 Pilot’s Guide Rev. Preliminary... -
Page 160: The Synthetic Approach Lateral Path
However, this will be overridden if the runway includes an ILS glideslope in the database. In this case, the vertical guidance will follow the ILS glideslope path. The pilot will be alerted to this by a message when the synthetic approach is armed. Sport/Horizon 10.1 Pilot’s Guide Rev. Preliminary... -
Page 161: Activating The Synthetic Approach
Sport/Horizon 10.1 Pilot’s Guide Rev. Preliminary... -
Page 162: Transitioning From Enroute To Synthetic Approach
HDG selection to turn the airplane onto the extended runway centerline. This will typically occur when the airplane is within 2.5° of the extended runway centerline and within 20 nm of the runway threshold. A message of “Synthetic Approach Captured” will Sport/Horizon 10.1 Pilot’s Guide Rev. Preliminary... -
Page 163: Step-By-Step Synthetic Approach Activation
Set the baro setting to what is being reported at the airport. DO NOT adjust the baro setting to zero the GPS altitude difference. The GPS altitude difference is provided to detect large baro setting errors ONLY. Sport/Horizon 10.1 Pilot’s Guide Rev. Preliminary... - Page 164 EFIS baro-altitude. This means incorrect altimeter settings and errors in the altimeter and static system will cause the vertical path to be inaccurate and could cause your descent path to intercept the ground at an unsafe location. Sport/Horizon 10.1 Pilot’s Guide Rev. Preliminary...
-
Page 165: Autopilot-Coupled Synthetic Approaches
• Reduce power when the airplane captures the glideslope to maintain a constant airspeed. • Expect that trimming may be required. • Monitor your approach path and speed. Disconnect the autopilot and abort the approach if any aspect of the approach becomes unsafe. Sport/Horizon 10.1 Pilot’s Guide Rev. Preliminary... - Page 166 GRT Avionics, Inc. September 2019 Sport/Horizon 10.1 Pilot’s Guide Rev. Preliminary...
- Page 167 GRT Avionics, Inc. September 2019 12.6.7.1.1 Capturing the Synthetic Approach Sport/Horizon 10.1 Pilot’s Guide Rev. Preliminary...
-
Page 168: When Is A Synthetic Approach Unavailable
When the EFIS navigation mode is LOC or ILS, the synthetic approach will still be based on GPS data (laterally), but its inbound course will be adjusted by up to +/- 1.5 degrees to more accurately match the localizer data. Sport/Horizon 10.1 Pilot’s Guide Rev. Preliminary... -
Page 169: Checklists
The checklist is created using any text editor, and creating a file named “checklist.txt”. A sample checklist is provided on the GRT Avionics website. The file has two elements, CHECKLIST and ITEM, and allows displaying current data using special %% codes as described below. - Page 170 While any checklist names may be used, an upcoming feature will require checklists with specific names to allow them to be displayed automatically. These names are: Checklist Names Pre-Start Startup Taxi Run-Up Takeoff Climb Lean Cruise Descent Initial Appr Final Appr Taxi/Shutdown Emergency Sport/Horizon 10.1 Pilot’s Guide Rev. Preliminary...
-
Page 171: Live Data In The Checklist
ENGINE 1 PERCENT POWER - %34% SELECTED COURSE - %80% EIS1 CHT 5 - %14% ENGINE 2 PERCENT POWER - %130% SELECTED ALTITUDE - %81% EIS1 CHT 6 - %15% RUDDER TRIM - %85% Sport/Horizon 10.1 Pilot’s Guide Rev. Preliminary... -
Page 172: Sample Checklist
A portion of the sample checklist is shown below. A text version of the full checklist may be downloaded from the GRT Avionics website. This example includes live data codes are included in this checklist to show fuel levels and totalizer. -
Page 173: Alarms, Alerting And Status
Coincident with the audio alerting and flashing warning light output, the EFIS shows the alarm condition on-screen. This will occur on any screen except a Set Menu screen. High-priority alarms will generate a flashing red annunciation. Lower priority alarms use yellow. Sport/Horizon 10.1 Pilot’s Guide Rev. Preliminary... -
Page 174: Acknowledging An Alarm
For example, the pilot may inhibit a CHT alarm for 15 minutes during the climb out when he may be devoting more attention to engine cooling and does not wish to be re-alerted. Sport/Horizon 10.1 Pilot’s Guide Rev. Preliminary... -
Page 175: Audio Alerting
Automatic Inhibiting After Takeoff To prevent nuisance audio alerts following takeoff, all audio alarms except those in the “Warning” category (see table below) are inhibited for the first minute after takeoff (on Sport/Horizon 10.1 Pilot’s Guide Rev. Preliminary... -
Page 176: Setting Up Audio Alerting
AOA to Stall AOA. Tone Repeats at 2 Hz Obstacle Warning “Obstacle” Warning Traffic “Traffic” Warning Autopilot Disconnect “Autopilot Disconnect” Warning (For Reasons Other Than Manual Disconnect) Max Oil Temperature “Oil Temperature” Caution Max CHT “Cylinder Head Caution Sport/Horizon 10.1 Pilot’s Guide Rev. Preliminary... -
Page 177: Status Page
The alarm conditions correspond to user alarms which are currently beyond limits and have been acknowledged by the pilot. Built-in-test messages provide information about the status of that display unit and all equipment connected to it. Sport/Horizon 10.1 Pilot’s Guide Rev. Preliminary... -
Page 178: Data Recording
Data is always added to the end of the “GRT Flight Data Log.CSV” file on the USB flash drive. 15.1 Recording a Screen Snapshot A Snapshot can be recorded as follows: 1. Go to SET MEN > General Setup. Sport/Horizon 10.1 Pilot’s Guide Rev. Preliminary... -
Page 179: Demo Recordings
Also places the start date and time in the DEMO filename in the format “DEMO-YYYYMMDD-HHMMSS.LOG” if the date and time are available. Otherwise, the file is named with a number only, starting with DEMO0000.LOG. Sport/Horizon 10.1 Pilot’s Guide Rev. Preliminary... -
Page 180: Starting And Saving Recordings Manually
File names will include the date and time in the name if this data was available to the EFIS. 15.2.3.2 Extracting Data for Review on a Spreadsheet Sport/Horizon 10.1 Pilot’s Guide Rev. Preliminary... - Page 181 GRT Avionics, Inc. September 2019 Download DECODE program from Avionics website (http://grtavionics.com/home/miscellaneous-software/). Open the program and use it to open the demo file. It will create a spreadsheet with all the data points. Sport/Horizon 10.1 Pilot’s Guide Rev. Preliminary...
-
Page 182: Automatic Demo Recordings
5 knots, RPM/N1 input is non-zero, fuel flow is non-zero. • USB FDL Record Interval (ms): Data samples are recorded within the EFIS at this interval: 200-30000 ms in steps of 200 ms. Default is 1000 ms (1000 ms = 1 second). Sport/Horizon 10.1 Pilot’s Guide Rev. Preliminary... -
Page 183: Legal Considerations Of Data Recording
Flight Data Log.csv and can be opened using any spreadsheet program. Legal Considerations of Data Recording Recorded data can be recovered and analyzed in the event of an accident. All GRT Avionics EFIS and EIS systems do not record any flight, engine or navigation information unless data recording has been specifically enabled, with the exception of engine hours and flight timer values. - Page 184 Sport/Horizon 10.1 Pilot’s Guide Rev. Preliminary...
- Page 185 GRT Avionics, Inc. September 2019 During troubleshooting, sometimes our techs find it useful if you can email us a copy of your settings file. Sport/Horizon 10.1 Pilot’s Guide Rev. Preliminary...
-
Page 186: Altimeter Calibration
3. Select Set Menu > Altimeter Calibration. 4. Using the left knob, highlight the Altimeter Calibration – OFF selection. 5. Toggle this to (Initiate)ON. Sport/Horizon 10.1 Pilot’s Guide Rev. Preliminary... -
Page 187: Full Altimeter Calibration - Using Air Data Test Set
(less than 200 feet) is observed with a zero correction at 30,000 feet. 11. Exit the calibration page by pressing the “SAVE” softkey. Sport/Horizon 10.1 Pilot’s Guide Rev. Preliminary... - Page 188 GRT Avionics, Inc. September 2019 Full calibration is complete. If necessary, the BIAS adjustment can be made without affecting the other corrections at any time. Sport/Horizon 10.1 Pilot’s Guide Rev. Preliminary...
-
Page 189: Typical Flight Efis (Read If You Don't Like Manuals!)
(See page 122.) As a side-note, I once discharged my battery significantly just before a night flight. Prior to takeoff I noted a battery voltage of only 12.9 volts, and 20 amps (instead of the normal Sport/Horizon 10.1 Pilot’s Guide Rev. Preliminary... -
Page 190: Takeoff
If I am taking off from someplace less familiar, or for some reason I expect a high workload after takeoff (such as taking off under class B airspace), I will enter my flight plan, and pre-set my selected altitude before takeoff. Sport/Horizon 10.1 Pilot’s Guide Rev. Preliminary... -
Page 191: Entering The Flight Plan
If I was on a sequenced flight plan and wished to go direct to the first waypoint (or any waypoint), I would highlight it with the knob (if needed) and select the “Go Direct”. Sport/Horizon 10.1 Pilot’s Guide Rev. Preliminary... -
Page 192: Climbing And Overheating
(not changing much). In my RV-6A with carbureted engine I can expect roughness to be felt when the first cylinder to peak drops only 10 or 15 degrees lean of peak (which is highlighted by a box around the EGT reading). The combination of the Sport/Horizon 10.1 Pilot’s Guide Rev. Preliminary... -
Page 193: Cruise Checks
METARs. For the nearest list of weather frequencies, that same press of the right knob that brings up the details selection also displays the map shortcut softkeys, one of which will be “NEAREST”. Press that softkey, select Sport/Horizon 10.1 Pilot’s Guide Rev. Preliminary... -
Page 194: You Do Use The Interval Timer, Right
(yikes!) I get distracted by traffic and whatever and forget to select the fullest tank before landing when I am near the airport. So I do it now as a precaution, and (hopefully) when I perform my landing checklist. 17.13 Descent Sport/Horizon 10.1 Pilot’s Guide Rev. Preliminary... -
Page 195: Landing
If the EFIS is indicating a tail wind on approach, re-check your choice of runway, as the headwind component is normally accurate. More than once I have changed runways when the EFIS showed I had a tailwind on approach, and it has always been correct! Sport/Horizon 10.1 Pilot’s Guide Rev. Preliminary... -
Page 196: Take It Home With You
I remove the USB memory stick and take it home to save it on my home computer. This gives me a long-term and detailed record of my airplane’s performance (and mine!). Sport/Horizon 10.1 Pilot’s Guide Rev. Preliminary...
Need help?
Do you have a question about the Horizon 10.1 and is the answer not in the manual?
Questions and answers