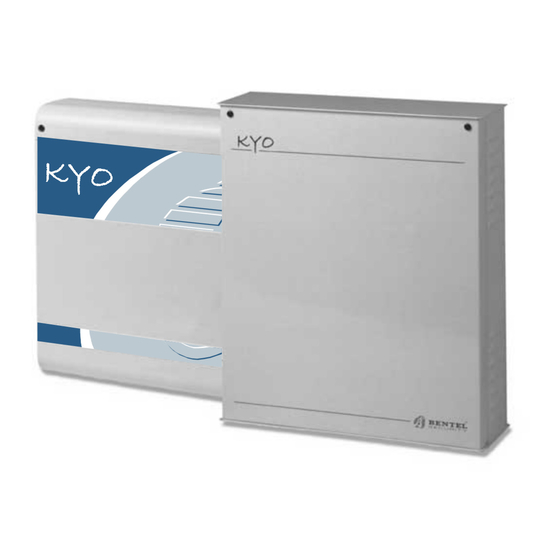
Bentel Security KYO 4 M Manual
Main unit
Hide thumbs
Also See for KYO 4 M:
- Installation manual (88 pages) ,
- User manual (52 pages) ,
- Programming manual (52 pages)
Table of Contents
Advertisement
Advertisement
Table of Contents

Related Manuals for Bentel Security KYO 4 M


Summary of Contents for Bentel Security KYO 4 M
- Page 1 Unit MAIN UNIT MANUAL ® MADE ITALY...
- Page 2 ® ® KYO 4 M – KYO 8 M – KYO 8W M – KYO 32 M – KYO 4 P – KYO 8 P – KYO 8W P – KYO 32 P KYO 8GWP-SW1 – KYO 8GWP-SW2 – KYO 8GWL-SW1 – KYO 8GWL-SW2 KYO 8G P-SW1 –...
-
Page 3: Table Of Contents
Section 2 - Identification of Components ......10 KYO 4 M — KYO 8 M — KYO 8W M — KYO 32 M ..........10 KYO 4 P — KYO 8 P — KYO 8W P — KYO 32 P ............ 11 KYO 8G P-SW1 —... - Page 4 ® ® Multifunction Control Panel Section 4 - Installing the Control Panel ......... 29 Mounting the Control Panel .................. 29 Opening and Closing the Control Panel ............... 30 Section 5 - Installing the NC2/VOX ......... 32 General Features ....................32 Additional VOX-REM Modules ................
-
Page 5: Section 1 - Introduction
(refer to Table 1.1). However, some features are included on certain models only, in such cases, the Control panel will be specified. 8 Programmable Input Zones (4 for KYO 4 M and KYO 4 P) Control Panel Expandable to 32 Input Zones via optional M-IN/6 Input Expanders (for... - Page 6 ® ® Multifunction Control Panel Auxiliary Open-Collector Outputs (OC): 3 x 150 mA for KYO 4, KYO 8, KYO 8W and KYO 32 series 5 x 500 mA for KYO 8 G, KYO 8 GW and KYO 32 G series Expandable to 14 x 150 mA Outputs for KYO 32 series Expandable to 16 x 150 mA Outputs for KYO 32 G series Metal box (Model M...
-
Page 7: About The System
Table 1.2 - Functional differences between Models Features Wireless Model Management Partition Input (Zone) O.C. Output KYO 4 M KYO 4 P 3 x 150 mA KYO 8 M KYO 8 P 3 x 150 mA KYO 8W M KYO 8W P... -
Page 8: Components And Accessories
® ® Multifunction Control Panel Components and Accessories T able 1.3 - C ompone nts and A cce ssory Item s C ode De scription K4 - K8 - K8W - K32 PCB for KYO 4, KYO 8, KY O8 W and KY O32 K8G - K8GW - K32G PCB for KY O 8 G, KY O 8 GW and KY O 32 G BOX-M... -
Page 9: Technical Specifications
® ® Section 1 - Introduction Technical Specifications Table 1.4 - Technical Specifications Control Panels Values KYO 4 M KYO 4 M KYO 4 M KYO 4 M KYO 4 P KYO 4 P KYO 4 P KYO 4 P... -
Page 10: Section 2 - Identification Of Components
The numbers in boldface in square brackets “[ ]”, in this and other Manuals relevant to this product, refer to the components described in this section. KYO 4 M — KYO 8 M — KYO 8W M — KYO 32 M 7 8 9a K YO 8 Fig. -
Page 11: Kyo 4 P - Kyo 8 P - Kyo 8W P - Kyo 32 P
® ® Section 2 - Identification of Components KYO 4 P — KYO 8 P — KYO 8W P — KYO 32 P K YO 8 Fig. 2.2 - KYO 32 Control panel complete with NC2/VOX Voice Board (accessory item) -
Page 12: Kyo 8G P-Sw1 - Kyo 8Gwp-Sw1 - Kyo 32G P-Sw1
® ® Multifunction Control Panel KYO 8G P-SW1 — KYO 8GWP-SW1 — KYO 32G P-SW1 Fig. 2.3 - KYO 32G P-SW1 Control panel complete with NC2/VOX Voice Board (accessory item) -
Page 13: Kyo 8G P-Sw2 - Kyo 8Gwp-Sw2 - Kyo 32G P-Sw2
® ® Section 2 - Identification of Components KYO 8G P-SW2 — KYO 8GWP-SW2 — KYO 32G P-SW2 Fig. 2.4 - KYO 32G P-SW2 Control panel complete with NC2/VOX (accessory item) -
Page 14: Kyo 8G L-Sw1 - Kyo 8Gwl-Sw1 - Kyo 32G L-Sw1
® ® Multifunction Control Panel KYO 8G L-SW1 — KYO 8GWL-SW1 — KYO 32G L-SW1 Fig. 2.5 - KYO 32G L-SW1 Control panel complete with NC2/VOX Voice Board (accessory item) -
Page 15: Kyo 8G L-Sw2 - Kyo 8Gwl-Sw2 - Kyo 32G L-Sw2
® ® Section 2 - Identification of Components KYO 8G L-SW2 — KYO 8GWL-SW2 — KYO 32G L-SW2 Fig. 2.6 - KYO 32G L-SW2 Control panel complete with NC2/VOX Voice Board (accessory item) - Page 16 ® ® Multifunction Control Panel Table 2.1 - Identification the Main Unit Parts Part Description Frontplate Screws (2) Locations (4) for backplate screws (Ø = 5 mm) Reverse locking PCB supports (see Figure 3.3) PCB location Tabs Locations (2) for PCB screws Arrester for BAQ35T12 Switching Power-Supply/Battery Charger 13 mm plastic support Terminal Board...
- Page 17 ® ® Section 2 - Identification of Components Table 2.2 - Identification of the Switching Power Supply Components Part Description Cable Tie Bases Mains Screw Terminal — for Mains and Earth General protection Fuse: F500MA - 250 Adhesive Label BAQ35T12 Switching Power Supply BAQ15T12 Switching Power Supply Mains LED (ON = Mains OK) Fine Adjustment Trimmer...
- Page 18 ® ® Multifunction Control Panel Table 2.3 - Identification of the NC2/VOX Components Part Description LOC-MIC Jumper: K (at Default) - NC2/VOX Microphone Enabled LOC-MIC Jumper: J - NC2/VOX Microphone Disabled REM-MIC Jumper: J (at Default) - VOX-REM Remote Microphone Disabled REM-MIC Jumper: K - VOX-REM Remote Microphone Enabled Terminal board for VOX-REM Module...
-
Page 19: Section 3 - Mounting The Components
® ® Section 3 - Mounting the Components 3 - M ECTION OUNTING THE OMPONENTS Introduction Please read this section to get an overall view of the steps involved in installing Control panels from the KYO Unit range. The end of the stranded conductor must not be soft soldered in places where it is subject to contact pressure. -
Page 20: Installing The Transformer And Mains Screw Terminal - Fused
® ® Multifunction Control Panel Installing the Transformer and Mains Screw Terminal - Fused The Transformer (see Fig. 3.1) package includes the following parts: 1 Mains Screw Terminal - Fused [19a] — 500 mA 1 Adhesive Label [19c] for the Mains Screw Terminal 1 x 12 cm Earth wire (Yellow-Green) with eyelet [13a] for earthing the Metal box or Transformer To install the Transformer (Order Code TRF), work carefully through the fol-... -
Page 21: Plastic Box (Box-P)
® ® Section 3 - Mounting the Components Plastic box (BOX-P) Stick the label [19c] onto the backplate (as shown in Fig. 3.1). Ensure that the 2 label holes correspond to the 2 holes on the backplate. Place the Mains Screw Terminal onto the screw location (Ø 2.5) then, using the Parker screw (3 x 14.2) secure it to the backplate. -
Page 22: Mounting K4-K8-K8W-K32 Pcbs
® ® Multifunction Control Panel Mounting K4-K8-K8W-K32 PCBs Please read this section to get an overall view of the steps involved in installing K4, K8, K8W and K32 PCBs in Metal and Plastic boxes. Metal box (BOX-M) For the following procedure, see Fig. 2.1. Insert the 4 reverse locking PCB supports [3a] into their locations on the backplate, then attach the PCB. -
Page 23: Installing 'G' Series Pcbs (K8G-K8Gw-K32G)
® ® Section 3 - Mounting the Components Installing ‘G’ series PCBs (K8G-K8GW-K32G) Please read the following instructions, to get an overall view of the steps involved in installing K8G, K8GW and K32G PCBs. “G” series PCBs can be installed in plastic boxes (BOX-P) and large metal boxes (BOX-L). Plastic box (BOX-P) For the following procedure, refer to Fig. -
Page 24: Installing The Switching Power Supply
® ® Multifunction Control Panel Installing the Switching Power Supply Please read the following instructions to get an overall view of the steps in- volved in installing Switching Power Supplies in ‘G’ series Control panels (i.e. Control panels with K8G, K8GW and K32G PCBs). Two Switching Power Supplies are available: SW1) BAQ 15T12 (1,5 A) SW2) BAQ 35T12 (3 A) -
Page 25: Installing Baq35T12 Switching Power Supplies
® ® Section 3 - Mounting the Components Installing BAQ35T12 Switching Power Supplies Plastic Box BOX-P To install a BAQ35T12 in a plastic box, work carefully through the following steps (see Fig. 2.4 and 3.5). Locate the BAQ35T12 onto its supports on the backplate. Ensure that the Switching Power Supply is secured firmly in place by the arrester [3d]. -
Page 26: Earthing The Pcb
® ® Multifunction Control Panel Earthing the PCB The PCB must be earthed by means of the Earth wire ([13a], [13b] or [13c]), in order to protect it from electrical surges from the Telephone Line, and comply with Safety Regulations. Marking Ticket Once you have assembled the components, specify the type of Control panel that you have constructed. -
Page 27: Connecting The Nc2/Vox Voice Board
® ® Section 3 - Mounting the Components If you are connecting a KST thermal probe to a Control panel with a BAQ15T12 Power Supply, ensure that the BAQ15T12 on-board Jumper [22b] is inserted. For further information, refer to the Insert in the KST package. Connecting the NC2/VOX Voice Board To install the NC2/VOX Voice Board, work carefully through the relevant steps (Metal box or Plastic box), and refer to Fig. -
Page 28: Pcb Identification Label
® ® Multifunction Control Panel CONTROL CONTROL CIRCUIT CIRCUIT BACKPLATE BACKPLATE (PCB) (PCB) GASKET [12] [12] Fig. 3.6 - Installing the NC2/VOX Voice board in Metal box (Left) or Plastic box (Right) PCB Identification Label The self-adhesive PCB Identification Label (supplied with the PCB) should be located on the frontplate, as shown in Fig. -
Page 29: Section 4 - Installing The Control Panel
® ® Section 4 - Installing the Control Panel 4 - I ECTION NSTALLING THE ONTROL ANEL Mounting the Control Panel The Control panel must be mounted in a safe, dry place, close to the placement of command devices (Keypads, Readers, etc.). Once you have selected a mounting location and created a layout, ensure that you will be able to connect the Mains and Telephone line. -
Page 30: Opening And Closing The Control Panel
® ® Multifunction Control Panel NOTE: In order to comply with the Safety Regulations in force, this device must be protected against electrical surges (e.g. from the Telephone Line), therefore, it must be properly connected to the Mains Earth line. The warranty does not cover damage to the PCB caused by non-connection, or improper connection to a faulty Mains Earth line. - Page 31 ® ® Section 4 - Installing the Control Panel Table 4.1 - Description of the Terminals PCB Terminals Voltage Current Description Max. (A) K8G - K8GW - K32G K4 - K8 - K8W - K32 1-2-3-4 Terminals for the BPI Device connections 13.8 [+][C][R][-] (Keypads, Readers, Expander, etc.)
-
Page 32: Section 5 - Installing The Nc2/Vox
® ® Multifunction Control Panel 5 - I NC2/VOX ECTION NSTALLING THE The NC2/VOX Voice Board (Accessory Item) will allow you to record and send Voice messages to the programmed Telephone numbers. For the installa- tion instructions refer to Section 3 under ‘NC2/VOX’. General Features Voice synthesizer —... -
Page 33: Record / Play Messages
® ® Section 5 - Installing the NC2/VOX NC2/VOX Jumper NOTE: If you connect a VOX-REM Module, you must set the jumpers on the Settings NC2/VOX as follows: LOC-MIC Open ( REM-MIC Closed ( LOC-SP Open ( REM-SP Closed ( G G - The NC2/VOX supports up to 4 additional VOX-REM Modules. -
Page 34: Selecting Messages
® ® Multifunction Control Panel Table 5.1 - Selecting the Message Message No. Length 15 sec 15 sec 15 sec 15 sec 7 sec 7 sec 7 sec 7 sec LED 1 LED 2 LED 3 LED 4 Selecting Messages The Voice Board can record up to 8 Alarm messages. -
Page 35: Programming
® ® Section 5 - Installing the NC2/VOX Programming Proper operation of the NC2/VOX Voice Board depends on Telephone and the Events pages (refer to ‘Programming from PC’ in the ‘INSTALLATION MANUAL’). Activation Fig. 5.2 shows the various phases of the Alarm call procedure. If a message- related event occurs, the Control panel will perform the following actions: 1. - Page 36 ® ® BENTEL SECURITY S.r.l. - C.da Ravigliano, Z.I. S. Scolastica - 64013 CORROPOLI - TE - ITALY Tel.: +39 0861 839060 - Fax: +39 0861 839065 E-mail: info@bentelsecurity.com - http://www.bentelsecurity.com ISTUCBLEUNKYO 2.0 231104 P70...
Need help?
Do you have a question about the KYO 4 M and is the answer not in the manual?
Questions and answers