
Related Manuals for KCI PREVENA PLUS Series


Summary of Contents for KCI PREVENA PLUS Series
- Page 1 PREVENA PLUS™ INCISION MANAGEMENT SYSTEM PREVENA PLUS™ CUSTOMIZABLE™ DRESSING WITH SENSAT.R.A.C.™ TECHNOLOGY INSTRUCTIONS FOR USE FOR CLINICIANS ONLY Rx Only...
- Page 2 Information in this publication may be subject to change at any time. Contact KCI for updates.
-
Page 3: Table Of Contents
Battery Charging................................. 25 Canister Removal and Replacement ........................... 27 Using the PREVENA PLUS™ Dressing with KCI V.A.C.® Therapy Units............... 27 Connecting the PREVENA PLUS™ Dressing to V.A.C.® Therapy Units ............ 27 Setting Negative Pressure on the V.A.C.® Therapy Units ................28 Alarm Resolutions .............................. - Page 4 Sleeping ..................................28 Showering and Bathing ............................29 Strenuous Activity ..............................29 Cleaning ..................................29 Dressing Removal ................................29 Warnings and Important Information for Users - PREVENA PLUS™ 125 Therapy Unit ......30 Customer Contact Information ............................. 31 PREVENA PLUS™ Therapy System Specifications ....................31 PREVENA PLUS™...
-
Page 5: Product Description And Indication For Use
The system consists of: A PREVENA™ Dressing and a source of negative pressure, which may be one of the following KCI therapy units: •... -
Page 6: Optimum Use Conditions
OPTIMUM USE CONDITIONS For maximum benefit the PREVENA PLUS™ Incision Management System should be applied immediately post surgery to clean surgically closed wounds. It is to be continuously applied for a minimum of two days up to a maximum of seven days. It can transition home with the patient. The PREVENA PLUS™... -
Page 7: Precautions
Failure to remove the dressing may inhibit transmission of electrical energy and/ or patient resuscitation. Magnetic Resonance Imaging (MRI): All KCI Therapy Units, including the PREVENA PLUS™ 125 Therapy Unit, are MR unsafe. Do not take therapy units into the MR environment. The PREVENA PLUS™... -
Page 8: Prevena Plus™ Incision Management System Dressings
Circumferential Dressing Application: Avoid applying the PREVENA PLUS™ Dressing circumferentially. In cases where the clinician determines that the benefits of applying the PREVENA PLUS™ Dressing circumferentially outweigh the risk of circulatory compromise, extreme care should be taken not to stretch or pull the dressing when securing it. Attach the dressing loosely and stabilize edges with an elastic wrap if necessary. -
Page 9: Prevena Plus™ Incision Management System Site Preparation
PREVENA PLUS™ INCISION MANAGEMENT SYSTEM SITE PREPARATION 1. Prior to surgery, shave or clip the surgical area where the dressing will be applied to improve dressing adhesion and seal integrity. 2. Gather all items needed for application: • sterile wound cleaning solution, e.g. water, saline or alcohol •... -
Page 10: Prevena Plus™ Incision Management System With Prevena Plus™ Customizable™ Dressing Components
Sealing Strips - used to create a continuous adhesive seal around the PREVENA PLUS™ CUSTOMIZABLE™ Dressing KCI Drapes - used to cover dressing and provide a seal for negative pressure Ruler - used to measure incision before cutting. The removable label may be used as needed to record date of dressing application or removal. -
Page 11: Prevena Plus™ Customizable™ Dressing Applications
• linear incisions • non-linear incisions • intersecting incisions The following figures show completed dressing applications using the PREVENA PLUS™ CUSTOMIZABLE™ Dressing, KCI Drape and SENSAT.R.A.C.™ Pad. Linear Incision Non-linear Incision Intersecting Incision Dressing Application Dressing Application Dressing Application WARNING: DO NOT use with V.A.C. VERAFLO™ Therapy (Instillation) provided by the V.A.C.ULTA™... -
Page 12: Dressing Application For Linear Incisions
DRESSING APPLICATION FOR LINEAR INCISIONS CAUTION: If the dressing covers the umbilicus, the umbilicus must first be fully filled with an anti-microbial petroleum gauze prior to dressing application. 1. Open the sterile dressing package, remove and unfold foam dressing using aseptic technique. Do not use if package has been torn or the sterile seal has been compromised. - Page 13 6. With sealing strips applied, position the foam dressing until the adhesive seal and white fabric are facing down. 7. Center the foam dressing over the incision/surgical closure. Ensure the adhesive seal and white fabric are facing down. 8. Press down around the length of the adhesive seal to ensure adhesion to the skin.
-
Page 14: Dressing Application For Non-Linear Incisions
DRESSING APPLICATION FOR NON-LINEAR INCISIONS CAUTION: If the dressing covers the umbilicus, the umbilicus must first be fully filled with an anti-microbial petroleum gauze prior to dressing application. 1. Open the sterile dressing package, remove and unfold foam dressing using aseptic technique. Do not use if package has been torn or the sterile seal has been compromised. -
Page 15: Dressing Application For Intersecting Incisions
6. With sealing strips applied, position the foam dressing until the adhesive seal and white fabric are facing down. NOTE: It is acceptable if sealing strips cover the incision line. 7. Place the foam dressing over the incision/surgical closure. Ensure the adhesive seal and white fabric are facing down. -
Page 16: Drape Application
3. With adhesive side down, apply KCI Drape over foam and onto intact skin. Ensure KCI Drape covers a minimum of 1.2 in (3 cm) of intact periwound skin. 4. Lift the drape at both ends and remove the two remaining end sections of layer 1. - Page 17 7. Add additional drape as needed to cover foam dressings in various configurations, as shown. • Smooth KCI Drape to remove creases and seal joints ensuring an occlusive seal. • All liners must be removed before additional drape is used.
-
Page 18: Sensat.r.a.c.™ Pad Application
4. Connect to the therapy unit. For connection to the PREVENA PLUS™ 125 Therapy Unit, see the Connecting the Dressing to PREVENA PLUS™ 125 Therapy Unit section. For connection to other KCI V.A.C.® Therapy Units, see the Connecting the PREVENA PLUS™ Dressing with V.A.C.® Therapy Units section. -
Page 19: Prevena Plus™ Canister Installation
CONNECTING THE DRESSING TO THE PREVENA PLUS™ 125 THERAPY UNIT For connecting to other KCI V.A.C.® Therapy Units, see the Using the PREVENA PLUS™ Dressing with KCI V.A.C.® Therapy Units section. 1. Connect the SENSAT.R.A.C.™ Pad tubing to the PREVENA PLUS™... -
Page 20: Beginning Therapy
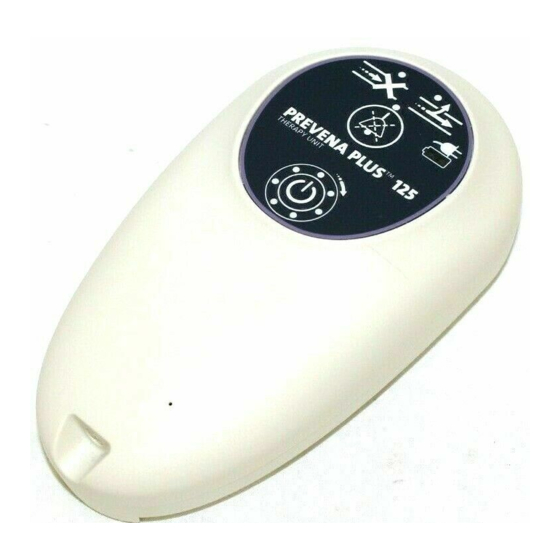
BEGINNING THERAPY Leak Alert Blockage Alert Power Connected Alert Mute Button Battery Level On/Off Therapy Life Button Indicator 1. Ensure the PREVENA PLUS™ Dressing has been applied as described in the PREVENA PLUS™ CUSTOMIZABLE™ Dressing Application section. 2. To begin therapy, press and hold center of the On/Off button for three seconds. -
Page 21: Unit Troubleshooting
UNIT TROUBLESHOOTING If the PREVENA PLUS™ 125 Therapy Unit will not power on, make sure batteries are charged (see Battery Charging section). If the therapy unit still will not turn on, contact KCI. THERAPY LIFE INDICATORS 1 Day... -
Page 22: Duration Of Prevena Plus™ Therapy
DURATION OF PREVENA PLUS™ THERAPY • Therapy should be continuous for a minimum of two days up to a maximum of seven days. NOTE: The PREVENA PLUS™ 125 Therapy Unit will automatically time-out after seven days of therapy. • Patients should be instructed to contact their treating physician and not to turn therapy off unless: º... - Page 23 The therapy unit will sound audible and display visual alerts as follows: Alert Type ID and Resolution • A solid yellow LED above the blockage symbol will turn on. Blockage Alert • Audible blockage alert will sound two beeps repeating every 15 seconds.
-
Page 24: Correcting A Leak Condition
2. Use fingers to smooth out any creases or wrinkles. 3. Use excess KCI Drape along the outer edge of drape to seal leaks. CHECK CANISTER TUBING CONNECTION 1. Ensure canister is securely locked onto the therapy unit. When canister is installed, a distinct click will be heard indicating it has been properly installed. -
Page 25: Indications That A Leak Condition Has Been Corrected
INDICATIONS THAT A LEAK CONDITION HAS BEEN CORRECTED NOTE: Upon correcting a leak condition, a small delay will occur before the therapy unit senses the correction and silences the alerts. The therapy unit will continue the alert until condition is corrected. When leak condition has been corrected, audible alerts will stop, and visual alerts will turn off. - Page 26 When the PREVENA PLUS™ 125 Therapy Unit is plugged into a power supply, the Power Connected icon turns yellow, indicating power is connected and system is charging. The icon will turn green when fully charged. NOTE: Upon receipt, the PREVENA PLUS™ 125 Therapy Unit battery may not be fully charged.
-
Page 27: Canister Removal And Replacement
10. Turn therapy on. NOTE: Dispose of used canister according to institution and local environmental regulations. USING THE PREVENA PLUS™ DRESSING WITH KCI V.A.C.® THERAPY UNITS When directed by the treating physician, PREVENA PLUS™ Dressings can be used with negative pressure wound therapy provided by ACTIV.A.C.™, V.A.C. -
Page 28: Setting Negative Pressure On The V.a.c.® Therapy Units
ALARM RESOLUTIONS KCI V.A.C.® Therapy Unit alarms should be addressed in a timely manner. Refer to the appropriate therapy unit user manual for complete information on alarm resolutions. Refer to the Correcting a Leak Condition section for correcting a leak in the dressing. -
Page 29: Showering And Bathing
SHOWERING AND BATHING • Do not use the PREVENA PLUS™ 125 Therapy Unit while bathing/showering or where it can fall or be pulled into a tub, shower or sink. • Do not reach for a product that has fallen into water. Unplug the unit immediately if plugged into an electrical source. -
Page 30: Warnings And Important Information For Users - Prevena Plus™ 125 Therapy Unit
WARNINGS AND IMPORTANT INFORMATION FOR USERS - PREVENA PLUS™ 125 THERAPY UNIT In order for KCI products to perform properly, KCI recommends the following conditions. Failure to comply with these conditions will void any applicable warranties. • Use this product only in accordance with these instructions and applicable product labeling. -
Page 31: Customer Contact Information
CUSTOMER CONTACT INFORMATION For questions regarding this product, supplies, maintenance or additional information about KCI products and services, please contact KCI or a KCI authorized representative, or: In the US call 1-800-275-4524 or visit www.acelity.com Outside the US visit www.kci-medical.com KCI USA, Inc. -
Page 32: Prevena Plus™ 125 Therapy Unit Electromagnetic Compatibility
PREVENA PLUS™ 125 THERAPY UNIT ELECTROMAGNETIC COMPATIBILITY The following are guidance and manufacturer’s declarations regarding EMC for the PREVENA PLUS™ 125 Therapy Unit. • The PREVENA PLUS™ 125 Therapy Unit needs special precautions regarding EMC and needs to be installed and put into service according to the EMC information provided in the following pages. WARNING: This equipment is intended for use by healthcare professionals only. - Page 33 Table 201 Guidance and Manufacturer’s Declaration - Electromagnetic Emissions The PREVENA PLUS™ 125 Therapy Unit is intended for use in the electromagnetic environment specified below. The customer or the end user of the PREVENA PLUS™ 125 Therapy Unit should assure that it is used in such an environment.
- Page 34 Table 202 Guidance and Manufacturer’s Declaration - Electromagnetic Immunity The PREVENA PLUS™ 125 Therapy Unit is intended for use in the electromagnetic environment specified below. The customer or the end user of the unit should assure it is used only in such an environment. Immunity Test IEC 60601 Test Level Compliance Level...
- Page 35 Table 204 Guidance and Manufacturer’s Declaration - Electromagnetic Immunity The PREVENA PLUS™ 125 Therapy Unit is intended for use in the electromagnetic environment specified below. The customer or the end user of the unit should assure it is used in such an environment. Immunity Test IEC 60601 Compliance Level...
- Page 36 Table 205 Guidance and Manufacturer’s Declaration - Electromagnetic Immunity Test Band Service Modulation Maximum Distance Immunity Test Frequency (MHz) Power Level (MHz) (V/m) Pulse modulation 380 - 390 TETRA 400 18 Hz GMRS 460, ±5 kHz deviation 430 - 470 FRS 460 1 kHz sine LTE Band...
-
Page 37: Included Power Supplies
Table 206 Recommended separation distances between portable and mobile RF communications equipment and the PREVENA PLUS™ 125 Therapy Unit The PREVENA PLUS™ 125 Therapy Unit is intended for use in an electromagnetic environment in which radiated RF disturbances are controlled. The customer or the user of the PREVENA PLUS™ 125 Therapy Unit can help prevent electromagnetic interference by maintaining a minimum distance between the portable and mobile RF communications equipment (transmitters) and the unit as recommended below, according to the maximum output power of the communications equipment. -
Page 38: Bibliography Of Published Studies
BIBLIOGRAPHY OF PUBLISHED STUDIES • Atkins BZ, et al. “Does Negative Pressure Wound Therapy Have a Role in Preventing Poststernotomy Wound Complications?” Surgical Innovations. 2009 June 16(2):140-6. • Atkins BZ, et al. “Laser Doppler flowmetry assessment of peristernal perfusion after cardiac surgery: beneficial effect of negative pressure therapy. - Page 39 • Mark KS, et al. “Incisional Negative Pressure Therapy to Prevent Wound Complications Following Cesarean Section in Morbidly Obese Women: A Pilot Study. ” Surgical Innovations 2013 September 20. • Masden D, Goldstein J, Endara M, Xu K, Steinberg J, Attinger C. “Negative pressure wound therapy for at-risk surgical closures in patients with multiple comorbidities: a prospective randomized controlled study.
- Page 40 All trademarks designated herein are proprietary to KCI Licensing, Inc., its affiliates and/or licensors. Copyright 2018 KCI Licensing, Inc. All rights reserved. 418148 Rev A 4/2018...
- Page 41 SYSTÈME DE PRISE EN CHARGE DES INCISIONS PREVENA PLUS™ PANSEMENT PREVENA PLUS™ CUSTOMIZABLE™ DOTÉ DE LA TECHNOLOGIE SENSAT.R.A.C.™ MODE D’EMPLOI RÉSERVÉ AUX CLINICIENS Rx Only...
- Page 42 ÉCRITE OFFERTE PAR KCI DOIT ÊTRE EXPRESSÉMENT STIPULÉE DANS CE DOCUMENT OU INCLUSE AVEC LE PRODUIT. KCI NE PEUT EN AUCUN CAS ÊTRE TENU RESPONSABLE DE TOUS DOMMAGES ET FRAIS INDIRECTS, ACCIDENTELS OU CONSÉCUTIFS, Y COMPRIS EN CAS DE DOMMAGES MATÉRIELS OU DE BLESSURES DE TIERS, RÉSULTANT EN PARTIE OU EN TOTALITÉ...
- Page 43 Chargement de la batterie .............................. 65 Retrait et remplacement du réservoir ......................... 67 Utilisation du pansement PREVENA PLUS™ avec les appareils de thérapie V.A.C.® de KCI ...... 67 Raccordement du pansement PREVENA PLUS™ aux appareils de thérapie V.A.C.® ......67 Réglage de la pression négative sur les appareils de thérapie V.A.C.®...
- Page 44 Douche et bain ................................. 69 Activité soutenue ..............................69 Nettoyage ................................... 69 Retrait du pansement ............................... 69 Mises en garde et informations importantes à l’attention des utilisateurs de l’appareil de thérapie PREVENA PLUS™ 125 ................................. 70 Nous contacter ..................................71 Caractéristiques du système de thérapie PREVENA PLUS™...
-
Page 45: Description Du Produit Et Indication D'utilisation
Appareil de thérapie V.A.C. SIMPLICITY™ Des études cliniques ont été menées sur les systèmes de prise en charge des incisions par pression négative KCI. Consulter la bibliographie des études publiées au dos de ce guide. INFORMATIONS IMPORTANTES À L’ATTENTION DES UTILISATEURS MISE EN GARDE : NE PAS utiliser avec la thérapie V.A.C. -
Page 46: Conditions D'utilisation Optimales
CONDITIONS D’UTILISATION OPTIMALES Pour une action optimale, le système de prise en charge des incisions PREVENA PLUS™ doit être appliqué immédiatement après l’intervention pour nettoyer les plaies chirurgicalement fermées. Il doit être appliqué en continu pendant une durée minimale de deux jours et une durée maximale de sept jours. Le traitement peut être poursuivi au domicile du patient. -
Page 47: Précautions
Le pansement peut empêcher la transmission du courant électrique et/ou la réanimation du patient. Imagerie par résonance magnétique (IRM) : aucun des appareils de thérapie KCI, y compris l'appareil de thérapie PREVENA PLUS™ 125, n'est protégé contre le champ magnétique de la RM. Ne pas introduire l’appareil de thérapie dans un environnement de RM. -
Page 48: Pansements Du Système De Prise En Charge Des Incisions Prevena Plus
Application d’un pansement circonférentiel : éviter d’appliquer le pansement PREVENA PLUS™ de forme circonférentielle. Si le clinicien estime que les avantages de l’application du pansement PREVENA PLUS™ de forme circonférentielle sont plus importants que le risque d’insuffisance circulatoire, des précautions extrêmement strictes doivent être prises pour ne pas tendre ou étirer le pansement lors de sa mise en place. -
Page 49: Système De Prise En Charge Des Incisions Prevena Plus™ : Préparation Du Site
SYSTÈME DE PRISE EN CHARGE DES INCISIONS PREVENA PLUS™ : PRÉPARATION DU SITE 1. Avant l’intervention, raser ou tondre la zone chirurgicale sur laquelle le pansement sera appliqué afin d’améliorer l’adhérence et l’étanchéité du pansement. 2. Rassembler tous les éléments nécessaires à la pose du pansement : •... -
Page 50: Système De Prise En Charge Des Incisions Prevena Plus™ Avec Éléments Du Pansement Prevena Plus™ Customizable
Bandes d’étanchéité : permettent d’assurer une étanchéité adhésive continue autour du pansement PREVENA PLUS™ CUSTOMIZABLE™. Films adhésifs KCI : utilisés pour recouvrir le pansement et assurer l’étanchéité nécessaire à l’application d’une pression négative. Réglette : permet de mesurer l’incision avant de découper le pansement. -
Page 51: Application Du Pansement Prevena Plus™ Customizable
• incisions en T ou en X. Les figures ci-après illustrent les applications de pansement réalisées avec le pansement PREVENA PLUS™ CUSTOMIZABLE™, le film adhésif KCI et le tampon SENSAT.R.A.C.™. Incision linéaire Incision non linéaire Incision en T ou en X... -
Page 52: Application Du Pansement Sur Une Incision Linéaire
APPLICATION DU PANSEMENT SUR UNE INCISION LINÉAIRE ATTENTION : Si le pansement recouvre l’ombilic, ce dernier doit d’abord être complètement rempli avec une gaze anti-microbienne imprégnée de vaseline avant l’application du pansement. 1. Ouvrir l’emballage stérile du pansement, enlever et déplier le pansement en mousse en utilisant une technique aseptique. - Page 53 6. Une fois les bandes d’étanchéité appliquées, positionner le pansement en mousse afin que le joint adhésif et le tissu blanc soient orientés vers le bas. 7. Placer le pansement en mousse au centre de l’incision/de la fermeture chirurgicale. S’assurer que le joint adhésif et le tissu blanc sont orientés vers le bas.
-
Page 54: Application Du Pansement Sur Une Incision Non Linéaire
APPLICATION DU PANSEMENT SUR UNE INCISION NON LINÉAIRE ATTENTION : Si le pansement recouvre l’ombilic, ce dernier doit d’abord être complètement rempli avec une gaze anti-microbienne imprégnée de vaseline avant l’application du pansement. 1. Ouvrir l’emballage stérile du pansement, enlever et déplier le pansement en mousse en utilisant une technique aseptique. -
Page 55: Application Du Pansement Sur Une Incision En T Ou En X
• Retirer la pellicule de protection restante de la bande d’étanchéité. Réitérer l’application de la bande à l’autre extrémité du pansement en mousse. 6. Une fois les bandes d’étanchéité appliquées, positionner le pansement en mousse afin que le joint adhésif et le tissu blanc soient orientés vers le bas. -
Page 56: Application Du Film Adhésif
Le film adhésif KCI doit être maintenu par les deux barres de manipulation bleues. 3. En orientant le côté adhésif vers le bas, appliquer le film adhésif KCI de manière à ce qu’il recouvre la mousse et la peau intacte. S’assurer que le film adhésif KCI couvre au minimum 3 cm (1,2 po) de peau... - Page 57 • Lisser le film adhésif KCI afin d’éliminer les plis éventuels et d’assurer l’étanchéité au niveau des bords, pour une étanchéité occlusive. • Avant toute utilisation de film adhésif supplémentaire, toutes les pellicules de protection doivent être retirées.
-
Page 58: Application Du Tampon Sensat.r.a.c
PREVENA PLUS™ 125, consulter la section Raccordement du pansement à l’appareil de thérapie PREVENA PLUS™ 125. Pour un raccordement à d’autres appareils de thérapie V.A.C.® de KCI, se reporter à la section Raccordement du pansement PREVENA PLUS™ aux appareils de thérapie V.A.C.®. -
Page 59: Installation Du Réservoir Prevena Plus
RACCORDEMENT DU PANSEMENT À L’APPAREIL DE THÉRAPIE PREVENA PLUS™ 125 Pour un raccordement à d’autres appareils de thérapie V.A.C.® de KCI, se reporter à la section Utilisation du pansement PREVENA PLUS™ avec les appareils de thérapie V.A.C.® de KCI. 1. Raccorder la tubulure du tampon SENSAT.R.A.C.™ au connecteur PREVENA PLUS™... -
Page 60: Lancement De La Thérapie
LANCEMENT DE LA THÉRAPIE Alerte de blocage Alarme de prise d’air Connexion à l'alimentation Bouton d'interruption d'alarme Niveau de charge de la batterie Touche Indicateur de cycle Marche/Arrêt de vie de la thérapie 1. S’assurer que le pansement PREVENA PLUS™ a été appliqué comme indiqué dans la section Application du pansement PREVENA PLUS™... -
Page 61: Dépannage De L'appareil
Si l'appareil de thérapie PREVENA PLUS™ 125 ne s'allume pas, vérifier que la batterie est chargée (voir la section Chargement de la batterie). Si l'appareil de thérapie ne s'allume toujours pas, contacter KCI. INDICATEURS DE CYCLE DE VIE DE LA THÉRAPIE 1 jour Début de... -
Page 62: Durée De La Thérapie Prevena Plus
DURÉE DE LA THÉRAPIE PREVENA PLUS™ • La thérapie doit être continue pendant un minimum de deux jours, jusqu'à un maximum de sept jours. REMARQUE : L'appareil de thérapie PREVENA PLUS™ 125 s'éteint automatiquement après sept jours de thérapie. • Les patients doivent prévenir leur médecin référent et ne pas éteindre l'appareil de thérapie sauf : º... - Page 63 L'appareil de thérapie produit les alarmes sonores et visuelles figurant ci-après : Type d'alarme Identification et résolution • Un voyant jaune situé au-dessus du symbole de blocage s’allume en continu. Alarme de blocage • L’alarme sonore de blocage émet deux signaux sonores toutes les 15 secondes.
-
Page 64: Résolution Des Problèmes De Prise D'air
étanchéité. 2. Lisser avec les doigts pour éliminer les plis éventuels. 3. Utiliser le film adhésif KCI restant au niveau du bord extérieur du champ afin d’assurer l’étanchéité. VÉRIFICATION DU RACCORDEMENT DE LA TUBULURE DU RÉSERVOIR 1. -
Page 65: Éléments Indiquant La Résolution Du Problème De Prise D'air
ÉLÉMENTS INDIQUANT LA RÉSOLUTION DU PROBLÈME DE PRISE D'AIR REMARQUE : Après résolution d'un problème de prise d'air, un bref délai s'écoule avant que l'appareil de thérapie ne détecte la correction. Les alarmes sont alors éteintes. L'alarme de l'appareil de thérapie reste active jusqu'à ce que le problème à l'origine de l'alarme soit résolu. - Page 66 Lorsque l’appareil de thérapie PREVENA PLUS™ 125 est relié à un bloc d’alimentation, le symbole Sous tension s’allume en jaune, indiquant que l’appareil est sur secteur et en charge. Le symbole devient vert lorsque la batterie est pleine. REMARQUE : À réception, la batterie de l'appareil de thérapie PREVENA PLUS™...
-
Page 67: Retrait Et Remplacement Du Réservoir
UTILISATION DU PANSEMENT PREVENA PLUS™ AVEC LES APPAREILS DE THÉRAPIE V.A.C.® DE KCI Selon les instructions du médecin référent, les pansements PREVENA PLUS™ peuvent être utilisés avec la thérapie par pression négative fournie par les appareils de thérapie ACTIV.A.C.™, V.A.C. FREEDOM™, V.A.C. -
Page 68: Réglage De La Pression Négative Sur Les Appareils De Thérapie V.a.c
V.A.C.ULTA™. RÉSOLUTIONS DES ALARMES Les problèmes à l’origine du déclenchement des alarmes de l’appareil de thérapie V.A.C.® de KCI doivent être traités rapidement. Pour obtenir des informations complètes sur la résolution des alarmes, consulter le manuel d’utilisation de l’appareil de thérapie. Pour résoudre un problème de prise d'air dans le pansement, consulter la section Résolution des problèmes de prise d'air. -
Page 69: Douche Et Bain
DOUCHE ET BAIN • N’utiliser l'appareil de thérapie PREVENA PLUS™ 125 ni dans le bain, ni sous la douche. Ne pas l'utiliser s’il risque de tomber dans une baignoire, un receveur de douche, un lavabo ou un évier. • Ne pas rattraper un produit tombé dans l’eau. Débrancher immédiatement l'appareil si celui-ci est relié... -
Page 70: Mises En Garde Et Informations Importantes À L'attention Des Utilisateurs De L'appareil De Thérapie Prevena Plus™ 125
Ne pas laisser tomber ni insérer d'objets dans une ouverture ou une tubulure de ce produit. • Ne pas connecter ce produit ni ses composants à des dispositifs non recommandés par KCI. • Ne pas modifier l'appareil de thérapie ni le pansement. Ne pas brancher l’appareil de thérapie ni le pansement sur d’autres dispositifs en cours d’utilisation. -
Page 71: Nous Contacter
NOUS CONTACTER Pour toute question concernant ce produit, les fournitures ou la maintenance, ou pour obtenir des informations supplémentaires sur les produits et services KCI, contacter KCI ou un représentant agréé de KCI, ou : Aux États-Unis, appeler le 1-800-275-4524 ou consulter le site www.acelity.com En dehors des États-Unis, consulter le site www.kci-medical.com... -
Page 72: Appareil De Thérapie Prevena Plus™ 125 : Compatibilité Électromagnétique
APPAREIL DE THÉRAPIE PREVENA PLUS™ 125 : COMPATIBILITÉ ÉLECTROMAGNÉTIQUE Les recommandations et déclarations du fabricant qui suivent concernent la compatibilité électromagnétique pour l’appareil de thérapie PREVENA PLUS™ 125. • L'appareil de thérapie PREVENA PLUS™ 125 doit faire l'objet de précautions particulières en ce qui concerne la compatibilité... - Page 73 Tableau 201 Recommandations et déclaration du fabricant – Émissions électromagnétiques L'appareil de thérapie PREVENA PLUS™ 125 est conçu pour une utilisation au sein de l'environnement électromagnétique indiqué ci-dessous. Le client ou l'utilisateur final de l'appareil de thérapie PREVENA PLUS™ 125 doit s'assurer qu'il est utilisé...
- Page 74 Tableau 202 Recommandations et déclaration du fabricant – Immunité électromagnétique L’appareil de thérapie PREVENA PLUS™ 125 est conçu pour une utilisation au sein de l’environnement électromagnétique indiqué ci-dessous. Il incombe au client ou à l'utilisateur final de l'appareil de s'assurer qu'il est utilisé dans un tel environnement.
- Page 75 Tableau 204 Recommandations et déclaration du fabricant – Immunité électromagnétique L’appareil de thérapie PREVENA PLUS™ 125 est conçu pour une utilisation au sein de l’environnement électromagnétique indiqué ci-dessous. Il incombe au client ou à l’utilisateur final de l’appareil de s’assurer qu’il est utilisé dans un tel environnement.
- Page 76 Tableau 205 Recommandations et déclaration du fabricant – Immunité électromagnétique Fréquence Bande Service Modulation Puissance Distance Niveau d’essai d’essai (MHz) maximale d’immunité (MHz) (V/m) 380 à Modulation par TETRA 400 impulsions 18 Hz déviation de 430 à GMRS 460, ± 5 kHz signal FRS 460 sinusoïdal 1 kHz 704 à...
-
Page 77: Alimentation Fournie
Tableau 206 Distances de séparation recommandées entre les appareils portables et mobiles de radiocommunication et l’appareil de thérapie PREVENA PLUS™ 125 L'appareil de thérapie PREVENA PLUS™ 125 est conçu pour une utilisation dans un environnement électromagnétique dans lequel les perturbations RF émises sont contrôlées. Le client ou l’utilisateur de l’appareil de thérapie PREVENA PLUS™ 125 peut éviter les interférences électromagnétiques en conservant une distance minimale entre les appareils portables et mobiles de radiocommunication (émetteurs) et l’appareil, comme indiqué... -
Page 78: Bibliographie Des Études Publiées
BIBLIOGRAPHIE DES ÉTUDES PUBLIÉES • Atkins BZ, et al. “Does Negative Pressure Wound Therapy Have a Role in Preventing Poststernotomy Wound Complications?” Surgical Innovations. Juin 2009 ; 16(2):140-6. • Atkins BZ, et al. “Laser Doppler flowmetry assessment of peristernal perfusion after cardiac surgery: beneficial effect of negative pressure therapy. - Page 79 • Mark KS, et al. “Incisional Negative Pressure Therapy to Prevent Wound Complications Following Cesarean Section in Morbidly Obese Women: A Pilot Study.” Surgical Innovations. 20 septembre 2013. • Masden D, Goldstein J, Endara M, Xu K, Steinberg J, Attinger C. “Negative pressure wound therapy for at-risk surgical closures in patients with multiple comorbidities: a prospective randomized controlled study.
- Page 80 Toutes les marques commerciales mentionnées dans le présent document sont la propriété de KCI Licensing, Inc., de ses filiales et/ou de ses concédants de licence. Copyright 2018 KCI Licensing, Inc. Tous droits réservés. 418148 Rev A 4/2018...
- Page 81 PREVENA PLUS™ SISTEMA DE TRATAMIENTO PARA INCISIONES APÓSITO PREVENA PLUS™ CUSTOMIZABLE™ CON TECNOLOGÍA SENSAT.R.A.C.™ INSTRUCCIONES DE USO SOLO PARA MÉDICOS Rx Only...
- Page 82 La información contenida en esta publicación puede estar sujeta a cambios en cualquier momento. Póngase en contacto con KCI para obtener actualizaciones.
- Page 83 Carga de la batería ................................105 Retirada y sustitución del contenedor ........................107 Uso del apósito PREVENA PLUS™ con las unidades de terapia V.A.C.® de KCI ..........107 Conexión del apósito PREVENA PLUS™ a las unidades de terapia V.A.C.® ........107 Configuración de la presión negativa en las unidades de terapia V.A.C.® ........108 Resolución de alarmas ............................108...
- Page 84 Uso durante el baño o la ducha ........................109 Actividad física intensa ............................109 Limpieza..................................109 Retirada del apósito.................................109 Advertencias e información importante para los usuarios: unidad de terapia PREVENA PLUS™ 125 ..110 Información de contacto para el cliente ........................111 Especificaciones del sistema de terapia PREVENA PLUS™ ................111 Compatibilidad electromagnética de la unidad de terapia PREVENA PLUS™...
-
Page 85: Descripción Del Producto E Indicaciones De Uso
V.A.C. SIMPLICITY™ Se han realizado estudios clínicos sobre los sistemas de tratamiento para incisiones por presión negativa de KCI. Consulte la Bibliografía de estudios publicados que aparece al final de esta guía. INFORMACIÓN IMPORTANTE PARA LOS USUARIOS ADVERTENCIA: NO utilice con la terapia V.A.C. -
Page 86: Condiciones Óptimas De Uso
CONDICIONES ÓPTIMAS DE USO Para obtener el máximo beneficio, el sistema de tratamiento para incisiones PREVENA PLUS™ debe aplicarse inmediatamente después de la intervención quirúrgica sobre heridas limpias y cerradas quirúrgicamente. Es necesario aplicarlo de forma continua durante un mínimo de dos días y un máximo de siete. -
Page 87: Precauciones
PREVENA PLUS™, retírelo. De lo contrario, el apósito puede inhibir la transmisión de la energía eléctrica o interferir en la reanimación del paciente. Resonancia magnética (RM): ninguna de las unidades de terapia de KCI, incluida la unidad de terapia PREVENA PLUS™ 125, es segura en entornos de RM. No utilice las unidades de tratamiento en un entorno de RM. -
Page 88: Apósitos Del Sistema De Tratamiento Para Incisiones Prevena Plus
Aplicación de apósito circunferencial: evite aplicar el apósito PREVENA PLUS™ de forma circunferencial. En los casos en los que el facultativo determine que las ventajas de la aplicación circunferencial del apósito PREVENA PLUS™ superan los riesgos de insuficiencia circulatoria, deberán extremarse las precauciones para no estirar o tirar del apósito al aplicarlo. -
Page 89: Preparación De La Zona De Aplicación Para El Sistema De Tratamiento Para Incisiones Prevena Plus
PREPARACIÓN DE LA ZONA DE APLICACIÓN PARA EL SISTEMA DE TRATAMIENTO PARA INCISIONES PREVENA PLUS™ 1. Antes de la intervención, rasure o recorte el vello de la zona quirúrgica en la que se aplicará el apósito para mejorar su adherencia y la integridad del sellado. 2. -
Page 90: Sistema De Tratamiento Para Incisiones Prevena Plus™ Con Componentes Del Apósito Prevena Plus™ Customizable
Interfase SENSAT.R.A.C.™: empleada para conectar el apósito PREVENA PLUS™ CUSTOMIZABLE™ a la unidad de terapia de KCI. Unidad de terapia PREVENA PLUS™ 125: suministra presión negativa a la zona de la incisión quirúrgica. La unidad se alimenta mediante batería y eléctricamente. -
Page 91: Aplicaciones Del Apósito Prevena Plus™ Customizable
• incisiones no lineales • incisiones cruzadas Las siguientes figuras muestran aplicaciones de apósitos realizadas con el apósito PREVENA PLUS™ CUSTOMIZABLE™, la lámina adhesiva y la interfase SENSAT.R.A.C.™ de KCI. Incisión lineal Incisión no lineal Incisión cruzada Aplicación del apósito Aplicación del apósito... -
Page 92: Aplicación Del Apósito En Incisiones Lineales
APLICACIÓN DEL APÓSITO EN INCISIONES LINEALES PRECAUCIÓN: si el apósito cubre el ombligo, antes de su aplicación, debe cubrirse el ombligo por completo con una gasa antibiótica impregnada con vaselina. 1. Abra el paquete del apósito estéril, retire y despliegue el apósito de espuma mediante una técnica aséptica. - Page 93 6. Cuando haya colocado las tiras de sellado, coloque el apósito de espuma con el sello adhesivo y el tejido blanco dirigidos hacia abajo. 7. Coloque el apósito de espuma centrado sobre la incisión/cierre quirúrgico. Asegúrese de que el sello adhesivo y el tejido blanco están hacia abajo.
-
Page 94: Aplicación Del Apósito En Incisiones No Lineales
APLICACIÓN DEL APÓSITO EN INCISIONES NO LINEALES PRECAUCIÓN: si el apósito cubre el ombligo, antes de su aplicación, debe cubrirse el ombligo por completo con una gasa antibiótica impregnada con vaselina. 1. Abra el paquete del apósito estéril, retire y despliegue el apósito de espuma mediante una técnica aséptica. -
Page 95: Aplicación Del Apósito En Incisiones Cruzadas
6. Cuando haya colocado las tiras de sellado, coloque el apósito de espuma con el sello adhesivo y el tejido blanco dirigidos hacia abajo. NOTA: las tiras de sellado pueden cubrir la línea de incisión. 7. Coloque el apósito de espuma sobre la incisión/cierre quirúrgico. Asegúrese de que el sello adhesivo y el tejido blanco están hacia abajo. -
Page 96: Aplicación De La Lamina Adhesiva
1. Alise cualquier arruga en la lámina adhesiva de KCI. PRECAUCIÓN: no presione las tiras de manipulación azules sobre el material de sellado. 5. Retire con cuidado la capa de rayas 2 de la lámina adhesiva de KCI. - Page 97 7. Añada las láminas adhesivas que sean necesarias para cubrir los apósitos de espuma en diversas configuraciones, como se muestra. • Alise la lámina adhesiva de KCI para eliminar pliegues y espacios en las juntas de sellado y garantizar así un sellado oclusivo. •...
-
Page 98: Aplicación De La Interfase Sensat.r.a.c
4. Conéctelo a la unidad de terapia. Para conectarlo a la unidad de terapia PREVENA PLUS™ 125, consulte la sección Conexión del apósito a la unidad de terapia PREVENA PLUS™ 125. Para conectarlo a otras unidades de terapia V.A.C.® de KCI, consulte la sección Conexión del apósito PREVENA PLUS™ con las unidades de terapia V.A.C.®. -
Page 99: Instalación Del Contenedor Prevena Plus
CONEXIÓN DEL APÓSITO A LA UNIDAD DE TERAPIA PREVENA PLUS™ 125 Para conectarlo a otras unidades de terapia V.A.C.® de KCI, consulte la sección Uso del apósito PREVENA PLUS™ con las unidades de terapia V.A.C.® de KCI. -
Page 100: Inicio De La Terapia
INICIO DE LA TERAPIA Alerta de fuga Alerta de obstrucción Conectado a la red Botón silenciador Nivel de batería de alertas Botón de Indicador de duración encendido/ de la terapia apagado 1. Asegúrese de que el apósito PREVENA PLUS™ se haya aplicado tal como se describe en la sección Aplicación del apósito PREVENA PLUS™... -
Page 101: Solución De Problemas De La Unidad
Si la unidad de terapia PREVENA PLUS™ 125 no se enciende, asegúrese de que la batería esté cargada (consulte la sección Carga de la batería). Si la unidad de terapia no se enciende aún así, póngase en contacto con KCI. INDICADORES DE LA DURACIÓN DE LA TERAPIA Queda 1 día... -
Page 102: Duración De La Terapia Prevena Plus
DURACIÓN DE LA TERAPIA PREVENA PLUS™ • La terapia debe ser continua durante un mínimo de dos días y hasta un máximo de siete días. NOTA: la unidad de terapia PREVENA PLUS™ 125 se desconectará automáticamente tras siete días de terapia. •... - Page 103 La unidad de terapia emitirá alertas acústicas y mostrará alertas visuales de la forma siguiente: Tipo de alerta ID y resolución Alerta de • Se encenderá un LED amarillo fijo encima del símbolo de bloqueo. obstrucción • La alerta acústica de obstrucción emitirá dos pitidos que se repetirán cada 15 segundos.
-
Page 104: Corrección De Una Situación De Fuga
2. Utilice los dedos para alisar cualquier pliegue o arruga. 3. Utilice los trozos sobrantes de lámina adhesiva KCI a lo largo de su borde exterior para sellar las fugas. COMPROBACIÓN DE LA CONEXIÓN DEL TUBO DEL CONTENEDOR 1. -
Page 105: Indicaciones De Que Se Ha Resuelto Una Situación De Fuga
INDICACIONES DE QUE SE HA RESUELTO UNA SITUACIÓN DE FUGA NOTA: una vez solucionada la causa de una fuga, se producirá un pequeño retraso antes de que la unidad de terapia detecte la corrección y silencie las alertas. La unidad de terapia continuará con la alerta hasta que la situación se haya corregido. Una vez que la situación de fuga se ha corregido, las alertas sonoras se detendrán y las alertas visuales se apagarán. - Page 106 Cuando la unidad de terapia PREVENA PLUS™ 125 se conecta a una fuente de alimentación, el icono de conexión a la red se ilumina en amarillo para indicar que está conectada y que el sistema se está cargando. El icono se iluminará en verde cuando la batería esté completamente cargada.
-
Page 107: Retirada Y Sustitución Del Contenedor
NOTA: deseche el contenedor usado según la normativa medioambiental institucional y local. USO DEL APÓSITO PREVENA PLUS™ CON LAS UNIDADES DE TERAPIA V.A.C.® DE KCI Cuando así lo indique el facultativo responsable, los apósitos PREVENA PLUS™ pueden utilizarse con la terapia de presión negativa para el tratamiento de heridas proporcionada por las unidades de terapia ACTIV.A.C.™, V.A.C. -
Page 108: Configuración De La Presión Negativa En Las Unidades De Terapia V.a.c
V.A.C.ULTA™ para obtener más información. RESOLUCIÓN DE ALARMAS Es preciso resolver las alarmas de la unidad de terapia V.A.C.® de KCI de manera oportuna. Consulte el manual de usuario de la unidad de terapia indicada para obtener información completa sobre la resolución de las alarmas. -
Page 109: Uso Durante El Baño O La Ducha
USO DURANTE EL BAÑO O LA DUCHA • No utilice la unidad de terapia PREVENA PLUS™ 125 mientras se baña o se ducha o donde pueda caerse dentro de una bañera, ducha o fregadero. • No trate de recoger un producto que se ha caído al agua. Desenchufe la unidad inmediatamente si está... -
Page 110: Advertencias E Información Importante Para Los Usuarios: Unidad De Terapia Prevena Plus™ 125
Asegúrese de que no haya humedad en o cerca de los componentes de la fuente de alimentación, en el conector eléctrico ni alrededor de ellos antes de volver a conectar el equipo a la red eléctrica. Si el producto no funciona correctamente, póngase en contacto con KCI. -
Page 111: Información De Contacto Para El Cliente
Si tiene alguna duda en relación con este producto, los suministros y el mantenimiento, o si desea información adicional sobre los productos y servicios de KCI, póngase en contacto con KCI o con un representante autorizado de KCI, o bien: En los EE. -
Page 112: Compatibilidad Electromagnética De La Unidad De Terapia Prevena Plus™ 125
COMPATIBILIDAD ELECTROMAGNÉTICA DE LA UNIDAD DE TERAPIA PREVENA PLUS™ 125 A continuación, se especifican las directrices y declaraciones del fabricante en relación con la compatibilidad electromagnética de la unidad de terapia PREVENA PLUS™ 125. • La unidad de terapia PREVENA PLUS™ 125 requiere la adopción de precauciones especiales respecto de la CEM, y debe ser instalada y puesta en servicio de acuerdo con la información sobre CEM que se detalla en las páginas siguientes. - Page 113 Tabla 201 Directrices y declaración del fabricante: emisiones electromagnéticas La unidad de terapia PREVENA PLUS™ 125 está diseñada para su uso en el entorno electromagnético especificado a continuación. El cliente o el usuario final de la unidad de terapia PREVENA PLUS™ 125 deben asegurarse de que se utilice en dicho entorno.
- Page 114 Tabla 202 Directrices y declaración del fabricante: inmunidad electromagnética La unidad de terapia PREVENA PLUS™ 125 está diseñada para su uso en el entorno electromagnético especificado a continuación. El cliente o el usuario final de la unidad deben asegurarse de que solo se utilice en dicho entorno. Prueba de inmunidad Nivel de prueba según Nivel de conformidad...
- Page 115 Tabla 204 Directrices y declaración del fabricante: inmunidad electromagnética La unidad de terapia PREVENA PLUS™ 125 está diseñada para su uso en el entorno electromagnético especificado a continuación. El cliente o el usuario final de la unidad deben asegurarse de que se utilice en dicho entorno. Prueba de Nivel de prueba Nivel de conformidad...
- Page 116 Tabla 205 Directrices y declaración del fabricante: inmunidad electromagnética Frecuencia Banda Servicio Modulación Potencia Distancia Nivel de la de prueba (MHz) máxima prueba de (MHz) inmunidad (V/m) Modulación de pulsos 380 - 390 TETRA 400 18 Hz Desviación GMRS 460, 430 - 470 de ±5 kHz;...
-
Page 117: Fuentes De Alimentación Incluidas
Tabla 206 Distancias recomendadas de separación entre equipos de comunicación por RF portátiles y móviles y la unidad de terapia PREVENA PLUS™ 125 La unidad de terapia PREVENA PLUS™ 125 está diseñada para su uso en un entorno electromagnético en el que las interferencias de RF irradiadas estén controladas. -
Page 118: Bibliografía De Estudios Publicados
BIBLIOGRAFÍA DE ESTUDIOS PUBLICADOS • Atkins BZ et al. “Does Negative Pressure Wound Therapy Have a Role in Preventing Poststernotomy Wound Complications?” Surgical Innovations. Junio de 2009; 16(2):140-6. • Atkins BZ et al. “Laser Doppler flowmetry assessment of peristernal perfusion after cardiac surgery: beneficial effect of negative pressure therapy”. - Page 119 • Mark KS, et al. “Incisional Negative Pressure Therapy to Prevent Wound Complications Following Cesarean Section in Morbidly Obese Women: A Pilot Study”. Surgical Innovations. 20 de septiembre de 2013. • Masden D, Goldstein J, Endara M, Xu K, Steinberg J, Attinger C. “Negative pressure wound therapy for at-risk surgical closures in patients with multiple comorbidities: a prospective randomized controlled study”.
- Page 120 Todas las marcas comerciales mencionadas en este documento son propiedad de KCI Licensing, Inc., sus filiales y/o otorgantes. Copyright 2018 KCI Licensing, Inc. Todos los derechos reservados. 418148 Rev A 4/2018...
-
Page 121: Symbols Used
EN - SYMBOLS USED, FR - SYMBOLES UTILISES, ES - SÍMBOLOS UTILIZADOS EN - Refer to Clinician Guide EN - Consult Instructions for Use FR - Consulter le Guide du clinicien FR - Consulter le mode d’emploi ES - Consulte la Guía de referencia ES - Consulte las Instrucciones de uso para facultativos EN - Ingress Protection... - Page 124 EN - ENGLISH FR - FRANCAIS ES - ESPAÑOL Manufactured for: KCI USA, Inc. 12930 IH 10 West San Antonio, TX 78249 USA 1-800-275-4524 www.acelity.com...
Need help?
Do you have a question about the PREVENA PLUS Series and is the answer not in the manual?
Questions and answers