KCI ActiV.A.C. International User Manual
Hide thumbs
Also See for ActiV.A.C.:
- User manual ,
- Owner's service manual (32 pages) ,
- Quick reference manual (2 pages)
Table of Contents
Advertisement
Quick Links
Advertisement
Chapters
Table of Contents

Related Manuals for KCI ActiV.A.C.


Summary of Contents for KCI ActiV.A.C.
- Page 1 ® c t i International User Manual English July 2007 340076 Rev B...
-
Page 2: Important Safety Information
KCI products. ® If there are questions or if the V.A.C. Therapy Safety Information Sheet or Quick Reference Guide are missing, immediately contact KCI. See back cover of this User Manual for country specific contact information. -
Page 3: Table Of Contents
® c t i Table of Contents Important Safety Information Statement . . Inside Front Cover Important Safeguards . ® ActiV.A.C. Therapy System Overview Introduction . Patient Mode . Patient 'Home' Screen Common Screen Control Buttons Navigation Buttons Patient Operating Instructions . - Page 4 ® c t i Table of Contents (cont.) Clinician Operating Instructions (cont.) Settings Guide . 28 Settings Guide Confirmation . 30 Starting Therapy . 31 Seal Check™ Overview . . 31 How to Use Seal Check™ (When Starting Therapy) . .
-
Page 5: Important Safeguards
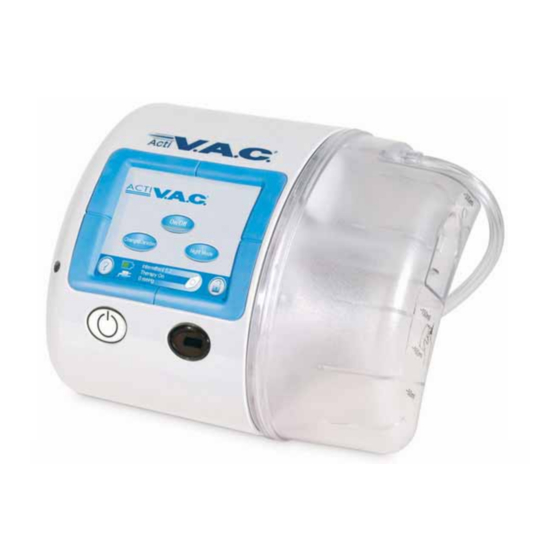
ActiV.A.C. Therapy Unit. · Never operate this product if it has a damaged power cord, power supply or plug. Should the power cord, power supply or plug be found to be worn or damaged, contact KCI. See back cover. ® ·... - Page 6 ® ActiV.A.C. Therapy System Overview Specific features are detailed in the Patient Feature Identification section of this manual. ® ActiV.A.C. Canister Touch Screen User Interface KCI Authorized Maintenance Access Only USB Data Port Power Connection Battery Charging Power On/Off Button...
-
Page 7: Activ.a.c. Therapy System Overview
® c t i ® ActiV.A.C. Therapy System Overview ® ActiV.A.C. Power Supply Components AC Power Cord ® ActiV.A.C. Charging Cord DC Power Supply “Brick” ® ActiV.A.C. Carrying Case and Adjustable Strap Storage Pocket for the ® ActiV.A.C. uick eference uide ®... -
Page 8: Introduction
® c t I Introduction ® ® V.A.C. is short for Vacuum Assisted Closure. V.A.C. Therapy is a system that uses controlled negative pressure (vacuum) to create an environment that promotes wound healing by bringing the wound edges together, reducing edema, promoting granulation tissue formation and perfusion, and by removing wound fluids and infectious material. - Page 9 ® c t I Introduction (cont.) Patient Mode Control Selection of Patient Mode by the clinician can help prevent unauthorized access to therapy set-up screens. Patient Mode allows the patient to have access to appropriate screen menus. Therapy History Report A chronological log with date and times for therapy starts/stops, therapy settings, alarm occurrences, and canister/dressing changes can be reviewed on-screen or transferred ®...
-
Page 10: Patient Mode
® c t I Patient Mode Patient ‘Home’ Screen Audio Pause Indicator with Mode Indicator Patient Mode ® Jun 22 2006 Countdown Timer 15:38 Current Date 58:23 Current Time Therapy Status Therapy On/Off Audio Pause On/Off Bar and Display Button Area. -
Page 11: Navigation Buttons
® c t I Patient Mode (cont.) Navigation Buttons One or more of these buttons may appear on a screen. leaves that particular screen. Exit stops action in progress. Cancel Next goes to the next screen of that particular procedure. Back returns to the previous screen of that particular procedure. -
Page 12: Patient Operating Instructions
® c t I Patient Operating Instructions ® Power the ActiV.A.C. Therapy Unit On or Off Press and hold the Power On/Off button for approximately 2 seconds to turn the ® ActiV.A.C. Therapy Unit On or Off. The Power On/Off button is located immediately below and to the left of the Touch Screen User Interface. -
Page 13: Help Menu
® c t I Help Menu Changing Languages Help Menu Exit Press to access the ‘ Help Menu ’. Operating Clinician Instructions Mode Press the ‘ Globe ’ (upper left) to access the ‘ Language ’ screen. Contact About Information Exit Language Use the... -
Page 14: Battery Charging Instructions
Interface to darken, the therapy unit to reset or the therapy unit to turn off. If unable to restart therapy by powering the therapy unit off and then on, immediately contact KCI. See back cover of this User Manual for country specific contact information. -
Page 15: Battery Charging Indicator Light
® c t I Battery Charging Instructions (cont.) Steps are numbered in order. See picture on previous page. Plug the AC Power Cord into the DC Power Supply “Brick”. Plug the AC Wall Plug into an AC wall outlet. ® Locate the “Arrow”... -
Page 16: Canister Changes
Silicone Seals Canister Latch Guide Canister Stabilization Bumpers Contact KCI if the Silicone Seals, Canister Latch Guide or the Canister Stabilization Bumpers are damaged or missing. See back cover of this User Manual for country specific contact information. Canister Latch Release ®... -
Page 17: Changing The Canister
® c t I Changing the Canister Canister Change (in Carrying Case) section for change instructions when in the Carrying Case. ® The ActiV. .C. Canister should be changed when full (the alarm will sound), or at least once a week to control odor. ®... -
Page 18: Carrying Case Parts Identification
® c t I Changing the Canister (cont.) Canister Latch Guide . Install the new canister onto the therapy unit by sliding the opening n the canister over the Canister Latch Guide . Ensure he anister is installed directly onto the therapy unit. -
Page 19: Canister Change (In Carrying Case)
® c t I Canister Change (in Carrying Case) Front Flap 1. Open the Front Flap on the Carrying Case. See picture ® V.A.C. Therapy is already off i f addressing a Canister Full Alarm. ® Stop V.A.C. Therapy by pressing on the Touch Screen On/Off User Interface. - Page 20 ® c t I Canister Change (in Carrying Case) cont. Canister ® 8 Grasp the ActiV.A.C. Therapy Unit in one hand and turn the unit and case so that the canister is facing up. Continue to fold the Access Flap back until the canister fully exposed...
- Page 21 ® c t I Canister Change (in Carrying Case) cont. 13. Secure the Hook and Loop Fastener. See Picture Close the Center Zipper over the canister. See picture 14 Reconnect the new canister tubing to the dressing tubing by: (1.) pushing the connectors together (1.) (2.)
-
Page 22: Inserting The Therapy Unit Into The Carrying Case
® c t I Inserting the Therapy Unit into the Carrying Case Start with the empty case. Hold the case open, and with a canister attached Open the Center Zipper and Access Flap. and the Touch Screen User Interface facing down, ®... -
Page 23: Carrying Case Configurations
® c t I Carrying Case Configurations The case can be worn over the The case can be worn over the opposite shoulder with the strap shoulder with the strap adjusted adjusted for comfort. for comfort. The attached Shoulder Strap can be A personal belt can be threaded through... -
Page 24: Clinician Mode
® c t I Clinician Mode Clinician Mode Home screen Mode Indicator Clinician Mode ® c t I Jun 22 2006 Therapy On/Off Current Date 15:38 Button Current Time On/Off Therapy Status Bar and Display Therapy Utilities Area. Continuous Screen Guard Help Button Therapy Off 0 mmHg... -
Page 25: Navigation Buttons
® c t I Clinician Mode (cont.) Navigation Buttons One or more of these buttons may appear on a screen. leaves that particular screen. Exit stops action in progress. Cancel Next goes on to the next screen of that particular procedure. Back returns to the previous screen of that particular procedure. -
Page 26: Clinician Operating Instructions
® c t I Clinician Operating Instructions CAUTION NOTICE TO PATIENTS: This section contains specific information intended for clinicians ONLY. Do not attempt to perform any applications or setting adjustments in this section without the express direction and supervision of your treating physician. ®... -
Page 27: Accessing Manual Therapy Settings
® c t I Therapy Accessing Manual Therapy Settings From the Clinician Mode Home screen, press ‘ Therapy ’, then ‘ Next ’ to access the Therapy screen. Therapy Exit Settings Settings Guide History Seal Check™ From the ‘ Therapy ’... -
Page 28: Pressure Settings
® c t I Settings (cont.) Pressure Settings Settings changed manually take immediate effect when therapy is on. From the Clinician Mode Home screen, press ‘ Therapy then ‘ ’, Next ’, then ‘ Settings ’, then ‘Pressure’ to access th e Pressure screen. -
Page 29: Continuous' And 'Intermittent' Modes
® c t I Settings (cont.) ‘Continuous’ and ‘Intermittent’ Modes From the Clinician Mode Home screen, press ‘ Therapy ’, then ‘ Next ’, then ‘ Settings ’ to access this screen. Press to switch between ‘ Continuous ’ and ‘Intermittent’... -
Page 30: Settings Confirmation
® c t I Settings (cont.) Settings Confirmation when finished with the ‘Settings’ screen leads to this ‘ Confirm ’ screen. Pressing Exit Confirm Pressure: 125mmHg Mode: Continuous Intensity: Back If the displayed settings are as desired, press ‘ ’ to continue to the Clinician Mode Home screen. - Page 31 ® c t I Settings Guide (cont.) Select Pressure Cancel 125 mmHg Back Next Use the buttons to select from the available pressure selections. Pressure selections are in ranges for the wound type selected on the previous screen. Press ‘Next’ when finished with this screen.
-
Page 32: Settings Guide Confirmation
® c t I Settings Guide (cont.) If ‘Intermittent’ Therapy was chosen on the previous screen, this ‘ Intermittent ’ screen will appear. Intermittent Exit On Time On Time Off Time Off Time Minutes Minutes Minutes Minutes Use the buttons to change the desired On and Off Time (in minutes). Both On and Off Times can be set from 1 minute to 10 minutes in 1 minute increments. -
Page 33: Starting Therapy
® c t I Starting Therapy ® WARNING: Ensure that a new V.A.C. Dressing was applied and therapy settings have been selected per physician’s orders before starting therapy. Clinician Mode ® c t I Jun 22 2006 15:38 On/Off Therapy Utilities Continuous Therapy Off... -
Page 34: How To Use Seal Check™ (When Starting Therapy)
® c t I Starting Therapy (cont.) How to Use Seal Check™ (When Starting Therapy) Pressing located on the Clinician Mode Home screen will immediately display On/Off this ‘ Therapy Start ’ screen. Orange bar graph Therapy Start Exit indicates a significant leak. Seal Check™... -
Page 35: Log Tool Overview
® c t I Starting Therapy (cont.) Log Tool Overview · Log Tool can be used to record the number of foam pieces used during a dressing change. · Log Tool can be used to record canister changes. · Logged information is viewable and exportable on the Therapy History screens. How to Use Log Tool (When Starting Therapy) Press on the... - Page 36 ® c t I Starting Therapy (cont.) Press to access this ‘ Foam Pieces ’ screen. Dressing Foam Pieces Cancel Press OK to log number of foam pieces and time/date Last recorded on 15:55 12/06/06 Information displayed represents the last logged entry. Use the buttons to change the number of pieces of foam used during the current dressing change.
-
Page 37: View Or Export Therapy History
® c t I View or Export Therapy History Therapy History is a chronological log with dates and times for therapy starts/stops, therapy settings, alarm occurrences, and canister/dressing changes. Data can be ® reviewed on-screen or transferred from the ActiV.A.C. Therapy Unit electronically in the form of a Therapy History Report. -
Page 38: Export Therapy History Report
Remove the flash drive. Press to power the unit off and then on. Retry exporting Therapy History. · If the above steps do not resolve the problem, contact KCI. See back cover of this User Manual for country specific contact information. Infrared: ·... -
Page 39: Clinician Help Menu
® c t I Clinician Help Menu To access the Clinician Help Menu, the unit must be in Clinician Mode. Changing to Patient or Clinician Mode Press to access the ‘ Help Menu ’. Help Menu Help Menu Exit Exit Operating Operating Patient... -
Page 40: Clinician Utilities
® c t I Clinician Utilities From the Clinician Mode Home screen, press ‘ Utilities ’ to access this screen. Utilities Exit Brightness Time/Date Region AC Light Settings From this ‘ Utilities ’ screen the clinician can · Select ‘Time/Date’ to set the ‘Time/Date’... -
Page 41: Changing Pressure Units And Date Format
® c t I Clinician Utilities (cont.) Changing Pressure Units and Date Format From the Clinician Mode Home screen, press ‘Utilities’ then press ‘ Region Settings ’ to access this screen. Exit Regional Settings mmHg Pressure Unit DD MM YY Date Format MM DD YY Pressing ‘... -
Page 42: Alerts And Alarms
2 minutes. Audio Pause Press for more information. If alarm conditions cannot be resolved, contact KCI. See back cover of this User Manual for country specific contact information. Index of Alerts and Alarms Battery Low Alert . -
Page 43: Battery Low Alert
® c t I Alerts and Alarms (cont.) Battery Low Alert Exit This alert screen appears approximately two (2) hours before Battery Low Alert the battery power level is too low to support continued operation ® of the ActiV.A.C. Therapy Unit. Battery Low;... -
Page 44: Canister Full Therapy Interrupted Alarm
® c t I Alerts and Alarms (cont.) Canister Full Therapy Interrupted Alarm ® This alarm screen appears when the ActiV.A.C. Therapy Unit Cancel Canister Full detects that the canister is full and should be replaced. Therapy Interrupted WARNING: If Canister is full, replace and press ‘Reset’. This alarm will be accompanied by a repeating audible tone. -
Page 45: Canister Not Engaged Alarm
6. Restart therapy by pressing On/Off 7. If this alarm continues to appear, repeat steps 1 through 6 with a new canister. If alarm condition cannot be resolved, contact KCI. See back cover of this User Manual for country specific contact information. ®... -
Page 46: Leak Alarm
® c t I Alerts and Alarms (cont.) Leak Alarm Flashing green oval ® This alarm screen appears when the ActiV.A.C. Therapy Unit Seal ™ Check detects a significant air leak. Leak Alarm If this alarm is not resolved in three (3) minutes, therapy will be Press ‘Seal Check™’... -
Page 47: Leak Alarm Therapy Interrupted
® WARNING: Under clinician supervision, replace V.A.C. Dressing with alternate dressing if therapy is interrupted for more than two hours. If alarm condition cannot be resolved, contact KCI. See back cover of this User Manual for country specific contact information. -
Page 48: Blockage Alert
® WARNING: Under clinician supervision, replace V.A.C. Dressing with alternate dressing if therapy is interrupted for more than two hours. If alarm condition cannot be resolved, contact KCI. See back cover of this User Manual for country specific contact information. -
Page 49: Low Pressure Alert
® WARNING: Under clinician supervision, replace V.A.C. Dressing with alternate dressing if therapy is interrupted for more than two hours. If alarm condition cannot be resolved, contact KCI. See back cover of this User Manual for country specific contact information. -
Page 50: Therapy Inactive Alarm
2. Power the unit off and then on using the Power On/Off button on the front of the unit. 3. If error persists, contact KCI. See back cover of this User Manual for country specific contact information. ® WARNING: Under clinician supervision, replace V.A.C. Dressing with alternate... -
Page 51: Service Timer Expired Alert
When ‘Days Left’ reaches (0) zero, this alert will reappear periodically during therapy. To resolve this alert: 1. Contact KCI to obtain a new Service Timer code. See back cover of this User Manual for country specific contact information. 2. Press ‘Enter Code’... -
Page 52: Frequently Asked Questions
® c t I ® ActiV.A.C. Frequently Asked Questions ® Q: How much does the ActiV.A.C. Therapy Unit weigh? ® The ActiV.A.C. Therapy Unit weighs ~1.08 kg ~2.4 lbs) with an empty canister installed. Q: How long does it take to charge the battery and how long will a fully charged battery last? ®... - Page 53 It is recommended that the patient travel with a fully charged battery, an alternate dressing, ® extra ActiV.A.C. Canister and the User Manual. Consult your clinician prior to traveling for patient specific recommendations. A car adapter is available, for a fee, from your KCI representative. ®...
-
Page 54: Standard Precautions
® c t I Standard Precautions The following are the KCI recommended daily and weekly cleaning and infection control procedures ® for the ActiV.A.C. Therapy Unit. Always follow Standard Precautions. Standard Precautions are designed to reduce the risk of transmission of microorganisms from both known and unknown sources of infection. -
Page 55: Care And Cleaning
If the unit is not operating properly refer to the Alerts and Alarms section of this manual or contact your healthcare provider or KCI. ® Avoid spilling liquid on any part of the ActiV.A.C. Therapy Unit. Liquids remaining on electronic controls can cause corrosion which can cause the electronic components to fail. - Page 56 ® c t I This page left intentionally blank...
-
Page 57: Manufacturer Information
United Kingdom www.kci-medical.com © 2007 KCI Licensing, Inc. All Rights Reserved. All trademarks designated herein are property of KCI Licensing, Inc, its affiliates and licensors. Those KCI trademarks designated with the "®" symbol are registered and those designated with "TM" are considered to be proprietary trademarks or are pending trademark applications in at least one country where this product/work is commercialized. -
Page 58: Explanation Of Symbols Used
(2002/96/EC). At the end of useful life, dispose of all waste according to local Tripping Hazard requirements, or contact your local KCI subsidiary or agent for advice. Conforms with the Medical Device No Bathing or Showering Directive (93/42/EEC) and has... -
Page 59: Specifications
® c t I Specifications* Dimensions: 19.3 x 15.2 x 6.4 cm (7.6” W x 6” H x 2.5” D) Weight (with empty canister attached): ~1.08 kg (~2.4 lbs) Pressure Options: 25 to 200 mmHg (3.3 to 26.6 kPa) Therapy Delivery Modes: Continuous or Intermittent Canister Volume: ~300 ml... -
Page 60: Customer Contact Information
F: +65 6749 6686 Orders: 1300 KCI VAC (1300 524 822) T (free): 1800 333377 E-mail: postmasterSG@kci-medical.com F: +61 (0) 2 9630 8855 F: +353 (0)14659500 Orders Fax: 1800 KCI VAC (1800 524 822) E-mail: postmastIE@kci-medical.com E-mail: postmasterAU@kci-medical.com Enquiries: 1800 815 529 Italy...
Need help?
Do you have a question about the ActiV.A.C. and is the answer not in the manual?
Questions and answers
how long does the battery last without needing to be recharged.
The battery life of the KCI ActiV.A.C. is approximately 14 hours, depending on settings.
This answer is automatically generated
My unit is not vacuuming anything out. My wound site is leaking thru the bandage & am concerned nothing coming out via vacuum