Advertisement
Quick Links
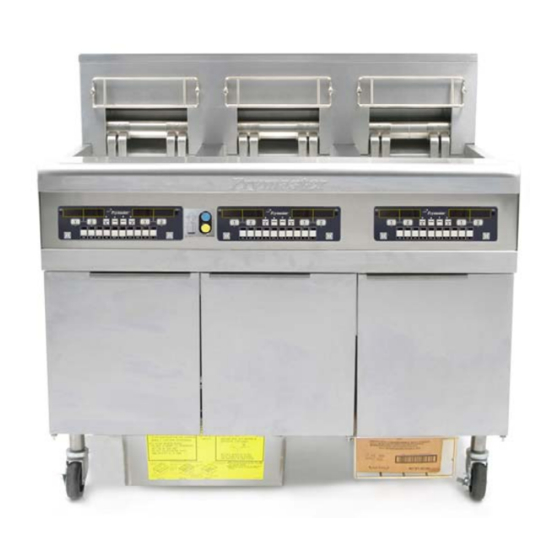
OPERATOR'S MANUAL
FRYMASTER BIELA14 SERIES LOV
ELECTRIC FRYER
This equipment chapter is to be
FOR YOUR SAFETY
installed in the Fryer Section of the
Do Not Store or use gasoline or other
Equipment Manual.
flammable vapors and liquids in the
vicinity of this or any other appliance.
MANUFACTURED
BY
P.O. BOX 51000
SHREVEPORT, LOUISIANA 71135-1000
PHONE: 1-318-865-1711
TOLL FREE: 1-800-551-8633
1-800-24 FRYER
FAX: 1-318-219-7135
TABLE OF CONTENTS
WARRANTY STATEMENT................................................................................................... Page i
INTRODUCTION................................................................................................................... Page 1-1
INSTALLATION INSTRUCTIONS ....................................................................................... Page 2-1
OPERATING INSTRUCTIONS ............................................................................................. Page 3-1
M2007 COMPUTER INSTRUCTIONS ................................................................................. Page 4-1
OPERATING THE BUILT-IN FILTRATION SYSTEM........................................................... Page 5-1
PREVENTIVE MAINTENANCE ............................................................................................ Page 6-1
OPERATOR TROUBLESHOOTING..................................................................................... Page 7-1
Frymaster L.L.C., 8700 Line Avenue 71106, 5489 Campus Drive 71129
P.O. Box 51000, Shreveport, Louisiana 71135-1000
PHONE 318-865-1711
FAX 318-219-7135
SERVICE HOTLINE 1-800-24-FRYER
DECEMBER 2007
PRINTED IN THE UNITED STATES
*8196239*
Advertisement

Related Manuals for Frymaster Enodis BIELA14 LOV Series


Summary of Contents for Frymaster Enodis BIELA14 LOV Series
-
Page 1: Table Of Contents
M2007 COMPUTER INSTRUCTIONS ................. Page 4-1 OPERATING THE BUILT-IN FILTRATION SYSTEM............Page 5-1 PREVENTIVE MAINTENANCE .................... Page 6-1 OPERATOR TROUBLESHOOTING..................Page 7-1 Frymaster L.L.C., 8700 Line Avenue 71106, 5489 Campus Drive 71129 P.O. Box 51000, Shreveport, Louisiana 71135-1000 PHONE 318-865-1711 FAX 318-219-7135... - Page 2 IF, DURING THE WARRANTY PERIOD, THE CUSTOMER USES A PART FOR THIS ENODIS EQUIPMENT OTHER THAN AN UNMODIFIED NEW OR RECYCLED PART PURCHASED DIRECTLY FROM FRYMASTER DEAN, OR ANY OF ITS FACTORY AUTHORIZED SERVICE CENTERS, AND/OR THE PART BEING USED IS MODIFIED FROM ITS ORIGINAL CONFIGURATION, THIS WARRANTY WILL BE VOID.
- Page 3 This fryer has a power cord (three-phase) for each frypot and a single five-wire cord for the entire system. Prior to movement, testing, maintenance and any repair on your Frymaster fryer; disconnect ALL electrical power cords from the electrical power supply.
-
Page 4: Introduction
BIELA14 SERIES LOV ELECTRIC FRYER CHAPTER 1: INTRODUCTION General Read the instructions in this manual thoroughly before attempting to operate this equipment. This manual covers all configurations of McDonald’s BIELA14 LOV models. The fryers in this model family have most parts in common, and when discussed as a group, will be referred to as “LOV” fryers. - Page 5 Installation, Operating, and Service Personnel Operating information for Frymaster equipment has been prepared for use by qualified and/or authorized personnel only, as defined in Section 1.6. All installation and service on Frymaster equipment must be performed by qualified, certified, licensed, and/or authorized installation or service personnel, as defined in Section 1.6.
- Page 6 QUALIFIED SERVICE PERSONNEL Qualified service personnel are those who are familiar with Frymaster equipment and who have been authorized by Frymaster, L.L.C. to perform service on the equipment. All authorized service personnel are required to be equipped with a complete set of service and parts manuals, and to stock a minimum amount of parts for Frymaster equipment.
- Page 7 FASC or distributor. Included with fryers when shipped from the factory is a list of Frymaster Dean FASCs. If you do not have access to this list, contact the Frymaster Dean Service Department at 1-800-551-8633 or 1-318-865-1711 or by email at service@frymaster.com.
-
Page 8: Installation Instructions
Section 1.6 of this manual) to install or otherwise service this equipment will void the Frymaster warranty and may result in damage to the equipment or injury to personnel. Where conflicts exist between instructions and information in this manual and local or national codes or regulations, installation and operation shall comply with the codes or regulations in force in the country in which the equipment is installed. - Page 9 NOTICE If the electrical power supply cord is damaged, it must be replaced by a Frymaster Dean Factory Authorized Service Center technician or a similarly qualified person in order to avoid a hazard. DANGER This appliance must be connected to a power supply having the same voltage and phase as specified on the rating plate located on the inside of the appliance door.
- Page 10 After Fryers Are Positioned At the Frying Station DANGER No structural material on the fryer should be altered or removed to accommodate placement of the fryer under a hood. Questions? Call the Frymaster Dean Service Hotline at 1-800-551-8633.
- Page 11 Adequate means must be provided to limit the movement of this appliance without depending on or transmitting stress to the electrical conduit. A restraint kit is provided with the fryer. If the restraint kit is missing contact your local Frymaster Dean Factory Authorized Service Center (FASC). DANGER Hot oil can cause severe burns.
-
Page 12: Operating Instructions
BIELA14 SERIES LOV ELECTRIC FRYER CHAPTER 3: OPERATING INSTRUCTIONS TYPICAL CONFIGURATION (BIELA314 SHOWN) NOTE: The appearance of your fryer may differ slightly from that shown depending upon configuration and date of manufacture. 3–1... - Page 13 3.1 Equipment Setup and Shutdown Procedures Setup DANGER Never operate the appliance with an empty frypot. The frypot must be filled to the fill line with water or oil before energizing the elements. Failure to do so will result in irreparable damage to the elements and may cause a fire.
- Page 14 3.3 Low Oil Volume Automatic Refill When the optional Low Oil Volume (LOV) system is in place on the fryer, oil is continually topped off in the frypots from a reservoir in the cabinet. The reservoir holds a 35 pound box of oil. In a typical operation this...
- Page 15 3.3.3 Routine Oil Changes When the oil reservoir level is low, a yellow LED is activated (see Figure 4). Once the reservoir is refilled and/or replaced, pressing the reset button above the JIB turns the LED off. Figure 4 2. Remove the cap and pour any remaining oil in the 1.
- Page 16 3.3.4 Bulk Oil Systems Bulk oil systems have large oil storage Fresh Oil tanks, typically located in the rear of the Connection Waste Oil restaurant, that are connected to a rear Connection manifold on the fryer. Waste oil is pumped from the fryer, via the fitting located on the right, to the disposal tanks and fresh oil is pumped from the tanks, thru the fitting located on the left, to the...
-
Page 17: M2007 Computer Instructions
BIELA14 SERIES LOV ELECTRIC FRYER CHAPTER 4: M2007 COMPUTER INSTRUCTIONS Filter, Temp, Info, Programming and Navigation Buttons Heat Cook Cycle Indicator Lamp Selection Buttons ON/OFF ON/OFF Product Buttons M2007 General Information Welcome to the M2007, a computer that retains the one-button ease of the M2000 and 100B and the utility of 40-product menu capability. - Page 18 Basic Operation...
- Page 19 Cooking with Multi-Product Display...
- Page 20 Cooking with Dedicated Display...
- Page 21 Changing from Breakfast Setup to Lunch Press and quickly Press and hold the cook release product button channel button under the for french fries. display until a beep is heard. Computer will change Display changes to FR from Hash Brn to Fries.
- Page 22 Changing from Lunch Setup to Breakfast Press and hold the cook Computer displays channel button under the display until a beep is heard. Display changes to Low Press and quickly Temp until setpoint is release product button reached. for hash browns. Display changes to Hash Brn.
- Page 23 M2007 Button Description and Functions 4.7.1 Navigation Buttons The menu on the M2007 uses buttons to navigate the various menus and submenus (see Figure 1). Figure 1 The displays on some menu items scroll text too long to fit on a single screen. Some illustrations here show additional characters to display scrolling message (see example in Figure 2).
- Page 24 M2007 Menu Summary Tree Reflected below are the major programming sections in the M2007 and the order in which submenu headings will be found under the sections in the Installation and Operation Manual. Adding New Product Menu Items See pg. 4-14 Storing Product Menu Items in Product Buttons See pg.
- Page 25 Fryer Setup Mode Programming The computer, upon initial power up, when changing out a computer or accessed from Level 1, enters setup mode. These parameters need to be set to allow the auto filtration, logs and other functions to operate correctly. The setup sets the time, date, date format, language, fryer type, vat type, oil system type and the temperature scale from F°...
- Page 26 Computer displays ENTER CODE (see Figure 16). Figure 16 5. Enter 1234 (see Figure 17). (1234) Figure 17 Computer displays time format (see Figure 18). Figure 18 6. Use the 3and 4 buttons (see Figure 19) to toggle between 24hr and 12hr (see Figure 20).
- Page 27 10. Use the 3and 4 buttons (see Figure 26) to toggle between am and pm if the 12 hour format was chosen (see Figure 27). Figure 26 Figure 27 11. With the desired selection displayed, press the (1 yes) button (see Figure 28). Figure 28 The computer displays DATE FORMAT on the left and US on the right (see Figure 29).
- Page 28 16. Use the 3and 4buttons to scroll through the language menu (see Figure 37). Figure 37 Current languages supported by the M2007 are: English, French, French Canadian, Spanish, Portuguese, German and Swedish. 17. With the desired selection displayed, press the (1 yes) button (see Figure 38).
- Page 29 NOTE: A JIB system uses a disposable JIB (Jug in a Bottle). A BULK system has large Figure 49 storage oil tanks that are connected to the fryer that fills a reservoir. 23. With the desired selection displayed, press the (1 yes) button (see Figure 50).
- Page 30 4.10.2 Adding New Product Items to the Menu This function is used to add additional products to the computer menu. To add a new product to the menu: 1. With the computer OFF (see Figure 57), enter Level 1 programming mode by pressing the TEMP and Figure 57 INFO buttons simultaneously (see Figure 58) until LEVEL 1 is displayed (see Figure 59).
- Page 31 Figure 68 (1 yes) button to select the product to 5. Press the modify (see Figure 69). Figure 69 The computer displays modify alternating with yes no (see Figure 70). (1 yes) button to modify selection (see 6. Press the (2no) button to return to Figure 71) or the PRODUCT SELECTION.
- Page 32 10. With cook time displayed on the left and :00 displayed on the right (see Figure 77) use the Figure 77 number keys (see Figure 78) to enter the product cook time in minutes and seconds (ex. 3:10 as 310) (see Figure 79).
- Page 33 18. With duty time1 displayed on the left and :00 displayed on the right (see Figure 90) use the Figure 90 number keys to enter the time in minutes and seconds for the first duty to be preformed (ex. shake the product after 30 seconds is entered as 30) (see Figure 91 Figure 91).
- Page 34 Note: If additional programming, to add other products, is necessary press the button (see Figure 103) and return to step 4. Figure 103 24. If no further programming is necessary, press the (2) button (see Figure 101). The computer displays Figure 104 the select product option with the...
- Page 35 When cooking oil is exhausted, drain the oil into an appropriate container for transport to the disposal container. Frymaster recommends a McDonald’s Shortening Disposal Unit (MSDU). Do not drain boil out solution into an MSDU. NOTE: If using an MSDU built before January 2004 the filter pan cover must be removed to allow the unit to be positioned beneath the drain.
- Page 36 Computer displays filter menu for three seconds, changing to Auto Filter (see Figure 120). Figure 120 3. With Auto Filter displayed, press the u (INFO) button (see Figure 121) to scroll to dispose (see Figure 122). Figure 121 Computer displays DISPOSE (see Figure 122). Figure 122 Figure 123 (1 yes) button to continue (see Figure...
- Page 37 6. With the MSDU or a METAL container with a capacity of FOUR gallons (15 liters) or larger is in place, press (1 yes) button to continue (see Figure 127). Figure 127 NOTE: If draining boil-out solution, only use a METAL container. Boil-out solution will damage an MSDU.
- Page 38 4.10.4.3 Draining and Disposing Oil using Bulk Oil Systems Bulk oil systems use pumps to move the oil from the fryer to holding tanks for fresh and exhausted oil. Additional plumbing is used to connect the bulk oil systems to the fryers. 1.
- Page 39 The computer displays cln vat Complete (see Figure 147). Figure 147 7. Clean the vat with a scrub brush and when complete (1 yes) button to continue (see Figure press the 148) or if waste tank is full, the message clears and Figure 148 the computer displays OFF.
- Page 40 4.10.4.4 Refilling the Vat from Bulk Oil Systems after Disposal The computer displays fill pot from bulk (see Figure 158). Figure 158 The bulk oil refill pump uses a momentary switch. It only pumps as long as the switch is depressed. (1 yes) button to refill the vat 14.
- Page 41 The first two menu items: AUTO FILTER and MANTAINENCE (MANUAL) FILTER are covered in Chapter 5. The other menu items are covered on the following pages. The DRAIN TO PAN and FILL POT FROM DRAIN PAN functions are used primarily for diagnostic purposes.
- Page 42 The heating source is disabled and the system checks that the pan is in place. If no pan is detected, the computer displays chk pan until the pan is detected. With the pan detected, the drain valve opens. computer displays draining for 20 seconds (see Figure 173).
- Page 43 Computer displays fill pot from DRAIN pan alternating with yes no (see Figure 184). Figure 184 (1 yes) button to continue (see Figure 4. Press the 185). Figure 185 Figure 186 System checks that the drain valve is closed. The return valve opens and the filter pump refills the vat.
- Page 44 2. Use the t and ubuttons to scroll to fill pot from bulk (see Figure 192). Figure 192 3. With fill pot from bulk displayed, press (1 yes) button to continue (see Figure 193). Figure 193 Computer displays fill pot from bulk, alternating with yes no (see Figure 194).
- Page 45 4.12 Programming Level One Level one programming is used to enter new products, control when AIF (auto intermittent filtration) is disallowed, and perform boil out and high-limit tests. To enter Level 1 programming mode: 1. With the computer OFF, press the TEMP and INFO buttons simultaneously (see Figure 203) for THREE Figure 203 seconds until LEVEL 1 is displayed;...
- Page 46 a. Name – Enter full product name limit eight characters (FR FRIES). b. cook time – Enter cook time (ex. 3:30 as 0330). c. temp – Enter cook temperature. (ex. 335° as 335). d. cook id – Enter four (4) letter product ID (ex. CPSY). e.
- Page 47 4. Use the 3and 4buttons to toggle between: (see Figure 217). a. disabled b. enabled Figure 217 Set this function to enabled if there are times in which the AIF (auto intermittent filtration) feature is disallowed (ex. noon rush). 5. With enabled displayed, press the (1 yes) button (see Figure 218).
- Page 48 13. If disabled is chosen in step three, the computer displays disabled and sounds an alert for three seconds (see Figure 228). Figure 228 (1 yes) button to accept disabled 14. Press the selection (see Figure 229). Figure 229 Computer displays Product selection (see Figure 230).
- Page 49 The computer displays oil rmvd, alternating with yes no (see Figure 237). (1 yes) button (see 6. If frypot is empty press the Figure 238) to continue the boil out process and skip to step 16. If the frypot contains oil, continue to step seven.
- Page 50 DANGER When draining oil into an appropriate METAL container, make sure the container will hold at least FOUR gallons (15 liters) or more. 11. When the MSDU or METAL container with a capacity of FOUR gallons (15 liters) or larger is in (1 yes) button to continue (see place, press the Figure 248...
- Page 51 The computer displays boil with the countdown timer on the left display and boilOUT on the right display Figure 259 (see Figure 259). The fryer heats to 195°F (91°C) for one hour. After one hour the heat shuts off. The computer displays boil done (see Figure 260) for three seconds when the boil out is complete and shuts off (see Figure 261).
- Page 52 The vat begins to heat. The computer displays the actual vat temperature during the test. When the temperature reaches 410°F ± 10° F (210°C ± 12°C), the high-limit should trip. NOTE: In computers used in the European Union (those with the CE mark), the temperature is 395°F (202°C). The computer displays hot hi-1 alternating with the actual temperature (ex.
- Page 53 The computer displays OFF (see Figure 276). 10. Follow the procedures on page 4-19 to dispose of the Figure 276 oil. 4.13 Programming Level Two To enter Level two programming mode: 1. With the computer OFF press the TEMP and INFO buttons (see Figure 277) simultaneously for 10 Figure 277 seconds until LEVEL 2 is displayed;...
- Page 54 4.13.1 PRODUCT COMP MODE The product comp mode allows the product compensation (sensitivity) to be changed. Some menu items may need an adjustment, depending on their cooking characteristics. Use caution when changing the product compensation, as it could have an adverse affect on the products cooking cycles.
- Page 55 4.13.2 E-LOG MODE The E-LOG mode is used to view the ten most recent error codes encountered on the fryer. These codes are displayed from 1-10 with the most recent displayed first. The time, date and error code are displayed. 1.
- Page 56 Computer displays fryer sETUP (see Figure 305). Figure 305 4. Press the t and u buttons (see Figure 306) to scroll between: a. FRYER Setup – Selects password to enter FRYER Setup mode. (Default is Figure 306 1234) b. usage – Selects password to enter usage mode to reset usage statistics.
- Page 57 4.13.4 ALERT TONE MODE The alert tone mode allows a manager to adjust the volume to nine levels and the tone is adjustable to three frequencies. One of three audio frequencies may be chosen to distinguish fryers in kitchens with multiple fryers. 1.
- Page 58 9. Press the (2) button again (see Figure 328) to exit. The computer displays OFF (see Figure 329). Figure 328 Figure 329 Note: The AIF filtration mode uses two measures before prompting to filter. One checks for cook cycles and the other checks for time. 4.13.5 FILTER AFTER The FLTR AFTR option is used to set the amount of cooking cycles which passes before the filtration prompt is displayed.
- Page 59 The computer displays fltr time on the left and :00 on the right (see Figure 340). Figure 340 3. Use the number keys from 0 to 9 to enter the amount of time between filter prompts (ex. after every 2:00 hours enter as 200) (see Figure 341).
- Page 60 NOTE: Use the 3and 4 buttons to move between days within the selections. Press the t and u buttons to move to other menu items. 3. With the desired selection displayed, press the yes) button to select chosen menu item (see Figure 348).
- Page 61 a. DAY (wed), DATE (03/20/07) – Current day and date. b. l fIltErEd # DAy – Number of times left vat filtered and day. c. L flt bpsd # day, – Number of times left vat filter was bypassed and day. d.
- Page 62 d. L on hrs # – Number of hours the left vat has been on e. R on hrs # – Number of hours the right vat has been on f. reset usage – Resets usage counters. 4. If resetting usage statistics, return to step 3 and scroll to RESET USAGE, otherwise skip to step 7.
- Page 63 2. With the desired selection displayed, press the yes) button (see Figure 372). Figure 372 3. Press the t and ubuttons (see Figure 373) to scroll between: Figure 373 FULL / SPLIT VAT CONFIGURATION a. PRODUCT fry – Last product cooked. b.
- Page 64 BIELA14 SERIES LOV ELECTRIC FRYER CHAPTER 5: FILTRATION INSTRUCTIONS Introduction The FootPrint Pro filtration system allows the oil in one frypot to be safely and efficiently filtered while the other frypots in a battery remain in operation. Section 5.2 covers preparation of the filter system for use. Operation of the system is covered in Section 5.3.
- Page 65 3. Then in reverse order, place the metal filter screen in the center of the bottom of the pan, then lay a filter pad over the screen, ensuring that the rough side of the pad is up. Make sure that the pad is in between the embossed ridges of the filter pan.
- Page 66 (1) for (2) for Press to start filtration and (see Figure 5). Figure 5 Note: If a timer button is activated during this filter prompt it will be as if No is chosen. (See below.) is chosen, SKIM VAT is displayed for ten seconds changing to cnfm fltr (see Figure 6).
- Page 67 DANGER Keep all items out of drains. Closing actuators may cause damage or injury. Troubleshooting the Auto Intermittent Filtration (AIF) 5.4.1 Incomplete AIF Should the AIF procedure fail for any reason after the second filter cycle after the filter pad was changed - the oil does not completely return to the vat, the drain valve is blocked, an actuator does not operate, etc - a signal is generated telling the computer that something is wrong.
- Page 68 If NO is chosen again, the pump runs for a final 15 seconds and the computer displays is pot filled alternating with yes no again (see Figure 17). If NO is chosen a third time (see Figure 19), the computer displays CHANGE FILTER PAD alternating with yes no (see Figure 20).
- Page 69 Computer displays filter service required - see manual alternating with yes no (see Figure 28). (1 yes) (see Figure 29) and check to see if 5. Press the pad needs replaced and filter pan needs cleaning. The fryer resumes to normal cooking mode for 30 Figure 28 Figure 29 minutes (see Figure 30).
- Page 70 5.4.4 Get Manager Flowchart Get Manager Flowchart ENTER PRESS Remove and replace the filter pan checking for excess oil in the pan. Fryer returns to cook mode for 30 minutes. Press after changing filter Fryer returns to NORMAL cook mode for 15 OPERATION minutes.
- Page 71 5.4.5 Filter Busy When FILTER BUSY is displayed (see Figure 36) the MIB board is waiting on another vat to be filtered or waiting on a computer error to clear. Wait 30 minutes to Figure 36 see if problem is corrected. If not, follow the instructions below.
- Page 72 Manual or End of Day Filtration (MAINT FLTR) NOTICE The filter pad or paper must be replaced daily. DANGER Do not drain more than one frypot at a time into the built-in filtration unit to avoid overflow and spillage of hot oil that may cause severe burns, slipping and falling. Ensure that the filter pad or paper is replaced daily to keep the system operating correctly.
- Page 73 If no pan is in place the computer displays chk pan until a pan is detected. The computer displays filtering and oil drains from the frypot (see Figure 21). Figure 21 DANGER Keep all items out of drains. Closing actuators may cause damage or injury. The computer display changes to scrub vat complete (see Figure 22).
- Page 74 The drain valve opens and remains open and the computer displays rinse again (see Figure 29). 8. If the pot is clear of debris, press the NO) button to continue and skip the rinse again cycle (see Figure 30). If rinse again is Figure 29 (1 yes) button and the desired, press the...
- Page 75 The computer will verify the oil temperature and turn on the heat source if needed. The computer will display low temp until the setpoint is reached (see Figure 36). Figure 36 Once setpoint is reached, the computer displays the product or dashed lines and is ready to resume cooking (see Figure 37).
-
Page 76: Preventive Maintenance
BIELA14 SERIES LOV ELECTRIC FRYER CHAPTER 6: PREVENTATIVE MAINTENANCE Cleaning the Fryer DANGER The crumb tray in fryers equipped with a filter system must be emptied into a fireproof container at the end of frying operations each day. Some food particles can spontaneously combust if left soaking in certain shortening material. - Page 77 Annual/Periodic System Inspection This appliance should be inspected and adjusted periodically by qualified service personnel as part of a regular kitchen maintenance program. Frymaster recommends that a Factory Authorized Service Technician inspect this appliance at least annually as follows: Fryer Inspect the cabinet inside and out, front and rear for excessive oil.
- Page 78 Verify that heating elements are in good condition with no carbon/caramelized oil build-up. Inspect the ● elements for signs of extensive dry-firing. Verify that the tilt mechanism is working properly when lifting and lowering elements and that the ● element wires are not binding and/or chafing. Verify the heating-element amp-draw is within the allowed range as indicated on the appliance’s rating ●...
-
Page 79: Operator Troubleshooting
Although the chapter covers the most common problems reported, you may encounter problems that are not covered. In such instances, the Frymaster Technical Services staff will make every effort to help you identify and resolve the problem. - Page 80 Troubleshooting 7.2.1 Computer and Heating Problems Problem Probable Causes Corrective Action A. Press the ON/OFF switch to turn A. Computer not turned on. the computer on. B. This fryer has two cords: a computer power cord and a main power cord. If the computer cord is not plugged in, the B.
- Page 81 Problem Probable Causes Corrective Action C. This fryer has two cords: 120V power cord and the main three-phase power cord. If the 120V power cord is plugged in but the main power cord is not, the computer will appear to C.
- Page 82 Problem Probable Causes Corrective Action This is normal for fryers equipped with M2007 computers. The default operational mode for these controllers is for the elements to cycle on and off until the temperature in the frypot reaches 180ºF (82ºC). In M2007 Fryer repeatedly computers, low temp will cycles on and off...
- Page 83 Problem Probable Causes Corrective Action Remove and discard product. Press and hold the cook button for three M2007 display In non-dedicated mode a product is seconds under the display with the shows REMOVE dropped that has a different setpoint error to remove the error. Reset the DISCARD.
- Page 84 Problem Probable Causes Corrective Action M2007 display shows PROBE Call your FASC Damaged computer wiring harness FAILURE with or connector. alarm sounding. Drain valve not fully closed. Press the reset switch on the front of M2007 display the MIB box, located inside the filter shows igNITION cabinet.
- Page 85 Problem Probable Causes Corrective Action B. If the motor is too hot to touch for more than a few seconds, the thermal overload switch has B. Pump motor has overheated probably tripped. Allow the causing the thermal overload motor to cool at least 45 switch to trip.
- Page 86 Problem Probable Causes Corrective Action B. In order to properly filter, the oil should be at or near 350ºF (177ºC). temperatures lower than this, the oil becomes too thick to pass through the Filter pump runs, filter medium easily, resulting B.
- Page 87 7.2.4 Auto Top Off Problems Problem Probable Causes Corrective Action A. Verify that the auto top off power switch is switched on. The switch is located behind the A. Auto top off power switch is off. JIB on the left side of the auto Frypots won’t top top off control box.
- Page 88 Frymaster, L.L.C., 8700 Line Avenue, PO Box 51000, Shreveport, Louisiana 71135-1000 Shipping Address: 8700 Line Avenue, Shreveport, Louisiana 71106 TEL 1-318-865-1711 FAX (Parts) 1-318-688-2200 (Tech Support) 1-318-219-7135 819-6239 SERVICE HOTLINE DECEMBER 2007 PRINTED IN THE UNITED STATES 1-800-551-8633...
Need help?
Do you have a question about the Enodis BIELA14 LOV Series and is the answer not in the manual?
Questions and answers