Table of Contents
Advertisement
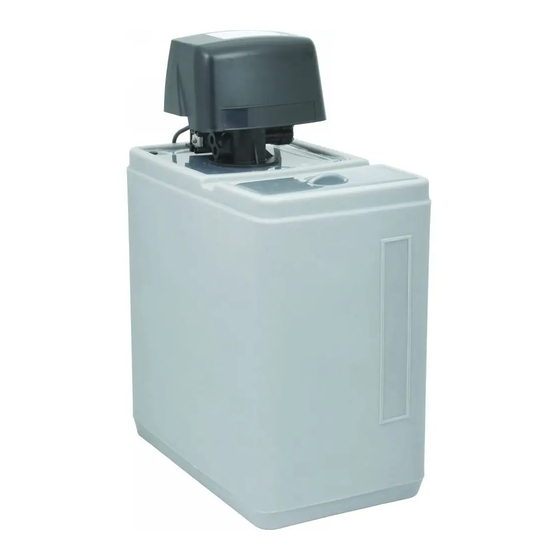
EWC TIME CLOCK
WATER SOFTENER
Before commencing the installation, please read and understand these instructions. Make
sure you have all the necessary plumbing fittings and tools.
Should you need help or advice, please telephone our helpline on:
01304 827272
Softened water is not suitable for drinking.
Prior to Fitting Your Water Softener
This softener must be Protected from frost and freezing.
Check you have sufficient water mains pressure. This should be:
Minimum operation pressure: 1.5 Bar
Maximum operating pressure: 6 Bar
With an optimum operation pressure of about: 3 Bar
o
Maximum operating temperature must not be above: 20
C, with a minimum operating temperature of
above freezing:
You can contact your local water authority for your areas mains water pressure. As a rule of thumb, if
you open the kitchen sink cold water tap fully and water splashes everywhere, the pressure could be
too high and if you can easily stop the flow with your thumb it is probably too low. Too low a
pressure, although perfectly possible is unlikely.
If the pressure is too high in your area, you will need to fit a pressure reducing valve. This can be
purchased from your EWC Ltd or your local plumbers merchants. This will prolong the life of the
softener and reduce the risk of flooding due to over pressurisation.
Water hardness test strips with their instructions attached are included with this softener. Follow
attached instructions on the test strips to determine the water hardness of your mains water and record
your results on page 11 of this manual. You will use this data later to set up the water softener.
Next:
Carefully remove the softener from the box, holding by the Cabinet, not the control box.
Important: Never lift by the black control valve/box on top of the cabinet. If you damage
this, it won't work.
Version 1. 1/12
1
Advertisement
Table of Contents

Subscribe to Our Youtube Channel
Summary of Contents for European Water Care EWC 10
- Page 1 EWC TIME CLOCK WATER SOFTENER Before commencing the installation, please read and understand these instructions. Make sure you have all the necessary plumbing fittings and tools. Should you need help or advice, please telephone our helpline on: 01304 827272 Softened water is not suitable for drinking. Prior to Fitting Your Water Softener This softener must be Protected from frost and freezing.
- Page 2 You will also find in the box: 1.) (Optional) 2 x Flexible water supply hoses. (One inlet and one outlet) 2.) (Optional) 2 metres of drain / overflow hose 3.) 1 x Salt Lid 4.) 1 x Control Valve Lid Certain Models only 5.) (Optional )1 x Worm Drive Clip...
- Page 3 8.) 1 pack of water hardness test strips When removed from the box, acquaint yourself with the connections at the rear of the water softener. These are as follows: Fig.1 1) 2 x ¾ inch BSP male connections. a. The left one being the Mains Water Inlet b.
-
Page 4: Installation Instructions
4) A white, 13mm hose barb elbow, which is located on the tank body. This is the Overflow Connection and is connected later. 5) The electrical connection cable is located under the control valve, on the right hand side. INSTALLATION INSTRUCTIONS Water softeners are very easy to install - there is only 1 electrical and 4 water connections: 1. - Page 5 Note: Install proprietary valves with direction of flow arrows as shown, terminating in ¾” BSP male (this is to accommodate the flexible hoses). To comply with Water Regulations: For Domestic installations, you must fit an approved single check non-return valve as shown in Fig 4.
- Page 6 (3) PLUMB IN THE SOFTENER INLET AND OUTLET HOSES Using the hoses provided, connect the softener inlet and outlet to the mains water pipe work, as shown to the previous diagram. Note: Ensure that the hoses are connected correctly as per the labels on the back of the softener cabinet Pressure drop across the system is rarely an issue for households fitted with cold water storage tanks.
- Page 7 Important: Make sure that no part of the hose, or pipe, run uphill, is kinked, or runs higher than the overflow outlet. The overflow must always run down hill. Do not seal the join between the wider piping and the overflow to prevent an air lock forming (see Fig.
- Page 8 Maximum fuse 3 amp Connection for wiring is as follows Brown Live Blue Neutral Yellow/Green - Earth WARNING: This appliance must be earthed. If in doubt consult a qualified electrician. LOFT OR UPPER FLOOR INSTALLATIONS Extreme care should be taken with such installations, as the potential for damage, should there be a leak, could be extremely high.
- Page 9 Set timer as described overleaf: Model E/C-STC Timer Control Valve Start –Up Procedures Fig 6 Setting the Timer Expose the timer assembly (Fig 6) by removing the black cover. This is done by gently lifting the cover upwards. 1. Manually dial the various regeneration positions by turning the control knob on the front of the control clockwise until the indicator shows that the softener is in the desired control position.
- Page 10 5. Manually turn the control clockwise to the ‘Brine + Rinse’ position and allow the control to draw water from the brine tank, until it stops drawing, (leaving approximately 2 inch of water in the brine tank, this takes approximately 10 to 12 minutes). Note: if at this stage the brine tank fills instead of emptying.
- Page 11 Fig 8 Fig 9 8. Manually advance the control clockwise to the beginning of the Settle Rinse position and allow the control to return to the In Service position automatically. This will take approximately 40 minutes and should restore the water level in the brine tank to between 3 inches to 4 inches.
- Page 12 *Circle Test Result: Very Soft / Soft / Moderately Hard / Hard / Very Hard* (Note: after fitment, if your mains water is fed to a tank wait at least a week before testing as it may take some time to expel remaining hard water in the water system). Using the table below set the time in days for when the softener should be set to regenerate.
- Page 13 14 Litre 1 Person 2 Persons 3 Persons 4 Persons 5 Persons 6 Persons 7 Persons 8 Persons Water Hardness Very Soft Not Req'd Not Req'd Not Req'd Not Req'd Not Req'd Not Req'd Not Req'd Not Req'd Soft Too Large Moderately Hard Hard Very Hard...
- Page 14 Please Note. For the larger softeners or irregular water usage, a metered softener would be a far better option for both salt and water consumption. In the UK it is very unlikely to find water in excess of very hard. If you have a private water supply i.e.
- Page 15 Note: Every single spare part no matter how small is available for this water softener from EWC Ltd. Technical help is also available via the telephone. This means that this water softener, if looked after and maintained properly, should give many years of reliable service. Trouble Shooting-Timer Controlled Water Softeners 1/ Softener Fails to regenerate a) Electrical Service Interrupted...
- Page 16 check water pressure - check for fouled resin 6/ Loss of resin through the a) Lower screen broken Replace internal lower screen - softener outlet check water pressure & or water hammer - check for fouled resin Rearrange drain hose to avoid 7/ Excessive water in brine tank a) Drain hose kinked kinking...
- Page 17 Version 1. 1/12...
- Page 18 Timer Control Valve Assembly Parts List ITEM NO: QUANTITY: PART NO: DESCRIPTION: 1 ………. 1 ………. 56283 FRONT LABEL (C TIMER) ………. ………. 56281 FRONT LABEL (E TIMER) 2 ………. 1 ………. 56201 "C" HOUSING WITH PIN 1A …….. 1 ………. 56204 "L"...
- Page 19 Version 1. 1/12...
- Page 20 Control Valve Assembly Parts List ITEM NO: QUANTITY: PART NO: DESCRIPTION: 1 ………. 3 ………. 02001 SCREW 2 ………. 2 ………. 02002 SCREW DRIVE MOUNTING 3 ………. 2 ………. 04004 WASHER 4 ………. 1 ………. 56050 END PLUG RETAINER 5 ………. 1 ……….
- Page 21 50 ………. 1 ……….. 04001 WASHER, BRINE VALVE 51 ………. 1 ……….. 04053 RETAINNING RING 52 ………. 1 ……….. 56102 BLFC, PLUG 53 ………. 1 ……….. 56101 BRINE VALVE, PLUG Cabinet Assembly 1 x CABINET (State Model and Size) 1 x STANDARD SLIMLINE SALT LID 1 x STANDARD TOP PLATE 4 x PRESS STUDS 1 x OVERFLOW ELBOW AND NUT...
- Page 22 EWC Timer Controlled Water Softener Model: Serial No: Date of Installation: Water Hardness: No. of People in Household: Regeneration Skipper Wheel Setting: Pin Numbers Pulled Out Household System: All Mains Water Tank in Loft Installed & Commissioned By: ……………………………………. Version 1. 1/12...
- Page 23 Version 1. 1/12...
- Page 24 Version 1. 1/12...
Need help?
Do you have a question about the EWC 10 and is the answer not in the manual?
Questions and answers