Table of Contents
Advertisement
Advertisement
Table of Contents

Related Manuals for Indu-Sol PROmesh P9


Summary of Contents for Indu-Sol PROmesh P9
-
Page 3: Revision Overview
No claims can be derived from the specifications, illustrations or descriptions in this documentation. Any kind of reproduction, subsequent editing or translation of this document, as well as excerpts from it, requires the written consent of Indu-Sol GmbH. All rights under copyright law are expressly reserved for Indu-Sol GmbH. -
Page 4: Table Of Contents
Contents Contents Revision overview Contents 4 General information Overview of the PROmesh P9 - Functionality Scope of supply Safety information Device ports and status indicators Device ports Installation Installation instructions Connection voltage supply and fault relay LED indicators Ports RJ-45 ports... - Page 5 Switching IGMP snooping VLAN 802.1Q Quality of Service (QoS) Bandwidth control 5.11 Access Simple Network Management Protocol (SNMP) 5.12 Maintenance SD card Backup Restore Firmware update Default Settings Restart Licenses Notes on troubleshooting Technical specifications PROmesh P9 - User Manual...
-
Page 6: General Information
Simple Mail Transfer Protocol (SMTP) for signalling alarms • Internet Gateway Management Protocol Snooping (IGMP Snooping) • Dynamical Host Configuration Protocol (DHCP) Client function • Simple Network Management Protocol (SNMP) • Updating, saving and backing up the system configuration via TFTP PROmesh P9 - User Manual... -
Page 7: Scope Of Supply
Please check the contents are complete before putting into operation. 1.3 Safety information • Never open the housing of the PROmesh P9 • Opening the housing immediately voids any warranty. • If you think the device is defective, send it back to the supplier. PROmesh P9 - User Manual... -
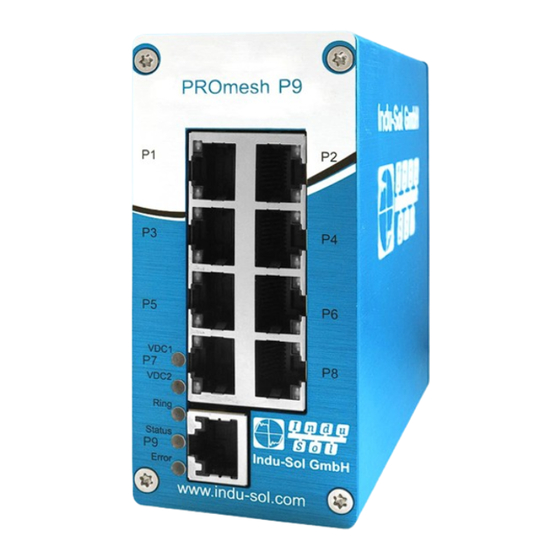
Page 8: Device Ports And Status Indicators
– DC 24V VDC2 – 0V Ground X1 Network Ports – Fault Relay 9 x RJ45 – Protective Earth Status - LED VDC1 / VDC2 / Ring / Status / Error Figure 1: Device ports PROmesh P9 - User Manual... -
Page 9: Installation
Do not mount the PROmesh P9 switches directly next to devices that generate a lot of heat and protect the switch against direct sun light to prevent an undesirable warming up. PROmesh P9 - User Manual... -
Page 10: Connection Voltage Supply And Fault Relay
Depending on the configuration, the relay contact opens then for example in case of a voltage drop or an RJ45 port fault. PROmesh P9 - User Manual... -
Page 11: Led Indicators
No voltage failure, no port fault and no configurable alarm active Green Full duplex mode (Ethernet port) No connection (LNK/ACT off) or half duplex (LNK/ACT on) Yellow Connection available LNK/ACT Flashing Sending or receiving packages (Ethernet port) No connection available Table 1: LED functions PROmesh P9 - User Manual... -
Page 12: Ports
Use twisted-pair cables of the category 5 or better to connect the RJ-45 ports. The electric connection cable between the switch and the connection partner (switch, hub, workstation etc.) must not be longer than 100 metres. PROmesh P9 - User Manual... -
Page 13: Network Topologies / Redundancy
4.1 Star structure Classic Ethernet-star structures, see Figure 4, can be networked with the PROmesh P9 switches without further configuration. The devices are functionable immediately. Figure 4: PROmesh P9 in a star-shaped network PROmesh P9 - User Manual... -
Page 14: Ring Structure
200 ms or less in case of a network failure. The MRP ring thereby increases the reliability in the network. Figure 5 illustrates an example for an application with ring functionality. Figure 5: PROmesh P9 in a ring-shaped network PROmesh P9 - User Manual... -
Page 15: Web Application
• Gateway: 0.0.0.0 • User name: admin • Password: admin The setting of your intended user addresses can be conducted easily with the Indu-Sol ServiceTool. This available download, free-of-charge from following link: https://www.indu- sol.com/support/downloads/software/. After installation and opening of the software, establish a network connection from your computer to one port of the switch and scan the system with the search setting "PROFINET device". -
Page 16: System Login
No communication is taking place at the respective port. Either there is no device connected (possibly also line interruption) or no telegram traffic can be detected (serious malfunction in the network) or the devices no longer communicate. PROmesh P9 - User Manual... -
Page 17: Start Page With Main Overview
The selection in the menu bar allows you to call up individual pages and make settings there. The displayed menu items are sub-divided into further sub-items. Message window Port statistics Leakage current Figure 7: Main overview PROmesh P9 - User Manual... -
Page 18: System Information
In this menu item, an overview of the activated or deactivated protocols and functions are displayed in addition to the device information. By selecting the respective edit button, you can switch directly to the corresponding protocols and function to make settings there. Figure 8: Status and diagnosis PROmesh P9 - User Manual... -
Page 19: Alarms / Notifications
If a trigger is triggered, there is an alarm message of the switch at the controller. This information can then be processed further by programs in the PLC. PROmesh P9 - User Manual... - Page 20 By activating the point Wrong Neighbour, an alarm is triggered and also the port assignment of the output configuration. • With the option Network Limit, messages for the exceeding of the configured limit can be sent. Figure 9: Alarms / Notifications: Adding an alarm trigger PROmesh P9 - User Manual...
- Page 21 The alarm receivers are linked to the alarm triggers by activating the checkboxes in the lower part of the page and activated by clicking on Create or Apply. Figure 10: Adding an alarm receiver PROmesh P9 - User Manual...
-
Page 22: Port Statistics
The time point at which the evaluation was started is displayed as last reset in the status line. PROmesh P9 - User Manual... -
Page 23: Syslog Messages
Enter the IP address of the syslog server written with decimal points and save the settings using the Apply button that appears at the bottom end. Please check if the server can be reached and saves the messages in a file. PROmesh P9 - User Manual... - Page 24 The time point of the deleting of the entries can be seen at the newly appearing log entry. Sorting and hiding the entries Individual columns of the syslog messages can be hidden or sorted via pull-down menus in the table headers. Figure 12: Syslog Messages PROmesh P9 - User Manual...
-
Page 25: Leakage Current
Since this takes place independently from each other, the LLDP is also termed a one-way protocol. The following information is compiled and sent by the LLDP: • System name • System description • Port description PROmesh P9 - User Manual... - Page 26 LLDP interval The LLDP interval parameter can be used to specify in what intervals (in seconds) the device-own LLDP telegram is sent to the neighbouring devices. Standard setting is 5 seconds. Figure 14: LLDP – Topology PROmesh P9 - User Manual...
-
Page 27: Basic Settings
On an existing PROFINET connection, no automatic or manual IP configuration is possible. PROFINET If the device is configured in a PROFINET network, the device receives its IP configuration from the PROFINET controller via the DCP protocol. PROmesh P9 - User Manual... - Page 28 DHCP server. Since the device has now received a new IP address, it can no longer be reached via the standard IP. Please contact your network administrator or use an appropriate tool (Indu-Sol ServiceTool) to get a new IP address. Manual In case your network does not feature a DHCP or BootP server or the setting should be made manually, then select the manual IP configuration in the upper area of the page.
-
Page 29: Password
Create combinations of letters, numerals and special characters • Use lower- and upper-case letters • Use a password with at least eight characters • Do not write down passwords Figure 17: Changing the password for administrator and guest access PROmesh P9 - User Manual... -
Page 30: Time Setting
First two positions for the month, then two for the day and finally two or four positions for the year. Enter the time and the corresponding time zone and check if everything was saved properly. Save the settings finally using the Apply button. PROmesh P9 - User Manual... - Page 31 End: Define at which date and at what time daylight saving time should end and the time changed back to normal time. • Offset: Please enter the time shift that lies between daylight saving time and standard time. Figure 18: Configuration of the time settings PROmesh P9 - User Manual...
-
Page 32: Port Configuration
Speed: The baud rate of the ports can be permanently specified. The option is provided to set a baud rate of 10 mbps or 100 mbps. Duplex: The duplex mode can be switched between semi- and full-duplex. This setting is thus permanently specified for one connection. PROmesh P9 - User Manual... -
Page 33: Port Mirroring
Once you have configures the respective parameters, click on the Apply button to save and activate the settings. Deactivate Port Mirroring in normal mode and use it only for problem analysis. PROmesh P9 - User Manual... -
Page 34: Redundancy
Usage of the redundancy protocols guarantees your network an increased reliability and availability in case of a malfunction. The failure of a component is absorbed and devices not affected by the failure can continue to communicate. PROmesh P9 - User Manual... -
Page 35: Media Redundancy Protocol (Mrp)
• Ring status: Specify whether the PROmesh P9 should act as manager or as client. Please also note thereby that only one manager may be used per ring. Figure 21: Media Redundancy Protocol (MRP) PROmesh P9 - User Manual... -
Page 36: Rapid Spanning Tree Protocol (Rstp)
Root Bridge ID: Identification number of the current root bridge, which was coordinated between the devices. • Designated Cost: Path costs calculated for the connection to the root bridge. • Root Bridge MAC Address: Displays the MAC address of the root bridge. PROmesh P9 - User Manual... - Page 37 Maximum age. Then select a Maximum age between 6 and 40 seconds that lies between the previously calculated limits. Once you have set the parameters, click on Apply to save the changes. The Root bridge information is now displayed in the upper area of the page. PROmesh P9 - User Manual...
-
Page 38: Port Settings
Backup ports can exist only there where two ports are connected as loopback via a point-to-point connection or a bridge with two or more connections to a common LAN segment. Deactivated port: A port that has no operational function in the tree structure. PROmesh P9 - User Manual... - Page 39 Force: The port is configured by standard as edge port. Auto: The detection as edge port is done automatically. Once you have set the respective parameters, click on Apply to save the settings. PROmesh P9 - User Manual...
-
Page 40: Profinet
The file is written in General Station Description Markup Language (GSDML) and serves as a basis for planning the configuration of a Profinet IO system. The option is also available to download the GSDML file via the following link: https://www.indu- sol.com/support/downloads/software/ Figure 24: Profinet PROmesh P9 - User Manual... -
Page 41: Switching
Static Ports: Specify which ports should always receive Multicast streams, independent of IGMP messages, by permanently entering the ports. Click into the column for that and select the port from the pulldown menu. • VLAN Name: The precise name of the VLAN is displayed. PROmesh P9 - User Manual... -
Page 42: Vlan 802.1Q
If the VLAN 802.1Q function is activated, you can add a new Tagged-VLAN using the Add button. Additionally you have the option to select an existing VLAN in the list and to edit or to delete it using a separate button (except VLAN ID 1 and the current management VLAN). PROmesh P9 - User Manual... - Page 43 Port Name: The port name is displayed here that you issued in the Port Configuration menu. When you add ports to your VLAN, the untagged output data traffic of these ports are tagged with the VLAN ID of your VLAN. Thus the package is uniquely associated with your VLAN. PROmesh P9 - User Manual...
-
Page 44: Quality Of Service (Qos)
(DSCP) in the IP header of the packages which can have up to 64 different priorities. As with COS, these priorities can be used to prioritise real-time control data, Voice over IP (VoIP) or audio data over normal data transmission. Adapt the settings according to your requirements. PROmesh P9 - User Manual... - Page 45 When using Quality of Service, the flow control ought to be switched off because data packages are transmitted throttled regardless of the priority when the flow control is activated. PROmesh P9 - User Manual...
-
Page 46: Bandwidth Control
Select the effective egress rate of the port. Possible settings are 128 kbps, 256 kbps, 512 kbps, 1 mbps, 2 mbps, 4 mbps and 8 mbps. The standard value is defined as "No limit". Once you have carried out the desired settings, click on "Apply" to activate them. PROmesh P9 - User Manual... -
Page 47: Access
"Delete" button. Figure 29: Overview of the currently available SNMP accesses PROmesh P9 supports SNMP of the versions V1 and V2C. Please select the desired version. Save the settings by clicking the "Create" button. PROmesh P9 - User Manual... -
Page 48: Maintenance
When entering the file name, be sure of a unique assignment to the respective device so that the file can be assigned reliably after a longer time. Once the parameters have been entered properly, click "Start backup" to save the backup file. Acknowledge the settings in the information window. PROmesh P9 - User Manual... -
Page 49: Restore
Upload: The backup file is located on the currently used computer and is transferred from there to the device. • SD card: The backup file is saved on the SD card in the device and is uploaded from there. Figure 31: Settings for recovering a configuration PROmesh P9 - User Manual... -
Page 50: Firmware Update
PROmesh P9 can be updated in the Firmware Update menu item. Please use only a firmware version that you have received from Indu-Sol and that was developed specifically for the PROmesh switches. The firmware file is provided either from a TFTP server or is loaded via upload or SD card onto the device. -
Page 51: Default Settings
IP Configuration: Enter whether the IP address, subnet mask and the gateway should be maintained after the recovery or reset to the standard settings. In the standard setting, the device does not have an IP address. This needs to be entered afterwards, for example using the Indu-Sol ServiceTool. -
Page 52: Licenses
GSDML file) as well as the contact data of the manufacturer (Figure 32). Manufacturer Please contact Indu-Sol as manufacturer of the device if you have serious problems with the configuration of the switch or questions arise that are not answered in the data sheet or in the operating instructions. -
Page 53: Notes On Troubleshooting
If in doubt, disconnect redundant network structures and reset the PROmesh P9 switch back to default settings. If the communication functions again afterwards, carry out your setting again step- by-step and observe at what point the fault occurs. PROmesh P9 - User Manual... -
Page 54: Technical Specifications
TFTP firmware update, TFTP backup and restoring Alarm contact Relay contact 25V DC (1A) / 60V DC (0.3A) Bandwidth Control Ingress and egress with combination options DHCP Client DHCP Client function to receive an IP address from the DHCP server PROmesh P9 - User Manual...
Need help?
Do you have a question about the PROmesh P9 and is the answer not in the manual?
Questions and answers