
Related Manuals for ILVE ULTRACOMBI


Summary of Contents for ILVE ULTRACOMBI
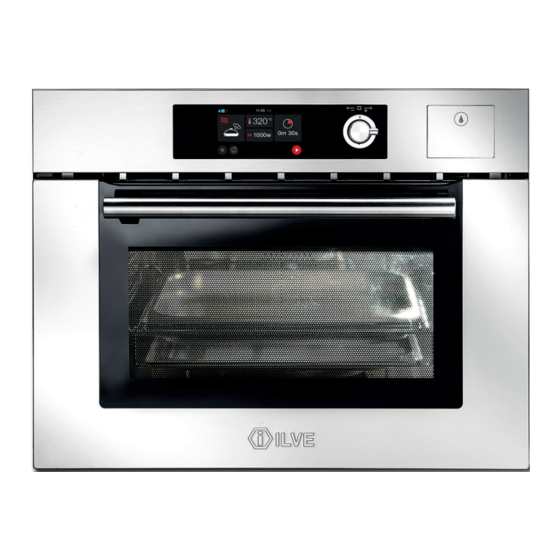
- Page 1 ULTRACOMBI Tri-mode oven hot air - steam - microwave INSTALLATION, USER AND MAINTENANCE INSTRUCTIONS cod. EI33960050000EN 11/2018...
- Page 2 INDEX IMPORTANT SAFETY WARNINGS ELECTRICAL CONNECTIONS INSTALLATION INSTRUCTIONS PRODUCT DESCRIPTION Supplied Accessories Cooking Accessories INSTRUCTIONS FOR USE Display TFT: Icon legend First start of the oven Settings Screen lock Turning the oven on and off Setting the cooking function Functions listi Setting the cooking function Cooking process Cooking function setting...
-
Page 3: Important Safety Warnings
IMPORTANT SAFETY WARNINGS Appliances’ data As well as being shown on the cover, the data plate is ap- plied to the oven door frame and is visible with the door open. CAUTION These warnings refer to different types of appliances. Pay attention in properly identifying the type you own (see the data plate). - Page 4 IMPORTANT SAFETY WARNINGS PRECAUTIONS TO AVOID POSSIBLE EXPOSURE TO EXCESSI- VE MICROWAVE ENERGY Do not attempt to operate this oven with the door open since open-door operation can result in harmful exposure to microwave energy. It is important not to damage or tamper with the safety interlocks Do not place any object between the oven front and the door or allow soil or cleaner residue to accumulate on the...
- Page 5 IMPORTANT SAFETY WARNINGS by the statutory rules of installation. When the oven is operated in microwave mode it is inten- ded to heat food and drinks. Do not use the microwa- ve mode for drying flowers, herbs, bread, rolls or other flammable materials like sponges, slippers, cushions or pads filled with cherry kernels, wheat grain, lavender or gel, such as those used in aromatherapy.
- Page 6 IMPORTANT SAFETY WARNINGS Danger of injury. The door can support a maximum weight of 8 kg. Do not let children sit on the door, lean against it or swing on it. They could injure themselves ATTENTION. Accessible parts may get very hot during ope- ration.
- Page 7 IMPORTANT SAFETY WARNINGS To avoid overheating and the following risk of a fire, it is recommended to attend the oven when cooking food- stuff in disposable containers made of plastic, cardboard or other flammable material, or when small quantities of food are reheated Do not put very cold dishes or food directly onto the inner door glass when it is hot: the thermal shock could make it...
- Page 8 IMPORTANT SAFETY WARNINGS dication of the temperature of the food or liquid in it. It is recommended to stir and shake the food also in order to ensure a uniform temperature. When using commer- cially available baby bottle sterilisers, always check that the containers are filled with the correct quantity of water indicated by the manufacturer.
- Page 9 IMPORTANT SAFETY WARNINGS Do not cook or reheat eggs in their shells using microwave power, because they could explode even after the co- oking has ended. For safety reasons, this multifunction oven may only be used when it has been built in. This is necessary to ensure that all electrical components are shielded.
- Page 10 IMPORTANT SAFETY WARNINGS Cleaning 32 • The appliance must be cleaned regularly and any food residues must be removed. Failing to clean the oven may cause deterioration of the surfaces. This can have a negative effect on the durability of the applian- ce and cause possible risk situations.
- Page 11 IMPORTANT SAFETY WARNINGS Steam cooking Do not operate the oven if the glass lamp cover has been removed. Steam could reach electrically live parts and cause a short-circuit; also electrical components could get damaged. If the multifunction oven is installed behind a furniture pa- nel (e.g.
-
Page 12: Disposal Of The Packaging Material
DISPOSAL OF THE PACKAGING MATERIAL The packaging is intended to protect the appliance from damage during transportation. The packaging materials are easily recyclable becau- se they have been selected according to environmental friendly criteria. Recycling them reduces the need for raw materials and reduces the volume of waste. -
Page 13: Electrical Connections
ELECTRICAL CONNECTIONS ATTENTION The instructions below are intended for the skilled techni- cian who will install the appliance, regulate it and perform technical maintenance and who will ensure that these operations are carried out in the most correct way possi- ble, in compliance with the regulations in force. - Page 14 ELECTRICAL CONNECTIONS -the socket or omnipolar switch, with a minimum 3 mm contact opening, must be easily reachable once the ap- pliance has been installed. - means for disconnection must be incorporated in the fixed wiring in accordance with the wiring rules ATTENTION The yellow-green ground wire must never be interrupted even by the switch.
-
Page 15: Installation Instructions
INSTALLATION INSTRUCTIONS Oven data The serial plate is positioned on one side of the front plate of the oven, and is visible opening the door; it shows all data necessary for the installation, e.g. model number nominal voltage and power input. Important points First check the dimensions of the furniture opening: they must be exactly equal to those shown in the picture. -
Page 16: Product Description
PRODUCT DESCRIPTION Control panel TFT touch Display Drawer for water load Food probe socket Grill heater Oven lamp Convection heater and fan Boiler with lid Rack supports... -
Page 17: Supplied Accessories
PRODUCT DESCRIPTION - Supplied accessories Wire rack For cookware, trays and roasting Pyrex glass tray For microwave cooking and drip pan use Steam cooking set Wire frame supporting 2 dedicated trays: - perforated tray, allows steam to reach the food comple- tely - shallow tray, to collect condensation water dripping down... - Page 18 PRODUCT DESCRIPTION - Supplied accessories Food probe To reheat and cook food selecting core temperature To fill the water tank for steam cooking and to collect the water when emptying the tank Silicon pipe To be used with the jug when emptying the tank...
-
Page 19: Cooking Accessories
PRODUCT DESCRIPTION - Cooking Accessories Baking tray (if applicable): Insert the baking tray in the wire frame as shown. Lift the outer part of the frame and push it into the cavity to slide beyond the corner. NOTE: the barrier indicated by the red arrow- must be oriented upwards and shows the back side of the frame. - Page 20 PRODUCT DESCRIPTION - Cooking Accessories Pyrex glass tray When using the glass tray put it on the upper part of the frame (the lower tray is not neces- sary). Insert the frame as seen before Wire rack Lift the outer part of the rack and push it into the cavity to slide beyond the corner.
- Page 21 INSTRUCTIONS FOR USE - Display TFT touch Icon legend Home Pause Light Start Timer °C - °F Exit - Terminate Screen lock Clock Confirm and go to next step Setting confirmation Settings Meat probe Knob present in some models. (It allows to set and confirm the functions of the TFT in addition to the Touch display)
- Page 22 INSTRUCTIONS FOR USE – First start of the oven Home: display homepage. 3 options Allows you to proceed to the screen setting of the cavity Allows you to set the timer Gives you direct access to the settings Warning at first power - on: washing cycle required (does not prevent operation if not performed)* NOTE: The yellow triangle will disappear:...
- Page 23 INSTRUCTIONS FOR USE – Settings Settings Choice of degree scale (°C or °F). Time settings. Exit the settings page. Screen lock Allows you to set the volume of the beep and choose a sound when touching the display Setting a timer 11:48 Increase or decrease the time.
- Page 24 INSTRUCTIONS FOR USE – Display TFT touch: Screen lock Turn on screen lock Enter the settings Choose Lock Screen - Choose closed Lock Give confirmation - Confirm Locked screen Turn off Screen lock Turn off Screen lock...
-
Page 25: Turning The Oven On And Off
INSTRUCTIONS FOR USE – Turning the oven on and off QUICK START ON/FUNCTION COOKING END/OFF 11:48 °C By touching any point of the TFT display the oven is At the end of any cooking process it is possible to turned on (ON state) showing this display and emit- go back to the initial home page pushing the HOME ting 3 acoustic signals. -
Page 26: Cooking Functions
INSTRUCTIONS FOR USE – Cooking functions The white frame shows the last operating mode After turning the oven on, if another function is desi- red, touching the microwave icon the full selection of the available cooking modes will appear. Choose the function touching the relevant icon. -
Page 27: Functions List
INSTRUCTIONS FOR USE – Functions list Microwave This function is especially suited for quickly reheating and defrosting food and ready meals. It is also possible to cook vegetables, fish, some cakes; moreover it is useful for softening butter, melting cho- colate and defrosting delicate cakes. - Page 28 INSTRUCTIONS FOR USE – Setting the cooking function Set the cooking time and Choose the cooking the programmed start function Light (on or off) Home (Return to home page) Set the cooking temperature °c 2a - There are three options for 2b - Confirm the selection setting the temperature:...
-
Page 29: Cooking Process
INSTRUCTIONS FOR USE INSTRUCTIONS FOR USE – Cooking process – Cooking process CAVITY SET Once the cavity has been set (cooking function, tem- perature and timer), confirm to start the preheating. At this point the display will switch to the preheating mode PREHEATING PHASE There are four levels that allow you to monitor the preheating process. - Page 30 INSTRUCTIONS FOR USE – Cooking function setting How it works Microwave operation In the oven there is a high-frequency tube (magnetron) that converts electrical energy into microwaves. These are distributed evenly throughout the oven interior, and are reflected by the metal sides of the oven interior. In order for microwaves to reach the food, they must be able to pass through the cooking utensil being used.
- Page 31 INSTRUCTIONS FOR USE – Cookware / Material Microwave Oven/Grill Defrosting Heating Cooking • Ovenproof glass and porcelain (with ● ● ● ● no metal components, e. g. Pyrex, heat-proof glass) • Non-ovenproof glass and porcelain ● • Glass and glass ceramic made of ●...
-
Page 32: Steam Cooking
INSTRUCTIONS FOR USE – Steam cooking Advantages The steam oven has many advantages, it allows to cook in a healthy and savoury way. Food is cooked by the moist heat generated by the hot water. This means that the cooking proces happens at not very high temperatures, so that minerals and vitamins inside the food are not altered. -
Page 33: Cleaning, Care & Maintenance
CLEANING - CARE - MAINTENANCE – Cleaning WARNING! Please refer to the paragraphs about safety. • Clean the front side of the appliance using a soft cloth soaked in soapy warm water. • To clean metallic surfaces use a normal detergent. •... - Page 34 CLEANING - CARE - MAINTENANCE – Cleaning WATER REQUIRED 11:48 °C 9m 30s BE CAREFUL...
- Page 35 CLEANING - CARE - MAINTENANCE – Emptying and Washing the tank At first power on, a yellow warning triangle appears on the display. Opening the door and touching it, the display shows the message: WASHING CYCLE REQUIRED If you do not want to perform the washing cycle, touching the X button makes the trian- gle disappear;...
- Page 36 CLEANING - CARE - MAINTENANCE – Emptying and Washing the tank When the tank is empty the display prompts to load the descaling solution (5% citric acid, or a package of a descaling product for coffee machine or steam iron) for a complete cleaning use 1L of solution.
- Page 37 CLEANING - CARE - MAINTENANCE – Emptying and Washing the tank Opening again the drawer and confirming, the display shows: LOAD WATER Completely fill the tank and confirm to start the pump and begin the final emptying operation. At the end (the process will take about 10 minutes) the display shows: CLEANING END When the washing has ended, pushing the confirmation button, it will be possible to start using the appliance normally.
- Page 38 CLEANING - CARE - MAINTENANCE – Emptying and Washing the tank Meaning of warnings re- levant to the water circuit WASHING CYCLE REQUIRED This warning appears every time the oven is connected to the mains supply. It is only informative and allows to normally operate the appliance even if the washing is not performed.
-
Page 39: Problem Solving
PROBLEM SOLVING – Error messages System errors The following errors are detected: The error code syntax is: “E YY X”, where: YY = error code x = cavity number when error occurred or ‘ 0 ‘ for general errors Description Error ID Cavity probe in open circuit Cavity probe in short circuit...
Need help?
Do you have a question about the ULTRACOMBI and is the answer not in the manual?
Questions and answers