Table of Contents
Advertisement
Quick Links
Advertisement
Table of Contents

Related Manuals for ILVE 200 Series


Summary of Contents for ILVE 200 Series
- Page 1 INSTRUCTION MANUAL FOR 200 SERIES BUILT-IN OVEN 200SPYKMP...
- Page 2 OPEN 24 ILVE ACCESSORIES ONLINE SHOP For a wide range of coffee machines, pods, and other ILVE accessories at the click of a button shop.ilve.com.au...
-
Page 3: Table Of Contents
TABLE OF CONTENTS Eco-Bake SAFETY INSTRUCTIONS Defrost INSTALLATION OF THE OVEN Pyrolyse (Self-Clean) Electricals Door lock for children safety (pyro) Respect for the environment Commands lock for children safety Connection to the electrical power (non pyro) mains Buzzer volume INSTRUCTIONS FOR USE Failure declarations and error codes 16 The first time you use the oven LOWER OVEN... - Page 4 Safety Warnings Models 200SPYKMPI & AO888XP The appliance is not intended for use by persons (including children) • with reduced physical, sensory or mental capabilities, or lack of experience and knowledge, unless they have been given supervised or instruction concerning use of the appliance by a responsible person for their safely.
-
Page 5: Safety Instructions
SAFETY INSTRUCTIONS - Do not disassemble any parts prior to having disconnected the oven from the mains. - Do not use the appliance if any part is broken (for example a glass). Disconnect it from the mains and call service. - Before using the oven, it is recommended to make it operate at noload at the maximum temperature for an hour to eliminate the insulating material odour. - Page 6 Refer to the figures below for the correct placement of the grills EMBOSSED GUIDES REMOVABLE GUIDES...
-
Page 7: Installation Of The Oven
INSTALLATION OF THE OVEN To install the oven into the kitchen a cutout should be made in accordance with the dimensions shown in figure. The apparatus is to be fastened to the top by means of the two screws provided in the kit through the holes made on the oven uprights. -
Page 8: Respect For The Environment
Respect for the environment The documentation for this appliance is printed on paper bleached without chlorine or recycled paper to contribute to protecting the environment. The packaging was designed to prevent damage to the environment; they are ecological products that can be recovered or recycled. Recycling the packing saves raw materials and reduces the volume of industrial and domestic waste. - Page 9 Dimensions are in millimeters...
- Page 10 Connection to the electrical power mains WARNING This apparatus must be earthed. The oven is only for domestic use. The feed voltage and the absorbed power are as indicated on the data plate attached to the left-hand side upright, which can be seen when the oven door is open. Connecting must be carried out by qualified personnel and in accordance with the regulations currently in force.
-
Page 11: Instructions For Use
INSTRUCTIONS FOR USE The first time you use the oven Clean the oven thoroughly with soapy water and rinse well. Operate the oven for about 30 minutes at maximum temperature to burn off all traces of grease which might otherwise create unpleasant smells when cooking. Oven Racks WARNING Never use aluminum foil to cover the oven racks or to line the... -
Page 12: Cooking Functions
COOKING FUNCTIONS Each type of oven is provided for various cooking systems. A system can be selected by bringing the pointer of knob to the relating symbol. Icon Mode Description Used for… All the cooking modes are OFF and the oven heating elements are OFF. The light is on only. - Page 13 The Convection Bake mode uses Consequently different foods can be the circular or third heating element cooked simultaneously (maximum hidden behind the baffle at the three levels) and is suitable for back wall of the oven. The heat is preparing a complete dinner (small circulated throughout the oven by portions).
-
Page 14: Oven Controls
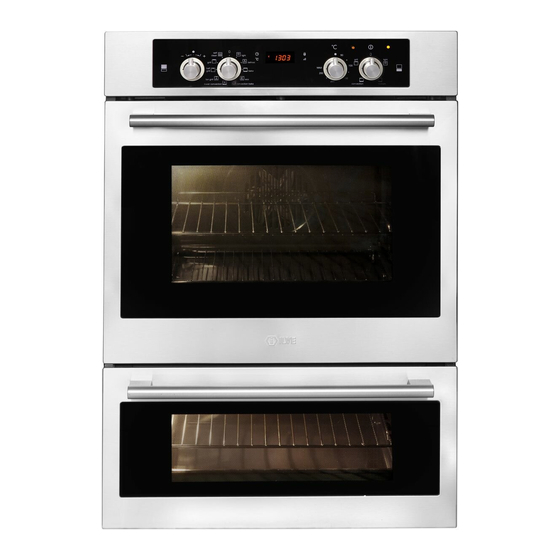
OVEN CONTROLS Control panel description The oven control panel is made with one display and four knobs. UPPER OVEN (PIROLITIC) A Time & Temperature knob (Push & Shuttle). B Mode (oven functions) knob. C Time & Temperature display. LOWER OVEN (TRADITIONAL) D Temperature knob. -
Page 15: Setting The Time Of Day
Setting the time of day The time of day is always displayed in the 24 hours format. Hours and minutes are set separately. In order to set the time of day, mode selector must be in ZERO position, the -/+ knob acts on the time of day by default. - Turn the selector left/right, the hours flash. -
Page 16: Setting An Oven Function Manually
Setting an oven function manually Turn the mode knob into the desired position, the clock display shows On for a few seconds. The oven will work for a maximum time (12hours). Depending on the oven model, the number and type of available functions can be different. If the selected function works using any heating elements, the symbol is displayed (it doesn’t appear in light and defrost position). -
Page 17: Oven Functions
- Turn the knob left/right, the hours flash. - Modify the flashing hours value turning the knob left/right. - Push the knob to switch back and forth between hours and minutes or wait a few seconds until the minutes flash. - Modify the flashing minutes value the knob left/right. -
Page 18: Eco-Bake
Eco-Bake This function is defined in order to obtain a consistent energy saving. The cooling fan is initially off and turns on only when the inner parts temperature gets high. Cooking might be a little bit slower than the standard Bake, especially when the oven is heavily loaded. Defrost This function is used to defrost frozen food in a short time. -
Page 19: Door Lock For Children Safety (Pyro)
Door lock for children safety (pyro) This is an additional safety functions available only in pyrolityc ovens. The door latch mechanism that is managed automatically during pyrolyse can be actuated manually by the user in order to lock the oven door and prevent children from having free access to the oven. - Page 20 Cooking mode table with preset, minimum, maximum temperatures (°C) and nominal power (Watt) PRESE TMIN TMAX HEATING N° MODE NAME (°C) (°C) (°C) ELEMENTS (W) ZERO LIGHT KEEP WARM 2200 BAKE 2200 ECO-BAKE 1200 LOWER BAKE DEFROST LOWER 1200 CONVECTION BAKE 2200 CONVECTION ROAST 2300...
-
Page 21: Lower Oven
LOWER OVEN The oven offers a basic choice between two types of cooking: A) conventional oven cooking B) grill (infrared radiant heat) Selector functions: Position 0 The oven is swiched OFF Position 1 Oven interior light (turn to the right) Lower heating element Position 2 Set the required temperature between 50 and 250 °C. -
Page 22: Door Locking System
DOOR LOCKING SYSTEM (Only on Upper oven) Automatic door locking during pyrolytic cycle For safety reasons, the door is locked automatically as soon as self-clean mode is selected (both standard, both eco clean). The door is also unlocked automatically when the clean time has expired but only after the temperature has fallen below the safety threshold. -
Page 23: Cleaning And Maintenance
CLEANING AND MAINTENANCE Prior to taking any action for cleaning, make sure the apparatus is cut-out from the mains. It is recommended that the oven interior be frequently cleaned. In particular, it should be cleaned every time the grill is used to prevent excessive fouling of the oven interior that may generate fumes or odours during subsequent cooking. - Page 24 Removing the “FULL GLASS” panoramic door WARNING Make sure that: • The oven is cool and power to the oven has been turned off before removing the door. Failure to do so could result in electrical shock or burns. • The oven door is heavy and fragile. Use both hands to remove the oven door.
-
Page 25: How To Remove The Inner Glass Of The "Full Glass" Panoramic Door
How to remove the inner glass of the “FULL GLASS” panoramic door 1. Wear protective gloves. 2. Place the door on a flat horizontal surface face down on a soft cloth to avoid scratching the visible part. 3. Simultaneously press the keys of the two side covers, removing the upper strip. 4. - Page 26 5. Replace the middle panes after cleaning in reverse order, checking that they are oriented so the words INTERNAL SIDE are properly legible. NOTE: a slight gap between the middle panes and the side supports is normal because it allows for the heat expansion of the glass. 6.
-
Page 27: Replacement Of The Oven Light
Replacement of the oven light WARNING Make sure that: • The oven and lights are cool and power to the oven has been turned off before replacing the light bulb(s). Failure to do so could result in electrical shock or burns. •... -
Page 28: Guidance Temperature An Time Schedule For Cooking
GUIDANCE TEMPERATURE AN TIME SCHEDULE FOR COOKING Traditional cooking system Hot-air cooking system Rack position Cooking Cooking FOOD Mode Temperature Temperature (from the time in time in °C °C bottom) minutes minutes Poork,calf (roast) 200 ÷ 225 100 ÷ 150 175 ÷... - Page 29 Warranty Card ilve.com.au Eurolinx Pty Limited A.B.N. 50 001 473 347 (b) use for purpose for which the ILVE product trading as ILVE (“ILVE”) was not sold or designed; Office: (c) use or installation which is not in 48-50 Moore Street, Leichhardt N.S.W 2040...
- Page 30 Address: State: Postcode: Email: Home Phone: Mobile: Purchase Date: (Please attach proof of purchase to validate warranty) SERIAL NUMBER MODEL NUMBER (if you cannot locate the serial number please call ILVE on 1300 85 64 11) ILVE Operating Manual 01072016...
- Page 31 Australia National Telephone Number 1300 MYILVE (694 583) New Zealand Telephone Number 0508 458 369 ilve.com.au ILVE showrooms are open Tuesday to Friday from 9am-5pm and Saturdays 10am-4pm. Closed Monday & Sunday NSW & ACT (Head Office) VIC & SA WA &...
Need help?
Do you have a question about the 200 Series and is the answer not in the manual?
Questions and answers