Table of Contents
Advertisement
Advertisement
Table of Contents

Related Manuals for Center 370


Summary of Contents for Center 370
- Page 1 RTD THERMOMETER...
- Page 2 370-00 JAN. 2006...
-
Page 3: Table Of Contents
CONTENTS TITLE PAGE 1. Introduction………………………………………………….……… 1 2. Specifications………………………………………………………..1 3. Symbol Definition and Button Location……………………..3 4. Operation Instructions……………………….…………………..5 4.1 Power-Up……………............5 4.2 Connection the Temperature Scale…………......5 4.3 Selecting the Temperature Scale……………. ……………… 5 4.4 Data-Hold Operation…………………………………………… 5 4.5 Back light Operation…………………………………………… 5 4.6 Relative Operation……………………………………………... -
Page 4: Introduction
RTD THERMOMETER 1. Introduction: This instrument is a digital thermometer for use with platinum-type temperature sensor. Temperature indication follows IEC751 temperature table for PT-type sensor. 2. Specifications: Numerical Display: 4 digital liquid crystal display Measurement Range: -100°C ~ 300°C; -148°F ~ 572°F Resolution: 0.1°C;... - Page 5 RTD THERMOMETER Note: The basic accuracy Specification does not include the error of the probe please refer to the probe accuracy specification for additional details. Sample Rate: 2 times per second Water resistance: ip67 Dimension: 150 × 66 × 31mm Weight: 175g Approx.
-
Page 6: Symbol Definition And Button Location
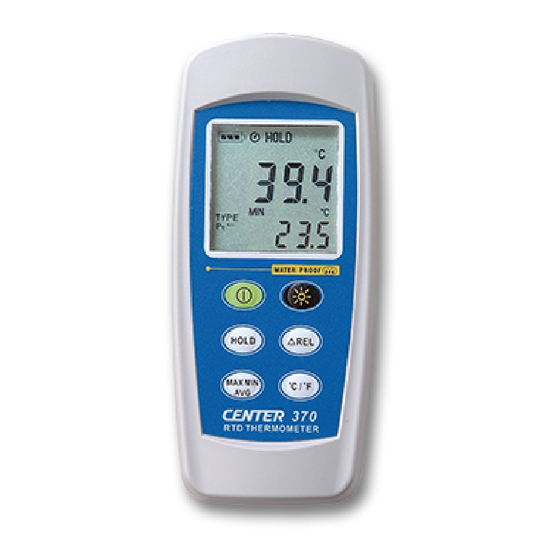
RTD THERMOMETER 3. Symbol Definition and Button Location: : This indicates that the minus temperature is sensed. °C °F : Centigrade and Fahrenheit indication. Pt xxx : Platinum Type Indication HOLD : This indicates that the display data is being hold. MAX : The Maximum value is now being displayed MIN : The Minimum value is now being displayed AVG : The Average value is now being displayed. - Page 7 RTD THERMOMETER ○ Pt type temperature sensor connector ○ LCD display ○ Power ON/OFF button ○ HOLD button ○ MAX MIN Average control button ○ Back light button ○ Relative readout button ○ °C , °F control button...
-
Page 8: Operation Instructions
RTD THERMOMETER 4. Operation Instructions: 4.1 Power-Up Press the ○ key to turn the thermometer ON or OFF 4.2 Connection the temperature probe For measurement, plug the temperature probe into the input connectors. 4.3 Selecting the Temperature Scale When the meter was first power on, the default scale setting is set at Celsius (°C) scale. -
Page 9: Relative Operation
RTD THERMOMETER 4.6 Relative Operation: When one press the “△REL” button, the meter will memorize the present reading and the difference between the new reading and the memorized data will be shown on the display. Press the “△REL” button again to exit the Relative operation. 4.7 MAX/MIN/AVG Operation: When one press the button the meter will enter the... -
Page 10: Low Battery Condition
RTD THERMOMETER 4.9 Low Battery Condition: The temperature meter incorporates visual low battery indication as follows: Battery OK, measurements are possible. Battery Low, battery needs to be replaced, measurements are still possible. Battery exhausted, the battery need to replaced with new one(size AAA, 1.5V x 3). -
Page 11: Temperature Meter Calibration Setup
RTD THERMOMETER 6. Temperature Meter Calibration Setup Below table diagram shows each button function when user enter into calibration mode. Note: Turn the Power “OFF” before attempting following SETUP. Setup mode is cancelled during below procedure if “POWER” button is pressed. - Page 12 RTD THERMOMETER 6.1 Pt type selection 6-1-1. Press and hold “Power” + “Light” buttons for 2 seconds to enter setup mode. 6-1-2. Press “Hold” button to enter PT selection mode. 6-1-3. Press “Max” button to select between PT probe type. (Pt100, Pt500, Pt1000 is circulate) 6-1-4.
- Page 13 RTD THERMOMETER 6.2 0 °C Calibration Insert temperature probe into 0°C Deg. Standard calibration unit before calibration. Hold the probe until condition is stabilized before starting calibration. 6-2-1. Press and hold “Power” + “Light” buttons for 2 seconds to enter setup mode. 6-2-2.
- Page 14 RTD THERMOMETER 6-2-5. Press “REL” button to confirm present calibration value. 6-2-6. Press “°C/°F” button to confirm selection 6.3 Recall Default factory setting value 6-3-1. Press and hold “Power” + “Light” buttons for 2 seconds to enter setup mode. 6-3-2. Press “REL”...
- Page 15 RTD THERMOMETER 6-3-3. Press “°C/°F” button to confirm PT selection 6-3-4. Press “Light” button to enter recall mode. 6-3-5. Press “°C/°F” button to confirm revert back to “Default factory setting value” 6-3-6. Press “°C/°F” button to confirm selection.
-
Page 16: Maintenance
RTD THERMOMETER 7. Maintenance Replacing the Batteries (1) Remove back cover screw to remove cover. Verify polarity and install new LR03(AAA size) alkaline batteries. (2) Fit cover properly and tighten screw. The unit’s back cover are fitted with rubber rings. After replacing the battery, check that the rubber rings are properly seated before reinstalling the back cover. -
Page 17: Cleaning
RTD THERMOMETER Cleaning In order to ensure the accuracy of the thermometer for a longer period of time you should calibrate it once a year. Clean the device and the window of the display with a clean, lint-free, antistatic and dry cleaning cloth. Do no use cleaning agents that contain carbon or benzenes, alcohol or anything similar to clean the product since these substances damage the surface of the measuring instrument. -
Page 18: Temperature Probe
RTD THERMOMETER 8. Temperature Probe 8.1 Piercing type temperature probe 8.2 Piercing type temperature probe Specification Platinum resistance thermometer Sensor Type sensor Pt 100(4 wires) IEC751, class A ±0.15°C±0.002t Accuracy (t: measurement temperature) Measurement Range -100 to 400°C Temperature Sensor Approx. - Page 19 CENTER TECHNOLOGY CORP. 4 / F NO. 415, Jung-Jeng Rd., 238 Shu-Lin, Taipei, Taiwan E-Mail : center@centertek.com http : / / www.centertek.com 370-00...
Need help?
Do you have a question about the 370 and is the answer not in the manual?
Questions and answers