
Subscribe to Our Youtube Channel
Related Manuals for phase II PHT-3300


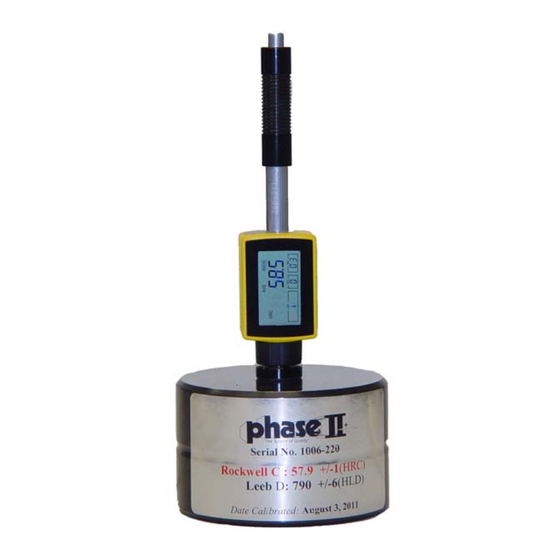
Summary of Contents for phase II PHT-3300
- Page 1 Model No. PHT‐3300 & 3340 Integrated Hardness Tester 21 Industrial Ave Upper Saddle River, NJ. 07458 P (201) 962-7373 F (201) 962-8353 www.phase2plus.com...
-
Page 2: Table Of Contents
..................3 VERVIEW 1.1 Advantages ................. 3 1.2 Main Application &Testing Range ..........4 1.2.1 Main Application ..............4 1.2.2 Testing Range ................4 1.3 Technical Specifications ............. 5 1.4 Configuration ................6 1.5 Working Conditions ..............6 1.6 Safety Instructions ..............6 &T ........ - Page 3 ................14 PERATION ETAIL 5.1 Power On/Off ................14 5.2 Material Setting ............... 14 5.3 Hardness/Strength testing switch ..........15 5.4 Hardness Scale Setting ............. 16 5.5 Impact Direction Setting ............16 5.6 Average Times Setting .............. 16 5.7 Saving testing result ..............16 5.8 Data logging ................
-
Page 4: Overview
1 Overview 1.1 Advantages PHT‐3300 is an advanced mini integrated hardness tester, characterized by its high accuracy, wide measuring range and simplicity for operation. It is suitable for testing hardness of most metals and widely applied in many industrial fields, such as petroleum, chemistry, machinery, castings, forgings, etc.. Large screen LCD, showing all functions and parameters. Test at any angle, even upside down. Direct conversion display of hardness scales HRB, HRC, HRA, HV, HB, HS, HL. Large memory could store 100 groups (Relative to average ... -
Page 5: Main Application &Testing Range
1.2 Main Application &Testing Range 1.2.1 Example of possible applications Large moulds Bearings and other large hard parts Failure analysis of pressure vessel, steam generator and other heavy equipment Large, heavy work pieces Installed machinery and permanently assembled parts Testing surface of a tight space on large part Material identification in the warehouse of metallic materials Rapid testing in large range 1.2.2 Testing Range The PHT‐3300 integrates the standard “D” impact device which covers most common applications. Other devices such as the “DL” are available for testing in tight spaces.. Testing range refer to Table 1 and Table 2 in the Appendix. -
Page 6: Technical Specifications
1.3 Technical Specifications Error and repeatability of displayed value see Table1‐1 below. Table 1‐1 Type of Hardness value of Error of No. impact Leeb standard displayed Repeatability device hardness block value 760±30HLD ±6 HLD 6 HLD 530±40HLD ±10 HLD 10 HLD 878±30HLDL ±12 HLDL 12 HLDL 736±40HLDL Measuring range:HLD(170~960)HLD Measuring direction:0°~360° Hardness Scale:HL、HB、HRB、HRC、HRA、HV、HS Display: LCD Data memory:100 groups max.(relative to impact times ... -
Page 7: Configuration
1.4 Configuration Table 1-2 Item Remarks ntity Standard Main unit D type Config. Standard test block USB cable comm. charging Battery Charger 5V 500mA Cleaning brush I Small support ring Li-Ion battery Manual DataPro software Carry Case 1.5 Working Conditions Working temperature:... -
Page 8: Structure Feature &Testing Principle
2 Structure Feature &Testing Principle 2.1 Structure Feature 2.1.1 The Hardness Tester Appearance 1 LCD display 2 Main unit 3 USB Port 4 Impact device 5 Battery compartment cover 6 Product label 7 Keypad 2.1.2 D Type Impact Device 1 Support ring 2 Impact body 3 Coil unit 4 Guide tube 5 Loading tube 6 Release button... -
Page 9: Different Types Of Impact Device
2.1.3 Different Types of Impact Device The instrument can be converted to a “DL” type impact device. Please refer to Table 1 and Table 3 for details. 2.2 Main Screen Below is the main display screen: Instruction of the Main Display Screen: :... -
Page 10: Keypad Definitions
: Times that have been impacted. Impact times : It will appear when showing the mean value of the Average Icon measured values after reaching the presetting impact times. Memory Icon: It appears when operating the instrument memory. 2.3 Keypad Definitions The instrument has three keys: 、S and H. -
Page 11: Preparation
3 Preparation 3.1 Instrument Preparation and Inspection Verification of the instrument is achieved by performing tests on the supplied standard test block. The error and repeatability of displayed value should be within the regulation of Appendix table 2. Calibration: Press key, while pressing down the S key to power on the system. -
Page 12: Preparation Of The Sample Surface
3.2 Preparation of the Sample Surface Preparation for sample surface should conform to the relative requirement in Appendix Table 3. Avoid extreme hot or cold temperatures as this will affect the readings. Surface finish should be close to Ra2µ. Clean and smooth surfaces yield the most stable and consistent results. -
Page 13: Testing Program
4 Testing Program 4.1 Start‐Up Press the key to power up the instrument. The instrument will go directly to the main measurement screen. 4.2 Loading Pushing the loading‐tube downwards until contact is felt. Then allow it to slowly return to the starting position 4.3 Localization Place the impact device support ring firmly on the surface of the sample, the impact direction should be vertical to the testing surface. 4.4 Testing Press the release button on the top of the impact device to ... -
Page 14: Read Measured Value
The distance between any two impact points or from the center of any impact point to the edge of testing sample should conform to the regulation of Table 4-1. Table 4-1 Type of Distance of center of Distance of center of Impact the two indentations the indentation to... -
Page 15: Operation Detail
5 Operation Detail 5.1 Power On/Off Press to turn on the instrument. The system would automatically detect the type of the impact device during power up, and would display this information on the screen. After pausing for several seconds, the screen will enter the main display screen as shown below: The instrument can be turned off by pressing the... -
Page 16: Hardness/Strength Testing Switch
ABLE Index Index ATERIAL ATERIAL Steel and cast steel Cast aluminum alloys Cold work tool steel Copper-Zinc alloys Stainless steel Copper –Aluminum alloys Gray cast iron Wrought copper Nodular cast iron Wrought steel In tensile strength testing mode, the following materials are selectable: Mild Steel、High-Carbon Steel、Cr Steel、Cr-V Steel、Cr-Ni Steel、... -
Page 17: Hardness Scale Setting
: Note The gauge will not display the hardness scale which is invalid. Please select material first, then select hardness scale. This unit will default back to HL scale after changing material. 5.4 Hardness Scale Setting Short-press S several times to scroll through the available hardness scales. -
Page 18: System Reset
file/group previously saved in memory. Viewing stored file/Group To view the memory data, follow these steps: 1) Long-press H to activate the data logging function. The memory icon will appear. The instrument will display the current file name, the test parameter of the group data and the mean value of the group. -
Page 19: Auto Powering Off
defaults. The only time this might possibly helpful is if the parameter in the instrument was somehow corrupted. 5.10 Auto Power Off The instrument features an auto power off function designed to conserve battery life. If the tool is idle (neither measuring nor any key operation) for 5 minutes, it will turn itself off. -
Page 20: Connecting To A Computer
Please use the supplied AC-DC adapter to charge the battery. An alternative charging method is connecting the instrument to PC via the USB cable. 5.12 Connecting to a Computer Insert one connection plug of the USB cable into the USB socket on the top side of main body, and insert the other plug into the USB port of the PC. -
Page 21: Appendix
APPENDIX Table 1 Impact device Material Method 20~68.5 20.0~69.5 20.6~68.2 HRC 38.4~99.6 37.0~99.9 HRB 59.1~85.8 HRA Steel and cast steel 127~651 80~683 81~646 83~976 80~996 80~950 32.2~99.5 31.8~102.1 30.6~96.8 20.4~67.1 20.7~68.2 Cold work HRC 80~898 100~941 tool steel 46.5~101.7 HRB Stainless steel 85~655 85~802 HRC Grey cast iron 93~334 HRC 131~387 Nodular cast iron... -
Page 22: Table
Table 2 No. Material HLD Strength σ (MPa) Mild steel 350~522 374~780 High‐Carbon steel 500~710 737~1670 Cr steel 500~730 707~1829 Cr‐V steel 500~750 704~1980 Cr‐Ni steel 500~750 763~2007 Cr‐Mo steel 500~738 721~1875 Cr‐Ni‐Mo steel 540~738 844~1933 Cr‐Mn‐Si steel 500~750 755~1993 Super strength steel 630~800 1180~2652 Stainless steel 500~710 703~1676... -
Page 23: Table
Table 3 Type of impact device D/DL Impacting energy 11mJ 2.7mJ Mass of impact body 5.5g/7.2g 3.0g Test tip hardness: 1600HV 1600HV Dia. Test tip: 3mm 3mm Material of test tip: Tungsten carbide Tungsten carbide Impact device diameter: 20mm 20mm Impact device length: 86(147)/ 75mm 50g 141mm Impact device weight: 75g Max. hardness of sample 940HV 1000HV Mean roughness value of sample 1.6μm 0.4μm surface Ra: Min. weight of sample: Measure directly >5kg >1.5kg Need support firmly 2~5kg 0.5~1.5kg Need coupling tightly 0.05~2kg... -
Page 24: Table
Table 4 Type Sketch Remarks Z10-15 For testing cylindrical outside surface R10~R15 Z14.5-30 For testing cylindrical outside surface R14.5~ Z25-50 For testing cylindrical outside surface R25~R50 HZ11-13 For testing cylindrical inside surface R11~R13 HZ12.5-17 For testing cylindrical inside surface R12.5~R17 HZ16.5-30 For testing cylindrical inside surface R16.5~R30... - Page 25 Main Headquarters: U.S.A Phase II Machine & Tool, Inc. 21 Industrial Avenue Upper Saddle River NJ 07458 USA Tel: (201) 962‐7373 Fax: (201) 962‐8353 General E‐Mail: phase2@comcast.net BEIJING, CHINA Phase II Measuring Instruments (Beijing) Ltd Room 301, Bldg 2 Qing Yuan Xi Li, Haidian District, Beijing 100192,China Tel:+86‐10‐59792409 Fax:+86‐10‐59814851 General E‐mail: info@phase2china.com.cn MEXICO VENEZUELA Phase II de Mexico Phase II Herramientas Universales EDCM.CA Calle A No. 4 Promer Piso Av. Francisco Lazo Marti CC Col. San Marcos Azcapotzalco Plaza Santa Monica PB Local C.P 02020 Mexico Santa Monica, Caracas 1040 Venezuela Tel: 011‐525‐5538‐39771 Tel: 212‐690‐28‐21 Fax: 212‐693‐29‐16 Fax: same E‐mail: edcphm@movistar.net General E‐mail: phase2mexico@hotmail.com...
Need help?
Do you have a question about the PHT-3300 and is the answer not in the manual?
Questions and answers