Table of Contents
Advertisement
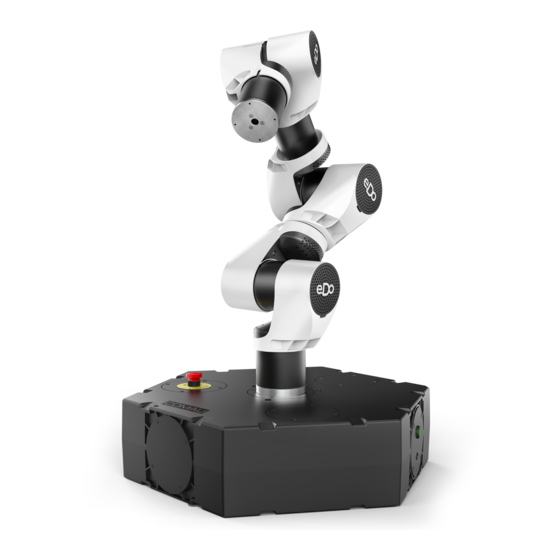
e.DO Robot
Rel. 00 - Versions
- 6 central axes
- 6 side axes
- 6 central axes, with Gripper
- 6 side axes, with Gripper
User Manual
- Robot description
- Removal of packaging and installation
- Connection and first power-up
- Tablet configuration
- Instructions for use of the application
- Instructions for cleaning and periodic checks.
CR00758210-en_00/2019.04
Advertisement
Table of Contents

Related Manuals for Comau e.DO


Summary of Contents for Comau e.DO
- Page 1 Robot Rel. 00 - Versions - 6 central axes - 6 side axes - 6 central axes, with Gripper - 6 side axes, with Gripper User Manual - Robot description - Removal of packaging and installation - Connection and first power-up...
- Page 2 The contents of this handbook are the property of COMAU S.p.A. Any reproduction, even partial, is prohibited without prior written authorization from COMAU S.p.A. COMAU S.p.A. reserves the right to modify, without notice, the features of the product presented in this hand- book.
-
Page 3: Table Of Contents
Comau Robotics Product Instruction SUMMARY SUMMARY TO WHOM IS THIS HANDBOOK ADDRESSED? ......6 PREFACE . - Page 4 Safety requirements for e.DO Marker Holder use ....... . .
- Page 5 SUMMARY GENERAL TECHNICAL FEATURES OF THE E.DO ROBOT ....62 WARRANTY TERMS AND CONDITIONS........63 Warranty conditions for B2B (Business-to-Business) sale.
-
Page 6: To Whom Is This Handbook Addressed
TO WHOM IS THIS HANDBOOK ADDRESSED? TO WHOM IS THIS HANDBOOK ADDRESSED? This handbook is addressed to users of e.DO. It contains information (e.g. description of the Robot, removal of packaging and installation, connection and first power-up, configuration of the tablet, Instructions for use of the application, instructions for cleaning and periodic checks) essential for the correct use of the Robot and the relative control app. -
Page 7: Preface
Comau Robotics Product Instruction PREFACE PREFACE This chapter contains: – Documentation storage – Limits on the handbook contents – Symbols used in the handbook – Modification History. -
Page 8: Documentation Storage
All documents supplied with e.DO must be stored in the immediate vicinity of the area in which e.DO is in use and kept available to all persons operating on the machine. The documentation must be kept intact for the entire operational life of e.DO. -
Page 9: Modification History
Comau Robotics Product Instruction MODIFICATION HISTORY MODIFICATION HISTORY The following table shows the history of the Handbook release, with related changes / improvements made. Edition of the Date Contents Handbook 2019/03 00/2019.03 First release of the handbook 2019/04 00/2019.04 Improvement of paragraphs related to “Control Switch”... -
Page 10: Safety Requirements
Comau Robotics Product Instruction SAFETY REQUIREMENTS SAFETY REQUIREMENTS Carefully read this document before carrying out any operation on the Robot. Comau will not be responsible for any damages or injuries caused by improper/unauthorized installations, uses or operations carried out on the Robot. -
Page 11: Robot General Description
Robot certification 2.1 Introduction e.DO Robot is a modular, multi-axis articulated (anthropomorphic with 6 degrees of freedom) Personal Care Robot with an integrated open-source intelligence, specially designed and built in order to be used in an educational environment, with the aim of making learning, creation, exploration and programming more fun and interactive. -
Page 12: Description Of The Main Parts That Make Up The Robot
The Robot is characterized by a modular composition, obtained by assembling and connecting the “smallest construction units” described below. Fig. 2.2 - Identification of e.DO components Tab. 2.1 - Description of the e.DO components Ref. Name and description Image Fig. 2.2... - Page 13 Comau Robotics Product Instruction ROBOT GENERAL DESCRIPTION Ref. Name and description Image Fig. 2.2 Small joint Unit consisting of joint board (for motor control), motor, encoder, gearbox, main shaft, support plate, gears and output flange. The small joint constitutes the remaining 3 axes of the Robot (Ax.
-
Page 14: Robot Axis Identification
“+” / “-” affixed directly on the Robot structure. 2.4 Intended use e.DO is suitable for use in schools / educational settings as an educational tool to support the teaching of school subjects such as mathematics, geometry, technical education and programming and finds various applications depending on the school of use (elementary, middle, high schools, university, etc.). -
Page 15: Incorrect, Unintended And Not Allowed Uses
2.6 Robot certification The e.DO Robot is considered a “Machine” as defined in Article 2(a) of the Machinery Directive 2006/42/EC and anthropomorphic “Personal Care Robot (type 1.1)” with 6 degrees of freedom as set out in the standard EN ISO 13482:2014. - Page 16 Comau Robotics Product Instruction ROBOT GENERAL DESCRIPTION Fig. 2.4 - Plate with CE marking (facsimile) xxxx REL. xxx xxxxxxxx xxxxxxxx xxx lb / xxx kg – A: Machine name and release – B: Product Part No. – C: Date of issue and serial number –...
- Page 17 - CE Declaration of Conformity (facsimile) Any unauthorized HW / SW modification and/or use of tools or tools other than those listed and described in the chapter Available options for e.DO will give rise to forfeiture of the CE certification.
-
Page 18: Robot Handling, Assembly And First Start
First power-up of the Robot 3.1 How to handle the Robot inside the packaging The e.DO Robot is packed inside a cardboard box. The box is equipped with special handles to be used as gripping points for manual lifting and handling. -
Page 19: Removal Of The Robot From The Packaging
2 corners shown in the figure as gripping points; – remove e.DO by grasping it by the base as shown in the figure; do not grasp e.DO by the rest of the structure to avoid possible damage; –... -
Page 20: Robot Positioning On Supporting Surface
Comau Robotics Product Instruction ROBOT HANDLING, ASSEMBLY AND FIRST START 3.3 Robot positioning on supporting surface After removing the Robot from the packaging, position it on the supporting surface. Make sure that the supporting surface: – is not made of particularly slippery material;... -
Page 21: Robot Connection
Comau Robotics Product Instruction ROBOT HANDLING, ASSEMBLY AND FIRST START 3.4 Robot connection In order to make the Robot operational it is necessary to make the following minimum connections: – Emergency stop push-button connection – Connection to the electric power supply mains. -
Page 22: Connection To The Electric Power Supply Mains
Use only the power supply provided as standard with the Robot; Check the integrity of the power cord and the power supply; in case the power cord is damaged, do not connect it to the electrical mains and contact the Comau Service Centre. -
Page 23: First Power-Up Of The Robot
Comau Robotics Product Instruction ROBOT HANDLING, ASSEMBLY AND FIRST START 3.5 First power-up of the Robot To power up the Robot for the first time: – check that you have correctly performed the Connection to the electric power supply mains... -
Page 24: Configuration And Connection Of The Command Interface (Tablet)
– e.DO configuration 4.1 Requirements The e.DO Robot can be controlled through a special app that can be installed on tablets with Android operating system (supported versions: from Android 5.0 to 8.0.0) and with a minimum screen size of 7”. -
Page 25: Download Of The App
Comau Robotics Product Instruction CONFIGURATION AND CONNECTION OF THE COMMAND INTERFACE (TABLET) 4.2 Download of the app The app for e.DO control via tablet can be downloaded for free from the internet, directly from the “Making / Apps” section of the website: https://edo.cloud The “Apps”... -
Page 26: Installation Of The App
* the wording may vary depending on the tablet model and the version and/or customization of the tablet's operating system. At the end of the installation, the e.DO app will be available among the tablet applications, identified by the icon... -
Page 27: Running Of The App And Connection To E.do
Comau Robotics Product Instruction CONFIGURATION AND CONNECTION OF THE COMMAND INTERFACE (TABLET) 4.4 Running of the app and connection to e.DO Open the e.DO app by tapping the icon When launched, the following screen images are displayed: Once the app has been completely started, the following screen image appears: Via this screen image it is possible to perform: –... -
Page 28: Selection Of Interface Language
Comau Robotics Product Instruction CONFIGURATION AND CONNECTION OF THE COMMAND INTERFACE (TABLET) 4.4.1 Selection of interface language To select the language of the app interface: – press the “Language” button at the top left of the app's main screen image;... -
Page 29: Connection To E.do
“Wi-Fi” section; among the available Wi-Fi networks, there will be a network named according to the following syntax: edo.wifi.SerialNumber* *The e.DO Serial Number is indicated on the CE identification plate of the Robot, as shown below: xxxx REL. xxx... -
Page 30: E.do Configuration
4.5.1 e.DO configuration selection After connection of e.DO, the configuration selection page is displayed. Through this page it is possible to select the configuration of e.DO tool, choosing one of the available items from the drop-down menu: - no tool - e.DO Gripper... -
Page 31: E.do Calibration
– using the buttons at the bottom, select the joint to be calibrated; The e.DO calibration must be performed on all joints; we recommend a progressive calibration of the joints, from joint 1 to 6. If the Robot is already in the calibration position (Robot in “vertical” position), it is possible to calibrate all the joints simultaneously by pressing “Calibrate all joints”... - Page 32 0 - OFF position – due to lack of electrical power supply to e.DO (for various reasons such as for example lack of power supply directly from the electrical power mains, disconnection of the power supply cord, etc.).
-
Page 33: Use Of The "E.do" App
“About” Menu 5.1 How to move e.DO through the app To move e.DO, it is necessary to access the Homepage of the app by selecting the menu button at the top left, then selecting “Home” item. The movement of e.DO through the app can be done in three different ways, described below: –... -
Page 34: Movement In Cartesian Mode
Comau Robotics Product Instruction USE OF THE “E.DO” APP 5.1.1 Movement in Cartesian mode The movement in Cartesian mode allows e.DO to be moved using Cartesian coordinates. Movement modes To carry out the movement in Cartesian mode: – select the “Cartesian” item;... -
Page 35: Movement In Joints Mode
Comau Robotics Product Instruction USE OF THE “E.DO” APP 5.1.2 Movement in Joints mode The movement in Joints mode makes it possible to move the e.DO axes (joints) one at a time by selecting them individually directly from the app interface. Movement modes To carry out the movement in Joints mode: –... - Page 36 Comau Robotics Product Instruction USE OF THE “E.DO” APP Recovery mode from anomaly / collision Following a collision, the Robot stops automatically and no movement is allowed through the app; “Unbrake” screen image appears on the tablet (need for the execution of the Robot axis brake release).
-
Page 37: Movement In Input Mode
“Input” item present in the center of the screen image; – on the left side of the screen image, select the mode (Joints or Cartesian) through which to enter the coordinates of the point that you want to be reached by e.DO; – in case of selection of “Joints”... - Page 38 Comau Robotics Product Instruction USE OF THE “E.DO” APP Stopping mode In the Input mode, the Robot stops automatically after releasing the “Go to point” button or after releasing the “Home” button. Recovery mode from anomaly / collision Following a collision, the Robot stops automatically and no movement is allowed through the app;...
-
Page 39: How To Create A Movement Program
USE OF THE “E.DO” APP 5.2 How to create a movement program e.DO allows the user to create small movement programs, to be run in automatic mode. The creation of a movement program is possible in the following 2 ways: –... - Page 40 – assign a name to the point (“Name” field (A) at the top left); – if present, select the open or closed position of the e.DO Gripper (“Gripper closed” switch (B) at the top right); – select the type of movement with which you want to save the point, to be chosen between Joints and Cartesian (“Movement type”...
- Page 41 Comau Robotics Product Instruction USE OF THE “E.DO” APP – at the end of program creation, a screen image similar to the following will be displayed; Delete Delete Sort Sort Clone Clone Edit – you can: • modify a previously created point by tapping on the corresponding line;...
-
Page 42: Creating A Movement Program Through "Blockly
“+” button to create a new project, entering the desired name by means of the related pop-up window that will appear at the time of the project creation; – “Blockly editor” screen image for creating the new Blockly program will open; the first block “e.DO Blockly start” will be created automatically;... - Page 43 “e.DO Move” blocks allow to enter e.DO movement commands in Joints or Cartesian mode; • “e.DO Gripper” blocks allow to enter e.DO Gripper movement commands (opening / closing) and to measure the opening level of the e.DO Gripper itself; • “e.DO Timer” blocks allow to enter delays between the movements;...
- Page 44 Comau Robotics Product Instruction USE OF THE “E.DO” APP – once the program has been completed it is possible to: • start / stop using “Play” (A) and “Stop” (B) buttons present at the bottom of the screen image; •...
-
Page 45: Settings" Menu
Comau Robotics Product Instruction USE OF THE “E.DO” APP 5.3 “Settings” Menu “Settings” menu is accessible by selecting the menu button at the top left, then selecting the “Settings” item. Through the “Settings” menu, you can access a series of Robot settings pages: –... -
Page 46: Lan Configuration
Comau Robotics Product Instruction USE OF THE “E.DO” APP 5.3.1 LAN Configuration Through “LAN Configuration” page, it is possible to access the page showing the information relating to the LAN to which the Robot is connected, and to modify the related properties/settings: –... -
Page 47: Wi-Fi Configuration
Comau Robotics Product Instruction USE OF THE “E.DO” APP 5.3.2 Wi-Fi Configuration Through “Wi-Fi Configuration” page, it is possible to access the page showing the information relating to the Wi-Fi network to which the Robot is connected, and to modify the related properties/settings: –... -
Page 48: Blockly
Comau Robotics Product Instruction USE OF THE “E.DO” APP 5.3.3 Blockly Through the “Blockly” page, it is possible to create e.DO movement programs using a simplified visual programming environment composed of function blocks, each corresponding to a specific command. To create a program, simply drag the desired blocks into the appropriate programming space, positioning and constraining them in order to obtain the desired function. -
Page 49: Control Switch
5.3.4 Control switch Selecting the “Control switch” item, a pop-up window will appear through which it will be possible to switch the e.DO control mode from tablet to Teach Pendant after a specific Procedure for connecting e.DO to the Desk Simulator... -
Page 50: About" Menu
5.4 “About” Menu “About” menu is accessible by selecting the menu button at the top left, then selecting the “About” item. Through this page you can view information relating to the firmware version of various HW and SW elements of e.DO. -
Page 51: Available Options For E.do
Comau Robotics Product Instruction AVAILABLE OPTIONS FOR E.DO AVAILABLE OPTIONS FOR E.DO e.DO can be equipped with the following optional devices, in order to expand its functionalities: – e.DO Gripper – e.DO Marker Holder The use of other tools or extensions different from those indicated in this chapter is to be understood as “incorrect use”... -
Page 52: E.do Gripper
How to mount the e.DO Gripper on the e.DO Robot 6.1.1 What is the e.DO Gripper for? The e.DO Gripper is a gripper specifically designed to be installed on the wrist of the e.DO Robot. The e.DO Gripper allows the execution of programs including small operations for... -
Page 53: E.do Gripper Technical Features
Do not use the e.DO Gripper working with wet or damp hands or feet. In the event of a fault or malfunction, do not disassemble or attempt to repair the e.DO Gripper by yourself; contact the Comau Service Center. See also the following address: edo.cloud/support-and-contacts/. -
Page 54: How To Mount The E.do Gripper On The E.do Robot
Comau Robotics Product Instruction AVAILABLE OPTIONS FOR E.DO 6.1.5 How to mount the e.DO Gripper on the e.DO Robot For detailed instructions and mounting procedures of the e.DO Gripper on the e.DO Robot, consult the Service Manual. -
Page 55: E.do Marker Holder
The e.DO Marker Holder is a tool specifically designed to be installed on the wrist of the e.DO Robot. The e.DO Marker Holder allows you to fix on the wrist of the e.DO Robot a felt-tip marker and have e.DO write operations on flat surfaces. -
Page 56: Safety Requirements For E.do Marker Holder Use
Comau Robotics Product Instruction AVAILABLE OPTIONS FOR E.DO 6.2.2 Safety requirements for e.DO Marker Holder use When using the e.DO Marker Holder, wear safety glasses of F.F. class (low energy impact). 6.2.3 e.DO Marker Holder diagrams and drawings For detailed instructions and drawings of the e.DO Marker Holder, consult the Service Manual. -
Page 57: How To Fix The Marker On The E.do Marker Holder
(B) (to be fixed on the base flange) Fig. 6.3 - e.DO Marker Holder - Composition To fix the marker on the e.DO Marker Holder you need to: – remove the marker holder (B) from the base flange (A), turning it counterclockwise, as indicated by the arrow “OPEN”... -
Page 58: E.do Cleaning Instructions And Periodic Checks
E.DO CLEANING INSTRUCTIONS AND PERIODIC CHECKS E.DO CLEANING INSTRUCTIONS AND PERIODIC CHECKS To keep e.DO efficient and properly functioning it is necessary to periodically carry out cleaning operations and checks as described and summarized below in the following table. Tab. 7.1 - Cleaning operations and periodic checks... -
Page 59: Periodic Checks
7.1.1 Check the presence and conservation state of the warning signs and labels When is it necessary to check the warning signs and labels of e.DO? The check of the warning signs and labels must be carried out before each use of the Robot. -
Page 60: Check The Correct Fixing Of The E.do Parts
Robot joints. In the event that one or more parts of e.DO are not correctly fixed, do not use the Robot and ensure correct tightening and fastening of loose or wobbly parts (for details, see the Service Manual). -
Page 61: E.do Cleaning
The general cleaning of e.DO must be performed at the end of each use. In case of long periods of non-use, it is recommended to put e.DO inside the original packaging or cover it appropriately with special sheets / nylon, to protect it from dust. -
Page 62: General Technical Features Of The E.do Robot
Maximum temperature gradient 1,5 °C/min Power supply voltage / frequency 230 Vac / 50 Hz Area of application and intended use Educational, mainly for didactic purposes Noisiness < 70 dB(A) * Limitation due to the maximum capacity load of the e.DO Gripper... -
Page 63: Warranty Terms And Conditions
Robot has been installed and used correctly, in full compliance with the technical features indicated in the technical documentation and instructions. To activate the Robot warranty it is necessary to register on the e.DO website, at https://edo.cloud/. As an example, outside the scope of the warranty are any malfunctions deriving from: –... -
Page 64: Warranty Conditions For B2B (Business-To-Business) Sale
Customer; after the assistance, the Robot shall be sent to the Customer directly by Comau, free of charge. 9.2 Warranty conditions for B2C... - Page 66 Original instructions Made in Comau...
Need help?
Do you have a question about the e.DO and is the answer not in the manual?
Questions and answers