
Subscribe to Our Youtube Channel
Related Manuals for SMART-AVI EZWall-Pro V2


Summary of Contents for SMART-AVI EZWall-Pro V2
- Page 1 EZWall-Pro V2 User Manual Multi‐Format Video Wall Processor www.smartavi.com Tel: (800) AVI‐2131 (702) 800‐0005 2455 W Cheyenne Ave, Suite 112 North Las Vegas, NV 89032...
-
Page 2: Table Of Contents
NOTICE: The information contained in this document is subject to change without notice. Smart-AVI makes no warranty of any kind with regard to this material, including but not limited to, implied warranties of merchantability and fitness for any particular purpose. Smart-AVI will not be liable for errors contained herein or for incidental or consequential damages in connection with the furnishing, performance or use of this material. -
Page 3: Introduction
introduction Thank you for choosing Smart‐AVI EZWall‐Pro for your video wall solution. The EZWall‐Pro 3x3 V2 offers top‐notch HD‐DVI output for five different type of signal inputs. Create striking 3x3 wall displays easily with simple signal‐switching and flexible connectivity. The EZWall‐Pro V2 even features a fully‐integrated USB media player, perfect for populating your displays with enticing digital content. -
Page 4: Technical Specifications
technical specifications: VIDEO Output Resolutions Up to 1080P (1920x1080@60Hz) Input Resolutions Up to 1080P (1920x1080) Input Video Signal 1.2 volts Input DDC Signal 5 volts Outputs (12) DVI-D DVI Format Single-link Inputs (3) HDMI, (1) VGA, (1) IR, (1) RS-232, (1) USB 2.0 Type A, (1) RJ-45 HDCP Compliance 1.0/2.0 Audio... -
Page 5: Hardware Installation
hardware installation 1. Position EZWall‐Pro 3x3 V2 conveniently and keep it unplugged. 2. Connect DVI output cables between the EZWall‐Pro 3x3 V2 and your video wall screens 3. Connect any input to their corresponding signal source (Blu‐Ray player, computer, etc) 4. -
Page 6: Hardware Installation
HARDWARE INSTALLATION notice: The Smart‐AVI EZWall‐Pro 3x3 V2 is available in several configurations; For this particular setup, ports 4, 8, and 12 are optional. The remaining ports; 1,3,5,7,9,11,2,6 and 10 are functional and are required for displaying nine large‐scale screens. -
Page 7: Front Panel Control
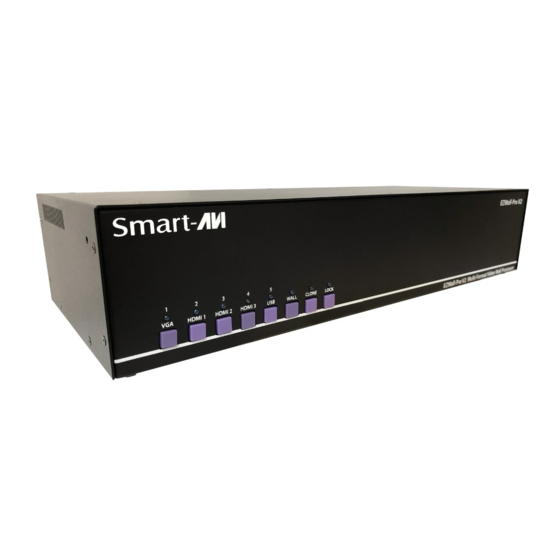
FRONT PANEL CONTROL To switch to Video Wall mode, press the WALL button. To switch to Clone mode, press the CLONE button. To switch between listed sources, press: 1. VGA 2. HDMI 1 3. HDMI 2 4. HDMI 3 5. USB * 6. -
Page 8: Establishing An Rs-232 Connection
ESTABLISHING AN RS-232 CONNECTION Before you start: The EZWall‐Pro 3x3 V2 may also be controlled via RS‐232 commands. This feature requires that an RS‐232 card is installed in your computer or a USB to RS‐232 adapter. Check the RS‐232 connections on your computer and the EZWall‐Pro 3x3 V2 to determine if you need a male to male, female to female or male to female cable. -
Page 9: Ir Remote Control
IR Remote Control BUTTON DESCRIPTION WALL Video Wall Mode CLONE Clone Mode Pressing SOURCE followed by pressing a SOURCE number will select the source port number. USB Player Remote Control** BUTTON DESCRIPTION (Navigating Menus) Pressing USB followed by pressing number 1 or 2 will select the USB port. [OK] Center Button Enter or Select Navigate UP... -
Page 10: Control Via Ethernet
CONTROL VIA ETHERNET EZWall‐Pro 3x3 V2 TCP/IP control is a feature that allows mode switching and other configurations to be controlled remotely via HTTP. Manage your EZWall‐Pro 3x3 V2 with ease from anywhere in the world. First you must find the IP address for the EZWall‐Pro 3x3 V2. Finder.exe (Smart IP‐Finder) is convenient‐ ly available on our website;... - Page 11 CONTROL VIA ETHERNET (CONTINUED) Enter the IP address into a web browser of your choice. You should see the EZWall‐Pro 3x3 Home/Wel‐ come page. Click on the LOG IN tab in the top tool bar. Enter the User ID and Password in the Login page. The User ID and Password are case sensitive.
- Page 12 CONTROL VIA ETHERNET (CONTINUED) You can use the internal web page to set the EZWall‐Pro 3x3 V2 to Wall Mode or Clone Mode and set the desired source*. See Figure 11‐1. * USB player requires the IR Remote Control for navigation and media selection.
-
Page 13: Firmware Update
FIRMWARE UPDATE Identify the COM port on your PC. 1. Click the Start button in the lower left corner of your Windows PC. 2. Click on Control Panel. 3. Click on Device Manager. 4. Click on the arrow next to “Ports (COM & LPT)”. 5. -
Page 14: Firmware Update
FIRMWARE UPDATE (CONTINUED) Click on the “Select Flash Hexfile” button. Navigate to and select the .hex firmware file. Click the “Program Flash” button. A green progress bar will display under the “Program Flash” button. The Status light will turn yel‐ low and display “Uploading”. -
Page 15: Limited Warranty Statement
LIMITED WARRANTY STATEMENT A. Extent of limited warranty Smart‐AVI Technologies, Inc. warrants to the end‐user customers that the Smart‐AVI product specified above will be free from defects in materials and workmanship for the duration of 1 year, which duration begins on the date of purchase by the customer. Customer is responsible for maintaining proof of date of purchase.
Need help?
Do you have a question about the EZWall-Pro V2 and is the answer not in the manual?
Questions and answers