Table of Contents
Advertisement
Quick Links
Advertisement
Table of Contents

Related Manuals for Heska Element COAG


Summary of Contents for Heska Element COAG
- Page 1 ™ Heska Element COAG Veterinary Analyzer Operator’s Guide November 8, 2017...
-
Page 3: Table Of Contents
......™ ™ 1.2. Intended Use of the Heska Element COAG 1.2. Intended Use of the Heska Element COAG Analyzer Analyzer . - Page 4 ........42 ™ ™ 5.5. Disposal of the Heska Element COAG 5.5. Disposal of the Heska Element COAG Analyzer Analyzer .
- Page 5 Contents 8.2. Test Specifications 8.2. Test Specifications ......58 8.3. Test Requirements 8.3.
-
Page 7: About This Guide
About this Guide ™ This Operator’s Guide is written for Heska Element COAG Analyzers with software newer than version 03102017_0848. Please refer to Section 3.2.2 Section 3.2.2 for information regard- ing finding the version of the software currently installed on the analyzer and instructions to upgrade to the newest version. -
Page 9: The Heska Element Coag ™ Veterinary Analyzer
Part I. ™ The Heska Element COAG Veterinary Analyzer... -
Page 11: Introduction
™ The Heska Element COAG Analyzer enables veterinarians to perform automated ™ in-clinic specialty testing using disposable cartridges. The Heska Element COAG Analyzer’s operation is based on light absorption. ™ The Heska Element COAG Analyzer contains microprocessors and LED optical el- ements to control all testing and analytical functionalities. -
Page 12: Basic Operating Principles
Analyzer’s database. No interaction is needed or required by the user during the analysis. ™ 1.4. Features of the Heska Element COAG Analyzer • Large, 7-inch color touchscreen •... -
Page 13: Symbols Used In Labeling
™ • Once the pouch has been opened, the Heska Element COAG cartridge must be used within the time limit stated on the package insert. - Page 14 ™ Do not reuse cartridges. All Heska Element COAG cartridges are for single use only. Once used, the cartridge should be disposed of in accordance with...
-
Page 15: System Description And Setup
• Do not expose the Heska Element COAG Analyzer to extreme temperatures: below 59 °F (15 C) and above 86 °F (30 C). Never expose the Heska Element ™ COAG Analyzer near a heat source nor expose it to direct sunlight. -
Page 16: Unpacking
• Sealing Cartridge • Power supply with cord • Power cord ™ • Heska Element COAG Diagnostic System Operator’s Guide. ™ • Quick Guide for each of the tests in the Heska Element COAG test portfolio, see Part II Part... -
Page 17: Main Components
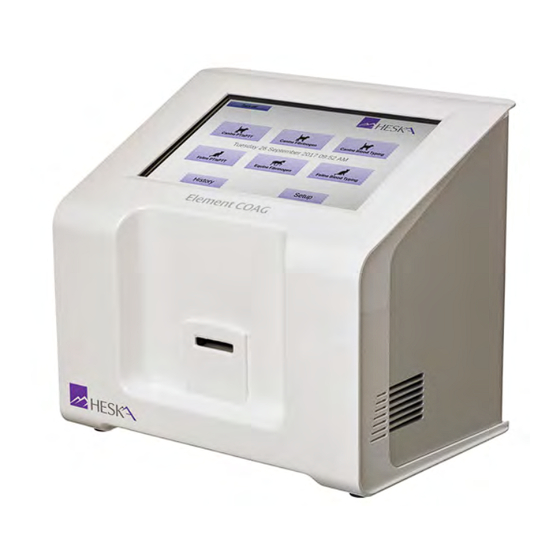
LAN port and two USB 2.0 ports. An on/off button is located at the rear of the instrument as well. Power Touch Cartridge On/Off USB 2.0 Supply Screen Slot Button Ports Port Connector ™ . : Front (left) and back (right) view of the Heska Element COAG Analyzer. - Page 18 2. System Description and Setup ™ . : Technical Specifications for the Heska Element COAG Analyzer. Operating Environment Indoor use only Temperature 59 °F to 86 °F (15 C to 30 C) Max. Relative Humidity 80 % Max. Altitude 9843 ft (3000 m)
-
Page 19: The Heska Element Coag ™ Cartridge
If the instrument has been stored outside the aforementioned temperature range, let the instrument reach room temperature prior to use. • When the abovementioned factors have been met, place the Heska Element ™ COAG Analyzer on a clean, flat, and stable vibration free surface at least 15 cm (6 in) from the nearest object. - Page 20 2. System Description and Setup ™ The Heska Element COAG Analyzer is now ready for configuration. See Chapter 3 Chapter 3 a detailed description of the Analyzer software and configuration options.
-
Page 21: Configuring The Heska Element Coag Analyzer
™ 3. Configuring the Heska Element COAG Analyzer 3.1. The Home Screen The Home Screen is the instrument’s main menu screen, see Figure 3.1 Figure 3.1. This screen is the first screen visible after the instrument has been turned on and serves as the main access point for operating the Analyzer and modifying the settings of the instrument. -
Page 22: Configuration Of The Heska Element Coag ™ Analyzer
Setup on-screen touch button for instrument configuration. This opens the Settings Menu for configuration. The instrument configuration is described in Section 3.2 Section 3.2. ™ 3.2. Configuration of the Heska Element COAG Analyzer ™ Configuration of the Heska Element COAG Analyzer is performed from the Settings Menu which is accessed by touching the Setup button at the Home Screen. -
Page 23: Clinic Info
™ 3.2. Configuration of the Heska Element COAG Analyzer Connections Use this menu to install an external printer or connect the instrument to a Laboratory Information System (LIS), see Section 3.2.6 Section 3.2.6 for a detailed discussion of the connectivity options. -
Page 24: Software Version/Upgrade
™ 3. Configuring the Heska Element COAG Analyzer 1. Touch the purple arrow button across the Clinic Info field on the Settings Menu. This opens the Clinic Info screen shown in Figure 3.3 Figure 3.3. 2. Edit each field by touching across each field. -
Page 25: Copy Data From The Analyzer
Current Software version text field. Software upgrade requires that you obtain a USB memory stick containing an installer for the new software from Heska Corporation or from your Distributor. 3.2.3. Copy Data from the Analyzer All test data and results stored in the Analyzer can be copied to a USB memory stick... -
Page 26: Customize
When Patient ID required is set to Yes, it is not possible to continue a test sequence without supplying information about the Patient ID. Requiring Patient ID is highly recommended when using Heska Element ™ COAG with a LIS, since editing the Patient ID is no longer possible after testing. -
Page 27: Regional Setup
™ 3.2. Configuration of the Heska Element COAG Analyzer (mg/dL) and grams per deciliter (g/dL). By default, the fibrinogen results are re- ported in grams per liter. Add-sample notification Change the frequency of beeps when a test is ready for the sample. -
Page 28: Set Date
™ 3. Configuring the Heska Element COAG Analyzer Language Use this menu to select the language used by the instrument, see Section 3.2.5.4 Section 3.2.5.4. Keyboard layout Use this menu to change the keyboard layout, see Section 3.2.5.5 Section 3.2.5.5. - Page 29 ™ 3.2. Configuration of the Heska Element COAG Analyzer The Date Format is shown below the Entry Box. Incorrect Format message is displayed above the entry box until the complete entry has been made. When the entry has been completed with the correct format,...
-
Page 30: Set Time
™ 3. Configuring the Heska Element COAG Analyzer 3.2.5.2. Set Time The screen for setting or displaying the current time is shown in Figure 3.9 Figure 3.9. . : Time menu. The current time is dis- played in the text field at the top of the page. -
Page 31: Set The Date Format
™ 3.2. Configuration of the Heska Element COAG Analyzer 3.2.5.3. Set the Date Format The screen for setting or displaying the current date and time format is shown in Figure 3.10 Figure 3.10. Two formats are available: USA When this date/time format is active, the date is shown as mm/dd/yy and the time is displayed using the 12-hour system followed by AM or PM. -
Page 32: Set The Language
™ 3. Configuring the Heska Element COAG Analyzer 3.2.5.4. Set the Language The screen for selecting or displaying the language used by the graphical user interface is shown in Figure 3.11 Figure 3.11. The currently active language is indicated by a dark purple arrow button to the right of the language name. -
Page 33: Set The Keyboard Layout
™ 3.2. Configuration of the Heska Element COAG Analyzer 3.2.5.5. Set the Keyboard Layout The screen for selecting or displaying the keyboard layout used by the graphical user interface is shown in Figure 3.12 Figure 3.12. The currently active keyboard layout is indicated by a dark purple arrow button to the right of the keyboard layout name. -
Page 34: Connections
Network The network text field shows the status of the build in Laboratory Information System (LIS). By default, data export to a LIS is disabled. Refer to Section 3.2.6.2 Section 3.2.6.2 ™ for details regarding how to configure the Heska Element COAG Analyzer for use with a LIS. - Page 35 ™ 3.2. Configuration of the Heska Element COAG Analyzer ™ To configure the Heska Element COAG Analyzer’s connections to an external printer or an external network, touch the to the right of the preferred category. Touching Done returns to the Settings Menu.
-
Page 36: Printer
To change the printer or to view a list of printer models compatible with the Heska Element ™ COAG Analyzer, follow these steps: 1. From the Home Screen, touch Setup (this opens the Settings Menu). -
Page 37: Network
This section discusses prerequisites and guidelines relevant to LIS technicians and the ™ options that are available regarding data transmission from the Heska Element COAG Analyzer to a media within your data exchange network. If your laboratory does not have a Laboratory Information System setup, leave the Data Export setting at off... - Page 38 ™ 3. Configuring the Heska Element COAG Analyzer Note that the information is transmitted in the language chosen on the Heska Element ™ COAG Analyzer. Contact Heska Corporation for an updated list of applied LIS tags, enabling your LIS ™...
- Page 39 Origin to a fixed value, you must contact you local IT administrator to obtain the values for the IP Address, Subnet mask and Default gateway. If you have a strict IT setup at your facility, and need to white-list your Heska ™...
-
Page 40: Quality Assurance
™ 3. Configuring the Heska Element COAG Analyzer A Note on the Communications Log: In the service page of the Heska Element ™ COAG Analyzer, a log of the data export communication can be found (the last 1000 messages are shown). - Page 41 Analyzer should use when performing a Fibrinogen Test. If the calibration is changed, you must touch Save to store the new selection and return the Settings Menu. Calibrate To perform a new calibration of the Heska Element COAG ™ Analyzer for use with the Fibrinogen Test, touch the Calibrate button.
-
Page 42: Analyzer Self Test
Settings screen, touch Setup on the Analyzer’s Home Screen and touch the to the ™ right of the Screen Saver category in the Settings Menu. The Heska Element COAG Analyzer’s screen saver consists of user-selected pictures shuffled randomly. : Screen saver settings. -
Page 43: Load Pictures
Touching Done in the Screen Saver Settings menu returns to the Settings Menu. 3.2.8.1. Load Pictures ™ Pictures for display when the Heska Element COAG Analyzer’s screen saver is running can be loaded from the Screen Saver Pictures menu, see Figure 3.20 Figure 3.20. - Page 44 ™ 3. Configuring the Heska Element COAG Analyzer 3. From the Screen Saver Settings page, touch to the right of the Load pictures entry (this opens the Screen Saver Pictures page, see Figure 3.20 Figure 3.20). 4. Insert a USB stick with the desired pictures in the USB port on the back of the Analyzer, see Figure 2.1...
-
Page 45: Memory Database
4. Memory Database ™ Up to a 1000 test results are automatically stored in the Heska Element COAG Ana- lyzer’s memory database. The files in the database are sorted by date, with the most recent first. Each file is stored with Patient ID, Sample ID, Test Date and Time, and test results. -
Page 46: Performing A Database Search
4. Memory Database The Resend button is only visible if the Analyzer is connected to a LIS. Use the Resend button to syncronize the results in the LIS if you have changed the Analyzer configuration (language, time format, etc.) or if the connection to the LIS has been corrupted. All test results will remain in the Analyzer’s database and only a copy will be transmitted to the LIS. -
Page 47: Search By Patient Id
4.2. Performing a Database Search Sample ID Supply a text string for filtering the results based on the user-supplied Sample IDs. See Section 4.2.2 Section 4.2.2 for details. From date & To date Supply dates for filtering the results based on the test dates when the analyses were performed. -
Page 48: Search By Date
4. Memory Database Writing the whole Sample ID info is not necessary. You can write the word or just part of the word as the search phrase. 4.2.3. Search by Date 1. Touch History on the Home Screen, and then touch Search on the lower right hand side of the Memory screen to access the Search Menu. -
Page 49: Maintenance And Support
A visual inspection of the instrument for damage and a regular cleaning of the surface are strongly recommended. ™ Do not use the Heska Element COAG Analyzer if it appears to be damaged. Disconnect the power, and contact your Distributor for technical support. -
Page 50: Service
The instrument monitors its internal hardware and software and reports problems to the display screen (see Troubleshooting Section). If the instrument, for some reason, does not work properly and needs to be serviced, please contact your Distributor or Heska Corporation Customer Support for technical assistance at 1-800-464-3752. -
Page 51: Troubleshooting
6.3. List of Advisories ™ In case a problem occurs during a test, the Heska Element COAG Analyzer will in most instances report an Advisory Number. For a list of possible advisories and corresponding corrective actions, please refer to Table 6.2 Table 6.2. - Page 52 6. Troubleshooting If the problem persists after trying the corrective action listed for the relevant advisory number in Table 6.2 Table 6.2, please contact technical support. . : List of Advisories. Cause Corrective Action Blood sample not detected due to Repeat the test with a new cartridge.
-
Page 53: Screen Calibration
RBCs or lipemia new sample 6.4. Screen Calibration A screen calibration can be initiated by touching the touch screen (anywhere) during start- ™ up of the Heska Element COAG Analyzer. Figure 6.1 Figure 6.1 shows the Screen Calibration initiation. - Page 54 6. Troubleshooting Once the screen calibration has been initiated, a progress-bar will appear. Upon progress bar time-out, the screen calibration program will start automatically. Otherwise, touch Start Now on the touch screen to initialize the program immediately. To cancel the screen calibration, touch the Cancel button.
-
Page 55: The Heska Element Coag ™ Test Portfolio
Part II. ™ The Heska Element COAG Test Portfolio... -
Page 57: Pt/Aptt Combination Test
7. PT/aPTT Combination Test The PT/aPTT Coag Combo cartridge ™ used with the Heska Element COAG Analyzer is designed to detect and diag- nose abnormalities in Prothrombin Time (PT) and Activated Partial Thromboplastin Time (aPTT). Each PT/aPTT Coag Combo cartridge contains dual optical detection windows filled with micro-channels: one for detect-... -
Page 58: Test Specifications
7. PT/aPTT Combination Test aPTT Prolonged Normal Prolonged Normal Prolonged Normal Common path- Intrinsic path- Extrinsic path- way disorder No coagula- way disorder way disorder tion disorder combined intrinsic and extrinsic pathway disorder Hemophilia A (VIII) Factor VII deficiency Consider primary bleeding disorder Over-heparinization - platelets... - Page 59 If stored in accordance with these guidelines, the test cartridges are stable until the expiration date printed on the pouch label. The test cartridge can be used only once and only in combination with the Heska Element ™...
- Page 60 7. PT/aPTT Combination Test . : Specifications for the PT/aPTT COAG Combo Test. Measurement Technology Clot time, light absorbance Result Units Second Reference Ranges Species aPTT Feline (Cat) 15 s to 21 s 90 s to 130 s Canine (Dog) 14 s to 19 s 75 s to 105 s Dynamic Range...
-
Page 61: Test Requirements
7.3. Test Requirements 7.3. Test Requirements 7.3.1. Materials and Equipment The following materials and equipment are required in order to perform a Heska Element ™ ™ COAG PT/aPTT COAG Combo Test on the Heska Element COAG Analyzer: ™ • Heska Element COAG Analyzer •... -
Page 62: Limitations
The veterinarian is always the final arbiter of test result interpretation and impact on ™ diagnosis. Therefore it is highly recommended that Heska Element COAG test results should be scrutinized in the light of a specific patient’s condition and medical history, as well as current or potential therapy. - Page 63 7.5. Test Procedure Remove a pouch with a test cartridge from the refrigerator and let the pouch and cartridge reach room temperature 59 °F to 86 °F/15 C to 30 C before starting the test. Draw blood from the patient into a sample tube containing 3.2 % sodium citrate as an anticoagulant.
- Page 64 7. PT/aPTT Combination Test Touch Next to continue. The Cartridge Warm- ing Up screen opens. It takes approximately 90 seconds for the Ana- lyzer to warm up the test cartridge to 99 °F or 37 C depending on the environment’s temper- ature.
-
Page 65: Equine Fibrinogen Test
10 minutes including warm-up time. 8.1. Fibrinogen Testing ™ . : The Heska Element COAG Fibrinogen test kit. Fibrinogen is an acute phase protein (APP), used as a clinical indicator of acute or chronic systemic inflammation. APPs are quickly released into the bloodstream as a reaction to injury or infection. -
Page 66: Test Specifications
One pre-filled tube with diluent should be used with each test. Dispose of the diluent tube after running a test. The test cartridge can be used only once and only in combination with the Heska ™ Element COAG Analyzer. - Page 67 8.2. Test Specifications ™ . : Specifications for the Heska Element COAG Fibrinogen Test. Measurement Technology Light absorbance, turbidity-based plasma assay Result Units mg/dL, g/L or g/dL Reference Range Species mg/dL Horse (equine) 150 to 400 1.5 to 4.0 Dynamic Range...
-
Page 68: Test Requirements
8.3.2. Centrifuge Table 8.2 Table 8.2 lists the required centrifugation time as a function of centrifuge radius and revolutions per minute to obtain platelet-poor plasma as needed by the Heska Element ™ COAG Fibrinogen Test. Some centrifuges do not display the -loading of the sample, but instead show the revolutions per minute (RPM) of the centrifuge. -
Page 69: Sample Preparation
RBCs. As part of the test procedure, the extracted platelet-poor plasma must be diluted in ™ accordance with the on-screen instruction on the Heska Element COAG Analyzer. Follow standard blood-drawing procedures at all times and pay special attention to the... -
Page 70: Limitations
The veterinarian is always the final arbiter of test result interpretation and impact on ™ diagnosis. Therefore, it is highly recommended that Heska Element COAG test results should be scrutinized in the light of a specific patient’s condition and medical history, as... -
Page 71: Test Procedure
Any test result exhibiting inconsistency with a patient’s status should be repeated and/or supplemented with additional diagnostic tests. ™ The accuracy of Heska Element COAG Analyzer test results is largely dependent on the quality of the sample specimen which in turn is dependent on: •... - Page 72 8. Equine Fibrinogen Test From the Home Screen, touch the Equine Fib- rinogen button to start the test. When the message Please insert new cartridge flashes on the screen, insert the Heska Ele- ™ ment COAG test cartridge completely into the cartridge slot on the front of the Analyzer.
- Page 73 8.5. Test Procedure Do not add sample while the cartridge is warming up. Wait until a prompt appears on the screen instructing you to add the sample. By default, a message Add sample and wait flashes on the screen and a single beeping sound can be heard which signals that the diluted plasma sample can now be added to the cartridge.
-
Page 75: Canine Fibrinogen Test
9. Canine Fibrinogen Test ™ The Heska Element COAG Canine Fib- rinogen cartridge used with the Heska El- ™ ement COAG Analyzer is designed to measure the concentration of clottable fib- rinogen in a canine (dog) plasma sample using the Ellis–Stransky method. -
Page 76: Test Specifications
One pre-filled tube with diluent should be used with each test. Dispose of the diluent tube after running a test. The test cartridge can be used only once and only in combination with the Heska ™... - Page 77 9.2. Test Specifications ™ . : Specifications for the Heska Element COAG Canine Fibrinogen Test. Measurement Technology Light absorbance, turbidity-based plasma assay Result Units mg/dL, g/L or g/dL Reference Range Species mg/dL Dog (canine) 120 to 300 1.2 to 3.0...
-
Page 78: Test Requirements
9. Canine Fibrinogen Test 9.3. Test Requirements 9.3.1. Materials and Equipment The following materials and equipment are required in order to perform a Canine Fibrino- ™ gen Test on the Heska Element COAG Analyzer: ™ • Heska Element COAG Analyzer •... - Page 79 Other than centrifugation, no special sample preparation is needed before initiating the Canine Fibrinogen Test. As part of the test procedure, the extracted platelet-poor plasma must be diluted in accordance with the on-screen instruction on the Heska Element ™ COAG Analyzer.
-
Page 80: Limitations
The veterinarian is always the final arbiter of test result interpretation and impact on ™ diagnosis. Therefore, it is highly recommended that Heska Element COAG test results should be scrutinized in the light of a specific patient’s condition and medical history, as well as current or potential therapy. -
Page 81: Test Procedure
See Chapter 3 Chapter 3 details regarding how to set the Analyzer up correctly. Verify that you have the necessary materials and equipment for performing a Heska ™ Element COAG Canine Fibrinogen test, see Section 9.3... - Page 82 9. Canine Fibrinogen Test From the Home Screen, touch the Canine Fib- rinogen button to start the test. When the message Please insert new cartridge flashes on the screen, insert the Heska Ele- ™ ment COAG test cartridge completely into the cartridge slot on the front of the Analyzer.
- Page 83 9.5. Test Procedure Do not add sample while the cartridge is warming up. Wait until a prompt appears on the screen instructing you to add the sample. By default, a message Add sample and wait flashes on the screen and a single beeping sound can be heard which signals that the diluted plasma sample can now be added to the cartridge.
-
Page 85: Canine Dea 1 Blood Typing
10. Canine DEA 1 Blood Typing ™ The Canine DEA 1 Test Cartridge is used in conjunction with the Heska Element COAG Analyzer for in vitro blood group determination testing. The Canine DEA 1 cartridge is intended for use in performing a rapid blood group determination for Canine DEA 1 from a drop of diluted EDTA-stabilized canine whole blood. -
Page 86: Blood Groups
DEA 1 positive and negative blood. A dog that is DEA 1 negative should not receive DEA 1 positive blood. ™ The Canine DEA 1 test cartridge used with the Heska Element COAG Analyzer is intended for use to classify dogs as DEA 1 positive, negative or inconclusive. - Page 87 10 minutes. The time it takes to perform a blood type determination ™ with the Heska Element COAG Analyzer depends on factors such as type of test and test environment. At room temperature, it takes about 90 seconds for the instrument to warm up the test cartridge to 99 °F or 37 C.
-
Page 88: Test Requirements
10.3.1. Materials and Equipment ™ In order to perform a Canine DEA 1 Blood Typing Test with the Heska Element COAG Analyzer, the following materials and equipment are required. The following materials are required but not provided with the Canine DEA 1 Blood Typing Test: ™... -
Page 89: Blood Sample Preparation
The veterinarian is always the final arbiter of test result interpretation and impact on ™ diagnosis. Therefore it is highly recommended that Heska Element COAG test results should be scrutinized in the light of a specific patient’s condition and medical history, as well as current or potential therapy. -
Page 90: Test Procedure
Blood samples with a hematocrit of less than 10 % or greater than 70 % are not ™ recommended for use with the Heska Element COAG Analyzer. Blood samples outside this range may result in an instrument error or inaccurate test result. - Page 91 finding the result in the Analyzer’s database. : Enter the previously measured hematocrit value in percent using the on-screen keyboard. Based on the specified hematocrit the Heska ™ Element COAG Analyzer will calculate the number of diluent drops needed for correct di- lution of the sample.
- Page 92 10. Canine DEA 1 Blood Typing : Dilute the sample following the on-screen in- structions. First, dispense the number of drops of diluent stated on the screen into one of the supplied sample tubes. Then mix 100 µL of blood into the diluent using the fixed volume pipette and supplied pipette tip.
- Page 93 The Element COAG™ DEA 1 Blood Typing Test is a joint development of dmslaboratories, dmslaboratories inc. and Heska and is manufactured by Zoetis Denmark ApS. Element COAG™ is a trade- mark of Heska. : Remove the used test cartridge and dispose of it properly.
-
Page 95: Feline A, B And Ab Blood Typing
11. Feline A, B and AB Blood Typing ™ The Feline A & B Blood Typing Test Cartridge is used with the Heska Element COAG Analyzer for in vitro blood group determination. The Feline A & B Blood Typing cartridge is intended for use in performing a rapid blood group determination for cats from a drop of diluted EDTA-stabilized whole blood. -
Page 96: Blood Transfusion Risks
48]. 11.2. Test Specifications ™ The Feline Blood Typing test cartridge used with the Heska Element COAG Analyzer is intended for use to classify cats as A positive, B positive, or A and B positive. Test results obtained under normal operating conditions have an accuracy of 99.31 %. - Page 97 11.2. Test Specifications ™ The time it takes to perform a blood type determination with the Heska Element COAG Analyzer depends on factors such as type of test and test environment. At room temper- ature, it takes about 90 seconds for the instrument to warm up the test cartridge to 99 °F or 37 C.
-
Page 98: Test Requirements
11. Feline A, B and AB Blood Typing The expiration date of each cartridge is printed on the pouch label. Do not use the cartridge after the expiration date. The test cartridge can be used only once and only in combination with the Heska ™ Element COAG Analyzer. -
Page 99: Blood Sample Preparation
The veterinarian is always the final arbiter of test result interpretation and impact on ™ diagnosis. Therefore it is highly recommended that Heska Element COAG test results should be scrutinized in the light of a specific patient’s condition and medical history, as well as current or potential therapy. -
Page 100: Test Procedure
11.5. Test Procedure ™ Before performing any tests, be sure that the Heska Element COAG Analyzer has been installed properly in accordance with the instructions in this guide. See Chapter 3 Chapter 3 details regarding how to set the Analyzer up correctly. - Page 101 11.5. Test Procedure On the on-screen keyboard, enter the cartridge code (printed on the cartridge pouch label) in the entry field and touch Done Touch Confirm to acknowledge that the blood has been obtained in a EDTA test tube and that the tube was appropriately filled.
- Page 102 The Element COAG™ Feline Blood Typing Test is a joint development of dmslaboratories, dmslaboratories inc. and Heska and is manufactured by Zoetis Denmark ApS. Element COAG™ is a trade- mark of Heska. : Remove the used test cartridge and dispose of it properly.
-
Page 103: Bibliography
Bibliography [1] B. Wiinberg, A. L. Jensen, E. Rozanski, P. I. Johansson, M. Kjelgaard-Hansen, M. Tranholm, and A. T. Kristensen, The Veterinary Journal 179, 121 (2009). [2] B. Wiinberg, A. L. Jensen, M. Kjelgaard-Hansen, R. Rojkjaer, P. I. Johansson, L. P. Gade, D. - Page 104 Bibliography [14] L. Lacerda, R. Campos, M. Sperb, E. Soares, P. Barbosa, E. Godinho, R. Ferreira, V. Santos, and F. D. Gonzalez, Archives of Veterinary Science 11, 40 (2006). [15] M. H. Barton, D. D. Morris, N. Crowe, C. Collatos, and K. W. Prasse, Journal of Veterinary Diagnostic Investigation: Official Publication of the American Association of Veterinary Laboratory Diagnosticians, Inc 7, 380 (1995), ISSN 1040-6387, PMID: 7578455.
- Page 105 Bibliography [31] M. Pichler and G. Turnwald, Physiology, collection, storage, and indications for whole blood therapy. Comp Cont Ed Pract Vet 7, 64 (1985). [32] G. Turnwald and M. Pichler, The Compendium on Continuing Education for the Practicing Veterinarian (USA) (1985). [33] H.
- Page 108 Heska Corporation 3760 Rocky Mountain Avenue Loveland, Colorado 80538...
Need help?
Do you have a question about the Element COAG and is the answer not in the manual?
Questions and answers