
Related Manuals for Heska Element DC5X


Summary of Contents for Heska Element DC5X
- Page 1 Veterinary Chemistry Analyzer Veterinary Chemistry Analyzer Product Manual Veterinary Chemistry Analyser Veterinary Chemistry Analyser...
- Page 2 Thank you for purchasing the Element DC5X® Veterinary Chemistry Analyzer. The Element DC5X Veterinary Chemistry Analyzer (henceforth, the Element DC5X Analyzer) is an in vitro diagnostic medical device for veterinary hospital use, to analyze blood by colorimetric end-point, rate and ISE tests, using the DRI-CHEM SLIDES.
-
Page 3: Table Of Contents
Element DC5X Table of Contents Veterinary Chemistry Analyzer SECTION 1: USING THIS MANUAL Cautions and Warnings Used in the Manual ..................................1 Operating Cautions ...............................................1 Biohazards and Disposal ............................................1 Warnings Regarding Explosives ........................................2 Warnings Regarding Electric Shock ......................................2 Electromagnetic Compatibility (EMC) .......................................2 Caution Regarding Moving Parts .........................................3... - Page 4 Dilution Tests ................................................30 Powering Off the Element DC5X Analyzer ..................................32 Sample Tubes for the Element DC5X Analyzer ................................34 3.8.1 Blood Collection Tubes ........................................34 3.8.2 Producing Samples Using Sample Tubes ................................34 3.8.3 Sample Racks ............................................35 QC Card System ..............................................
- Page 5 SECTION 7: TROUBLESHOOTING Error Display ................................................76 7.1.1 Error Log ..............................................76 7.1.2 Error Code and Reference Section Table ................................78 7.1.3 Printout Reference Table ....................................... 80 Troubleshooting ..............................................81 7.2.1 Startup Errors ............................................81 7.2.2 Printer or LCD Trouble ........................................81 7.2.3 Slide Reading Errors ..........................................
- Page 6 8.4.14 Operator ID Setting ........................................116 8.4.15 Test Item Name Setting ......................................116 SECTION 9: OTHER FUNCTIONS Data Communication ............................................ 117 SECTION 10: SPECIFICATIONS 10.1 Specifications ..............................................118 SECTION 11: GLOSSARY 11.1 Glossary .................................................. 119...
-
Page 7: Cautions And Warnings Used In The Manual
Cautions and Warnings Used in this Manual This section contains the safety precautions that must be followed for safe operation of the Element DC5X Analyzer. Before using this analyzer, please read this section carefully and follow the precautions given so that it may be operated correctly. -
Page 8: Warnings Regarding Explosives
WARNING When discarding the main unit that may be contaminated with blood samples, follow applicable regulations in your country and dispose of it appropriately. WARNING When handling samples (blood) and performing maintenance (cleaning the analyzer), always follow biohazard procedures (wear gloves, a lab coat, and safety goggles) in accordance with the sample handling rules of your facility. If the sample is accidentally touched, immediately rinse the contaminated area thoroughly under running water and disinfect. -
Page 9: Caution Regarding Moving Parts
CAUTION Do not use other devices which generate and can radiate radio frequency energy near the Element DC5X Analyzer. Otherwise, physical damage or malfunction on the Element DC5X Analyzer may occur. Caution Regarding Moving Parts WARNING Do not place your fingers near moving parts (sampler and sample disk) when operating the equipment, including during maintenance. -
Page 10: Measurement Results
When the device is subject to vibrations, such as when being moved by vehicle, it is necessary to secure the moving parts within the device. Contact Heska Technical Support Services. Failure to observe these precautions may result in unexpected errors or equipment malfunctions. -
Page 11: Qc Card System
“mixing cup”. The Element DC5X Analyzer performs sample application automatically. However, it is necessary to load the tips, samples, tubes and mixing cups designed for use with the Element DC5X Analyzer. The sample tubes include the following types: • HEPARIN TUBE 1.5 mL (green cap) •... -
Page 12: Light Source Lamp
Use specified recording paper for the Element DC5X Analyzer. If other recording paper is used, the printer head section may be damaged. 1.16 Labels The following safety labels are affixed to the Element DC5X Analyzer. Power button Biohazard label Sampler cover lock... -
Page 13: Part Names
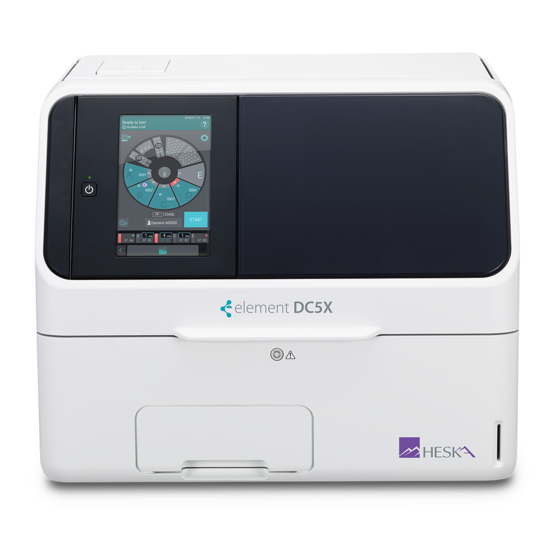
Element DC5X Section 2: Part Names, Accessories and Optional Items Veterinary Chemistry Analyzer Part Names Printer Sampler cover LCD (touch panel) Power button Sampler cover lock Front bottom cover Card reader Disposal box Sampler nozzle cover Incubator cable Incubator cover... - Page 14 (Louver) RS-232C connector USB connector LAN terminal Power switch Power inlet (Louver) (Louver) (Louver) (Louver)
- Page 15 Disposal box Light source lamp Sample rack (A - E) Slide cartridge (A - E) Calibrator holder Diluent holder (D1 - D3) Mixing cup Sample application Tip rack unit cover...
-
Page 16: Touch Panel Screen Names And Functions
Touch Panel Screen Names and Functions On the Element DC5X, the touch panel is used to perform configurations, run measurements, confirm measurement results and messages, and perform other operations. Because a pressure-sensitive touch panel was employed, the screen can LCD (touch panel) be operated while wearing gloves. -
Page 17: Help Screen
2.2.2 HELP screen During measurement, maintenance, consumable exchange, and other actions on the Element DC5X Analyzer. the ? may be touched on the Measurement preparation screen to check the procedures. 1. X button Touch and the Measurement preparation screen appears. -
Page 18: Names And Functions Of Software Keyboard Screens
Names and Functions of Software Keyboard Screens When data entry for operations and configurations is necessary, the software keyboard appears on the LCD automatically. Enter alphanumeric characters and symbols. Alphabetical characters, numbers and symbols. Enter alphabetical characters, numbers and symbols. X button Delete all entered characters, and then quit keyboard entry. -
Page 19: Accessories
When the [ABC] button is selected abc button Display the entry screen for lowercase alphabetical characters and numbers. 10 . 123 button Display the entry screen for numbers, decimal ( . ) and minus symbol (- ). 11. - # / button Display the entry screen for symbols and numbers. -
Page 20: Consumables And Optional Accessories
*Light source lamp *O-ring *DRI-CHEM Mixing Cups 50 × 1 box NOTE: Parts names marked with “*” are the same parts packed with the Element DC5X Analyzer. Chemicals DRI-CHEM CONTROL QN DRI-CHEM REFERENCE FLUID RE NOTE: Types of packages or containers for consumables are subject to change without notice. -
Page 21: Optional Accessories
Do not connect a barcode reader other than specified for this analyzer. Otherwise, physical damage or danger of fire may result. NOTE: Parts names marked with “*” are the same parts packed with the Element DC5X Analyzer. NOTE: Specifications and capabilities are subject to change without notice. -
Page 22: Section 3: Measurement
Element DC5X Section 3: Measurement Veterinary Chemistry Analyzer Operation Overview On the Element DC5X Analyzer, first load the consumables and other items to prepare for measurement (Step 1), and then perform the actual measurement (Step 2). Step 1 – Measurement preparation •... - Page 23 Step 2 – Measurement Basic measurements Slide Sample Checking Checking the sample the tips type Start button Slide set order •To test CM and ISE slide 電解質 ISE Slide CM Slide Checking the measurement results. Ending measurement.
-
Page 24: Measurement Preparation
Measurement Preparation Cleaning the disposal box Remove the disposal box and dispose of the tips and slides. Use isopropyl alcohol to disinfect the waste drawer. IMPORTANT If the disposal box is full, a slide transfer error or tip disposal error may occur, which may negatively affect the measurement values. - Page 25 Starting the Element DC5X Press power button. Power button Power button NOTE: If the power switch is not in the ON position, press the switch to the "|" side. Power switch Power switch NOTE: The listing to the right is displayed during start-up once a...
-
Page 26: Basic Measurements
Section 5. Reading a QC card The Element DC5X Analyzer can compensate for the differences of the slide production lots by reading the QC card in the box of slides. When [Warming up] or [Ready to test] appears on the LCD, set... - Page 27 Setting tips Open the sampler cover, and then check the tip racks have been loaded with tips. When there are not enough tips, touch the tip display on the LCD to display the replacement screen, and then load the tips. For details of the loading method, refer to Section 5.2.
- Page 28 e. Make sure the sample rack and sample tube size match. NOTE: To avoid a suction error or malfunction, use a sample tube that matches the label on the sample rack. NOTE: Refer to Section 3.8 for sample tubes that can be used. 0.5ml ×...
- Page 29 Enter or select the sample information (sample number, sample ID, reference standard, and sample type), and then touch OK (button 7). If desired, enter the sample number using the software keyboard. Obtain order information from the host PC if using work lists. Section 4.4 A...
- Page 30 If sample application is started, the sample rack display blinks during sample application. If sample application ends, the sample rack display switches off. When slides and samples have been loaded in multiple sample racks, the next sample rack display blinks orange, and then sample application is started.
-
Page 31: Lamp Off And Measurement Start Scheduling
Checking the measurement results. After measurement of all samples has ended, touch then check the measurement results. The measurement results are printed in the order that the slides were loaded in the cartridge, if using the internal thermal printer. To retest (Section 4.3), touch RERUN. NOTE: For the details of the measurement result screen. -
Page 32: Measurement Results Screen
The touch panel screen becomes darker when the lamp is off. If the screen is touched, the lamp switches on, and [Lamp warming up] is displayed on the LCD. If measurement is possible, it starts automatically. NOTE: To cancel a scheduled measurement-start, touch STOP. Result data display area Measurement Results Screen After measurement has ended, touch... - Page 33 Green: All measurement results are Result data display area within reference interval Red: There is a result outside the reference interval Measurement results that include a value outside the reference interval are indicated by , and the corresponding test name and value become red.
-
Page 34: Measurement Results Screen Buttons
3.4.2 Measurement Results screen buttons button Close the Measurement results screen, and then return to the Measurement preparation screen. CHANGE SAMPLE NO. button Change the sample number for which measurement results are to be displayed. FEED button Feed the recording paper with a fixed amount. PRINT button Print all measurement results of the displayed sample. -
Page 35: Calendar Display
3.4.3 Calendar display Measurement month scroll buttons Change the display of the calendar month. Date buttons Display the measurement results screen of a date. The currently displayed date is displayed in blue. NOTE: Dates with no measurements are displayed in gray and cannot be selected. -
Page 36: Dilution Tests
Load samples and slides. For details of the sample and slide loading method. Section 3.3. NOTE: Place an ISE slide with the arrows facing up and pointing opposite the sample label of the cartridge (in this case, “A”) as shown in the illustration. ISE slide CM slide NOTE: When you measure an ISE slide and CM slide at the... - Page 37 In the list, touch x2. • Dilution is performed according to [Dilution setting] in Mode function for administrator. None : No dilution NOTE: If necessary, enter or choose other sample information. A ..0160503009 ..0160503010 STOP MYID001 Touch OK to finish Sample A configuration. Close the sample cover.
-
Page 38: Powering Off The Element Dc5X Analyzer
Dilution is performed at the dilution factor specified for each sample. Powering off the Element DC5X Analyzer Make sure that measurement and mode operation are not in progress. CAUTION Do not switch off the power during measurement or mode operation. Otherwise, the analyzer may malfunction. If the power was shut off during measurement, load tips and other consumables, and then run the measurement again from the start. - Page 39 Press the power button. Power button Touch OK. NOTE: When the analyzer will not be used for a long time, set the power switch to the [] side. Empty the disposal box. NOTE: When disinfecting the disposal box, use alcohol for disinfection.
-
Page 40: Sample Tubes For The Element Dc5X Analyzer
Sample Tubes for the Element DC5X Analyzer The following sample tubes can be used on the Element DC5X Analyzer. • DRI-CHEM Sample Tube; 1.5 mL • DRI-CHEM Sample Tube; 0.5 mL 3.8.1 Blood collection tubes Tube contents and inspection items that can be measured. -
Page 41: Sample Racks
3.8.3 Sample racks A sample rack is specified for each sample tube. Place each sample tube into the specified sample rack. 0.5 ml 1.5ml 0.5 ml Sample rack QC Card System Overview The QC card system compensates for variations between lots of DRI-CHEM slides and ensures uniform performance. 3.9.1 Calculation method A variety of the reference fluids developed for DRI-CHEM slides are measured on each lot of slides. - Page 42 Set the QR code on the left side, and then insert the QC card into the card reader fully. NOTE: If the QC card is dirty or folded, the read error may occur. QR code The slide test and production number (lot) are displayed on the LCD and output to the printer as well.
-
Page 43: Interrupting Sample Application And Stat Tests
Element DC5X Section 4: Applicable Usage Methods Veterinary Chemistry Analyzer Interrupting Sample Application and STAT Tests Before adding consumables during sample application, touch PAUSE to interrupt sample application. When the analyzer has run out of tips during sample application, the analyzer stops (as when PAUSE was touched). In this paused state, you can display the loading screen by touching the display of each consumable. -
Page 44: Requesting A Stat Test
Canceling the remaining sample application after interrupting sample application. If STOP is touched while the analyzer is interrupted, the remaining sample application is canceled. If the cancel operation is completed, the LCD changes to [Ready to test]. All sample rack displays get switched off. 4.1.2 Requesting a STAT test You can request a STAT test by touching STAT. - Page 45 Touch sample rack display C. Register the measurement information, and then touch OK.
-
Page 46: Running Tests
Touch RESTART to (re)start measurement. NOTE: In this example, the analyzer finishes the remaining application of Sample A, and then measures Sample C. Measurement order: A C B Rerunning Tests You can test again using the previous sample number, sample ID, sample type setting, and reference interval setting by touching at the Measurement results screen. - Page 47 Touch the sample rack display of the sample position to be retested. NOTE: The sample information registration screen displays the previous sample number or sample ID that was measured at the Sample A position. NOTE: Touch DILUTION to set the dilution factor, if needed. Touch OK.
-
Page 48: Slide Loading Order When Measuring Different Items Simultaneously
Touch START to begin retesting. Slide Loading Order When Measuring Different Items Simultaneously NOTE: Any order of slide stacking can be measured. However, please follow the recommended slide stacking rules below. Otherwise, the analyzer may consume excessive amounts of disposal tips and cups. It is recommended to load an ISE slide first. - Page 49 The Work List index screen appears. NOTE: If there are no measurement requests, the buzzer sounds, and the message [There is no request information] is displayed. NOTE: The display of the list is configured by [Work list selection setting] in Mode function for administrator. Section 8.4.8 NOTE: When there are multiple pages in a list, you can scroll the pages using NOTE: If...
- Page 50 Touch the desired patient from the list. NOTE: If SELECT ALL is touched, information is registered in order from the first sample information. The work list measurement items of the registered sample information are displayed. NOTE: If is touched, registration is cleared. NOTE: The work list measurement items can be printed by touching NOTE: If DESELECT ALL is touched, registrations for all racks are...
- Page 51 Touch OK to finish registration. The Measurement-preparation screen appears. NOTE: Work lists can also be obtained from the sample information registration screen. A ..0160503009 ..0160503010 STOP MYID001...
-
Page 52: Editing Sample Numbers And Sample Ids
Editing Sample Numbers and Sample IDs You can edit the sample number and sample ID of measurement results. You can also send edited data to a host computer. To edit the sample number, touch [No.] at the Measurement results screen. Section 3.4 Enter the administrator password, then touch OK. -
Page 53: Using The Sample Barcode Reader
Using the Sample Barcode Reader (sold separately) You can easily enter the sample ID and operator ID by using the optional sample barcode reader. IMPORTANT If the sample barcode reader malfunctions or the print quality of the barcode label is poor, incorrect barcode data may be read. -
Page 54: When Imputing The Operator Id
Read the barcode of the sample using the barcode reader. After reading is complete, the analyzer makes a beep sound. The Sample ID is displayed on the LCD for the selected sample, and the request information is registered. NOTE: Position the sample barcode reader properly facing the barcode label. -
Page 55: Loading Consumables
Element DC5X Section 5: Loading Consumables Veterinary Chemistry Analyzer Loading Consumables To load consumables, touch the display of each consumable to display the loading screen. When the consumable loading is complete, touch FINISH to exit. NOTE: If there are not enough consumables (tips, mixing cups, diluent, reference fluid, etc.), sample application may be interrupted or canceled. - Page 56 The Tip loading screen appears. The sample disk turns, and the consumables are moved to the front. CAUTION Do not touch the sample disk until it stops. After the sample disk stops, remove the tip racks from the sample disk. NOTE: Always remove the tip racks from the sample disk before loading tips.
-
Page 57: Loading Mixing Cups
To initialize the tip usage position, touch RESET. Touch FINISH to exit. The sample disk turns, and the sample rack is moved to the front. Loading Mixing Cups Mixing cups are necessary for measurements requiring dilution (Section 3.6). Check the quantity of mixing cups on the LCD before measurement. - Page 58 The Mixing cup loading screen appears. The sample disk turns, and the consumables are moved to the front. CAUTION Do not touch the sample disk until it stops. Remove the used mixing cups from the sample disk. Mixing cups Set one or two new mixing cups. For the mixing cups that were replaced, touch RESET to reset the quantity, and then touch FINISH to exit.
-
Page 59: Loading Diluent
Loading Diluent Diluent is necessary for dilution measurements. Refer to Section 3.6. Dilution measurement requires a specified diluent. WARNING When the analyzer is applying samples, touch PAUSE to interrupt sample application and then load the diluent. It is unsafe to set tips during sample application due to the moving parts of the sampler unit and the sample disk. Section 4.1 IMPORTANT Use specified tube for the diluent. - Page 60 Load the tube containing diluent in the "water" position. NOTE: • DL: Not used on Heska analyzers. • Water: Distilled water-use for all Heska slides. • NSS: Not used on Heska analyzers. Touch FINISH to exit. The sample disk turns, and the sample rack is moved to the...
-
Page 61: Loading Reference Fluid
Loading Reference Fluid Reference fluid is necessary for ISE measurements. Section 3.5 WARNING When the analyzer is applying samples, touch PAUSE to interrupt sample application (Section 4.1), and then load the reference fluid. It is unsafe to set tips during sample application due to the moving parts of the sampler and the sample disk. - Page 62 The Reference fluid loading screen appears. The sample disk turns, and the consumables are moved to the front. CAUTION Do not touch the sample disk until it stops. Load the tube containing the reference fluid. IMPORTANT Clean the cap of the reference fluid every time you load the reference fluid.
- Page 63 Section 6: Maintenance Veterinary Chemistry Analyzer To keep the performance of the Element DC5X at its best, users must perform daily and periodic maintenance, and designated repair personnel must perform maintenance. When repairs are necessary, contact Heska Technical Support Services.
-
Page 64: Periodic Maintenance Items
Periodic Maintenance Items 6.1.1 Items for daily and periodic inspection by the user Users must perform the daily and periodic maintenance and replacement of parts in the following table. Location Cleaning Interval Inspection Interval Replacement Interval Procedure Air filter Once a month. Refer to Section 6.2 Once every 3 months if inaccurate test Transfer bar... -
Page 65: Inspecting And Cleaning The Transfer Bar, Incubator, Spotting Part And Ise Unit
Remove dust adhering to the filter with a vacuum cleaner or running water. NOTE: If you wash the filter with running water, make sure it is dried well before setting in the analyzer. Insert the filter into the louver and put the louver back in the analyzer. Insert the back side of the louver first, then snap the front side in place. - Page 66 Touch REFERENCE PLATE LEVEL CHECK to run a check. If check ends, the Check results screen appears. Check the results of [Reference plate level check]. If the result is level 2 or level 3, cleaning is necessary. Touch OK. Using the procedure on the following pages, clean the transfer bar, incubator, spotting part, and ISE unit.
-
Page 67: Cleaning The Transfer Bar, Incubator, Spotting Part And Ise Unit
6.3.2 Cleaning the transfer bar, incubator, spotting part and ISE unit Cleaning the transfer bar and ISE unit Touch CLEANING MODE in Normal mode. Touch START CLEANING. NOTE: Keep your fingers clear as the sample disk moves. - Page 68 The screen to the right appears. NOTE: Although step 2 on the screen prompts to power off the analyzer, do not power off until step 10. Remove the tip rack from the analyzer. Loosen the 2 thumbscrews and pull the sample application unit cover frontward to remove it.
- Page 69 Use gauze or a cotton swab moistened with water or isopropyl Transfer bar alcohol to wipe the upper surface of the transfer bar visible in the spotting part. Next, clean the incubator, spotting part and ISE test unit. ISE unit probes Press down on the black plastic piece to make probes accessible.
- Page 70 Connector Unplug the connector cable from the incubator by turning it to the left. Incubator cover Remove the incubator cover. Loosen the 5 screws on the upper surface of the incubator, and then remove the incubator. Thumbscrew Incubator pressure plate Wipe off the 13 pressure plates on the backside of the incubator with a soft cloth or cotton swab moistened with isopropyl alcohol.
- Page 71 Loosen the 2 screws on the reference plate and remove the plate from the analyzer. Thumbscrew Reference plate Turn over the reference plate and clean the white plate and Reference Reference black plate white plate black plate with a dry cotton swab or using a swab mostened with isoprpyl alcohol.
-
Page 72: Reassembling Parts And Ending Cleaning
6.3.3 Reassembling parts and ending cleaning Reassemble the incubator. Align the arrow marks on the incubator and the reference plate, and then tighten the 5 thumbscrews evenly by tightening opposing thumbscrews in numerical order (1 to 5). IMPORTANT Tighten the five thumbscrews securely. Otherwise, the Thumbscrew measurement results may be negatively affected. -
Page 73: Replacing Recording Paper
When red lines appear along the sides of the recording paper, the printer is nearly out of paper, so replace the recording paper roll with a new one. NOTE: Use the recording paper specified for the Element DC5X Analyzer. Press the section indicated in the illustration (1) to release the lock, and then open the cover (2). -
Page 74: Replacing And Cleaning The Light Source Lamp
Replacing and Cleaning the Light Source Lamp The average life of the lamp is about 1,000 hours. Replace the light source lamp if a photometer gain error has occurred or the lamp’s cumulative illumination time is near 1,000 hours. CAUTION The light source lamp gets very hot. -
Page 75: Inspecting And Replacing The Sampler O-Ring
Thumbscrew A Attach the front bottom cover, load the disposal box, and Connector then switch on the power of the Element DC5X Analyzer. IMPORTANT Be sure to load the disposal box. If the analyzer is used without the box, the measurement results may be negatively affected. - Page 76 Touch NORMAL MODE. Touch SAMPLER LEAK CHECK. Follow the on-screen instructions to prepare for the leak check.
- Page 77 Touch the nozzle to be checked to select it, and then run the leak check. Once check ends, the Check results screen appears. CAUTION Keep your fingers away as the sampler unit and sample disk move. Check the results of the [Sampler leak check]. If the check results are [OK], it is not necessary to replace the O-ring.
-
Page 78: Replacing The Sampler O-Ring
IMPORTANT Be sure to use the O-ring designed for the Element DC5X Analyzer. Otherwise, the sample application volume will be inaccurate, and the measurement results may be negatively affected. Remove the sample rack and slide cartridge. - Page 79 Touch NORMAL MODE. Touch REPLACE O-RING. Touch the nozzle on which you want to replace the O-ring to select it. The sampler unit moves, and the sampler nozzle comes down. CAUTION Keep your fingers away as the sampler unit moves.
-
Page 80: Cleaning The Slide Reading Section
Follow the on-screen instructions to replace the O-ring. Touch LEAK CHECK to check for leaks. Section 6.6.1 Cleaning the Slide Reading Section When a slide-detection error has occurred, dust and other soiling may be the cause. Clean the slide reading section to avoid these errors. -
Page 81: Cleaning And Replacing The Reference Fluid Cap
Cleaning and Replacing the Reference Fluid Cap Clean the reference fluid cap each time the reference fluid is replaced. Replace the reference fluid cap if it becomes cracked. IMPORTANT If you do not clean the reference fluid cap, the reference fluid will be concentrated, which may negatively affect the measurement values. -
Page 82: Section 7: Troubleshooting
Element DC5X Section 7: Troubleshooting Veterinary Chemistry Analyzer WARNING When you troubleshoot, always wear gloves, a lab coat, and safety goggles. If you accidentally touch a contaminant, immediately rinse the contaminated area thoroughly under running water and disinfect. IMPORTANT If an analyzer malfunction (error) appears before or during measurement or warnings appear in the measurement results, the measurement results may be inaccurate. - Page 83 Touch ERROR LOG. An error log list is displayed. Touch an error. The error details are displayed.
-
Page 84: Error Code And Reference Section Table
7.1.2 Error code and reference section table Error code Error Description Reference Section E0021 The disposal box was open during measurement. 7.2.13 E0035 Photometric control system error. 7.2.8 E0050 Light source lamp is burned out. 7.2.5 E0080, E0081 Tip detection sensor error. 7.2.13 E0082–E0085 Tip mounting error. - Page 85 Error code Error Description Reference Section E5500 Signal system error inside circuit board. 7.2.8 E5510 Slide position offset during measurement. 7.2.5 E5901 Signal system error inside circuit board. 7.2.8 E6200, E6201, E6210 Communication error. 7.2.12 Error code Error Description Reference Section W0020 The disposal box is open.
-
Page 86: Printout Reference Table
Error code Error Description Reference Section W4720 Clock time error. 7.2.8 W4721, W4731, W4733, W4735, Signal system error inside circuit board. 7.2.8 W4736 W5000, W5020 Signal system error inside circuit board. 7.2.8 W5050 USB memory has not been inserted. 7.2.8 W5100 Printer error. -
Page 87: Troubleshooting
Check that the power cable is properly connected. Turn the power switch OFF and ON again, and press the power button. If the analyzer still does not start, please contact Heska Technical Support Services for assistance. 7.2.2 Printer or LCD trouble Printed characters are too faint or dark. -
Page 88: Slide Reading Errors
Section 6.7 be read correctly. NOTE: If the error occurs again, please contact Heska Technical Support Services. NOTE: When this error occurs, the slide is discarded and application for the next slide will start. 7.2.4 Sampler errors When tip cannot be mounted. - Page 89 W0154 Mixing cup detection sensor ERR Error of the mixing cup detection If the error still occurs after switching the sensor. analyzer off and on, please contact Heska Technical Support Services. During a sample volume error. Error Code Error Message...
- Page 90 NOTE: If the error occurs again, there might the diluent. be a piping system problem. Please contact E0127 Aspiration clogging ERR (diluent) Heska Technical Support Services. Clogging was detected during Clogging was detected during sampling. Check reference fluid application. the sample and diluent.
-
Page 91: Photometric System Errors
NOTE: If the error still occurs after switching E1002 Sampler up/down motor operation ERR the analyzer off and on, please contact Heska Problem on the sample nozzle side. Movement error of sample/ Technical Support Services. -
Page 92: Transfer Errors
E09003, motor. NOTE: If the errors still occur after switching Problem with the interference filter. W0904 off and on the analyzer, please contact Heska Technical Support Services for assistance. E0902 Filter motor operation ERR Problem with the interference filter. Other errors. -
Page 93: Temperature Controller Errors
Error Message Error Condition Troubleshooting E0565 ISE temperature control ERR When the measurement results Please contact Heska Technical Support Problem with ISE. are appended with a “+” or “-” Services for assistance. mark or an error listed to the left E1500 Temperature control ERR Perform the following troubleshooting. -
Page 94: Circuit Board Signal Errors
E0035 Light too intense Light too intense. A circuit board signal error has If the error still occurs after switching the occurred. analyzer off and on, please contact Heska Technical Support Services for assistance. E0300, E0301, Gain setting ERR E0302... - Page 95 Set the date and time using [Date & Time Set date & time. reset. settings] in Normal mode. Section 8.3.1 If the error still occurs, contact Heska Technical IMPORTANT Support Services. If the date and time are not adjusted correctly, the analyzer may fail to...
-
Page 96: Qc Card And Di Card Errors
Make sure the card is inserted at correct Check the QC card direction and reread it. orientation. (Insert the QR code so that it faces the far left side.) If the error occurs repeatedly, contact Heska Technical Support Services. W4011 QC card ERR Panel card read error. -
Page 97: Slide Loading Errors
Use a sample rack intended for this Unusable sample rack was set in place. used is loaded. equipment. Check the sample. If the error occurs again, please contact Heska Technical Support Services for assistance. W5400 Expired slide The validity term of the slide Always use valid slides. - Page 98 3. Clean the spotting part and ISE probe unit. Section 6.3.2 4. Make sure that the analyzer can measure correctly by running a quality control on an electrolyte slide. NOTE: If the error occurs again, please contact Heska Technical Support Services for assistance. When the error code is E3.
-
Page 99: Errors Related To Data Communication And Sample Barcode Reader
NOTE: If the error occurs again, please W4510 LAN communication ERR LAN communication error. contact Heska Technical Support Services for Check the specification and the connection of assistance. the communication cable. W4520 Incorrect work list information The received work list Check the work list information. -
Page 100: 7.3 Slide Code Table
Error Code Error Message Error Condition Troubleshooting W1650 No sample rack No sample rack has been Load a sample rack. Sample rack is not set. loaded. I5920 Turn the power ON A long time has passed since Switch the analyzer off and on. 30 days or more have passed from when startup. -
Page 101: Section 8: Function Menu
Element DC5X Section 8: Function Menu Veterinary Chemistry Analyzer Function Menu If the (Function menu) is touched, the Function menu screen appears. Function menu list. Function Menu Items Settings Advanced Settings Reference Section Control – – Date & time settings –... -
Page 102: Control
Operator ID setting – 8.4.14 Display and printout Test item name setting 8.4.15 Data transmission Error log – – 7.1.1 Control This mode is not used for Heska Chemistry Control. If Control mode is entered accidentally, cycle power to cancel control mode. -
Page 103: Normal Mode
Normal mode Use this function menu for general, normal operation. For example, set the time and configure the brightness of the LCD. 8.3.1 Date and time settings This mode is used to set the date and time settings stored in the memory. -
Page 104: Brightness And Volume
8.3.2 Brightness and volume You can configure the brightness of the LCD and buzzer sounds (error warning, measurement completed). • Configure the brightness of the LCD using [Display brightness]. to set the minimum and maximum brightness. • Configure the buzzer sound when an error occurs by using [Error sound]. -
Page 105: Lot Information
8.3.4 Lot information The screen displays the lot information of currently registered QC cards. You can also print all currently registered lot information. • When there are two or more pages that can be displayed, touch to scroll pages. • is touched, all currently registered lot information is printed. -
Page 106: Language Setting
8.4.1 Language setting Configure the language to be used. Touch the language to be configured. NOTE: After configuration, the analyzer shuts down once. When the analyzer is started again, the settings are applied. 8.4.2 Host connection setting Configure the connection terminal and communication parameters to connect to the host computer (PC). - Page 107 • If [Serial connection] is set, configure the communication type and whether to output from the printer. You can choose from 3 communication types. Type 1: Bidirectional connection Type 2: Unidirectional connection (bidirectional format) Type 3: Unidirectional connection (standard format) NOTE: After configuration, the analyzer shuts down once.
-
Page 108: Calculated Parameter
Anion Gap = Na value - (Cl value + TCO value) If using HeskaView Integrated Software® or Heska Data Capture Utility (DCU), desired calculated parameters can be selected within the software program and do not need to be selected in the analyzer. - Page 109 If [Calculated Parameter] is touched in Mode function for administrator, precautions for use of calculation items are displayed. To use calculation items after confirming the precautions, touch OK. Configure the calculation items to be used. NOTE: If the QC card of an item to be used for calculation has not been read, the calculation item is not displayed.
-
Page 110: Unit Conversion
8.4.4 Unit conversion Configure the main unit and secondary unit for each measurement item. The following table shows the units that can be used for each configuration item and the conversion coefficient. Conversion Conversion Test Test Code Unit (A) UNIT (B) Coefficient Test Test Code... -
Page 111: Switch Measurement Range Display
8.4.5 Switch measurement range display Switch the display method for data outside the measurement range (passing the upper/lower limit of the determination range) for all tests. • If [@] is configured, an [@] symbol is added to indicate the displayed measurement value is outside the measurement range. NOTE: Measured values with an [@] symbol may not be accurate. - Page 112 If an entry field is touched, the software keyboard appears in order to edit the test name and other details. Section 2.3 Make sure the sample type selected is [P/S, W]. Changing the display order. Touch of the test to change the display order. Next-page buttons...
-
Page 113: Sample No. And Id Settings
Touch the transfer destination of the test field to be configured and then touch OK. 8.4.7 Sample No./ID settings • Configure whether to display the sample number in the measurement results under [Edit and print No.]. • Configure whether to record the sequence number of the analyzer under [Store No.]. -
Page 114: Work List Selection Setting
8.4.8 Work list selection setting Configure whether to display the sample ID or patient ID at the Work list index screen. 8.4.9 Correlation coefficients Enter, reset, or print the correlation coefficients for each sample type ([P/S,W] or [U]). For details, refer to “Description of the correlation function”... - Page 115 Touch the measurement item you want to edit. NOTE: Only measurement items for which QC cards have been read are displayed. If the [Input] field of an item is touched, the software keyboard appears so you can enter the value. Section 2.3 To change the sample type, touch [P/S], [W], or [U].
- Page 116 Y=aX+b IMPORTANT Description of the correlation function Element DC5X This function is designed to determine the correlation between the measured data obtained using the Element DC5X and the data obtained using the conventional measuring method with your own instruments. The X-axis shows the measured data obtained using your instruments, and the Y- axis shows the measured data obtained using the analyzer.
- Page 117 If the regression formula is Y = 1.1X - 5: A = 14 mg/dl Y=1.1X-5 (mg/dl) B = 550 mg/dl reference 0 10 (mg/dl) Measurement using your instruments If the measured data is below the measurement range, an “@” mark is added as shown in the example printout. Value under the If the measured data is above the measurement range, a “>”...
-
Page 118: 8.4.10 Lot Compensation Coefficients
If the [Input] field of an item is touched, the software keyboard appears so you can enter the value. Section 2.3 NOTE: The most significant digit of a [Lot] number (the type number) is fixed. Enter from the second digit. NOTE: Incorrect entries will cause incorrect measurement results. -
Page 119: Dilution Setting
8.4.11 Dilution setting You can configure the dilution factor and position of the diluent to be used for each measurement item. When a dilution factor is not configured for each sample on the sample information registration screen, measurement is performed using the dilution factor configured here. - Page 120 For the sample type (liquid type), touch a button, and then select from [D1], [D2], or [D3]. NOTE: D2 is the default for PS and should not be changed. For the dilution factor, touch a button, and then select from [None], [2], [3], [4], [5], or [10].
-
Page 121: Tube Setting For Diluent And Reference Fluid
8.4.12 Tube setting for diluent and reference fluid Configure the test tube type to be used for diluent and reference fluid. NOTE: For the types of containers that can be used for diluent and reference fluid. Section 5.4 and 5.5 •... -
Page 122: Operator Id Setting
8.4.14 Operator ID setting Configure whether to display the Operator ID at the Measurement preparation screen and Measurement results screen. To display the operator ID, touch the check box. NOTE: By default, the check box is cleared (not-enabled). 8.4.17 Test item name setting Configure the display of item names. -
Page 123: Data Communication
Element DC5X Section 9: Other functions Veterinary Chemistry Analyzer Data Communication The analyzer can transmit measurement results to a host computer or PC that has been approved by IEC/UL60950–1. To communicate, it is necessary to prepare the software and a cable to receive data. Before you use this function for the first time, please contact your dealer for assistance. -
Page 124: Section 10: Specifications
Element DC5X Section 10: Specifications Veterinary Chemistry Analyzer 10.1 Specifications Processing speed 190 tests per hour (simultaneous CM and ISE measurements) Number of incubator cells CM: 13; ISE: 1 Incubation temperature 98.6°F [37°C] (CM) 86°F [30°C] (ISE) Incubation time 1 to 6 minutes... -
Page 125: Section 11: Glossary
For further assistance, please call Heska’s Technical Support Services at 800.464.3752, option 3. ©2018 Heska Corporation . All Rights Reserved. HESKA, Heska Integrated Software and Element DC5X are registered trademarks of Heska Corporation in the U.S. and other countries. 18MD0508...
Need help?
Do you have a question about the Element DC5X and is the answer not in the manual?
Questions and answers
What is "NSS" stand for under the D3 tube slot?