Table of Contents

Subscribe to Our Youtube Channel
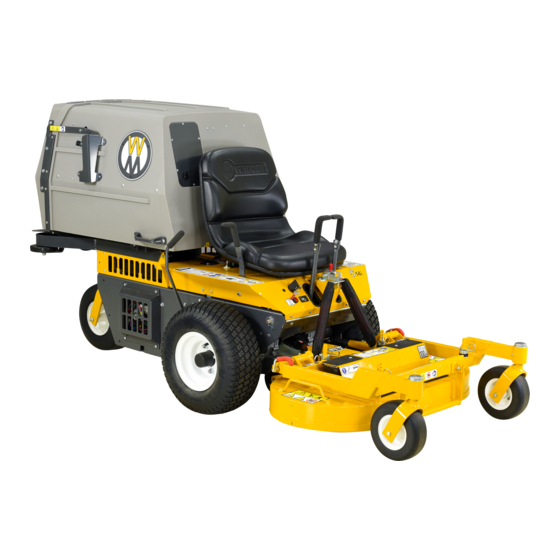
Related Manuals for Walker S14i


Summary of Contents for Walker S14i
- Page 1 Operator’s Manual Safety, Assembly, Operating, and Maintenance Instructions Please Read and Save These Instructions For Safety, Read All Safety and Operation Beginning S/N: 154257 Instructions Prior to Operating Machine P/N 5000-46...
- Page 2 Foreword Thank you. . .for purchasing a Walker mower. Every effort has been made to provide you with the most reliable mower on the market, and we are sure you will be among our many satisfied custom ers. If for any reason this product does not perform to your expectations, please contact your local dealer.
-
Page 3: Table Of Contents
Table of Contents General Information Operating Instructions ________________ 1 _____________ 26 HIGHLIGHTED INFORMATION _____________ 1 CONTROL IDENTIFICATION, GLOSSARY ____________________________ 1 LOCATION, AND FUNCTION _____________ 26 IDENTIFYING NUMBER LOCATIONS ________ 1 Engine Throttle _______________________ 26 ENGINE SERIAL NUMBER LOCATION _______ 2 Forward Speed Control (FSC) ___________ 27 SERVICING OF ENGINE AND Steering Levers_______________________ 27... - Page 4 Table of Contents Maintenance Instructions PTO U-Joints ________________________ 67 __________ 48 Safety Switch System__________________ 67 MAINTENANCE SCHEDULE CHART _______ 48 Forward Speed Control Friction Lock _____ 67 IMPORTANT TIPS FOR CARE REPLACING/REPAIRING _________________ 68 OF THE KOHLER ENGINE ________________ 49 Drive Belts ___________________________ 68 Fuel System _________________________ 49 Engine Belt _________________________ 69...
-
Page 5: General Information
Most accidents associated with the opera ● RIGHT HAND (RH) refers to the right-hand side tion or maintenance of a Walker Mower are caused by disregarding basic safety precautions or specific of the tractor when the operator is seated facing warnings. -
Page 6: Engine Serial Number Location
If you have any difficulty finding an authorized outlet or obtaining warranty service, please contact our Service Department for assistance: Tractor Serial Number Location Walker Manufacturing Company 5925 E. Harmony Road Serial Number Fort Collins, CO 80528 1-970-221-5614 www.walker.com... -
Page 7: Specifications
Specifications MODEL S14i ENGINE Manufacturer/Model Kohler ECH440, 1 Cyl., Gasoline (Air-Cooled), Electronic Fuel Injection (EFI) Displacement cu. in. (cc) 26.2 (429) Max. Power HP (kW) 14.0 (10.4) @ 3600 RPM Governed RPM 3600 · · 22.7 (30.8) @ 2800 RPM Max. -
Page 8: Blade Drive
Transmission Oil Capacity fl oz (L) 77 (2.3) Transmission Cooling Cooling Fan Mounted on Drive Pulley Oil Filter Hydro-Gear P/N 52114 (Walker P/N 2026-6) ® Ground Travel Speed Forward MPH (km/h) 0-6.5 (0-10.5) Infinitely Variable Reverse MPH (km/h) 0-5 (0-8) Infinitely Variable... -
Page 9: Dimensions (Tractor And Mower)
Specifications MODEL S14i DIMENSIONS (Tractor and Mower) Length in. (cm) Tractor Only 65 (165) Tractor Wheel Base 42.25 (107) Tractor with Tilted Deck 77 (196) (Approximate) Tractor with 42" Collection Deck 89.25 (227) (DC42-1) Width in. (cm) Tractor Only (Outside Tire) 36.25 (92) -
Page 10: Mower Deck
1.5 to 4 in. (4 to 10 cm) in 1/2 in. (1 cm) Increments Deck Suspension Independent Torsion-Flex Frame with Caster Wheels and Counterweight Springs DRIVE BELTS Engine Walker P/N 5234-6 Ground Drive Walker P/N 5232-1 PTO Drive Walker P/N 5234-7 SEAT... -
Page 11: Component Identification
Component Identification NOTE: Control Identification shown in Operating Instructions section. Grass Handling System 7.0 Bushel Catcher Tilt-Up Latch Spring Clip Counterweight Spring and Protective Cover Deck Support Arm Deck Support Pins and Height Adjustment Anti-Scuff Hitch Pins Roller Catcher Lift / Dump Handle 30 Amp Circuit Breaker... - Page 12 Component Identification Catcher Door Removable Grass Gas Spring Catcher Screen (Not Visible) (Not Visible) Gas Spring Catcher Door Cover Catcher Lift / Dump Handle Catcher Footrests Air Exhaust Catcher Door Handle Dump Flap Anti-Scuff Roller Left Hand Drive Wheel Cylinder Head Muffler Cooling Air Duct Rotating Engine...
- Page 13 Component Identification Negative (-) Battery Positive (+) Battery Cable Battery Cable Fuel Pump Module (High Pressure) Fuel Shut-Off Valve Air Cleaner Cover Fuel Filter Tailpipe Air Cleaner Fuel Tank Throttle Linkage Fuel Tank Muffler Heat Shield Oil Dipstick / Oil Fill Fuel Pump (Low Pressure, Not Visible) Cylinder Head...
-
Page 14: Safety Instructions
Manufacturing must take full responsibility for safety. comply with safety instructions may result in per sonal injury. The Walker Rider Lawnmower has been designed with many safety features to protect the operator The seriousness or degree of importance of each from personal harm or injury. - Page 15 Safety Instructions - Before Operating 11. Never attempt to make any adjustments 6. Do not wear loose fitting clothing that could get caught in moving parts. Do not operate this ma while the engine is running, except where chine while wearing shorts; always wear ade- specifically instructed to do so.
-
Page 16: Operating
Safety Instructions - Operating Operate the mower only in daylight or in Do not operate machine if the operator pres- good artificial light with good visibility of the area ence safety switch system is not working. being mowed. Verify proper operation by having the operator lift off the seat with the engine running and mov... - Page 17 Safety Instructions - Operating 14. The maximum recommended slope operat- 20. In case of a clogged or plugged mower deck or GHS catching system: ing angle is 15 degrees or 27% grade. When operating the machine on a slope, reduce speed Disengage the blade clutch (PTO), engage and use caution to start, stop, and maneuver.
-
Page 18: Maintenance
For ser vice of the pressurized fuel system, including the fuel pump module, fuel lines, and fuel injectors, contact your Walker dealer or autho rized Kohler service dealer. Altering the equipment or engine in any manner... -
Page 19: Safety, Control, And Instruction Decals
Safety Instructions SAFETY, CONTROL, AND INSTRUCTION DECALS Safety, Control, and Instruction Decals are installed on the machine; if any are missing, illegible, or damaged, a replacement should be ordered and installed before putting the machine into operation. The Decal Part Number is listed below and in the Parts Manual. 8600-12 Location: Top of Fuel Tank Part Number: 8600-12... - Page 20 Safety Instructions SAFETY, CONTROL, AND INSTRUCTION DECALS Safety, Control, and Instruction Decals are installed on the machine; if any are missing, illegible, or damaged, a replacement should be ordered and installed before putting the machine into operation. The Decal Part Number is listed below and in the Parts Manual. 8600-28 Location: Each End of Mower Deck Part Number: 8600-28...
- Page 21 Safety Instructions SAFETY, CONTROL, AND INSTRUCTION DECALS Safety, Control, and Instruction Decals are installed on the machine; if any are missing, illegible, or damaged, a replacement should be ordered and installed before putting the machine into operation. The Decal Part Number is listed below and in the Parts Manual. 8600-43 Location: LH Fender Location: RH Fender...
-
Page 22: Assembly Instructions
SETUP INSTRUCTIONS Raise catcher box up for battery access (refer to Front Body Latch Release in Operating Instruc Walker Mowers are shipped partially assembled to tions). Check the battery for electrolyte level and our distribution network, and are typically assem... -
Page 23: Dry Battery Service
Assembly Instructions Dry Battery Service Battery Charging DANGER DANGER BATTERIES PRODUCE EXPLOSIVE GASES Activating a battery can be dangerous. The battery should be taken to a reliable ● Charge the battery in a well-ventilated service station, battery store, or power area, so that gases produced while equipment dealer where a trained techni- charging can dissipate. -
Page 24: Battery Installation
Assembly Instructions Battery Installation Tighten the bolt and nut until the inner bearing race bottoms against the inside of the wheel IMPORTANT: Make sure battery is securely mount fork (will not turn) while the wheel spins freely ed in the frame. A loose battery may cause damage without binding. -
Page 25: Deck Discharge Deflector Shield Installation
Assembly Instructions Deck Discharge Deflector Shield Installation Tilt-Up Roller Wheel Installation (Side Discharge Models Only) Mount the two (2) tilt-up roller wheels on the brack Attach the side discharge deflector shield using two ets on the rear skirt of the deck housing using the P/N F543 axle bolt, 3/8 in. - Page 26 Assembly Instructions Align and connect the splined PTO shaft and Counterweight socket halves, as shown in PTO Shaft Connec- Springs Clip tion photo. The PTO shaft has a pilot end to Onto Body ease alignment of shaft; fit shaft end into socket With Forward and rotate shaft until the splines line up as indi...
-
Page 27: Deck Leveling
Assembly Instructions Deck Leveling WARNING The mower deck and support frame are jig welded; within normal tolerances, very little, if any, shimming The machine must be shut off during this should be required to level the deck. Tire pressure procedure. will influence the levelness of the deck. -
Page 28: Preoperating Checklist
Assembly Instructions PREOPERATING CHECKLIST IMPORTANT: DO NOT mix oil with gasoline. Al ways use fresh, automotive grade unleaded gaso Before operating the mower for the first time, and as line. DO NOT use gasoline containing greater than a routine before daily operations, it is important to 10% ethanol. - Page 29 Assembly Instructions CHECK FUNCTION OF ENGINE SERVICE LIGHT Tilt-Up Handle Turn ignition switch to the ON (RUN) position. The Tilt-Up Hook and engine service light should illuminate, indicating nor Latch Connected mal function. CHECK FUNCTION OF SAFETY INTERLOCK SWITCHES Tilt-Up Refer to Operating Instructions to check for proper Latch operation of safety switches, both during engine...
-
Page 30: Operating Instructions
Operating Instructions CONTROL IDENTIFICATION, LOCATION, AND Engine Throttle FUNCTION The throttle control lever (red knob) is located on the left side of the seat and is used to control engine CAUTION speed. Moving the lever forward toward the FAST position increases engine speed; moving it back- ward toward the IDLE position decreases engine Before operating the mower, become famil- speed. -
Page 31: Forward Speed Control (Fsc)
Operating Instructions Forward Speed Control (FSC) Front Body Latch Release Forward Speed Control (FSC) has two functions: The front portion of the tractor body hinges forward One is to set forward travel speed, and the other is for maintenance access and is latched down in the to establish the NEUTRAL-PARK position. - Page 32 Operating Instructions The Forward Speed Control also Establishes the Neutral-Park Position of the Steering Levers LEFT WHEEL FORWARD SPEED STEERING LEVER RIGHT WHEEL CONTROL LEVER (FSC) STEERING LEVER Forward Position (No Control Change) Full Forward Ground Speed Position Neutral-Park Position Intermediate Ground Speed Position...
-
Page 33: Parking Brake
Operating Instructions Parking Brake Transaxle Lockout Arms The parking brake functions by locking a detent arm The transaxle lockout arms disengage the transax to a cog in the hydraulic motor rotor. Moving the les. By lifting the arms up and locking them into lever FORWARD engages the parking brake;... -
Page 34: Engine Low Oil Warning Horn
IMPORTANT: Continued operation of the engine *** In normal operating conditions, oil changes in with the engine low oil warning horn sounding MAY 100-hour intervals are acceptable. Walker and cause engine damage if not corrected as soon as the engine manufacturers recommend engine possible. -
Page 35: Ignition Switch
Failure to follow these guidelines can damage the starter motor and shorten battery STARTING THE ENGINE life. Consult your Walker dealer or authorized Kohler dealer for additional help. CAUTION ADJUSTING GROUND SPEED AND STEERING Before operating the mower, read and un- derstand all Safety Instructions and Operat... - Page 36 Operating Instructions NOTE: If the FSC lever will not stay in the DANGER selected position, the friction lock needs to be adjusted. Refer to ADJUSTMENTS for Step 7 - Forward Speed Control Friction Adjustment in Keep feet on footrests at all times when the Maintenance Instructions.
-
Page 37: Engaging The Blade Drive
Speed Control (FSC) lever into the NEU- ♦ Remember it is not necessary to hold the TRAL-PARK position. steering levers forward (a unique Walker feature); always PULL on the levers for steering or for reverse motion of the The FSC may be adjusted forward for faster mower. -
Page 38: Stopping The Machine
DO NOT erating the mower. Contact your Walker disconnect the safety switches; they are dealer, or refer to ADJUSTMENTS of Blade for the operator’s protection. -
Page 39: Adjusting Cutting Height
Operating Instructions ADJUSTING CUTTING HEIGHT WARNING WARNING Remove the key from the ignition switch when leaving the mower unattended. This The engine must be stopped before ad- will prevent children and inexperienced justing cutting height. Disengage the blade operators from starting the engine. clutch (PTO), engage the parking brake, stop the engine, and remove the ignition key. -
Page 40: Recommendations For Mowing
Operating Instructions The mower will “freewheel” with the arms in the RECOMMENDATIONS FOR MOWING LOCKOUT position. The levers must be in the highest position to completely unlock the trans DANGER axles. Do not mow around overhanging tree Transaxle Lockout Arm branches or bushes at the same height as the operator’s torso and head where inad- vertent contact may cause injury. - Page 41 Operating Instructions ● When mowing, operate the engine at full throt- tle for the best cutting action and performance of the grass handling system (GHS). Mowing with a lower engine RPM causes the mowing blade to not cut clean and tear the grass. The engine is designed to be operated at full speed.
- Page 42 Operating Instructions ● When using a side discharge mower deck, the side discharge deflector shield must not be re- Maximum Recommended moved and must be kept in the lowest possible Slope - Do Not Operate position to deflect grass clippings and thrown on Steep Slopes objects down ward.
-
Page 43: Recommendations For Tilt-Up Deck Operation/Transport
Operating Instructions RECOMMENDATIONS FOR TILT-UP DECK OPERATION/TRANSPORT To avoid potential deck and/or tractor damage while using the tilt-up deck, the following recommenda tions are offered: ● Do not move the tractor with the deck in the tilt-up position since both the roller wheels (on the back of the deck) and the GHS discharge chute may be damaged by moving the tractor. -
Page 44: Grass Handling System (Ghs)
Operating Instructions GRASS HANDLING SYSTEM (GHS) GHS Model Only Grass Exhaust Screen Catcher (Removable) ® Grass-Pak Catcher Vane Switch Door Spring (Not Visible) Actuator ® Catcher Powerfil Air Exhaust Drive Motor “Full” Signal Horn Clutch Catcher Door PTO and Blade Gear Drive ®... -
Page 45: General Information
Operating Instructions General Information DANGER The Grass Handling System (GHS) consists of a rear discharge, collection mower deck connected to ROTATING BLOWER BLADES a 12.75 in. (32 cm) blower and a rear mounted grass catcher with 7.0 bushel (246 liters) capacity. The NEVER operate the GHS blower with the GHS blower operates any time the mower blade blower discharge chute uncovered (grass... - Page 46 Operating Instructions ● Check to see if the mower blades are installed ● Check that the interior of the deck housing and for the correct rotation. The blade cutting baffling is reasonably clean and free of grass edges should move towards each other at the and dirt buildup.
-
Page 47: Using The Tilt-Up Deck
Operating Instructions Using the Tilt-Up Deck The “full” signal horn is designed to operate (sound) when the grass catcher is almost full. The timing Refer to CLEANING of Grass Buildup in Mower of the signal is adjustable by changing the position Deck Housing in Maintenance Instructions. -
Page 48: Cleaning The Ghs Exhaust Screen
Operating Instructions Cleaning the GHS Exhaust Screen CAUTION To remove the grass catcher screen for cleaning, open the catcher door, push forward and pull down Use leg muscles and firm footing when lift- on the grass catcher screen knobs (on either side of ing the catcher to dump;... -
Page 49: Using The Dump Bag
Operating Instructions Using the Dump Bag Catcher Lift / Open the back door by lifting on the door handle. Dump Handle Orient the dump bag with one of the handle straps on the bag opening facing up. Tailgate Door Handle (Not Visible) Hook Bag on Bumper... -
Page 50: Power Dump Option
Operating Instructions Power Dump Option CAUTION When equipped with the optional power dump sys tem, the operator dumps the catcher while sitting in The operator should be in the seat and by- the seat. A toggle switch operating a power ram is standers stay clear when the power dump used to raise and lower the catcher. - Page 51 Operating Instructions RH Catcher Door Arm Door Arm Catcher Actuator Door Catcher Door Gas Spring Cable Guide Grass Catcher Lift Channel Spring Lift LH Catcher Door Arm Power Dump Ram Actuator Cable Assembly Guard Power Dump Mount Power Dump Switch Power Dump Components...
-
Page 52: Maintenance Instructions
CAUTION Maintenance Instructions Maintenance procedures requiring special training or tools should be performed by a trained technician. MAINTENANCE SCHEDULE CHART - RECOMMENDED SERVICE INTERVALS - MODEL S14i Every Ref. Service Item Daily Hours Hours Hours Yearly 2 Years Page Check Engine Crankcase Oil Level... -
Page 53: Important Tips For Care Of The Kohler Engine
Walker dealer or authorized Kohler Air Cleaner System service dealer. ●... -
Page 54: Lubrication
Maintenance Instructions LUBRICATION LUBRICATION Remove the dipstick again and check the oil lev- el on the dipstick. The oil level should be within the “Operating Range” on the dipstick (between WARNING the low level and the “F” mark). IMPORTANT: DO NOT operate engine without DO NOT attempt to lubricate the machine a sufficient oil supply in the crankcase. -
Page 55: Changing Engine Crankcase Oil
Maintenance Instructions LUBRICATION Fill the crankcase (through the dipstick tube) Changing Engine Crankcase Oil with new, clean oil. Use only crankcase lubri Change the engine crankcase oil after every 100 cants recommended by the engine manufac hours of operation as follows: turer. - Page 56 Maintenance Instructions LUBRICATION Ident Lubrication Ident Lubrication Location Type Places Location Type Places Brake Band Pivot Pins (Clevis) Deck Caster Wheel Fork Pivot Grease Catcher Hinge Point Δ Blade Spindle Grease Throttle Control Cable Ends Pivot Assembly, Tilt-Up Deck Grease Engine Dipstick / Oil Fill Oil*** Deck Support Arm Socket...
- Page 57 Maintenance Instructions LUBRICATION 21 & 26 Chassis and Deck Lubrication Points (DC36R Shown)
-
Page 58: Mower Deck Gearbox Lubrication
Maintenance Instructions LUBRICATION Mower Deck Gearbox Lubrication NOTE: In case the gearboxes are completely drained of oil, approximately 5 fl. oz. (15 cl) of oil NOTE: These instructions apply to all mower decks per gearbox is required to refill the gear drive with gear-driven blades. -
Page 59: Check Transaxle Fluid Level
Maintenance Instructions LUBRICATION Check Transaxle Fluid Level ● The transaxle oil lubrication is SAE 20W-50 (API Service Class SL or higher) engine oil. ● Inspect both transaxle cases after every 25 hours of operation for visible leaks. ● The fluid level of the transaxles can be checked visually by looking at the fluid level in the expan... -
Page 60: Transaxle Oil And Filter Change
Maintenance Instructions LUBRICATION Transaxle Oil and Filter Change Elbow Screw Locking Change the transaxle oil after the initial break-in Nut Down period of 75-100 hours. Thereafter, change oil ev- ery 400 hours of operation as follows: Thoroughly clean the exterior of the transaxle housing before servicing. -
Page 61: Cleaning
Maintenance Instructions CLEANING CLEANING IMPORTANT: Use only Kohler air filter and pre cleaner for replacement (Kohler Filter P/N 17-083- 21-S and Precleaner P/N 17-083-15-S). Aftermar CAUTION ket filters may not seal properly or filter efficiently. If a pressure washer is used on the ex- Cover posed working parts, avoid water on the electrical parts and the engine cooling... -
Page 62: Precleaner
Maintenance Instructions CLEANING Precleaner Precleaner Clean or replace the air cleaner precleaner after ev- Radial Sealing ery 25 hours of service; more often in extremely Surface dusty or dirty conditions. Service the precleaner as follows: 1. Release the two (2) air cleaner cover latches and remove the foam precleaner by sliding it off Paper the paper element. -
Page 63: Engine Cooling System
Maintenance Instructions CLEANING Cylinder Head Cooling Fins It is essential for performance and longevity of the air-cooled engine to keep the cylinder head cooling fins clean and free of obstruction. After every 8 hours of operation, check the performance of the cooling system by starting the engine, holding a hand adjacent to the cylinder head cooling air duct, and feeling the cooling airflow. -
Page 64: Grass Buildup In Mower Deck Housing
Maintenance Instructions CLEANING Tilt-Up Handle Tilt-Up Hook and Latch Connected Cooling Fins Tilt-Up Latch Deck Lock Lever Inspect and Clean Cylinder Head Tilt-Up Cooling Fins Hook IMPORTANT: Yearly, it is good maintenance prac tice to remove the engine cooling shroud and clean the cylinder head cooling fins and cooling fan thor... -
Page 65: Ghs Blower
Maintenance Instructions CLEANING GHS Blower Normally, the GHS blower operates with no mainte- nance or cleaning. However, when mowing grass that is dirty and damp (especially certain spring time mow ing conditions), a deposit of dirt may ac cumulate inside the blower housing, causing wear and binding of the blower wheel. -
Page 66: Transaxle Housing
Pay close attention to any oily dirt build up on the transaxle housings. This may be the result of an oil leak. If an oil leak is noticed, contact your local Walker dealer. Cooling Fins Transaxle Housing and Cooling Fins... -
Page 67: Checking/Servicing
Maintenance Instructions CHECKING/SERVICING CHECKING/SERVICING CAUTION DANGER Important Battery Service, Installation, and Charging Tips for Electronic Fuel Injection To prevent accidental starting of the en- Engines: gine when servicing or adjusting the ma- chine, remove the key from the ignition ● Do not allow the battery cables to touch switch and disconnect the spark plug opposing terminals. -
Page 68: Cleaning The Terminals
Maintenance Instructions CHECKING/SERVICING Tire Pressure Cleaning the Terminals If battery terminals are corroded, remove battery Inflate tires to pressures shown below: from the mower. Using a wire brush, remove corro- Deck Caster Wheel* = 20 PSI (137 kPa) sion with a solution of one part baking soda and Drive = 15 PSI (103 kPa) four parts water. -
Page 69: Drive Belts
Maintenance Instructions CHECKING/SERVICING WARNING DO NOT try to straighten a blade that is bent. NEVER weld a broken or cracked blade. ALWAYS replace with a new blade to assure safety. Blade Balancer If the blade cutting edge is dull or nicked, it should be sharpened. -
Page 70: Spark Plug
Step 5 in this section. NOTE: The engine fuel injection system is pressur Blade Brake Action ized and should be serviced by a Walker dealer or authorized Kohler engine service outlet. WARNING Every year, inspect the fuel supply line from the tank to engine for deterioration or damage. -
Page 71: Pto U-Joints
If the FSC friction lock needs to be adjusted, refer to malfunctioning. Contact your Walker dealer for trou ADJUSTMENTS for Step 7 - Forward Speed Con- bleshooting and/or replacement. trol Friction Adjustment in this section. -
Page 72: Replacing/Repairing
Maintenance Instructions REPLACING/REPAIRING REPLACING/REPAIRING Drive Belts There are three (3) individual belts on the ma DANGER chine: ● Engine Belt To prevent accidental starting of the en- gine when replacing parts or repairing the ● PTO Drive Belt machine, remove the key from the ignition switch and disconnect the spark plug ●... -
Page 73: Engine Belt
Maintenance Instructions REPLACING/REPAIRING Engine Belt To remove the engine belt: Roll the belt off the pulleys and remove the Relax belt by pushing the spring-loaded belt, then slowly release the idler. idler pulley. Compound Pulley Idler Pulley Push Idler Pulley Engine Belt to Relax Belt Engine Idler... -
Page 74: Pto Drive Belt
Maintenance Instructions REPLACING/REPAIRING PTO Drive Belt Remove the two (2) wing nuts and belt To remove the PTO drive belt: guide on the PTO Drive Pulley. Remove the engine belt, as described in With the PTO clutch disengaged, roll the previous section. -
Page 75: Ground Drive Belt
Maintenance Instructions REPLACING/REPAIRING Ground Drive Belt To remove the ground drive belt: Slide belt off pulleys, then slowly release the idler pulley. Raise the spring-loaded idler pulley to relax belt. Raise Idler Pulley to Relax Belt Drive Pulley Ground Drive Belt LH Transaxle Drive Pulley... -
Page 76: Fuel Filter
(2) shear bolts (10-24 x 5/8 in. stainless steel machine screws). These bolts Model S14i is equipped with an in-line fuel filter be are designed to shear and protect the blade drive tween the fuel tank and the fuel pump (low pressure gearbox from damage if the blade encounters a fuel pump). -
Page 77: Mower Blades
ING/SERVICING in this section. If blades are re An excessive amount of the flat section of the ● placed, always use Walker original equipment blade has been ground away (removed) when blades to ensure safety and optimum performance. the blade is sharpened. -
Page 78: Adjustments
Maintenance Instructions ADJUSTMENTS ADJUSTMENTS Adjust the position of the RH lever by turning the stop bolt in the Speed Control Actuator in or out. Transmission Control Turning the stop bolt in will make the RH lever move back, and turning it out will make it move IMPORTANT: The proper adjustment of the forward. -
Page 79: Neutral Function Adjustment
Maintenance Instructions ADJUSTMENTS Step 3 - Neutral Function Adjustment Adjust the tracking adjustment nuts at the front of both control rods so that 2 or 3 threads are With the Forward Speed Control (FSC) in NEU- visible, then loosen the jam nuts on the ball joints TRAL-PARK, the lever should be straight up. -
Page 80: Full Forward Speed Adjustment
Maintenance Instructions ADJUSTMENTS Step 4 - Full Forward Speed Adjustment WARNING Move the FSC to the full FORWARD speed position. The following adjustments are made with the engine running. Keep all body parts Raise the body. The maximum speed tracking and tools away from rotating and hot adjustment set screw in both transmission components, and secure all loose cloth-... -
Page 81: Straight Tracking Adjustment
Maintenance Instructions ADJUSTMENTS Step 5 - Straight Tracking Adjustment Step 6 - FSC Neutral Switch Adjustment Sit in the seat, start the engine, set throttle at full Place the FSC lever in the NEUTRAL-PARK speed, and with the FSC in the NEUTRAL- position. -
Page 82: Forward Speed Control Friction Adjustment
Maintenance Instructions ADJUSTMENTS Step 7 - Forward Speed Control Friction Adjustment CAUTION Before testing the FSC Neutral Switch, FSC Full disconnect the spark plug wire from the Forward Position engine and engage the parking brake to prevent accidental starting and inadver- tent machine movement. -
Page 83: Blade Clutch (Pto)
Maintenance Instructions ADJUSTMENTS Blade Clutch (PTO) With the clutch engaged, adjust the length of the clutch actuator rod to achieve a clutch spring Clutch Engagement/Belt Tension assembly bolt head clearance of 1/4 in. to 5/16 in. (6.5 mm to 8 mm). To adjust the clutch actuator rod The clutch engagement and PTO belt tension are length, loosen both ball joint jam nuts (one ball joint adjusted using the clutch actuator rod. -
Page 84: Blade Brake Band Adjustment
Maintenance Instructions ADJUSTMENTS 11 in.* (280 mm) 6 in.* Knuckle (152.5 mm) Clutch Spring Assembly Joint (Spring Uncompressed) 2-1/8 in.* (54 mm) *NOTE: Factory preset dimensions. Reset to these dimensions prior to adjustment if components have been disassembled. PTO Clutch Disengaged Adjust the working travel of the clutch idler pulley by Blade Brake Band Adjustment adjusting the brake band nut:... -
Page 85: Tilt-Up Deck Adjustable Stop
Maintenance Instructions ADJUSTMENTS After adjustments are complete, verify blade Tilt-Up Deck Adjustable Stop brake performance by following the procedure When the carrier frame hinge joint is properly ad in CHECKING/SERVICING the Blade Brake justed, the deck lock levers should move in and out Action in this section. -
Page 86: Ghs "Full" Signal Horn Adjustment
Maintenance Instructions ADJUSTMENTS GHS “Full” Signal Horn Adjustment Exhaust ® The vertical position of the Grass-Pak switch is Screen 4 to 4-1/2 in. critical to make sure the catcher box does not over (10 to 11.5 cm) fill causing the delivery chute to clog. The vertical position can be adjusted by moving the aluminum ®... -
Page 87: Warranty
(1) year* after date of sale to the original retail purchaser unless the product is used for rental purposes, in which case this warranty is limited to ninety (90) days. At Walker’s request, customer will make the defective part available for inspection by Walker and/or return the defective part to Walker, transpor... - Page 88 WALKER MFG. CO. • 5925 E. HARMONY ROAD, FORT COLLINS, CO 80528 • (970) 221-5614 FORM NO. 071019 PRINTED IN USA www.walker.com ©2019 WALKER MFG. CO...
Need help?
Do you have a question about the S14i and is the answer not in the manual?
Questions and answers