Table of Contents
Advertisement
Quick Links
Advertisement
Table of Contents

Related Manuals for Phoenix Contact PSR-CT Series


Summary of Contents for Phoenix Contact PSR-CT Series
- Page 1 Non-contact safety switch PSR-CT Original operating instructions...
- Page 2 2019-01-25 This user manual is valid for: Designation As of version Order No. PSR-CT-F-SEN-1-8 V1.1.0 2702976 PSR-CT-C-SEN-1-8 V1.1.0 2702972 PSR-CT-M-SEN-1-8 V1.1.0 2702975 PSR-CT-C-ACT V1.0.0 2702973 PHOENIX CONTACT GmbH & Co. KG • Flachsmarktstraße 8 • 32825 Blomberg • Germany phoenixcontact.com...
-
Page 3: Table Of Contents
Connector pin assignment ...................20 Coding types .......................21 Active sensor areas and response area...............22 Actuation positions and travel directions..............23 Limit range monitoring ..................24 2.10 Series connection ....................24 2.11 Error safety ......................25 2.12 Safe state ......................25 3 / 69 108366_en_01 PHOENIX CONTACT... - Page 4 Series connection with central reset for all safety switches ....49 9.2.3 Series connection with local reset on all safety switches ......51 9.2.4 Series connection with mixed startup behavior ........53 PSR-CT safety switch connected to a safe controller ..........55 4 / 69 PHOENIX CONTACT 108366_en_01...
- Page 5 Interface types according to ZVEI classification ........62 10.1.6 Approvals .....................62 10.2 Ordering data.......................63 Technical appendix........................64 Explanation of switching distances ..............64 Explanation of the typical system times ...............65 FCC / IC conformity .....................66 Revision history ........................67 5 / 69 108366_en_01 PHOENIX CONTACT...
-
Page 6: For Your Safety
Requirements Knowledge of the following topics is required: – Handling safety components – Valid EMC regulations – Valid regulations governing occupational safety and accident prevention 6 / 69 PHOENIX CONTACT 108366_en_01... -
Page 7: Field Of Application Of The Product
Only use the device according to the defined technical data and environmental conditions. ronmental conditions See Section “Technical data” on page 57. Approved components Only use approved components and combinations for PSR-CT safety switches. See Section “PSR-CT components” on page 13. 7 / 69 108366_en_01 PHOENIX CONTACT... -
Page 8: Foreseeable Misuse
Modifications to hardware and firmware of the device are not permitted. Incorrect operation or modifications to the device can endanger your safety or damage the device. Do not repair the device yourself. If the device is defective, please contact Phoenix Contact. 8 / 69 PHOENIX CONTACT... -
Page 9: Safety Notes
Otherwise the warranty is invalidated. – Repairs to the device – Opening the housing Decommissioning and dis- • Dispose of the device in accordance with environmental regulations. posal • Make sure that the device can never be reused. 9 / 69 108366_en_01 PHOENIX CONTACT... -
Page 10: Electrical Safety
Observe the manufacturer's information. ESD information NOTE: Electrostatic discharge Electrostatic discharge can damage or destroy the components. When handling the device, observe the necessary safety precautions against electrostatic discharge (ESD) according to EN 61340-5-1 and IEC 61340-5-1. 10 / 69 PHOENIX CONTACT 108366_en_01... -
Page 11: Safety Of Machines Or Systems
EC declaration of conformity. These documents are available on the Internet. See phoenixcontact.net/products. For separate notes on FCC / IC conformity, refer to the Appendix “FCC / IC conformity” on page 66. 11 / 69 108366_en_01 PHOENIX CONTACT... -
Page 12: Documentation
See phoenixcontact.net/products. Also observe the documentation of any additional devices used together with the safety switches. Safety hotline Should you have any technical questions, please contact our 24-hour hotline. Phone: +49 5281 9462777 E-mail: safety-service@phoenixcontact.com 12 / 69 PHOENIX CONTACT 108366_en_01... -
Page 13: Product Description And Method Of Operation
PSR-CT-C-ACT 2.2.1 Approved combinations The sensor and actuator combinations with checkmarks are approved combinations. Table 2-1 Approved PSR-CT combinations Actuator Sensor PSR-CT-C-ACT PSR-CT-F-SEN-1-8 PSR-CT-C-SEN-1-8 PSR-CT-M-SEN-1-8 13 / 69 108366_en_01 PHOENIX CONTACT... -
Page 14: Mounting Accessories
– Dummy plug for each sensor circuit See Section “Ordering data” on page 63. The functional safety range from Phoenix Contact will provide you with suitable evalua- tion devices for use with PSR-CT safety switches. See phoenixcontact.net/products. 14 / 69... -
Page 15: Design
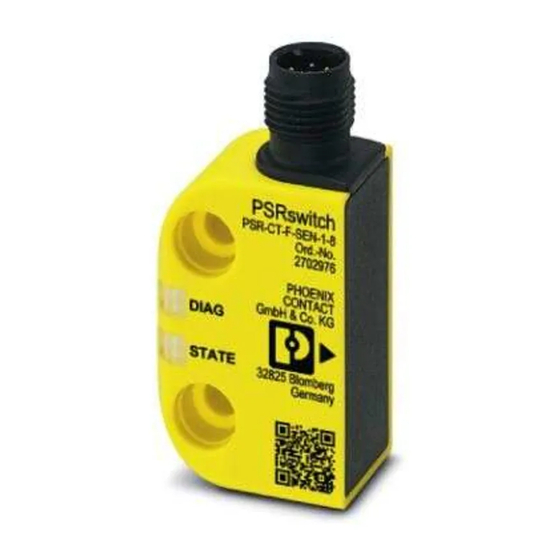
See Section “Electrical connection” on page 32. Year of manufacture and The year of manufacture and the current version number are located on the housing under version the serial number in the format YY VX.X.X. 15 / 69 108366_en_01 PHOENIX CONTACT... -
Page 16: Inputs And Outputs
Single switch When using a single safety switch, connect the safety inputs to 24 V DC. 16 / 69 PHOENIX CONTACT 108366_en_01... -
Page 17: Start/Reset Input
The safety function can be centrally reset in the event that several switches are connected in series. For this, execute the reset function at the evaluating switching device, and oper- ate the individual switches with automatic startup behavior. 17 / 69 108366_en_01 PHOENIX CONTACT... -
Page 18: Safety Outputs
The signal output is switched on as soon as the actuator has left the response area of the sensor. The information is non-safety-related. The information is used for evaluating the position of safety equipment, for example. See Section “Switching states of the outputs” on page 19. 18 / 69 PHOENIX CONTACT 108366_en_01... -
Page 19: Switching States Of The Outputs
Start command not present start FO1A FO1B Overview of the switching states in combination with the LED indicators for general states and error messages: See Section “LED status indicators and switching states” on page 43. 19 / 69 108366_en_01 PHOENIX CONTACT... -
Page 20: Connector Pin Assignment
Enable input for channel 2 24 V DC power supply FO1A Safety output for channel 1 FO1B Safety output for channel 2 Signal output/diagnostic output FI1A Enable input for channel 1 0 V DC ground START Start/reset input 20 / 69 PHOENIX CONTACT 108366_en_01... -
Page 21: Coding Types
You can use the product designation to determine the coding type of the sensor, which is the letter after PSR-CT-... Table 2-4 Sensor coding types Sensor Coding type PSR-CT-F-SEN-1-8 Fixcode PSR-CT-C-SEN-1-8 Unicode PSR-CT-M-SEN-1-8 Multicode 21 / 69 108366_en_01 PHOENIX CONTACT... -
Page 22: Active Sensor Areas And Response Area
In order to avoid influence of the side lobes, observe the specified minimum dis- tances between sensor and actuator. • Please observe the information in Section “Mounting” on page 26 and Section “Tech- nical data and ordering data” on page 57. 22 / 69 PHOENIX CONTACT 108366_en_01... -
Page 23: Actuation Positions And Travel Directions
There are three possible travel directions in each actuation position, in which the actuator can approach the sensor. Actuation position and travel direction influence the switching distances. Please observe the information in Section “Mounting” on page 26 and Section “Technical data and ordering data” on page 57. 23 / 69 108366_en_01 PHOENIX CONTACT... -
Page 24: Limit Range Monitoring
See Section “Mounting” on page 26 and Section “Maximum cable lengths” on page 35. Observe the rise of the risk time for a switch chain. See Appendix “Explanation of the typical system times” on page 65. 24 / 69 PHOENIX CONTACT 108366_en_01... -
Page 25: Error Safety
Restart the safety switch: a) Disconnect the operating voltage. b) Connect the operating voltage again. If the error cannot be reset, please contact Phoenix Contact. Perform a function test after every error. See Section “Function test” on page 40. 2.12... -
Page 26: Mounting
- 2 6 - 2 2 - 1 8 - 1 0 - 1 4 - 1 8 - 2 2 - 2 6 - 3 0 Figure 3-1 Transponder field of the sensor 26 / 69 PHOENIX CONTACT 108366_en_01... - Page 27 X direction Position B: ±15 mm Switching hysteresis 1 mm, minimum 2 mm, typical Assured release distance S +Z direction: 23 mm, maximum -Z direction: 32 mm, maximum Repeat accuracy ≤10 % 27 / 69 108366_en_01 PHOENIX CONTACT...
- Page 28 At 1 mm distance between the sensor and 4 mm actuator in the X direction Switching hysteresis 1 mm, minimum 2 mm, typical Assured release distance S ±29 mm, maxi- Repeat accuracy ≤10 % 28 / 69 PHOENIX CONTACT 108366_en_01...
- Page 29 In order to prevent mutual interference, keep a minimum distance of min. 140 mm 140 mm between two sensors. The minimum distance applies in the following cases: – Individual wiring of safety switches min. 140 mm – Series connection of safety switches 29 / 69 108366_en_01 PHOENIX CONTACT...
-
Page 30: Mounting Instructions
Install the connecting cable so that it is protected in areas where high-pressure cleaners are used. Mounting surface Prepare the mounting surface on the safety equipment appropriately. The mounting surface requires drill holes for M4 screws. See dimensional drawings in Section “Technical data” on page 57. 30 / 69 PHOENIX CONTACT 108366_en_01... -
Page 31: Mounting
Adjust the actuator: – According to the arrow alignment between the sensor and actuator – According to the required distances between the sensor and actuator Tighten the actuator. Close the mounting slots using the caps. 31 / 69 108366_en_01 PHOENIX CONTACT... -
Page 32: Electrical Connection
(relay, controller, etc.). When switched on, the safety outputs provide a +24 V level. • Use downstream evaluation devices with pulse-switching inputs. Observe the information in the section on safety regulations and installation notes. 32 / 69 PHOENIX CONTACT 108366_en_01... -
Page 33: Notes On Using Y Distributors And Dummy Plugs
Use of a connecting cable that is listed under UL category code CYJV2 or CYJV The devices have been checked according to the requirements of UL508 and CSA/ C22.2 no. 14 (protec- tion against electric shock and fire). Only for use according to NFPA 79 (Industrial Machinery). 33 / 69 108366_en_01 PHOENIX CONTACT... -
Page 34: Fuse Protection For The Power Supply
Note that too high cable capacities at very low load currents may falsify the test pulses of the safety outputs. If you are planning a cable design that differs (cross section, material, etc.), please contact Phoenix Contact: 34 / 69 PHOENIX CONTACT... -
Page 35: Maximum Cable Lengths
5 x 0,34 mm PSR-CT n PSR-CT n-1 PSR-CT 1 Figure 4-1 Maximum cable length with n PSR-CT safety switches Key: PSR-CT 1 First switch in the switch chain PSR-CT n Last switch in the switch chain 35 / 69 108366_en_01 PHOENIX CONTACT... -
Page 36: Checking The Planned Design
0.34 mm² cable Note that connecting a reset button will influence the cable length design. If you are connecting more than ten switches in series, please contact Phoenix Contact: 36 / 69 PHOENIX CONTACT... - Page 37 The total length of the switch chain l is 140 m and therefore lower than the maxi- target = 200 m for 20 switches). mum value according to Table 4-2 (l The planned application in this format is operational. 37 / 69 108366_en_01 PHOENIX CONTACT...
-
Page 38: Startup
Learning duration A successful learning process takes 30 s, approximately. Information on fixcode sensors – The learning process can be carried out once. – It is not possible to teach in any additional actuators. 38 / 69 PHOENIX CONTACT 108366_en_01... -
Page 39: Teaching In Actuators
A blocked actuator could be involved in the case of unicode sensors. 4. Restart the safety switch: a) Disconnect the operating voltage. b) Apply the operating voltage again. The safety switch is in normal mode after the self-test has been carried out successfully. 39 / 69 108366_en_01 PHOENIX CONTACT... -
Page 40: Function Test
See Section “LED status indicators and switching states” on page 43. The red DIAG LED should remain switched off during the entire function test. Proceed as follows to check the safety function of each safety switch on all safety equip- ment. 40 / 69 PHOENIX CONTACT 108366_en_01... - Page 41 Expected behavior of the safety switch: – The green STATE LED flashes cyclically: green short, off long. The sensor indicates normal mode with open safety equipment. 5. Repeat steps 1 to 4 individually for each safety equipment. 41 / 69 108366_en_01 PHOENIX CONTACT...
-
Page 42: Service And Maintenance
PSR-CT Service and maintenance The device requires no maintenance during the permissible duration of use. Repairs may not be carried out. In the event of an error, please contact Phoenix Contact. Perform the following checks regularly: – Visual inspection –... -
Page 43: Led Status Indicators And Switching States
The following section describes the LED indicators for general states and error messages, as well as the respective switching states of the safety outputs and the signal output. In the event of an error or fault that is not listed, please contact Phoenix Contact. Table 8-1... - Page 44 During this, the LED flashes 2 x briefly and then pauses for a longer period. The LED executes a repeating flashing cycle. During this, the LED goes off 2 x briefly and then lights up for a longer period. 44 / 69 PHOENIX CONTACT 108366_en_01...
-
Page 45: Recovery In The Event Of An Error
Restart the safety switch: a) Disconnect the operating voltage. b) Apply the operating voltage again. If the error cannot be reset, please contact Phoenix Contact. Perform a function test after every error. See Section “Function test” on page 40. 45 / 69... -
Page 46: Application Examples
The input of the controller must be suitable for clocked safety signals (OSSD). – The controller must tolerate test pulses on the input signals (can usually be param- eterized). – See Section “Interface types according to ZVEI classification” on page 62. 46 / 69 PHOENIX CONTACT 108366_en_01... -
Page 47: Psr-Ct Safety Switches With Safety Relay
• See fault exclusion according to EN ISO 13849-2. Also observe the documentation for all other devices used together with the safety switch. Phoenix Contact components used – 3 x PSR-CT safety switch –... - Page 48 Start input of the safety relay S12, S22 Sensor circuit inputs of the safety relay 13/14, 23/24 Enabling current paths of the safety relay K3, K4 Positively driven contactors Fuse protection for the power supply 48 / 69 PHOENIX CONTACT 108366_en_01...
-
Page 49: Series Connection With Central Reset For All Safety Switches
• See fault exclusion according to EN ISO 13849-2. Also observe the documentation for all other devices used together with the safety switch. Phoenix Contact components used – 3 x PSR-CT safety switch –... - Page 50 Start input of the safety relay S12, S22 Sensor circuit inputs of the safety relay 13/14, 23/24 Enabling current paths of the safety relay K3, K4 Positively driven contactors Fuse protection for the power supply 50 / 69 PHOENIX CONTACT 108366_en_01...
-
Page 51: Series Connection With Local Reset On All Safety Switches
• See fault exclusion according to EN ISO 13849-2. Also observe the documentation for all other devices used together with the safety switch. Phoenix Contact components used – 3 x PSR-CT safety switch –... - Page 52 Start input of the safety relay S12, S22 Sensor circuit inputs of the safety relay 13/14, 23/24 Enabling current paths of the safety relay K3, K4 Positively driven contactors Fuse protection for the power supply 52 / 69 PHOENIX CONTACT 108366_en_01...
-
Page 53: Series Connection With Mixed Startup Behavior
• See fault exclusion according to EN ISO 13849-2. Also observe the documentation for all other devices used together with the safety switch. Phoenix Contact components used – 3 x PSR-CT safety switch –... - Page 54 Start input of the safety relay S12, S22 Sensor circuit inputs of the safety relay 13/14, 23/24 Enabling current paths of the safety relay K3, K4 Positively driven contactors Fuse protection for the power supply 54 / 69 PHOENIX CONTACT 108366_en_01...
-
Page 55: Psr-Ct Safety Switch Connected To A Safe Controller
WARNING: Loss of functional safety Make sure that all safety switches and the safe controller have the same ground potential. Also observe the documentation for all other devices used together with the safety switch. Phoenix Contact components used – 3 x PSR-CT safety switch... - Page 56 START Start/reset input 24 V DC power supply Signal output FI1A, FI1B Safety inputs SIS / FS-PLC Safety Instrumented System / failsafe controller DI1 ... DI3 Digital inputs Fuse protection for the power supply 56 / 69 PHOENIX CONTACT 108366_en_01...
-
Page 57: 10 Technical Data And Ordering Data
80 g Dimensional drawing 26,5 Ambient conditions Ambient temperature (operation) -25 °C ... 55 °C Ambient temperature (storage/transport) -40 °C ... 70 °C Vibration (operation) According to EN 60947-5-2 EMC conformity According to EN 60947-5-3 57 / 69 108366_en_01 PHOENIX CONTACT... - Page 58 - 1.5 V, minimum (HIGH FO1A, FO1B)) maximum (HIGH FO1A, FO1B)) 0 V DC, minimum (LOW FO1A/FO1B) 1 V DC, maximum (LOW FO1A/FO1B) Switching current 1 mA, minimum (per safety output) 150 mA, maximum (per safety output) 58 / 69 PHOENIX CONTACT 108366_en_01...
- Page 59 10 ms, typical (risk time delay per device) Switch-on time 400 ms, maximum (of the safety outputs) Discrepancy time 10 ms, maximum (between the safety outputs) Test pulses 300 μs, typical (test pulse duration) 100 ms, approximately (test pulse interval) 59 / 69 108366_en_01 PHOENIX CONTACT...
-
Page 60: Technical Data For The Actuator
7 mm (between sensor and actuator when traveling in y direction) Assembly instruction Observe EN ISO 14119 Maximum tightening torque for mounting: 0.8 Nm General data Housing material Color Yellow Degree of protection IP65/IP67/IP69/IP69K Power supply Inductively, via the sensor 60 / 69 PHOENIX CONTACT 108366_en_01... - Page 61 1 mm, minimum 2 mm, typical Assured release distance S 17 mm, maximum Repeat accuracy ≤10 % Additional values Table 3-1 “Minimum distances and switching distances” in Section “Positioning and distances” on page 26. 61 / 69 108366_en_01 PHOENIX CONTACT...
-
Page 62: Safety-Related Characteristics
Interface Additional Source/ Suitable Suitable drain type measure drain interface interface type type Source Drain Additional – Outputs are not types according to IEC 61131-2 measure M 10.1.6 Approvals phoenixcontact.com for the latest approvals. 62 / 69 PHOENIX CONTACT 108366_en_01... -
Page 63: Ordering Data
Type 2 Y distributor for manual startup behavior of SAC-8PY-M/2XF BK 2-PSR 1054339 PSR-CT safety switches Type 3 Y distributor for integrated diagnostics via the SAC-8PY-M/2XF BK 3-PSR 1054341 signal contact in the case of PSR-CT safety switches 63 / 69 108366_en_01 PHOENIX CONTACT... -
Page 64: A Technical Appendix
The switching operation at a certain switching distance is repeated with this accuracy in the case of the same switching distance. Actuator moves away off Actuator approaches Distance Figure A-1 Schematic view of the switching distances 64 / 69 PHOENIX CONTACT 108366_en_01... -
Page 65: A 2 Explanation Of The Typical System Times
Test pulses on the safety outputs The safety outputs generate test pulses: – When switched on – When switched off during device startup Downstream devices have to tolerate these test pulses. 65 / 69 108366_en_01 PHOENIX CONTACT... -
Page 66: A 3 Fcc / Ic Conformity
L’exploitation est autorisée aux deux conditions suivantes : (1) L’appareil ne doit pas produire de brouillage; (2) L’appareil doit accepter tout brouillage radioélectrique subi, même si le brouillage est su- sceptible d’en compromettre le fonctionnement. 66 / 69 PHOENIX CONTACT 108366_en_01... -
Page 67: B Revision History
Picture frame for Figure 2-4 and Figure 2-5 inserted Risk time according to EN 60947-5-3 and delay time of the risk time changed Publication year for EN ISO 13849-1: 2015 inserted Appendix A 3 “FCC / IC conformity” inserted 67 / 69 108366_en_01 PHOENIX CONTACT... - Page 68 The receipt of technical documentation (in particular user documentation) does not constitute any further duty on the part of Phoenix Contact to furnish information on modifications to products and/or technical documentation. You are responsible to verify the suitability and intended use of the products in your specific application, in particular with regard to observing the applicable standards and regulations.
- Page 69 Should you have any suggestions or recommendations for improvement of the contents and layout of our manuals, please send your comments to: tecdoc@phoenixcontact.com 69 / 69 PHOENIX CONTACT GmbH & Co. KG • Flachsmarktstraße 8 • 32825 Blomberg • Germany phoenixcontact.com...
Need help?
Do you have a question about the PSR-CT Series and is the answer not in the manual?
Questions and answers