Advertisement
Quick Links
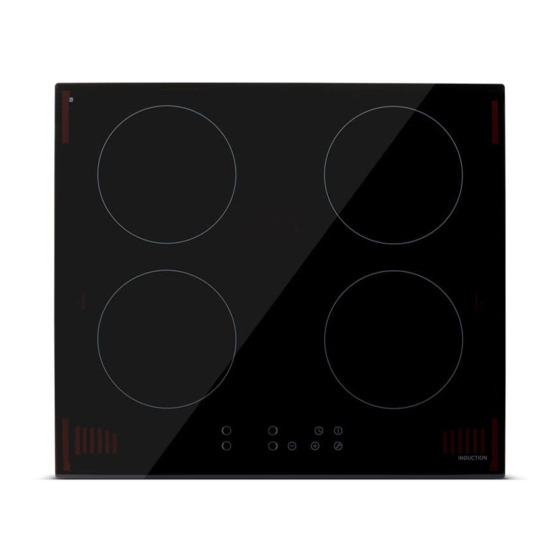
Induction Cooktop (60cm)
KAMCOOKTPIA
Quick Start Guide
Table of Contents
Safety & Warnings .................................................................................................................................................... 2
Overview ...................................................................................................................................................................... 4
Installation ................................................................................................................................................................... 6
Operation ................................................................................................................................................................... 10
Cleaning & Care ........................................................................................................................................................17
Specifications ........................................................................................................................................................... 18
Troubleshooting ...................................................................................................................................................... 19
1
Advertisement

Subscribe to Our Youtube Channel
Related Manuals for Kogan KAMCOOKTPIA

Summary of Contents for Kogan KAMCOOKTPIA
-
Page 1: Table Of Contents
Induction Cooktop (60cm) KAMCOOKTPIA Quick Start Guide Table of Contents Safety & Warnings ..............................2 Overview ..................................4 Installation ................................... 6 Operation ................................... 10 Cleaning & Care ................................17 Specifications ................................18 Troubleshooting ..............................19... -
Page 2: Safety & Warnings
Safety & Warnings Read these instructions carefully before installing or using this appliance. • No combustible material or products should be placed on this appliance at any • time. In order to avoid a hazard, this appliance must be installed according to these •... - Page 3 Do not place or drop heavy objects on your cooktop. • Do not stand on your cooktop. • Do not use pans with jagged edges or drag pans across the induction glass surface • as this can scratch the glass. Do not use scourers or any other harsh abrasive cleaning agents to clean your •...
-
Page 4: Overview
Overview Top View Maximum 1500W zone Maximum 2000W zone Maximum 1500W zone Maximum 2000W zone Glass plate Control panel ON/OFF control... - Page 5 Control Panel Heating zone selection controls Power / Timer regulating key Key lock control ON/OFF control Timer control Induction cooking works by electromagnetic vibrations generating heat directly into the pot or pan, rather than indirectly through heating the glass surface. The glass becomes hot only because the pot or pan eventually warms it up.
-
Page 6: Installation
Installation Cut out the work surface according to the sizes shown in the following drawings. For the purpose of installation and use, a minimum of 5cm space shall be kept around the hole. Be sure the thickness of the work surface is at least 30mm. Please select heat-resistant and insulated work surface material (Wood and similar fibrous or hygroscopic material shall not be used as work surface material) to avoid electrical shock and larger deformation caused by the heat radiation from the hotplate. - Page 7 Warning: Ensure adequate ventilation Make sure the induction cooktop is well ventilated and that the air inlet and outlet are not blocked. In order to avoid accidental touch with the overheating bottom of the cooktop or getting an unexpected electric shock while working, it is necessary to put a wooden insert, fixed by screws, at a minimum distance of 50mm from the bottom of the cooktop.
- Page 8 Before Locating the Fixing Brackets The unit should be placed on a stable, smooth surface (use the packaging). Do not apply force onto the controls protruding from the cooktop. Adjusting the Bracket Position Fix the cooktop on the work surface by screwing brackets on the bottom of the cooktop (see picture) after installation.
- Page 9 Connecting the Cooktop to the Mains Power Supply This cooktop must be connected to the mains power supply only by a qualified technician. Before connecting the cooktop to the mains power supply, check that: The domestic wiring system is suitable for the power drawn by the cooktop. 2.
-
Page 10: Operation
If the cable is damaged or to be replaced, the operation must be carried out the by • a qualified technician to avoid any accidents. If the appliance is being connected directly to the mains, an omnipolar circuit- • breaker must be installed with a minimum opening of 3mm between contacts. The installer must ensure that the correct electrical connection has been made and •... - Page 11 If you do not have a magnet: • Put some water in the pan you want to check. 2. If does not flash in the display and the water is heating, the pan is suitable. Cookware made from the following materials is not suitable: pure stainless steel, •...
- Page 12 How to Use Start cooking Touch the ON/OFF control for three seconds. After powering on, the buzzer beeps once, all displays show “–” or “– –”, indicating that the induction cooktop has entered the state of standby mode. Place a suitable pan on the cooking zone that you wish to use. Make sure the bottom of the pan and the surface of the •...
- Page 13 Finish cooking Touch the heating zone selection control that you wish to switch off. Turn the cooking zone off by scrolling down to “0” with the “-” control or touching “-” and “+” control together. Make sure the display shows “0”. Turn the whole cooktop off by touching the ON/OFF control.
- Page 14 Timer Control You can use the timer in two different ways: a) You can use it as a minute minder. In this case, the timer will not turn any cooking zone off when the set time is up. b) You can set it to turn one or more cooking zones off after the set time is up. The maximum duration of the timer is 99 minutes.
- Page 15 Touch the timer control, the minder indicator will start flashing and “10” will show in the timer display. Set the time by touching the “-” or “+” controls of the timer. Hint: Touch the “-” or “+” control of the timer once will decrease or increase by 1 minute.
- Page 16 Default Working Times Auto-shutdown is a safety protection function for your induction cooktop. It shuts down automatically if ever you forget to turn off your cooking. The default working times for various power levels are shown in the below table: Power Level Default working timer (hour) When a pot is removed, the induction cooktop can stop heating immediately and the cooktop...
-
Page 17: Cleaning & Care
4. Cook any meat at first, put it aside and keep warm. 5. Stir-fry the vegetables. When they are hot but still crisp, turn the cooking zone to a lower setting, return the meat to the pan and add your sauce. 6. -
Page 18: Specifications
Never leave cleaning • residue on the cooktop: the glass may become stained. Remove stains left by • Remove these immediately Boil over, melting and hot melting and sugary food with a fish slicer, palette sugary spills on the glass or spillages as soon as knife or razor blade possible. -
Page 19: Troubleshooting
Troubleshooting Problem Possible Causes What to do The induction cooktop cannot No power. Make sure the cooktop is be turned on. connected to the power supply and that it is switched Check whether there is a power outage in your home or area. - Page 20 The induction cooktop or a Technical fault. Please note down the error cooking zone has turned itself letters and numbers, switch off unexpectedly, a tone the power to the induction sounds, and an error code is cooktop off at the wall and displayed.
- Page 21 Temperature sensor of the IGBT failure. F9/FA (short circuit/open circuit for #1) Replace the power board. Temperature sensor of the IGBT failure. FC /FD (short circuit/open circuit for #2) 2. Specific failure and solution Failure Problem Solution A Solution B The LED does not No power supplied.
- Page 22 To prevent possible harm to the environment or human health from uncontrolled waste disposal, recycle it responsibly to promote the sustainable reuse of material resources. User manual is subject to change without notice. For the latest version of your user manual, please visit https://www.kogan.com/usermanuals/...
Need help?
Do you have a question about the KAMCOOKTPIA and is the answer not in the manual?
Questions and answers