GFA TS 971 Series Brief Instructions
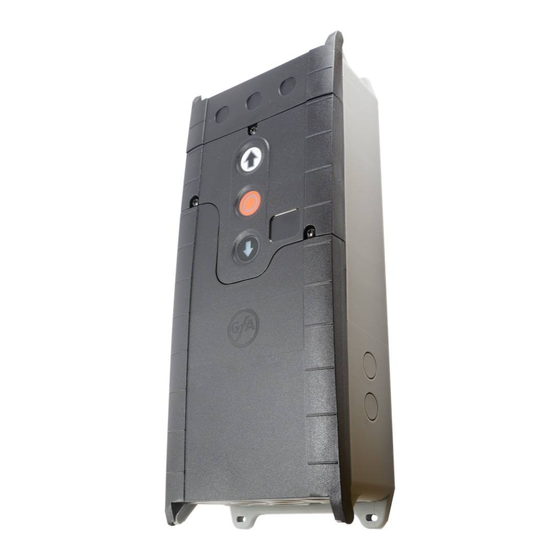
Door control. automatic control panel with radio.
Hide thumbs
Also See for TS 971 Series:
- Electrical wiring instructions (2 pages) ,
- Installation/connections manual (28 pages) ,
- Installation instructions manual (40 pages)

Related Manuals for GFA TS 971 Series


Summary of Contents for GFA TS 971 Series
- Page 1 Brief instructions Door control TS 971 Automatic control panel with radio Version: 51171638 -aus- Version: e / 01.2015 0 0 0 0 0 0 0 0 0 0 0 5 1 1 7 1 6 3 8 XXXXX...
- Page 2 GfA-ELEKTROMATEN Australia Pty Ltd P.O. Box 267 Roseville 2069 NSW Telephone: 02 9882 2782 Facsimile: 02 9882 2783 Email: info@gfa-elektromaten.net Web: www.gfa-elektromaten.net...
-
Page 3: Table Of Contents
Contents General safety information .................... 5 Technical data ......................6 Electrical installation ..................... 7 Mains supply ........................7 Connection cable connection overview ................8 Limit switch configuration, screwable version up to year of construction in 1997 ....9 ... - Page 4 DI / FI settings ......................... 26 Extended door functions ....................27 Teach-in of handheld transmitter ..................28 Maintenance cycle counter ....................29 Readout of Data memory ....................30 Deleting of all settings ..................... 30 Reading out WSD door-module data................
-
Page 5: General Safety Information
1 General safety information Specified normal use The door control is intended for a power-operated door with a drive unit (NES/DES GfA limit switch system). The safe operation is only guaranteed with specified normal use. The drive unit is to be protected from rain, moisture and aggressive ambient conditions. -
Page 6: Technical Data
Operation: -10..+50 Temperature range °C Storage: +0..+50 up to 93 % Air humidity non-condensing Protection class of housing IP54 NES (mechanical limit switch) Compatible GfA limit switch DES (digital limit switch) Integrated radio receiver WSD (Wireless Safety Device) Handheld transmitter... -
Page 7: Electrical Installation
3 Electrical installation Warning - Danger to life due to electrical current! Disconnect the cables (mains OFF) and check that the supply is off Observe the applicable regulations and standards Ensure proper electrical connection Use suitable tools On-site backup fuse and disconnector unit! ... -
Page 8: Connection Cable Connection Overview
Connection cable connection overview Ⓐ Ⓑ Ⓒ Ⓓ DES → X12 DES MOT → Core Description: Core Term. Description: ① 5/wh ① +24 V safety circuit ① Phase W ② 6/bn ② Channel B (RS485) ② Phase V ③ 7/gn ③... -
Page 9: Limit Switch Configuration, Screwable Version Up To Year Of Construction In 1997
Limit switch configuration, screwable version up to year of construction in 1997 4 (N) Thermal contact Limit switch board Rectifier Emergency OPEN limit switch Motor Emergency CLOSE limit switch Emergency manual operation OPEN limit switch Connection cable CLOSE limit switch Spring-loaded brake Auxiliary limit switch Auxiliary limit switch... -
Page 10: Overview Of Control
Overview of control DES/ F1 = 1,6A t 24 V mains supply, external devices DES/ DES or NES limit switch socket Mains supply Micro-fuse 1.6 A time-lag Safety edge and door safety switch Motor socket Selector switch Emergency STOP control device OPEN push-button Automatic closing On/Off STOP push-button... -
Page 11: Starting Up The Control
4 Starting up the control ▶ Supply cables Insert / switch on DES: Rapid adjustment of final limit positions 1. Check output rotating direction 2. Move to OPEN final limit position 3. Save OPEN final limit position 4. Move to CLOSE final limit position 5. -
Page 12: Nes: Rapid Adjustment Of Final Limit Positions
Observe the installation instructions of the drive unit! For adjusting the mechanical limit switch, see the drive unit installation instructions NES: Rapid adjustment of final limit positions 1. Check output rotating direction 2. Move to OPEN final limit position and adjust S3 OPEN limit switch 3. -
Page 13: Electrical Installation - Control Accessories
5 Electrical installation – control accessories External s upply X1 Emer gency stop X3 Automatic closi ng, On/Off X4 External supply X1 Emergency stop X3 Automatic closing, On/Off X4 A1 External device A2 Control device A3 Control device Emergency stop Key switch External C ontr ol device X5 External Control device X5... -
Page 14: Light Curtain X6
Light curtain X6 Light curtain X6 24V* 24V* 1 2 3 4 5 24V* 24V* X20 Function relay Light curtain Light curtain X21 Function relay A25 Transmitter A27 Transmitter Test light curtain A26 Receiver A28 Receiver Radi o r eceiv er X7 Pull swi tch X7 Inter mediate stop X8 Radio receiver X7... -
Page 15: Connection Of Spiral Cable
Connecti on of s piral c abl e Connection of spiral cable Electrical safety edge Junction box ST+ Mains supply Input for door safety switch Input electrical safety edge Electrical safety edge End of line resistor (8k2) Door control socket Pneumatic safety edge Junction box ST+ Mains supply... -
Page 16: Wsd Door-Module (Wireless Safety Device)
WSD door-modul e (Wireles s Safety Device) WSD door-module (Wireless Safety Device) Direction for opening ⑥ WSD door module ST2 Socket for system-2 connection cable ① ⑦ WSD door-module push-button Safety edge evaluation switch: ② Switch “A” for system 1, switch “B” for system 2 ... -
Page 17: Teach-In Of Wsd Door-Module
Teach-in of WSD door-modul e Teach-in of WSD door-module Insert battery Supply cables insert / switch on Activate Channel 8, for example Available channels Teach in WSD door-module connected, dot on right is lit Note! Use of a safety edge only possible via menu item "0.1", door operating mode “3”, “4”... -
Page 18: Control Programming
6 Control programming 1. Start programming Note! Possible after rapid adjustment of final limit positions 2. Select menu item and confirm 3.a) Set and store functions 3.b) Set and store positions 4. Exit programming... -
Page 19: Door Operating Modes
7 Table menu items Door oper ating modes Door operating modes Door operating mode OPEN Hold-to-run CLOSE Hold-to-run OPEN Self-hold CLOSE Hold-to-run OPEN Self-hold CLOSE Self-hold OPEN Self-hold CLOSE Self-hold, CLOSE hold-to-run release via external X5 control device OPEN Hold-to-run CLOSE Hold-to-run with active safety edge Output rotating direction... -
Page 20: Door Positions
Door positions Door positions OPEN final limit position, coarse correction (DES) Approach and store desired door position CLOSE final limit position, coarse correction (DES) Approach and store desired door position OPEN final limit position, fine correction (DES) Without door movement, [ + ] OPEN correction [ –... -
Page 21: Door Functions
Door functi ons, Door functions, part 1 Safety device Spiral cable Teach-in of WSD door-module wireless safety device 2 to 2.1: Manual channel selection Up to 20 doors: Do not assign any radio channel twice. If more than 20 doors: Ensure maximum distance between the door controls with the same channels. - Page 22 Door functions, part 2 Automatic closing 0 to 240 seconds Extended photo cell function Cancel automatic closing and CLOSE command Vessel recognition Cancellation of automatic closing and CLOSE-command if photo cell activation duration > 1.5 seconds Reversing 0 = Off 1 to 10 safety-device activations Pull switch or radio receiver function X7 Type of impuls 1...
- Page 23 Door functions, part 3 Relay function on X20 Relay function on X21 Impuls contact for 1 second Permanent contact Red lamp, permanently lit during door movement OPEN final limit position Flashing for 3 seconds CLOSE final limit position Flashing for 3 seconds Red lamp, permanently lit during door movement OPEN final limit position Flashing for 3 seconds...
- Page 24 Door functions, part 4 Intermediate open function All command inputs Input X7.2 and internal radio receiver Input X5.3 and OPEN push-button of control...
-
Page 25: Safety Functions
Safety functions Safety functions Force monitoring (DES) 0 = Off Adjustable for 2 % to 10 % overload Interruption of the photo cell function (DES) (single reference position taught-in twice) Travel time monitoring (NES) 0 = Off 0 to 90 seconds Door safety switch function (Input X2.2 / WSD door-module) Slack-rope or pass-door switch... -
Page 26: Di/Fi Settings
DI / F I s etti ngs DI/FI settings OPEN output speed Output speed in rpm CLOSE output speed Output speed in rpm Increased CLOSE output speed Up to an opening height of 2.5 m Output speed in rpm 0 = Off Changeover position to CLOSE output speed (with adherence to minimum opening height requirement of 2.5 m!) Approach and store desired door position... -
Page 27: Extended Door Functions
Selection of radio transmitters manufacturer (434 MHz) Internal radio receiver deactivated (Fixcode) GfA, Tedsen Teleco "COD1" (Rolling code of various providers) GfA UK, JCM, Dickert (Fixed code) RDA (Fixcode) TRL Radio receiver function Teach-in of a handheld transmitter Cancellation of a taught-in handheld transmitter... -
Page 28: Teach-In Of Handheld Transmitter
Note! A combination of different radio transmitter manufacturers is possible Only use 434-MHz handheld transmitters Up to 64 radio channels can be taught. Teach-in of handheld trans mitter Teach-in of handheld transmitter 1. Select radio transmitter manufacturer’s system 2. -
Page 29: Maintenance Cycle Counter
Maintenanc e cy cle counter Maintenance cycle counter Maintenance cycle preselection 01-99 corresponds to 1,000 to 99,000 cycles Cycles are counted down Reaction upon reaching zero Status indication "CS" appears in turns with value set by menu item 8.5. Changeover to "hold-to-run" door operating mode. Status indication "CS" appears in turns with value set by menu item 8.5. -
Page 30: Readout Of Data Memory
Readout of D ata memory Readout of Data memory Cycle counter 7-digit number Displayed in division of ten consecutively 1,000,000 10,000 100,000 1,000 Last faults Display change of the last 6 faults Data counter 7-digit number Displayed in division of ten consecutively 1,000,000 10,000 100,000... -
Page 31: Reading Out Wsd Door-Module Data
Reading out W SD door-modul e data Reading out WSD door-module data WSD door-module data (Only activated at taught-in WSD door-module, Displaying of missing data is done by „-.-.“) Data indicated alternately 1. Version of master radio module 2. Type of safety edge „0.0.“... -
Page 32: Emergency Operation
EMERGENCY operation Warning! ▶ For EMERGENCY operation, the door has to be checked (it has to be in a fault- free state) “Hold-to-run” door operating mode: The door must be fully visible from the operating point EMERGENCY operation allows for moving the door to a required position by bypassing faults with the signal transmission of the safety device. -
Page 33: Status Display
9 Status display Faults Faults Display: "F" and code Code Fault description Fault causes and fault correction Check door safety switch. Terminals X2.1 – X2.2 are open. Check whether the connection cable is Slack-rope switch/Pass-door contact is open. connected. Open safety circuit (DES) Check emergency manual operation. - Page 34 Faults Display: "F" and code Code Fault description Fault causes and fault correction Faulty entrysense switch. Open and close pass door. Contact resistances are too high. Check resistance. Faulty entrysense installation. Check the pass door installation. Entrysense input Switch control off and on. X2.1 –...
- Page 35 Faults Display: "F" and code Code Fault description Fault causes and fault correction Wireles safety device of the WSD door-module Check the WSD door-module. or optical safety edge system has been activated Check whether the safety edge system is or is defective. correctly functioning.
- Page 36 Faults Display: "F" and code Code Fault description Fault causes and fault correction Check light curtain. Terminals X6.1 – X6.2 are open. Check whether the connection cable is Light curtain has been activated. connected. Comply with the light curtain manufacturer’s Light curtain defective.
- Page 37 Faults Display: "F" and code Code Fault description Fault causes and fault correction Switch control off and on. DI / FI closing speed is too high. Replace drive unit if necessary. Switch control off and on. Internal FI communication fault. Replace FI drive unit if necessary.
-
Page 38: Explanation Of Symbols
10 Explanation of symbols Symbol Explanation Prompt: Read installation instructions Prompt: Check Prompt: Note Prompt: Note the setting of the menu below Factory setting of the menu Factory setting of the menu, value on the right Factory setting of the minimum limit, dependent on drive unit Factory setting of the maximum limit, dependent on drive unit Setting range Prompt: Select menu item or value,... - Page 39 Symbol Explanation Prompt: Setting via OPEN/CLOSE built in push-button; Use OPEN push-button to increase value, CLOSE push-button to decrease value Prompt: Press stop button once via built in push-button Prompt: Save, press stop button once via built in push-button Prompt: Save, press stop button for three seconds via built in push-button Prompt: Reset the control, press stop button for three seconds via built in push-button...
-
Page 40: Declaration Of Incorporation/Declaration Of Conformity
Appendix II Part B Declaration of Conformity pursuant to EMC Directive 2004/108/EC GfA ELEKTROMATEN GmbH & Co. KG hereby declare that the product specified in the following complies with the above-mentioned EC Directive and is only intended for installation in a door.
Need help?
Do you have a question about the TS 971 Series and is the answer not in the manual?
Questions and answers