
Subscribe to Our Youtube Channel
Related Manuals for Phil & Teds inline classic


Summary of Contents for Phil & Teds inline classic
- Page 1 i n l i n e c l a s s i c s u r v i v a l g u i d e .......
- Page 2 w e l c o m e t o t h e c r a z y w o r l d o f p a r e n t i n g ........t a k e a d e e p b r e a t h .
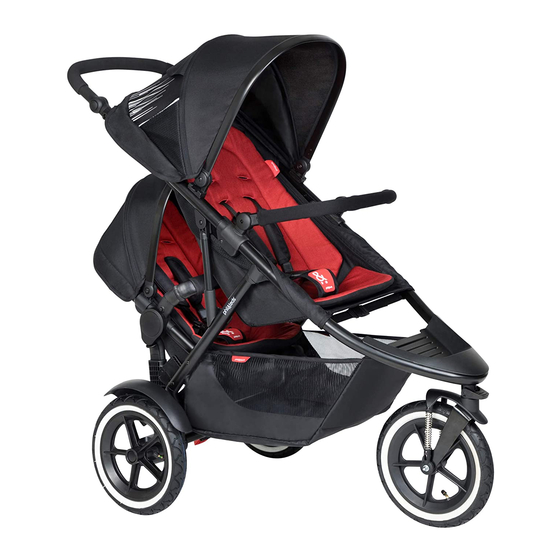
- Page 3 c l a s s i c ..u n d r e s s e d !
- Page 4 ..d o i t ! - n o n o t t h a t , t h i s ..
- Page 5 t h a t ’ s i t ! ... .
- Page 6 classic instructions wheeling ` dealing keep tyres inflated to 22PSI assembling your new phil`teds inline classic release fold lock by pushing in grey button. is effortless and fun. just follow these simple attach rear guards using a screw driver steps and in 5 minutes you’ll be off! as shown.
-
Page 7: Ups ` Downs
brakes ups ` downs stand behind buggy and with one foot push there are 3 seat positions: upright, heads brake down to activate; lift to deactivate. up and newborn. adjust as required using note always apply brakes when parking your seat adjustment clips at rear of main seat. -
Page 8: Cuts ` Bruises
add ` adapt note hinges are marked with L and R denoting left and right when viewed from other products available for the classic: behind buggy. buggy covers feed retaining strap beneath rear of hood, • single and double storm covers loop it around handle and connect clip. -
Page 9: Rights ` Remedies
happily repair it for a reasonable charge.* new inner tubes and tyres are generally avail- who is covered? original purchaser buying able (2 ” x 12 ” tyre) from your dealer, cycle product from an authorised dealer. proof of or specialist wheel shops. standard tyre kits purchase is required. - Page 10 purchase. you will be required to show proof do not allow a child to stand on the of purchase. they will inform you of next step. seat. do not carry extra weight over products that are returned directly to manufac- that allowed by the instructions;...
- Page 11 warning always place wrist strap around your wrist when using buggy. warning do not place a child in the rear seat of a buggy without a heavier child being in the front seat. do not modify the buggy or use accessories not designed for the buggy.
- Page 12 ........s e n d 1 0 2 1 1 2 d a n i e l l s t n e w t o w n w e l l i n g t o n n z v i s i t w w w .
Need help?
Do you have a question about the inline classic and is the answer not in the manual?
Questions and answers