Advertisement
Advertisement
Table of Contents

Related Manuals for Buffalo DW464


Summary of Contents for Buffalo DW464
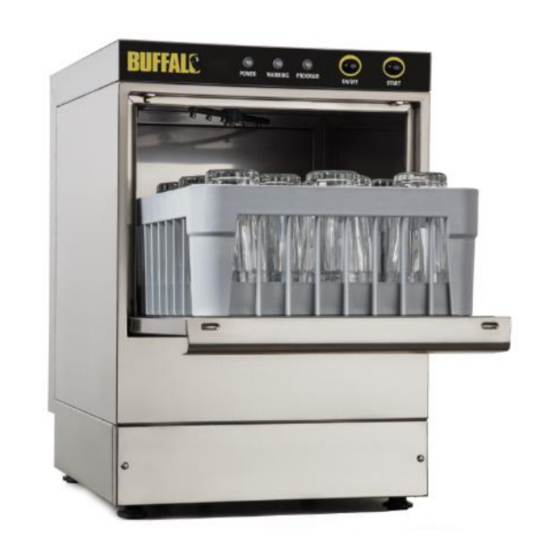
- Page 1 Glass Washer Instruction manual Model: DW464...
-
Page 2: Safety Tips
Do not use electrical extension lead(s) to supply power to your Glass Washer If the power cord is damaged, it must be replaced by a BUFFALO agent or a recommended qualified technician in order to avoid a hazard. -
Page 3: Pack Contents
Water Drain Hose Instruction Manual BUFFALO prides itself on quality and service, ensuring that at the time of packaging the contents are supplied fully functional and free of damage. Should you find any damage as a result of transit, please contact your BUFFALO dealer immediately... - Page 4 Chemical Feeder Tubes Before placing the Glass Washer in its permanent position extend the chemicals feeder tubes making sure not to kink. Chemical Feeder Tubes R: Rinse Aid – Blue Pipe D: Detergent – Clear Pipe Note - Do not add extensions to chemical feeder tubes Note - Chemical supply containers must be placed as close to the machine as possible and must NOT be elevated Note - Reposition the chemical tubing at the back of the machine, ensuring there are no...
-
Page 5: Plumbing Connection
Plumbing Connection Water Connection Note - Plumbing connections must be made in such way that will allow the machine to be removed for service and cleaning. 1. Connect the hose supplied with the machine to the inlet at the rear of the machine and the ¾”... -
Page 6: Electrical Connection
This machine has a molded U.K type plug BS1363. Chemical Feeders Priming Your Buffalo Glass Washer has a detergent pump and a rinse-aid pump for use with containers of NON-FOAMING liquid detergent. 1. Insert the hoses of the pumps in the correct chemical container (clear tube for detergent, blue tube for rinse aid). -
Page 7: Operation
Detergent Pump Detergent amount required is dependent on soil and water hardness. Dosage can be regulated by a screw above and on the right of the glass cover. The regulation can be from 0 lt/hour to 3.0 lt/hour. Adjust the quantity by regulating the dosing. Turning the adjustment screw clockwise, the flow is reduced (-), turning it counterclockwise the flow is increased (+). - Page 8 Starting a Wash Cycle 1. Close the door. Ensure the door is closed properly. The Glass Washer will not start if the door is not closed 2. Press the start button to initiate the washing cycle. The program light indicator will illuminate while washing cycle is in progress 3.
- Page 9 Cleaning the Filter With the machine fully empty, rotate the suction-pump filter anti-clockwise to remove Clean the filter under running water Replace the filter and secure by rotating clockwise Note - Allow to cool before removing filter Note - Do not run a washing program without filter securely in place Cleaning the Wash Arm Rotate the retaining nut anti-clockwise to release the wash arm Clean with warm soapy water...
-
Page 10: Troubleshooting
Troubleshooting PROBLEM CAUSE SOLUTION The machine does not Connection interruption Check the connection and turn on the safety fuse of the cabling The moulded plug or the wires are Disconnect the machine damaged from the power supply and contact your authorized local dealer or the manufacturer. - Page 11 PROBLEM CAUSE SOLUTION The water of the The machine has not stopped the Wait for the filling of the machine is not warming filling of the water water to stop. Check that (the warming indicator the overflow pipe is at the is not lighting up) correct position to avoid constant filling...
- Page 12 PROBLEM CAUSE SOLUTION The finish washing result is inadequate The suction of the liquid detergent- Check both the peristaltic rinse aid doesn’t take place pumps and regulate them according to the recommendation according the of the manufacturer reccomedation of the manufacturer of the machine and the manufacurer of the...
- Page 13 PROBLEM CAUSE SOLUTION The dishwasher does The drain and overflow valve is Remove the drain and not drain still at the drain base overflow valve Something has blocked the Check the draining pipe for draining pipe folds or for blockages The filter of the drain is blocked Clean the drain's filter (for machines with draining pump)
-
Page 14: Electrical Wiring
All rights reserved. No part of these instructions may be produced or transmitted in any form or by any means, electronic, mechanical, photocopying, recording or otherwise, without the prior written permission of BUFFALO. Every effort is made to ensure all details are correct at the time of going to press, however, BUFFALO reserve the right to change specifications without notice.
Need help?
Do you have a question about the DW464 and is the answer not in the manual?
Questions and answers