Table of Contents
Advertisement
Quick Links
Advertisement
Table of Contents

Related Manuals for METER WP4C


Summary of Contents for METER WP4C
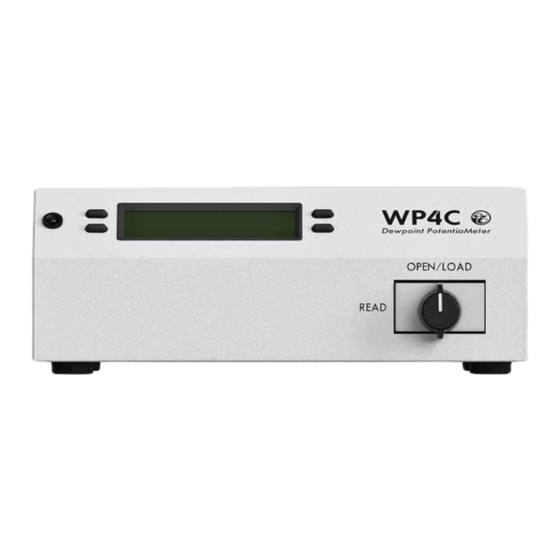
- Page 1 WP4C...
-
Page 2: Table Of Contents
13588-06 4.30.2019 TABLE OF CONTENTS 1. Introduction ....................1 2. Operation ....................2 2.1 Installation ....................2 2.2 Preparing Samples ..................3 2.3 Checking Sample Temperature ..............4 2.4 Taking a Reading ..................4 3. System ......................6 3.1 Specifications .................... 6 3.2 Components .................... - Page 3 4.4 Repair ...................... 25 4.5 Troubleshooting ..................26 4.6 Customer Support..................28 4.7 Terms and Conditions ................28 Further Reading ..................29 Index ......................... 32...
-
Page 5: Introduction
1. INTRODUCTION Thank you for choosing the WP4C Dewpoint PotentiaMeter from METER Group. WP4C is a fast, accurate, and reliable way to measure water potential using the chilled- mirror dew point technique. This manual includes instructions for setting up, calibrating, and maintaining the WP4C. -
Page 6: Operation
Plug In Instrument Plug the power cord into the back of the WP4C unit and an outlet. Use only the supplied power cord. If in the field, plug the instrument into a 12-V portable power inverter that plugs into the 12 V output of a vehicle.The inverter should have a continuous output of... -
Page 7: Preparing Samples
Be consistent in sample preparation methods to obtain reproducible results. Considerations regarding sample temperature are discussed in Section 2.3. NOTE: Calibrate the WP4C (Section 4.1) using the same type of sample cup that will be used for subsequent measurements. Follow the steps listed below to prepare samples. -
Page 8: Checking Sample Temperature
• Never try to move the instrument after a sample is loaded. Movement may cause the sample material to spill and contaminate the sample chamber. • Never leave a sample in the WP4C after a reading has finished. The sample may spill and contaminate the instrument chamber if the instrument is accidentally moved or jolted. - Page 9 Values display the initial measurements being taken and the Main screen will update values throughout the reading. WP4C signals when it reaches the final values by a green LED flash and an audible notification (if enabled). The WP4C will display the final water potential and temperature of the sample (Figure 3).
-
Page 10: System
The range of 0 to −5 MPa has an accuracy of ±0.05 MPa. For example, a measurement of −0.1 MPa has an accuracy of ±50% of the measurement and a measurement of −1 MPa has an accuracy of ±5%. The WP4C will not measure water potential accurately near field capacity (-0.033 MPa). - Page 11 WP4C Sample Cup Capacity 15 mL (0.5 oz) full 7 mL (0.25 oz) recommended Weight 3.2 kg (7.1 lb) Display 20 x 2 alphanumeric LCD with backlighting Sensor Types Chilled-mirror dew point sensor Infrared temperature sensor Operating Temperature Minimum 5 °C...
-
Page 12: Components
SySTEM 3.2 COMPONENTS The WP4C uses the chilled-mirror dew point technique to measure the water potential of a sample. In an instrument that uses the dew point technique, the sample is equilibrated with the headspace of a sealed chamber that contains a mirror and a means of detecting condensation on the mirror. -
Page 13: Sample Chamber
WP4C Lidscrew RS-232 connection Fuse well ON/OFF Power switch cord plug Figure 5 Back view 3.2.1 SAMPLE CHAMBER The sample chamber has many components (Figure 6). An internal thermoelectric module equilibrates the sample temperature to the headspace of the chamber. A thermoelectric (Peltier) cooler controls the mirror temperature. A photoelectric cell detects the exact point when condensation first appears on the mirror by measuring a reflected beam of light with a photodetector. -
Page 14: Led
Figure 6 Sample chamber 3.2.2 LED A flashing green LED, located on the left front corner of the WP4C case, blinks to notify the user of different settings. The LED flashes once when a sample reading starts. In Fast and Precise reading modes, the LED will flash continuously when the sample reading is finished until the sample drawer knob is moved to the OPEN/LOAD position. -
Page 15: Display Screen
Figure 9 Main Menu screen and button functions Pressing the upper left button will change the reading mode (Section 3.2.5). The symbol on the screen will toggle between p, c, or f to indicate if WP4C is reading in Precise, Continuous, or Fast mode. - Page 16 NOTE: The sample drawer knob must be in the OPEN/LOAD position to access the Sample Temperature screen. Figure 11 Sample Temperature screen 3.2.4.5. SySTEM SETUP SCREEN The System Setup screen is used to change how the WP4C signals after each reading, enter the Calibration Menu, and set the Temperature (set T) (Figure 12). Figure 12 System Setup screen...
- Page 17 Press the lower left button to exit back to the Main menu at any time. 3.2.4.6. TEMPERATURE SET SCREEN The default temperature of the WP4C sample block temperature is 25 °C. The Temperature Set screen allows the sample block temperature to be set manually (Figure 13). The sample block temperature roughly corresponds to the temperature needed to read the sample.
-
Page 18: Reading Modes
Press the button next to –Exit– to bring up the Main menu. 3.2.5 READING MODES WP4C has three reading modes: precise, continuous, or fast. The display will show a small p, c, or f to the left of the water potential readings (Figure 15) indicating which mode is selected. -
Page 19: Computer Interface
3.2.6 COMPUTER INTERFACE The WP4C can connect to a computer to send water activity data to a computer for further analysis and storage. An RS-232-to-USB serial cable is included for this purpose. The interface is run through the AquaLink 4 Software or a terminal communication program. -
Page 20: Theory
Pressure potential depends on the hydrostatic or pneumatic pressure on the water. The WP4C measures the sum of the osmotic and matric potentials in a sample. Often one or the other of these potentials will be the dominant factor in determining the total potential. -
Page 21: Measuring Water Potential
• T is the Kelvin temperature of the sample, and • M is the molecular mass of water. In the WP4C, the sample cup is sealed against a sensor block, while a fan speeds equilibration of the sample with the headspace vapor and controls the boundary layer conductance of the dew point mirror. - Page 22 (Section 3.2.4.4). 3.3.2.2. OSMOTIC EFFECTS The WP4C measures the sum of osmotic and matric potential. An approximate value for the osmotic potential can be found by measuring the electrical conductivity (EC) of the saturation extract of the soil.
-
Page 23: Service
0.5 mol/kg KCl verification standard available from METER. The WP4C calibration should be checked before each use and at regular intervals. This will alert the user to the possibility of contamination of the unit or shifts in the calibration from other causes. - Page 24 SERVICE Instructions will appear (Figure 17). Figure 17 Onscreen instructions Empty the whole vial of KCl solution into a sample cup. NOTE: Use the same type of sample cup (plastic or stainless steel) that will be use in subsequent measurements. Place the standard in the sample drawer and carefully slide the drawer closed to avoid spilling solution and contaminating the chamber.
-
Page 25: Maintenance
WP4C If the WP4C is reading within 0.05 MPa of the standard, press –Exit– and proceed with sample readings. If the reading is not within 0.05 MPa of the standard, a change in calibration may have occurred or the sensor chamber may be contaminated. Clean the chamber (Section 4.3) - Page 26 SERVICE Remove the lid screw located on the back panel (Figure 20). Figure 20 Lid screw Carefully remove the lid by pulling the back of the lid upward and then sliding the lid back (away from the front of the case) and off the unit completely. Remove black foam (Figure 21).
- Page 27 WP4C Pull out the two locking levers on either side of the 20-pin socket. Carefully pull out the blue pin connector (Figure 23). Figure 23 Pull out levers prior to pulling out cable Carefully lift the block straight up from its mount. Turn the block over to expose the chamber cavity (Figure 24) and set it onto the work area carefully.
- Page 28 Clean all surface edges of the sample chamber including the edge where the sample cup seals to the chamber block. Replace the strip if it becomes too dirty during this process. NOTE: Do not damage the fragile fan blades. If a fan blade breaks, the WP4C will not work properly. d. Repeat step c using new KIMWIPES strip moistened with deionized water instead of cleaning solution.
-
Page 29: Repair
Customer Support to obtain an RMA number. The following steps will help to ensure the safe shipping and processing of the WP4C: Ship the WP4C in its original cardboard box with suspension packaging. If this is not possible, use a box with adequate space (at least 4 in) between the instrument and each wall of the box. -
Page 30: Troubleshooting
A Certificate of Calibration will be issued upon completion of the work. 4.5 TROUBLESHOOTING WP4C is a high-performance instrument, designed to have low maintenance and few problems if used with care. Unfortunately, sometimes even the best operators using the best instruments encounter technical diffculties. - Page 31 This triangle is a mirror performance indicator. Clean the mirror and the rest of the sample chamber. When the WP4C senses that the mirror performance has dropped to Triangle appears in upper unacceptable levels, it will display the triangular warning sign after right corner measuring the sample.
-
Page 32: Customer Support
NOTE: For products purchased through a distributor, please contact the distributor directly for assistance. 4.7 TERMS AND CONDITIONS By using METER instruments and documentation, you agree to abide by the METER Group, Inc. USA Terms and Conditions. Please refer to metergroup.com/terms-conditions... -
Page 33: Further Reading
Water Potential Measurement." Agricultural Meteorology, 12: 113–121. Gee, G. W., M. D. Campbell, Gaylon S. Campbell, and J. H. Campbell (1992). "Rapid Measurement of Low Soil Water Potentials Using a Water Activity Meter." Soil Science Society of America Journal 56(4): 1068–1070. - Page 34 APPENDIx A. PREPARING SALT SOLUTIONS Verification standards are specially prepared,unsaturated salt solutions with a specific molality and water potential value that are accurately measurable. METER has verification standards that are produced under a strict quality assurance regimen. It is also possible to make verification standards that can read accurately if proper care is taken while preparing the salt solutions.
- Page 35 WP4C APPENDIx B. TEMPERATURE CORRECTION OF METER VERIFICATION STANDARDS Table 6 provides the temperature correction for multiple verification standards available from METER. Table 6 Temperature correction of verification standards Temperature 0.50 mol/kg 2.33 mol/kg 6.00 mol/kg 8.57 mol/kg 13.41 mol/kg 17.18 mol/kg...
-
Page 36: Index
INDEX INDEx maintenance 21 accuracy 6 AquaLink 15 matric potential 16, 18 measurement 4–5 audible notification 13 buttons 10 osmotic potential 16, 18 calibration 2, 3, 13, 26 pressure potential 16 cleaning 21–25 components buttons 10 reading mode 14–15, 19 dew point sensor 7 continuous 14, 15 display screen 8, 11–14... - Page 37 INDEX sample cup 7 temperature 6, 7 water activity 6 terms and conditions 28 theory osmotic effects 18 temperature effects 18 water potential 16–17 troubleshooting 13–14, 26–28 vapor pressure 17 verification standards 19, 30 water potential 3, 16–18...
- Page 38 13589-01 4.30.2019 METER Group, Inc. USA 2365 NE Hopkins Court Pullman, WA 99163 T: +1.509.332.2756 F: +1.509.332.5158 E: info@metergroup.com W: metergroup.com METER Group AG Mettlacher Straße 8, 81379 München T: +49 89 12665236 F: +49 89 1266520 E: info@metergroup.de W: metergroup.de...
Need help?
Do you have a question about the WP4C and is the answer not in the manual?
Questions and answers