Table of Contents
Advertisement
Advanced User Manual
Premium+ PDU with RackLink™
Monitor | Control | Alert | Report | Analyze
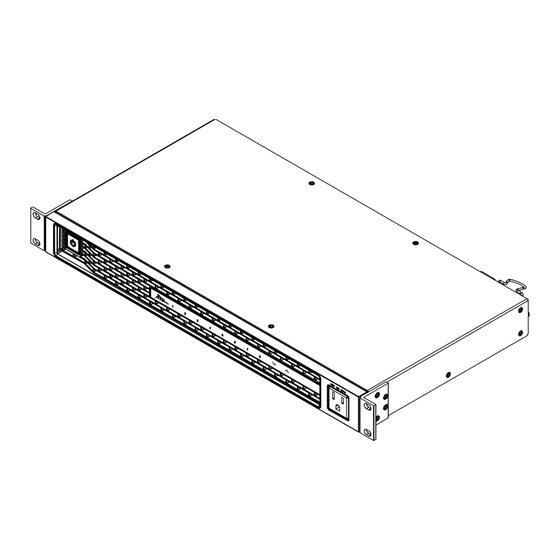
(Model RLNK-P915R Shown)
THANK YOU
Thank you for assisting our customers with their Premium+ PDU with RackLink™ product. Please read these
instructions thoroughly before installing or assembling this product.
I-00852
Rev B
Advertisement
Table of Contents
Troubleshooting

Subscribe to Our Youtube Channel
Related Manuals for Middle Atlantic Products Premium+ RLNK-P915R


Summary of Contents for Middle Atlantic Products Premium+ RLNK-P915R
- Page 1 Advanced User Manual Premium+ PDU with RackLink™ Monitor | Control | Alert | Report | Analyze (Model RLNK-P915R Shown) THANK YOU Thank you for assisting our customers with their Premium+ PDU with RackLink™ product. Please read these instructions thoroughly before installing or assembling this product. I-00852 Rev B...
-
Page 2: Table Of Contents
Contents Chapter 1: Introduction Chapter 2: Configuring the PDU Connecting the PDU to a Computer ....................7 Installing the USB-to-Serial Driver (Optional) ................8 Initial Network Configuration via CLI ....................9 Chapter 3: Additional PDU Information Reserving IP Addresses in DHCP Servers .................. 14 Reserving IP in Windows .................... - Page 3 Contents Environmental Sensor Package Information ..............29 Actuator Information ......................29 Outlet Sensor Threshold Information ................. 30 Inlet Sensor Threshold Information ................... 31 Environmental Sensor Threshold Information ..............32 Environmental Sensor Default Thresholds ................ 33 Security Settings ........................ 34 Existing User Profiles......................34 Existing Roles ........................
- Page 4 Contents Environmental Sensor Configuration Commands ............104 Configuring Environmental Sensors' Default Thresholds ..........108 Sensor Threshold Configuration Commands ..............109 Actuator Configuration Commands ................. 116 Component Reachability Configuration Commands ............118 Serial Port Configuration Commands ................121 Setting the History Buffer Length ..................122 Multi-Command Syntax ....................
- Page 5 Contents Bulk Configuration/Upgrade Procedure ................135 TFTP Requirements ......................135 Configuration or Firmware Upgrade with a USB Drive .............. 136 Device Configuration/Upgrade Procedure ............... 136 System and USB Requirements ..................137 Configuration Files ......................137 Firmware Upgrade via USB ..................... 145 Chapter 6: Using Secure Copy (SCP) Commands Firmware Update via SCP ......................
-
Page 6: Chapter 1: Introduction
Chapter 1: Introduction Thank you for purchasing Middle Atlantic Products Premium+ PDU with RackLink (referred to in this document as PDU). This Advanced User Manual provides explanations for more advanced functionality when using your PDU. The complete set of instructions for your PDU is available from www.middleatlantic.com/resources/power-downloads.aspx... -
Page 7: Connecting The Pdu To A Computer
Chapter 2: Configuring the PDU Device Information For link-local IP address retrieval, see in the Premium+ PDU With RackLink User Manual at www.middleatlantic.com/resources/power-downloads.aspx. Tip: To configure a number of PDUs quickly, see Chapter 5: Bulk Configuration Methods (on page 134). Connecting the PDU to a Computer The PDU can be connected to a computer for configuration via one of the following ports. -
Page 8: Installing The Usb-To-Serial Driver (Optional)
Chapter 2: Configuring the PDU USB connection: Installing the 1. A USB-to-serial driver is required in Windows . Install this driver before connecting the USB cable. See ® USB-to-Serial Driver (Optional) (on page 8). 2. Connect a USB cable between the PDU's USB-B port and a computer's USB-A port. Initial Network Configuration via CLI 3. -
Page 9: Initial Network Configuration Via Cli
Chapter 2: Configuring the PDU 2. The computer detects the new device and the "Found New Hardware Wizard" dialog appears. If this dialog does not appear, choose Control Panel > System > Hardware > Device Manager, right-click the • RackLink Serial Console , and choose Update Driver. - Page 10 Chapter 2: Configuring the PDU Stop bits = 1 • Parity = None • Flow control = None • Tip: For a USB connection, you can determine the COM port by choosing Control Panel > System > Hardware > Device Manager, and locating the "RackLink Serial Console" under the Ports group. 3.
- Page 11 Chapter 2: Configuring the PDU To set or enable Use this command IPv6 configuration method network ipv6 interface <ETH> configMethod <mode> automatic static <mode> = (default) or Preferred host name (optional) network <ipvX> interface <ETH> preferredHostName <name> <name> = preferred host name IP address returned by the DNS network dns resolverPreference <resolver>...
- Page 12 Chapter 2: Configuring the PDU To set or enable Use this command BSSID network wireless BSSID <bssid> none <bssid> = AP MAC address or 802.11n protocol network wireless enableHT <option> true false <option> = , or Authentication method network wireless authMethod <method> <method>...
- Page 13 Chapter 2: Configuring the PDU In order to Use this command Make the connection network wireless allowConnectionWithIncorrectClock <option3> successful by ignoring the true false "incorrect" system time <option3> = Wireless IPv4 / IPv6 settings: • Commands for wireless IP settings are identical to those for wired networking. Just replace the variable <ETH> with the word 'wireless'.
-
Page 14: Chapter 3: Additional Pdu Information
Chapter 3: Additional PDU Information Reserving IP Addresses in DHCP Servers The PDU uses its serial number as the client identifier in the DHCP request. Therefore, to successfully reserve an IP address for the PDU in a DHCP server, use the PDU's serial number as the unique ID instead of the MAC address. Since all network interfaces of the PDU can be simultaneously enabled and configured with diverse static IP addresses, the client identifier of each network interface is different. -
Page 15: Reserving Ip In Linux
Chapter 3: Additional PDU Information Field Data entered MAC address The following ASCII codes. 50 45 47 31 41 30 30 30 30 33 Other fields Configure as needed. Reserving IP in Linux There are two methods to reserve the IP address of any network interface in the standard Linux DHCP server (ISC DHCP server): hexadecimal Convert an interface's client identifier into... -
Page 16: Data For Btu Calculation
Chapter 3: Additional PDU Information Interface Client identifier conversion WIRELESS PEG1A00003-WIRELESS = 50 45 47 31 41 30 30 30 30 33 2D 57 49 52 45 4C 45 53 53 The suffix comprising the dash symbol and the word "WIRELESS" is also converted. 2. -
Page 17: Ways To Probe Existing User Profiles
Chapter 3: Additional PDU Information Ways to Probe Existing User Profiles This section indicates available ways to query existing user accounts on the PDU. With SNMP v3 activated, you get the "user unknown" error when the user name used to authenticate does not exist. •... -
Page 18: Chapter 4: Using The Command Line Interface
Chapter 4: Using the Command Line Interface This section explains how to use the command line interface (CLI) to administer a PDU. CLI commands are case sensitive. About the Interface The PDU provides a command line interface that enables data center administrators to perform some basic management tasks. -
Page 19: With Ssh Or Telnet
Chapter 4: Using the Command Line Interface 2. Launch HyperTerminal on your computer and open a console window. When the window first opens, it is blank. Make sure the COM port settings use this configuration: Bits per second = 115200 (115.2Kbps) •... -
Page 20: Different Cli Modes And Prompts
Chapter 4: Using the Command Line Interface 2. Launch an SSH or Telnet client and open a console window. A login prompt appears. 3. Type a name and press Enter. The name is case sensitive. Note: If using the SSH client, the name must NOT exceed 25 characters. Otherwise, the login fails. Then you are prompted to enter a password. -
Page 21: Closing A Local Connection
Chapter 4: Using the Command Line Interface Closing a Local Connection Close the window or terminal emulation program when you finish accessing a PDU over the local connection. When accessing or upgrading multiple PDUs, do not transfer the local connection cable from one device to another without closing the local connection window first. -
Page 22: Showing Information
Chapter 4: Using the Command Line Interface To query available parameters for the "show user" command: show user ? To query available network configuration parameters: config:# network ? To query available role configuration parameters: config:# role ? To query available parameters for the "role create" command: config:# role create ? Showing Information... - Page 23 Chapter 4: Using the Command Line Interface To show the IP-related configuration of a specific network interface, use the following command. show network ip interface <ETH> Variables: ethernet (or ETH1/ETH2) wireless <ETH> is one of the network interfaces: • Option Description eth1 Show the IP-related configuration of the ETH1 interface.
- Page 24 Chapter 4: Using the Command Line Interface Variables: ethernet (or ETH1/ETH2) wireless <ETH> is one of the network interfaces: • Option Description eth1 Show the IPv4 or IPv6 configuration of the ETH1 interface. eth2 Show the IPv4 or IPv6 configuration of the ETH2 interface. Show the IPv4 or IPv6 configuration of all interfaces.
-
Page 25: Pdu Configuration
Chapter 4: Using the Command Line Interface Variables: http https telnet snmp modbus zeroconfig <option> is one of the options: • Option Description Displays the settings of all network services, including HTTP, HTTPS, Telnet, SSH and SNMP. -- OR – [blank] http Only displays the TCP port for the HTTP service. -
Page 26: Inlet Information
Chapter 4: Using the Command Line Interface Variables: <n> is one of the options: , or a number. • Option Description Displays the information for all outlets. -- OR -- [blank] A specific outlet number Displays the information for the specified outlet only. Displayed information: Without the parameter "details,"... -
Page 27: Overcurrent Protector Information
Chapter 4: Using the Command Line Interface Overcurrent Protector Information This command is only available for models with overcurrent protectors for protecting outlets. This command syntax shows the overcurrent protector information, such as a circuit breaker or a fuse. show ocp <n> To show detailed information, add the parameter "details"... -
Page 28: Environmental Sensor Information
Chapter 4: Using the Command Line Interface Note: If a user has set his/her own preferred measurement units or the administrator has changed any user's preferred units, the web and CLI interfaces show the preferred measurement units for that user instead of the default ones after that user logs in to the PDU. -
Page 29: Environmental Sensor Package Information
Chapter 4: Using the Command Line Interface Displayed information: Without the parameter "details," only the sensor ID, sensor type and reading are displayed. • Note: A state sensor displays the sensor state instead of the reading. With the parameter "details," more information is displayed in addition to the ID number and sensor reading, such as •... -
Page 30: Outlet Sensor Threshold Information
Chapter 4: Using the Command Line Interface Variables: <n> is one of the options: , or a number. • Option Description Displays the information for all actuators. -- OR -- [blank] A specific actuator number* Displays the information for the specified actuator only. * The actuator number is the ID number assigned to the actuator. -
Page 31: Inlet Sensor Threshold Information
Chapter 4: Using the Command Line Interface Sensor type Description lineFrequency Line frequency sensor Displayed information: Without the parameter "details," only the sensor reading, state, threshold, deassertion hysteresis and assertion timeout • settings of the specified outlet sensor are displayed. With the parameter "details,"... -
Page 32: Environmental Sensor Threshold Information
Chapter 4: Using the Command Line Interface If the requested sensor type is not supported, the "Sensor is not available" message is displayed. • Environmental Sensor Threshold Information This command syntax shows the specified environmental sensor's threshold-related information. show sensor externalsensor <n> To show detailed information, add the parameter "details"... -
Page 33: Environmental Sensor Default Thresholds
Chapter 4: Using the Command Line Interface Displayed information: Without the parameter "details," only the reading, threshold, deassertion hysteresis and assertion timeout settings of • the specified environmental sensor are displayed. With the parameter "details," more sensor information is displayed, including resolution and range. •... -
Page 34: Security Settings
Chapter 4: Using the Command Line Interface Security Settings This command shows the security settings of the PDU. show security To show detailed information, add the parameter "details" to the end of the command. show security details Displayed information: Without the parameter "details," the information including IP access control, role-based access control, password •... -
Page 35: Existing Roles
Chapter 4: Using the Command Line Interface Existing Roles This command shows the data of one or all existing roles. show roles <role_name> Variables: <role_name> is the name of the role whose permissions you want to query. The variable can be one of the following •... - Page 36 Chapter 4: Using the Command Line Interface Show the last 30 entries: show eventlog Show a specific number of last entries in the event log: show eventlog limit <n> Show a specific type of events only: show eventlog class <event_type> Show a specific number of last entries associated with a specific type of events only: show eventlog limit <n>...
-
Page 37: Wireless Lan Diagnostic Log
Chapter 4: Using the Command Line Interface Wireless LAN Diagnostic Log This command shows the diagnostic log for the wireless LAN connection. show wlanlog Component Reachability Information This command shows all component reachability information with a list of monitored servers and status. show componentReachability Component Reachability Information for a Specific Component To show the component reachability information for a certain device only, use the following command. -
Page 38: History Buffer Length
Chapter 4: Using the Command Line Interface Displayed information: A list of commands that were previously entered in the current session is displayed. • History Buffer Length This command syntax shows the length of the history buffer for storing history commands. show history bufferlength Displayed information: The current history buffer length is displayed. -
Page 39: Examples
Chapter 4: Using the Command Line Interface Examples This section provides examples of the show command. Example 1 - Basic Security Information show security The diagram shows the output of the command. Example 2 - In-Depth Security Information show security details More information is displayed when typing the command. - Page 40 Chapter 4: Using the Command Line Interface Example 3 - Basic PDU Information show pdu The diagram shows the output of the command. Example 4 - In-Depth PDU Information show pdu details More information is displayed when typing the command. Displayed information varies depending on the model you purchased.
-
Page 41: Clearing Information
Chapter 4: Using the Command Line Interface Clearing Information You can use the clear commands to remove unnecessary data from the PDU. After typing a "clear" command, press Enter to execute it. Note: Depending on your login name, the # prompt may be replaced by the > prompt. See Different CLI Modes and Prompts (on page 20). -
Page 42: Configuring The Pdu And Network
Chapter 4: Using the Command Line Interface Configuring the PDU and Network To configure the PDU or network settings through the CLI, it is highly recommended to log in as the administrator so that you have full permissions. To configure any settings, enter the configuration mode. Configuration commands are case sensitive so ensure you capitalize them correctly. -
Page 43: Pdu Configuration Commands
Chapter 4: Using the Command Line Interface PDU Configuration Commands A PDU configuration command begins with . You can use the PDU configuration commands to change the settings that apply to the whole PDU. Changing the PDU Name This command changes the PDU's name. config:# pdu name "<name>"... - Page 44 Chapter 4: Using the Command Line Interface Note: Power-on sequencing is disabled in the latching mode. Refer to PDU Latching Relay Behavior in the Premium+ PDU With RackLink User Manual at www.middleatlantic.com/resources/power-downloads.aspx. Setting the Outlet Power-On Sequence Delay This command sets the delays (in seconds) for outlets when turning on all outlets in sequence. config:# pdu outletSequenceDelay <outlet1>:<delay1>;<outlet2>:<delay2>;...
- Page 45 Chapter 4: Using the Command Line Interface Setting the PDU-Defined Cycling Power-Off Period This command sets the power-off period of the power cycling operation for all outlets. config:# pdu cyclingPowerOffPeriod <timing> Variables: pduDefined <timing> is the time of the cycling power-off period in seconds, which is an integer between 0 and 3600, or •...
- Page 46 Chapter 4: Using the Command Line Interface Variables: <outlets1> is one or multiple outlet numbers to be set as critical outlets. Use commas to separate outlet numbers. • Use a dash for a range of consecutive outlets. For example, represents outlets 3 to 8. <outlets2>...
- Page 47 Chapter 4: Using the Command Line Interface Variables: rackUnits freeForm <option> is one of the options: • Option Description rackUnits The height of the Z coordinate is measured in standard rack units. When this is selected, you can type a numeric value in the rack unit to describe the Z coordinate of any environmental sensors or dry contacts.
-
Page 48: Network Configuration Commands
Chapter 4: Using the Command Line Interface Example 2 - Outlet Sequence The following command causes a 10-outlet PDU to first power on the 8th to 6th outlets and then the rest of outlets in the ascending order after the PDU powers up. config:# pdu outletSequence 8-6,1-5,9,10 Example 3 - Outlet Sequence Delay... - Page 49 Chapter 4: Using the Command Line Interface dhcp static <mode> is one of the modes: • Mode Description dhcp The IPv4 configuration mode is set to DHCP. static The IPv4 configuration mode is set to static IP address. Setting the IPv4 Preferred Host Name After selecting DHCP as the IPv4 configuration mode, you can specify the preferred host name, which is optional.
- Page 50 Chapter 4: Using the Command Line Interface Interface Description eth2 Determine the IPv4 preferred host name of the ETH2 interface (that is, wired networking). wireless Determine the IPv4 address of the WIRELESS interface (that is, wireless networking). <ip address> is the IP address being assigned to your PDU. Its format is "IP address/prefix". For example, •...
- Page 51 Chapter 4: Using the Command Line Interface Variables: IP address/subnet <dest-1> is a combination of the IP address and subnet mask of the other subnet. The format is • mask <hop> is the IP address of the next hop router. •...
- Page 52 Chapter 4: Using the Command Line Interface config:# network ipv6 interface <ETH> preferredHostName <name> Variables: ethernet (or ETH1/ETH2) wireless <ETH> is one of the network interfaces: • Interface Description eth1 Determine the IPv6 preferred host name of the ETH1 interface (wired networking). eth2 Determine the IPv6 preferred host name of the ETH2 interface (wired networking).
- Page 53 Chapter 4: Using the Command Line Interface Variables: <ip address> is the IP address of the gateway. This value uses the IPv6 address format. • Setting IPv6 Static Routes If the IPv6 network mode is set to static IP and your local network contains two subnets, you can configure static routes to enable or disable communications between the PDU and devices in the other subnet.
- Page 54 Chapter 4: Using the Command Line Interface Specify the primary DNS server: config:# network dns firstServer <ip address> Specify the secondary DNS server: config:# network dns secondServer <ip address> Specify the third DNS server: config:# network dns thirdServer <ip address> Determine which IP address is used when the DNS server returns both IPv4 and IPv6 addresses: config:# network dns resolverPreference <resolver>...
- Page 55 Chapter 4: Using the Command Line Interface Option Description true The specified network interface is enabled. false The specified network interface is disabled. Changing the LAN Interface Speed This command determines the LAN interface speed. config:# network ethernet <ETH> speed <option> Variables: ethernet <ETH>...
- Page 56 Chapter 4: Using the Command Line Interface auto half full <mode> is one of the modes: • Option Description auto The PDU selects the optimum transmission mode through auto-negotiation. half Half duplex: Data is transmitted in one direction (to or from the PDU) at a time. full Full duplex: Data is transmitted in both directions simultaneously.
- Page 57 Chapter 4: Using the Command Line Interface Variables: <method> is one of the authentication methods: • Method Description The wireless authentication method is set to PSK. The wireless authentication method is set to EAP. Setting the PSK If the Pre-Shared Key (PSK) authentication method is selected, you must assign a PSK passphrase by using this command.
- Page 58 Chapter 4: Using the Command Line Interface Provide a CA TLS certificate: config:# network wireless eapCACertificate After performing the above command, the system prompts you to enter the CA certificate's contents. For details, see CA Certificate Example (on page 59). Enable or disable verification of the TLS certificate chain: config:# network wireless enableCertVerification <option1>...
- Page 59 Chapter 4: Using the Command Line Interface true false <option3> is one of the options: • Option Description true Make the wireless network connection successful when the PDU system time is earlier than the firmware build before synchronizing with the NTP server, causing the TLS certificate to become invalid.
- Page 60 Chapter 4: Using the Command Line Interface 5. Select and copy the contents as illustrated below, excluding the starting line containing "BEGIN CERTIFICATE" and the ending line containing "END CERTIFICATE." MIICjTCCAfigAwIBAgIEMaYgRzALBgkqhkiG9w0BAQQwRTELMAkGA1UEBhMCVVMxNjA0BgNVBAoTLU5hdGlvbmF sIEFlcm9uYXV0aWNzIGFuZCBTcGFjZSBBZG1pbmlzdHJhdGlvbjAmFxE5NjA1MjgxMzQ5MDUrMDgwMBcROTgwNT I4MTM0OTA1KzA4MDAwZzELMAkGA1UEBhMCVVMxNjA0BgNVBAoTLU5hdGlvbmFsIEFlcm9uYXV0aWNzIGFuZCBTc GFjZSBBZG1pbmlzdHJhdGlvbjEgMAkGA1UEBRMCMTYwEwYDVQQDEwxTdGV2ZSBTY2hvY2gwWDALBgkqhkiG9w0B AQEDSQAwRgJBALrAwyYdgxmzNP/ts0Uyf6BpmiJYktU/w4NG67ULaN4B5CnEz7k57s9o3YY3LecETgQ5iQHmkwl YDTL2fTgVfw0CAQOjgaswgagwZAYDVR0ZAQH/BFowWDBWMFQxCzAJBgNVBAYTAlVTMTYwNAYDVQQKEy1OYXRpb2 5hbCBBZXJvbmF1dGljcyBhbmQgU3BhY2UgQWRtaW5pc3RyYXRpb24xDTALBgNVBAMTBENSTDEwFwYDVR0BAQH/B A0wC4AJODMyOTcwODEwMBgGA1UdAgQRMA8ECTgzMjk3MDgyM4ACBSAwDQYDVR0KBAYwBAMCBkAwCwYJKoZIhvcN AQEEA4GBAH2y1VCEw/A4zaXzSYZJTTUi3uawbbFiS2yxHvgf28+8Js0OHXk1H1w2d6qOHH21X82tZXd/0JtG0g1 T9usFFBDvYK8O0ebgz/P5ELJnBL2+atObEuJy1ZZ0pBDWINR3WkDNLCGiTkCKp0F5EWIrVDwh54NNevkCQRZita +z4IBO 6.
- Page 61 Chapter 4: Using the Command Line Interface Option Description true The HTTP port is enabled. false The HTTP port is disabled. Setting the HTTPS Port network services https The commands used to configure the HTTPS port settings begin with Change the HTTPS port: config:# network services https port <n>...
- Page 62 Chapter 4: Using the Command Line Interface Changing the Telnet Port This command changes the Telnet port. config:# network services telnet port <n> Variables: <n> is a TCP port number between 1 and 65535. The default Telnet port is 23. •...
- Page 63 Chapter 4: Using the Command Line Interface Variables: passwordOnly publicKeyOnly passwordOrPublicKey <option> is one of the options: • Option Description passwordOnly Enables the password-based login only. publicKeyOnly Enables the public key-based login only. passwordOrPublicKey Enables both the password- and public key-based login. This is the default. If the public key authentication is selected, you must enter a valid SSH public key for each user profile to log in over the Specifying the SSH Public Key SSH connection.
- Page 64 Chapter 4: Using the Command Line Interface Option Description disable The SNMP v3 protocol is disabled. Setting the SNMP Read Community This command sets the SNMP read-only community string. config:# network services snmp readCommunity <string> Variables: <string> is a string comprising 4 to 64 ASCII printable characters. •...
- Page 65 Chapter 4: Using the Command Line Interface Variables: <value> is a string comprising 0 to 255 alphanumeric characters. Changing the Modbus Configuration You can enable or disable the Modbus agent, configure its read-only capability, or change its TCP port. network services modbus A Modbus command begins with Enabling or Disabling Modbus This command enables or disables the Modbus protocol.
-
Page 66: Time Configuration Commands
Chapter 4: Using the Command Line Interface Enabling or Disabling Service Advertising This command enables or disables the zero configuration protocol, which enables advertising or auto discovery of network Chapter services. See 7: Enabling Service Advertising (on page 151) for details. config:# network services zeroconfig enabled <option>... - Page 67 Chapter 4: Using the Command Line Interface Determining the Time Setup Method This command determines the method to configure the system date and time. config:# time method <method> Variables: manual <method> is one of the time setup options: • Mode Description manual The date and time settings are customized.
- Page 68 Chapter 4: Using the Command Line Interface Variables: true false <option> is one of these options: • Mode Description true Customized NTP server settings override the DHCP-specified NTP servers. false Customized NTP server settings do NOT override the DHCP-specified NTP servers. Deleting an NTP Server The following commands delete the primary and/or secondary time server(s).
- Page 69 Chapter 4: Using the Command Line Interface Assign the date: config:# time set date <yyyy-mm-dd> Assign the time: config:# time set time <hh:mm:ss> Variables: Variable Description <yyyy-mm-dd> Type the date in the format of yyyy-mm-dd. 2015-11-30 For example, type for November 30, 2015. <hh:mm:ss>...
-
Page 70: Checking The Accessibility Of Ntp Servers
Chapter 4: Using the Command Line Interface Example 2 - Primary NTP Server The following command sets the primary time server to 192.168.80.66. config:# time ntp firstServer 192.168.80.66 Checking the Accessibility of NTP Servers This command verifies the accessibility of NTP servers specified manually on your PDU and then shows the result. For Setting NTP Parameters instructions on specifying NTP servers via CLI, see (on page 67). - Page 71 Chapter 4: Using the Command Line Interface IPv4 commands • Enable or disable the IPv4 firewall control feature: config:# security ipAccessControl ipv4 enabled <option> Determine the default IPv4 firewall control policy for inbound traffic: config:# security ipAccessControl ipv4 defaultPolicyIn <policy> Determine the default IPv4 firewall control policy for outbound traffic: config:# security ipAccessControl ipv4 defaultPolicyOut <policy>...
- Page 72 Chapter 4: Using the Command Line Interface Option Description reject Discards traffic from all IP addresses, and an ICMP message is sent to the source host for failure notification. Tip: You can combine both commands to modify all firewall control parameters at a time. See Multi-Command Syntax (on page 122).
- Page 73 Chapter 4: Using the Command Line Interface config:# security ipAccessControl ipv6 rule add <direction> <insert> <rule_number> <ip_mask> <policy> Variables: <direction> is one of the options: • Direction Description Inbound traffic. Outbound traffic. <ip_mask> is the combination of the IP address and subnet mask values (or prefix length), which are separated with a •...
- Page 74 Chapter 4: Using the Command Line Interface IPv4 commands • Modify an IPv4 rule's IP address and/or subnet mask: config:# security ipAccessControl ipv4 rule modify <direction> <rule_number> ipMask <ip_mask> Modify an IPv4 rule's policy: config:# security ipAccessControl ipv4 rule modify <direction> <rule_number> policy <policy>...
- Page 75 Chapter 4: Using the Command Line Interface Option Description accept Accepts traffic from/to the specified IP address(es). drop Discards traffic from/to the specified IP address(es), without sending any failure notification to the source or destination host. reject Discards traffic from/to the specified IP address(es), and an ICMP message is sent to the source or destination host for failure notification.
- Page 76 Chapter 4: Using the Command Line Interface Option Description true Enables the Restricted Service Agreement feature. false Disables the Restricted Service Agreement feature. After the Restricted Service Agreement feature is enabled, the agreement's content is displayed in the login screen. Do either of the following, or the login fails: In the web interface, select the checkbox labeled "I understand and accept the Restricted Service Agreement."...
- Page 77 Chapter 4: Using the Command Line Interface 3. Press Enter. 4. Type the following: --END-- 5. Press Enter again. 6. Verify that the message "Successfully entered Restricted Service Agreement" is displayed, indicating that the content input is successful. Login Limitation The login limitation feature controls login-related limitations, such as password aging, simultaneous logins using the same user name, and the idle time permitted before forcing a user to log out.
- Page 78 Chapter 4: Using the Command Line Interface Variables: enable disable <option> is one of the options: • Option Description enable Enables the password aging feature. disable Disables the password aging feature. Password Aging Interval This command determines how often the password should be changed. config:# security loginLimits passwordAgingInterval <value>...
- Page 79 Chapter 4: Using the Command Line Interface Variables: unlimited <value1> is an integer between 3 and 10, or , which sets no limit on the maximum number of failed logins and • thus disables the user blocking function. infinite <value2> is a numeric value ranging from 1 to 1440 minutes (one day), or , which blocks the user all the time •...
- Page 80 Chapter 4: Using the Command Line Interface Variables: <value> is an integer between 16 and 64. • Lowercase Character Requirement This command determines whether a strong password includes at least a lowercase character. config:# security strongPasswords enforceAtLeastOneLowerCaseCharacter <option> Variables: enable disable <option>...
- Page 81 Chapter 4: Using the Command Line Interface Special Character Requirement This command determines whether a strong password includes at least a special character. config:# security strongPasswords enforceAtLeastOneSpecialCharacter <option> Variables: enable disable <option> is one of the options: • Option Description enable At least one special character is required.
- Page 82 Chapter 4: Using the Command Line Interface IPv6 commands • Enable or disable the IPv6 role-based access control feature: config:# security roleBasedAccessControl ipv6 enabled <option> Determine the IPv6 role-based access control policy: config:# security roleBasedAccessControl ipv6 defaultPolicy <policy> Variables: true false <option>...
- Page 83 Chapter 4: Using the Command Line Interface IPv4 commands • Add a new rule to the bottom of the IPv4 rules list: config:# security roleBasedAccessControl ipv4 rule add <start_ip> <end_ip> <role> <policy> Add a new IPv4 rule by inserting it above or below a specific rule: config:# security roleBasedAccessControl ipv4 rule add <start_ip>...
- Page 84 Chapter 4: Using the Command Line Interface Option Description insertBelow Inserts the new rule below the specified rule number. Then: new rule's number = the specified rule number + 1 <rule_number> is the number of the existing rule which you want to insert the new rule above or below. •...
- Page 85 Chapter 4: Using the Command Line Interface Modify an IPv6 rule's policy: security roleBasedAccessControl ipv6 rule modify <rule_number> policy config:# <policy> Modify all contents of an existing IPv6 rule: security roleBasedAccessControl ipv6 rule modify <rule_number> config:# startIpAddress <start_ip> endIpAddress <end_ip> role <role> policy <policy>...
- Page 86 Chapter 4: Using the Command Line Interface To enable the front panel outlet control feature: config:# security frontPanelPermissions add switchOutlet To disable the front panel outlet control feature: config:# security frontPanelPermissions remove switchOutlet Enabling or Disabling Front Panel Actuator Control The following CLI commands control whether you can turn on or off a connected actuator by operating the front panel display.
-
Page 87: Outlet Configuration Commands
Chapter 4: Using the Command Line Interface Example 2 - Adding an IPv4 Firewall Rule The following command adds a new IPv4 access control rule and specifies its location in the list. security ipAccessControl ipv4 rule add 192.168.84.123/24 accept config:# insertAbove 5 Results: A new IPv4 firewall control rule is added to accept all packets sent from the IPv4 address 192.168.84.123. - Page 88 Chapter 4: Using the Command Line Interface Variables: <n> is the number of the outlet that you want to configure. • <name> is a string comprising up to 32 ASCII printable characters. The <name> variable must be enclosed in quotes •...
-
Page 89: Inlet Configuration Commands
Chapter 4: Using the Command Line Interface Example - Outlet Naming The following command assigns the name "Win XP" to outlet 8. config:# outlet 8 name "Win XP" Inlet Configuration Commands inlet An inlet configuration command begins with . You can configure an inlet by using the inlet configuration command. Changing the Inlet Name This command syntax names an inlet. -
Page 90: User Configuration Commands
Chapter 4: Using the Command Line Interface Example - Inlet Naming The following command assigns the name "AC source" to the inlet 1. If your PDU contains multiple inlets, this command names the 1st inlet. config:# inlet 1 name "AC source" User Configuration Commands user Most user configuration commands begin with... - Page 91 Chapter 4: Using the Command Line Interface After performing the above command, PDU prompts you to enter a new password. Then: 1. Type a new password and press Enter. 2. Re-type the new password for confirmation and press Enter. Variables: <name>...
- Page 92 Chapter 4: Using the Command Line Interface <phone_number> is the phone number that can reach the specified user. The <phone_number> variable must be • enclosed in quotes when it contains spaces. <email_address> is the email address of the specified user. •...
- Page 93 Chapter 4: Using the Command Line Interface Variables: <name> is the name of the user whose settings you want to change. • enable disable <option1> is one of the options: • Option Description enable Enables the SNMP v3 access permission for the specified user. disable Disables the SNMP v3 access permission for the specified user.
- Page 94 Chapter 4: Using the Command Line Interface Variables: <name> is the name of the user whose settings you want to change. • <authentication_passphrase> is a string used as an authentication passphrase, comprising 8 to 32 ASCII printable • characters. Determine whether the privacy passphrase is identical to the authentication passphrase: user modify <name>...
- Page 95 Chapter 4: Using the Command Line Interface Determine the privacy protocol: config:# user modify <name> privacyProtocol <option6> Variables: <name> is the name of the user whose settings you want to change. • AES-128 <option6> is one of the options: • Option Description DES privacy protocol is applied.
- Page 96 Chapter 4: Using the Command Line Interface Variables: <name> is the name of the user whose settings you want to change. • <option1> is one of the options: • Option Description This option displays the temperature in Celsius. This option displays the temperature in Fahrenheit. Set the preferred length unit: config:# user modify <name>...
- Page 97 Chapter 4: Using the Command Line Interface To specify or change the SSH public key for a specific user: 1. Type the SSH public key command as shown below and press Enter. config:# user modify <name> sshPublicKey 2. The system prompts you to enter the contents of the SSH public key. Do the following to input the contents: a.
- Page 98 Chapter 4: Using the Command Line Interface After performing this command, the PDU prompts you to enter both current and new passwords respectively. Important: After the password is changed successfully, the new password is effective immediately wether or not you type the command “apply”...
- Page 99 Chapter 4: Using the Command Line Interface Variables: <option1> is one of the options: • Option Description This option displays the temperature in Celsius. This option displays the temperature in Fahrenheit. Set the default length unit: config:# user defaultpreferences preferredLengthUnit <option2> Variables: meter feet...
-
Page 100: Role Configuration Commands
Chapter 4: Using the Command Line Interface Results: A new user profile "May" is created. • The new user profile is enabled. • The admin role is assigned to the new user profile. • Example 2 - Modifying a User's Roles The following command assigns two roles to the user "May."... - Page 101 Chapter 4: Using the Command Line Interface Variables: <name> is a string comprising up to 32 ASCII printable characters. • <privilege1>, <privilege2>, <privilege3> and the like are names of the privileges assigned to the role. Separate each • All Privileges privilege with a semi-colon.
- Page 102 Chapter 4: Using the Command Line Interface Privilege Description switchActuator** Switch Actuator switchTransferSwitch Switch Transfer Switch viewEventSetup View Event Settings viewEverything Unrestricted View Privileges viewLog View Local Event Log viewSecuritySettings View Security Settings viewSnmpSettings View SNMP Settings viewUserSettings View Local User Management * The "switchOutlet"...
- Page 103 Chapter 4: Using the Command Line Interface Modify a role's description: config:# role modify <name> description "<description>" Variables: <name> is a string comprising up to 32 ASCII printable characters. • <description> is a description comprising alphanumeric characters. The <description> variable must be enclosed in •...
-
Page 104: Environmental Sensor Configuration Commands
Chapter 4: Using the Command Line Interface Variables: <name> is a string comprising up to 32 ASCII printable characters. • <privilege1>, <privilege2>, <privilege3> and the like are names of the privileges assigned to the role. Separate each • All Privileges privilege with a semi-colon. - Page 105 Chapter 4: Using the Command Line Interface Variables: <n> is the ID number of the environmental sensor that you want to configure. The ID number is available in the PDU • web interface or using the command "show externalsensors <n>" in the CLI. It is an integer between 1 and 32. <name>...
- Page 106 Chapter 4: Using the Command Line Interface Setting the Y Coordinate This command specifies the Y coordinate of an environmental sensor. config:# externalsensor <n> ylabel "<coordinate>" Variables: <n> is the ID number of the environmental sensor that you want to configure. The ID number is available in the PDU •...
- Page 107 Chapter 4: Using the Command Line Interface Using Default Thresholds This command determines whether default thresholds, including the deassertion hysteresis and assertion timeout, are applied to a specific environmental sensor. config:# externalsensor <n> useDefaultThresholds <option> Variables: <n> is the ID number of the environmental sensor that you want to configure. The ID number is available in the PDU •...
-
Page 108: Configuring Environmental Sensors' Default Thresholds
Chapter 4: Using the Command Line Interface Configuring Environmental Sensors' Default Thresholds You can set the default values of upper and lower thresholds, deassertion hysteresis and assertion timeout on a sensor type basis, including temperature, humidity, air pressure and air flow sensors. The default thresholds automatically apply to all environmental sensors that are newly detected or added. -
Page 109: Sensor Threshold Configuration Commands
Chapter 4: Using the Command Line Interface Sensor types Description airPressure Air pressure sensors airFlow Air flow sensors vibration Vibration sensors <value> is the value for the specified threshold of the specified sensor type. Note that diverse sensor types use •... - Page 110 Chapter 4: Using the Command Line Interface Environmental sensors • It is permitted to assign a new value to the threshold at any time regardless of whether the threshold has been enabled. Commands for Outlet Sensors sensor outlet A sensor configuration command for outlets begins with You can configure various outlet sensor threshold settings at a time by combining multiple commands.
- Page 111 Chapter 4: Using the Command Line Interface Sensor type Description apparentPower Apparent power sensor powerFactor Power factor sensor activeEnergy Active energy sensor lineFrequency Line frequency sensor Note: If the requested sensor type is not supported, the "Sensor is not available" message is displayed. enable disable <option>...
- Page 112 Chapter 4: Using the Command Line Interface Set the Lower Critical threshold for an inlet sensor: config:# sensor inlet <n> <sensor type> lowerCritical <option> Set the Lower Warning threshold for an inlet sensor: config:# sensor inlet <n> <sensor type> lowerWarning <option> Set the deassertion hysteresis for an inlet sensor: config:# sensor inlet <n>...
- Page 113 Chapter 4: Using the Command Line Interface Option Description enable Enables the specified threshold for a specific inlet sensor. disable Disables the specified threshold for a specific inlet sensor. A numeric value Sets a value for the specified threshold of a specific inlet sensor and enables this threshold at the same time.
- Page 114 Chapter 4: Using the Command Line Interface Set the assertion timeout for an overcurrent protector: config:# sensor ocp <n> <sensor type> assertionTimeout <as_value> Variables: <n> is the number of the overcurrent protector that you want to configure. • <sensor type> is one of the following sensor types: •...
- Page 115 Chapter 4: Using the Command Line Interface Set the Upper Warning threshold for an environmental sensor: config:# sensor externalsensor <n> <sensor type> upperWarning <option> Set the Lower Critical threshold for an environmental sensor: config:# sensor externalsensor <n> <sensor type> lowerCritical <option> Set the Lower Warning threshold for an environmental sensor: config:# sensor externalsensor <n>...
-
Page 116: Actuator Configuration Commands
Chapter 4: Using the Command Line Interface "To <hy_value> is a numeric value that is assigned to the hysteresis for the specified environmental sensor. Refer to • De-assert" and Deassertion Hysteresis in the Premium+ PDU With RackLink User Manual at www.middleatlantic.com/resources/power-downloads.aspx. - Page 117 Chapter 4: Using the Command Line Interface Multi-Command Syntax You can configure various parameters for one actuator at a time. See (on page 122). Change the name: config:# actuator <n> name "<name>" Set the X coordinate: config:# actuator <n> xlabel "<coordinate>" Set the Y coordinate: config:# actuator <n>...
-
Page 118: Component Reachability Configuration Commands
Chapter 4: Using the Command Line Interface Example - Actuator Naming The following command assigns the name "Door lock" to the actuator whose ID number is 9. config:# actuator 9 name "Door lock" Component Reachability Configuration Commands You can use the CLI to add or delete an device, from the component reachability list, or modify the settings for a monitored componentReachability device. - Page 119 Chapter 4: Using the Command Line Interface Deleting a Monitored Device This command removes a monitored device from the component reachability list. config:# componentReachability delete <n> Variables: <n> is a number representing the sequence of the device in the monitored list. •...
- Page 120 Chapter 4: Using the Command Line Interface Modify the wait time after a unsuccessful ping: config:# componentReachability modify <n> waitTimeAfterUnsuccessfulPing <fail_wait> Modify the wait time before resuming pinging after declaring "Unreachable": config:# componentReachability modify <n> waitTimeBeforeResumingPinging <resume> Modify the number of consecutive "Unreachable" declarations before disabling the ping monitoring feature: config:# componentReachability modify <n>...
-
Page 121: Serial Port Configuration Commands
Chapter 4: Using the Command Line Interface Serial Port Configuration Commands serial A serial port configuration command begins with Setting the Baud Rates The following commands set the baud rate (bps) of the serial port labeled CONSOLE on the PDU. Change the baud rate before connecting it to the desired device. -
Page 122: Setting The History Buffer Length
Chapter 4: Using the Command Line Interface Setting the History Buffer Length This command syntax sets the history buffer length, which determines the amount of history commands that can be retained in the buffer. The default length is 25. config:# history length <n>... -
Page 123: Load Shedding Configuration Commands
Chapter 4: Using the Command Line Interface Results: The Upper Critical threshold of the 2nd overcurrent protector's RMS current is disabled. • The Upper Warning threshold of the 2nd overcurrent protector's RMS current is set to 15A and enabled at the same •... -
Page 124: Power Control Operations
Chapter 4: Using the Command Line Interface After performing the above command, the PDU prompts you to confirm the operation. Press y to confirm or n to abort the operation. To skip the confirmation step, you can add the "/y" parameter to the end of the command so that the operation is executed immediately. -
Page 125: Turning Off The Outlet(S)
Chapter 4: Using the Command Line Interface Option Description A specific outlet number Switches ON the specified outlet. A comma- separated list of Switches ON multiple, inconsecutive or consecutive outlets. outlets For example, to specify 7 outlets -- 2, 4, 9, 11, 12, 13 and 15, type outlets 2,4,9,11-13,15. -
Page 126: Power Cycling The Outlet(S)
Chapter 4: Using the Command Line Interface If you entered the command without "/y", a message appears, prompting you to confirm the operation. Then: Type y to confirm the operation, OR • Type n to abort the operation • Power Cycling the Outlet(s) This command power cycles one or multiple outlets. -
Page 127: Example - Power Cycling Specific Outlets
Chapter 4: Using the Command Line Interface Example - Power Cycling Specific Outlets The following command power cycles these outlets: 2, 6, 7, 8, 10, 13, 14, 15 and 16. power outlets 2,6-8,10,13-16 cycle Actuator Control Operations An actuator, which is connected to a dry contact signal channel of a DX sensor, can control a mechanism or system. You can switch on or off that mechanism or system through the actuator control command in the CLI. -
Page 128: Example - Turning On A Specific Actuator
Chapter 4: Using the Command Line Interface Variables: <n> is an actuator's ID number. • The ID number is available in the PDU web interface or using the show command in the CLI. It is an integer between 1 and 32. If you entered the command without "/y", a message appears, prompting you to confirm the operation. -
Page 129: Resetting Active Energy Readings
Chapter 4: Using the Command Line Interface 2. Type either of the following commands to restart the PDU. reset unit -- OR -- reset unit /y 3. If you entered the command without "/y" in Step 2, a message appears prompting you to confirm the operation. Type y to confirm the reset. -
Page 130: Resetting To Factory Defaults
Chapter 4: Using the Command Line Interface Variables: <n> is the inlet number. • <outlet_n> is an outlet number. • Resetting to Factory Defaults The following commands restore all settings of the PDU to factory defaults. To reset PDU settings after login, use either command: reset factorydefaults -- OR -- reset factorydefaults /y... -
Page 131: Quitting Diagnostic Mode
Chapter 4: Using the Command Line Interface Quitting Diagnostic Mode To quit the diagnostic mode, use this command: diag> exit The # or > prompt appears after pressing Enter, indicating that you have entered the administrator or user mode. See Different CLI Modes and Prompts (on page 20). -
Page 132: Retrieving Previous Commands
Chapter 4: Using the Command Line Interface Variables: <host> is the host name or IP address whose networking connectivity you want to check. • Options: You can include any or all of additional options listed below in the ping command. •... -
Page 133: Automatically Completing A Command
Chapter 4: Using the Command Line Interface Automatically Completing a Command A CLI command always consists of several words. You can easily enter a command by typing first word(s) or letter(s) and then pressing Tab or Ctrl+i instead of typing the whole command word by word. To have a command completed automatically: 1. -
Page 134: Chapter 5: Bulk Configuration Methods
Chapter 5: Bulk Configuration Methods If you have to set up multiple PDUs, you can use one of the following configuration methods to save time. Use a bulk configuration file: Requirement: All PDUs to configure are of the same model and firmware. •... -
Page 135: Bulk Configuration/Upgrade Procedure
Chapter 5: Bulk Configuration Methods Warning: The feature of bulk configuration or firmware upgrade via DHCP/TFTP only works on standalone PDUs directly connected to the network. Tip: For the alternative, see Configuration or Firmware Upgrade with a USB Drive (on page 136). Bulk Configuration/Upgrade Procedure The DHCP/TFTP feature is supported, so make sure that all PDUs which you want to configure or upgrade are running the latest firmware version. -
Page 136: Configuration Or Firmware Upgrade With A Usb Drive
Chapter 5: Bulk Configuration Methods /etc/xinetd.d/tftp In Linux, remove any IPv4 or IPv6 flags from Note: DHCP will execute the "fwupdate.cfg" commands once for IPv4 and once for IPv6 respectively if both IPv4 and IPv6 settings are configured properly in DHCP. Bulk Configuration/Upgrade Procedure All required configuration files are available in the TFTP root directory. -
Page 137: System And Usb Requirements
Chapter 5: Bulk Configuration Methods If nothing is shown on the display and no task is performed after plugging the USB drive, check the log file in the USB drive. System and USB Requirements You must satisfy ALL of the following requirements prior to using a USB flash drive to perform device configuration and/or firmware upgrade. - Page 138 Specify the name of a firmware binary file used to upgrade your PDU. • The specified firmware file must be compatible with your PDU and have an official Middle Atlantic Products signature. • If the specified firmware file is the same as the current firmware version of your PDU, no firmware upgrade is •...
- Page 139 Chapter 5: Bulk Configuration Methods config Specify the name of the configuration file containing device settings. • config.txt config.txt The suggested filename is . See (on page 140). • device_list Specify the name of the configuration file listing all PDUs to configure and their device-specific settings. •...
- Page 140 Chapter 5: Bulk Configuration Methods bulk_config_restore Supported as of release 3.1.0. • Specify the name of the bulk configuration file used to configure or restore the PDU. • Note: For instructions on generating a bulk configuration file, refer to Bulk Configuration in the Premium+ PDU With RackLink User Manual at www.middleatlantic.com/resources/power-downloads.aspx.
- Page 141 Chapter 5: Bulk Configuration Methods Regular configuration key syntax: Each configuration key and value pair is in a single line as shown below: • key=value Note: Each value in the file must be separated by an equal sign (=), without any surrounding spaces. Here Document Syntax As of release 3.1.0, multi-line values are supported by using the with a user-chosen delimiter.
- Page 142 Chapter 5: Bulk Configuration Methods To rename the admin user: As of release 3.1.0, you can rename the admin user by adding the following configuration key: users[0].name=new admin name Example: users[0].name=May devices.csv devices.csv If there are device-specific settings to configure, you must create a device list configuration file - , to store unique data of each PDU.
- Page 143 Chapter 5: Bulk Configuration Methods For example: Value-1,"Value-2,with,three,commas",Value-3 Value-1,"Value-2,""with""three""double-quotes",Value-3 Value-1,"Value-2 with a line break", Value-3 Creating Configuration Files via Mass Deployment Utility The Mass Deployment Utility is an Excel file that lets you fill in basic information required for the three configuration files, such as the admin account and password.
- Page 144 Chapter 5: Bulk Configuration Methods b. Click Export Lists to generate configuration files. fwupdate.cfg config.txt devices.csv 6. Verify that at least 3 configuration files are created - . You are ready to Configuration or Firmware Upgrade with a USB Drive configure or upgrade any PDU with these files.
-
Page 145: Firmware Upgrade Via Usb
Chapter 5: Bulk Configuration Methods 8. Save the changes made to the "config.txt" file. Now you can use this file to configure any PDU running the latest Configuration or Firmware Upgrade with a USB Drive firmware version. See (on page 136). Illustration: In this example, we will encrypt the word "private", which is the value of the SNMP write community in the "config.txt"... - Page 146 Chapter 5: Bulk Configuration Methods 3. Plug the USB drive into the USB-A port on the PDU. 4. The PDU performs the firmware upgrade. The front panel display shows the firmware upgrade progress. • Tip: You can remove the USB drive and plug it into another PDU for firmware upgrade when the firmware upgrade message displays.
-
Page 147: Chapter 6: Using Secure Copy (Scp) Commands
Chapter 6: Using Secure Copy (SCP) Commands You can perform a Secure Copy (SCP) command to update the PDU firmware, do bulk configuration, or back up and restore the configuration. Firmware Update via SCP During all PDU firmware updates, all user management operations are suspended and all login attempts fail during the Updating the PDU Firmware process. -
Page 148: Bulk Configuration Via Scp
Chapter 6: Using Secure Copy (SCP) Commands Bulk Configuration via SCP Like performing bulk configuration via the web interface, there are two steps with the bulk configuration using the SCP commands: 1. Save a configuration from a source PDU. 2. Copy the configuration file to one or multiple destination PDUs. Bulk Configuration For detailed information on the bulk configuration requirements, refer to in the Premium+ PDU With... -
Page 149: Backup And Restore Via Scp
Chapter 6: Using Secure Copy (SCP) Commands Windows PSCP commands: PSCP in Windows works in a similar way to the SCP. Save operation: • pscp <user name>@<device ip>:/bulk_config.xml Copy operation: • pscp bulk_config.xml <user name>@<device ip>:/bulk_restore Backup and Restore via SCP To back up ALL settings of a PDU, including device-specific settings, you should perform the backup operation instead of the bulk configuration. -
Page 150: Downloading Diagnostic Data Via Scp
Chapter 6: Using Secure Copy (SCP) Commands Restoration operation: • scp backup_settings.xml admin@192.168.87.50:/settings_restore Windows PSCP commands: PSCP in Windows works in a similar way to the SCP. Backup operation: • pscp <user name>@<device ip>:/backup_settings.xml Restoration operation: • pscp backup_settings.xml <user name>@<device ip>:/settings_restore Downloading Diagnostic Data via SCP You can download the diagnostic data via SCP. -
Page 151: Chapter 7: Enabling Service Advertising
Chapter 7: Enabling Service Advertising The PDU advertises all enabled services that are reachable using the IP network. This feature uses DNS-SD (Domain Name System-Service Discovery) and MDNS (Multicast DNS). The advertised services are discovered by clients that have implemented DNS-SD and MDNS. The advertised services include the following: HTTP •... -
Page 152: Apipa And Link-Local Addressing
Chapter 7: Enabling Service Advertising APIPA and Link-Local Addressing The PDU supports Automatic Private Internet Protocol Addressing (APIPA). With APIPA, your PDU automatically configures a link-local IP address and a link-local host name when it cannot obtain a valid IP address from any DHCP server in the TCP/IP network. the same subnet Only IT devices connected to can access the PDU using the link-local address/host name. -
Page 153: Chapter 8: Troubleshooting
Chapter 8: Troubleshooting Windows NTP Server Synchronization Solution The NTP client on the PDU follows the NTP RFC so the PDU rejects any NTP servers whose root dispersion is more than one second. An NTP server with a dispersion of more than one second is considered an inaccurate NTP server by the PDU. -
Page 154: Chapter 9: Compliance With Iec 62020
Chapter 9: Compliance with IEC 62020 IEC 62020 is an international standard for Residual Current Monitors. All PDUs with RCM are IEC 62020 compliant. rated residual operating current IEC 62020 uses the term (IΔn) to specify residual current, equal to or above which causes an alarm. - Page 155 Chapter 9: Compliance with IEC 62020 IEC 62020 specification PDU with RCM characteristics Rated residual operating current 0.5A (highest value). Residual currents with direct current Model dependent. components Models ending in -M5 are Type A, -M11 are Type B.
- Page 156 Factory Distribution United States: New Jersey, California, Illinois - Canada: Ontario - The Netherlands: Weert At Middle Atlantic Products we are always listening. Your comments are welcome. Middle Atlantic Products is an ISO 9001 and ISO 14001 Registered Company.
Need help?
Do you have a question about the Premium+ RLNK-P915R and is the answer not in the manual?
Questions and answers