Table of Contents
Advertisement
Advertisement
Table of Contents

Related Manuals for BMPRO J35


Summary of Contents for BMPRO J35
- Page 1 ControlNode102 J35A J35B J35C J35D FOR MODELS TEAM BMPRO .COM...
- Page 2 To learn more about the BMPRO range of products, please visit our website teambmpro.com TEAM BMPRO .COM...
-
Page 3: Safety Precautions
Correct installation is the most critical factor in ensuring the safe use of the J35 and ControlNode102. If every consideration of these instructions has been satisfied, the J35 and ControlNode102 will be safe to operate. -
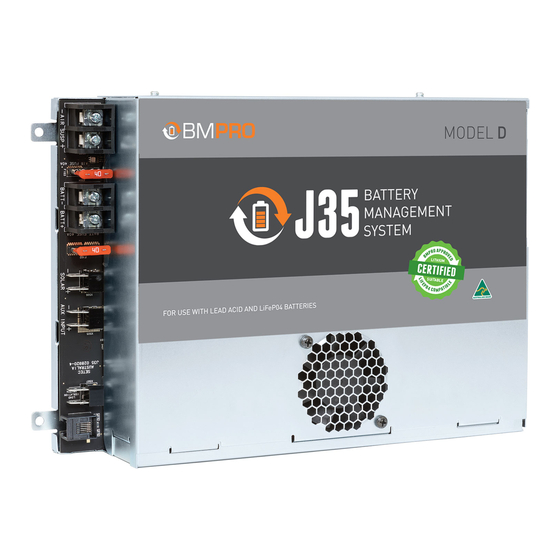
Page 4: About The J35
Download the JHub App to your mobile device and with the ControlNode102, enjoy the freedom to monitor your caravan battery and operate caravan onboard features, all from your own personal mobile device. The J35 is available in a range of models to suite any RV and battery management needs. FEATURE... -
Page 5: Optional Accessories
9 JControl or JHub Battery Monitors 9 MiniBoost DC-to-DC charge-booster for RV applications COMPATIBLE BATTERY TYPES The J35 is rated to charge battery banks of up to 600Ah in capacity and of the following battery types: BATTERY J35A... - Page 6 Australia, and represent a high-quality product that will provide years of service. DISCLAIMER BMPRO accepts no liability for any loss or damage which may occur from the improper or unsafe use of its products. Warranty is only valid Copyright © 2019...
-
Page 7: Table Of Contents
Connecting Multiple Batteries USING YOUR J35 Battery Charging and Management with the J35 Sleep Mode Storage Mode Using the J35 as a Power Supply (Battery-Less Operation) Fault Protection PAIRING WITH THE CONTROLNODE102 SERVICING, MAINTENANCE AND STORAGE FAQS AND TROUBLESHOOTING JHub App... -
Page 8: J35
(rated 250V, 10A). Do not replace a damaged power supply cord. If the power cord is damaged, the J35 must be discarded. Ensure that the AC mains source always has an earth terminal. - Page 9 To ensure continuous air-flow, the fan ventilation holes must never be blocked otherwise the temperature of the J35 may rise and inhibit the optimal operation of the J35 and/or cause the J35 to shut down. The J35 will automatically restart once it has cooled to an acceptable level.
- Page 10 LOAD ISOLATION SWITCH To connect the caravan’s load isolation switch. This switch is used to enter Storage Mode and power off all outputs (load terminal block and CAN bus) on the J35, except for the Air Suspension output. Battery charging is not affected by use of the load isolation switch.
-
Page 11: Controlnode102
ControlNode102 Figure 2: The ControlNode102 PAIRING BUTTON Button to enable Bluetooth pairing between the ControlNode102 and the JHub App on your own personal mobile device or JHub Tablet. LED STATUS INDICATOR Indicates the operational/pairing status of the ControlNode102. Table 5: ControlNode102 Operational Status and LED Flash Codes Operational Status Flashing Status Note ControlNode102 is ready to pair... -
Page 12: Installation Instructions
Figure 3 details connection of the caravan battery to the J35. After fitting a new battery to the J35, make sure that it is configured in the JHub App. Correctly configuring the battery capacity and profile will ensure that the J35 will select the best charging parameters for the caravan battery in use, and the software accurately estimates battery usage. -
Page 13: Disconnecting A Battery From The J35
DISCONNECTING A BATTERY FROM THE J35 To disconnect a battery from the J35: Power off all loads connected to the J35, the easiest way is with the switch connected to the J35 Load Isolation input Turn off and remove all power sources (mains/solar/AUX) to the J35 Disconnect the battery’s negative (black) terminal from the J35 Batt-... -
Page 14: Using Your J35
The J35 may be powered from mains, AUX or solar inputs to provide battery charging current and power to caravan loads. If mains and one or more other sources are available to the J35, the J35 will be powered exclusively by the mains source. -
Page 15: Sleep Mode
10.5V 11.5V Table 6: LVD Mode voltage thresholds The J35 will enter the two stages of LVD, Sleep Mode and Storage Mode, when the caravan’s battery voltage falls below the LVD thresholds. SLEEP MODE The J35 will provide power to the CAN bus. This allows you to continue to monitor battery consumption from the battery monitor. -
Page 16: Using The J35 As A Power Supply (Battery-Less Operation)
If your battery is heavily discharged, disconnect it from the J35 and charge with a stand-alone charger. Reconnect the battery once the battery voltage has recovered to normal levels. Heavily Discharged Batteries (LiFePO4) (J35 Model D only) The J35D can recover and charge a heavily discharged LiFePO4 battery. The internal Battery Management System (BMS) of a LiFePO4 battery will turn off if it detects that the battery is heavily discharged. -
Page 17: Pairing With The Controlnode102
PAIRING WITH THE CONTROLNODE102 To pair the ControlNode102 to your own personal mobile device: Make sure that the ControlNode102 is connected to the J35 and that the J35 is powered on. Turn on Bluetooth on your own personal device Press the Pairing Button on the ControlNode102. The LED Status Indicator on the ControlNode102 will flash green, indicating you have 30 seconds to pair to the ControlNode102. -
Page 18: Servicing, Maintenance And Storage
If any fuse continues to fail, please contact your dealership for guidance. MAINTENANCE Use a dry or moist cotton cloth to lightly remove dust or dirt from the J35. Do not use alcohol, thinners, benzene or any other chemical cleaner as these products may degrade the housing surface. -
Page 19: Faqs And Troubleshooting
No, the ControlNode101T (orange dot) is only capable of pairing to the JHub Tablet. BATTERY I’ve fitted a battery to the J35, but it’s not detected by my BMPRO battery monitor? Check the following: Battery connections are tight and not loose or corroded... -
Page 20: Caravan Loads
I think one of my loads is not receiving power? The load may be faulty, activating the protective electronic fuse and turning the load off. If this is the case, the LED Status Indicator on the J35 will flash a solid red. - Page 21 Solar Output Appears to be Lower than Expected If the battery is close to fully charged, the J35 will periodically turn off solar to protect the batteries from overcharging. As a result, you may see less output on your solar display.
-
Page 22: Appendices
APPENDICES J35 OPERATIONAL STATUS INDICATOR The following details the operational status of the J35, as shown by the coloured flash of the LED Status Indicator on the J35. Colour Code Flashing Status Internal Error On, Solid Identify Device Flashes, 5 Times Quickly... -
Page 23: Battery Charging Management Algorithm
BATTERY CHARGING MANAGEMENT ALGORITHM The following describes the Battery Charging Management Algorithm used by the J35 when charging the caravan battery from a mains power source. The J35 will operate as described when the caravan loads are connected directly to the J35 and not the caravan battery. - Page 24 Battery is charged at Absorption voltage until the current drops below 2A or Boost-Bulk-Absorption timeout occurs. FLOAT Charging current is limited to 10A to keep the battery level topped up. Charging will remain in Float for 6 hours. After Float timeout, the J35 will enter back into Boost-Bulk-Absorption modes.
-
Page 25: Specifications
SPECIFICATIONS J35 BATTERY MANAGEMENT SYSTEM J35A J35B J35C J35D Input Voltage Range 240 VAC ± 10% (nominal), 50-60 Hz Input Surge < 40A (cold start) Output Current (Load + Battery Current) Factory Set Voltage (Float Voltage) 13.65 V +/0.1 V Output Ripple Voltage <... -
Page 26: Warranty Terms And Conditions
5. BMPRO may seek reimbursement of any costs incurred by BMPRO when a product is found to be in proper working order or damaged as a result of one or more of the warranty exclusions mentioned in point 4 of this statement. - Page 28 BMPRO TEAM +61 3 9763 0962 sales@teambmpro.com BMPRO 19 Henderson Rd, Knoxfield VIC 3180 Australia .COM teambmpro.com...
Need help?
Do you have a question about the J35 and is the answer not in the manual?
Questions and answers