Table of Contents
Advertisement
Advertisement
Table of Contents

Summary of Contents for MED-EL ADHEAR
- Page 1 ADHEAR Quick Guide AW37225_2.0 (English EU)
-
Page 2: Table Of Contents
Table of Contents ADHEAR system ....... . . 2 Switching ADHEAR on/off ......3 Changing the battery . - Page 3 Introduction The ADHEAR Quick Guide contains easy-to-use instructions to get you started with your ADHEAR. For detailed information on the intended use, indications, contraindications, warnings and precautions of the ADHEAR system, please refer to the instructions for use. © 2018 MED-EL Elektromedizinische Geräte GmbH. Revision 2.0 (12/2018).
-
Page 4: Adhear System
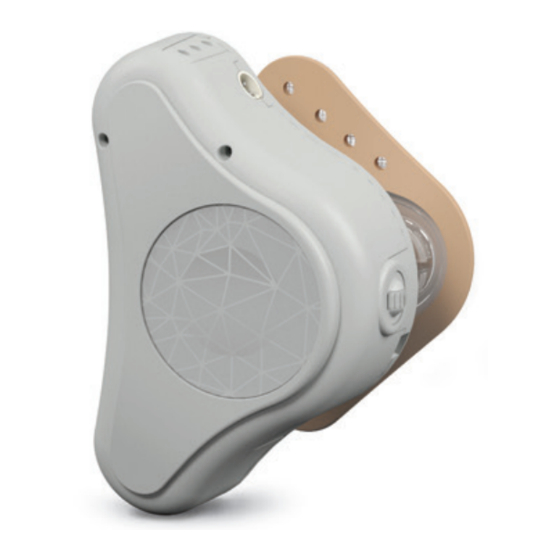
ADHEAR ADHEAR system Audio processor Program button Microphones Battery compartment Audio input socket Volume control Coupling plate Adhesive adapter Snap connector... -
Page 5: Switching Adhear On/Off
Switching ADHEAR on/off Simply insert a battery and close To switch the audio processor off, the battery compartment to open the battery compartment switch the audio processor on. and/or remove the battery. Open Make sure the plus sign (+) faces the battery compartment upwards. -
Page 6: Changing The Battery
ADHEAR Changing the battery Remove the empty battery and insert a Battery lifetime is usually one to new one (see page 3). To activate the two weeks. battery, remove the plastic tab. Only use size 13 zinc-air batteries It is recommended to peel the tab off (also called PR48 batteries). -
Page 7: Applying The Adhesive Adapter
Applying the adhesive adapter The skin behind the ear must be Clean the skin with mild soap and clean, dry and free from any hair. let it dry completely before you If the hairless area is not big apply the adhesive adapter. enough for the adhesive adapter, adjust the hairline with a razor. - Page 8 ADHEAR The optional positioning tool can help you to correctly position the adhesive adapter. Place the adhesive adapter in the Remove the protective film. positioning tool cavity. Do not touch the adhesive surface.
- Page 9 Make sure that the application area is free from hair (see page 5) and move any hair away from the area. Find the correct position where Press the tool firmly against the the tool is lightly touching the ear. skin. Make sure the adhesive adapter is placed over bone.
- Page 10 ADHEAR Gently remove the positioning Press firmly on the entire surface tool by moving it away from the of the adhesive adapter for at skin. Take care that you do not least 30 seconds. pull against the adhesive adapter when removing the tool.
-
Page 11: Connecting The Audio Processor
Connecting the audio processor Find the correct position and tilt By pressing and rotating the audio the audio processor onto the processor, the position may be snap connector from behind the slightly adjusted. For optimal ear, while pressing on the performance make sure the audio adhesive adapter. -
Page 12: Disconnecting The Audio Processor
ADHEAR Disconnecting the audio processor To disconnect the audio processor Remove the audio processor from the adhesive adapter, tilt it gently and do not pull on the towards your ear. adhesive adapter. -
Page 13: Changing The Adhesive Adapter
Changing the adhesive adapter Remove the adhesive adapter by slowly peeling it off the skin. The adhesive adapter can usually be worn day and night and should be changed once or twice a week. It is for single-use only. -
Page 14: Changing The Program
ADHEAR Changing the program Press the program button to change the program. The audio processor always starts up in program 1 when it is switched on. -
Page 15: Changing The Volume
Changing the volume Scrolling away from the skin increases the volume. Scrolling towards the skin decreases the volume. Changes of volume are indicated by a beep. -
Page 16: Connecting Adhear To External Devices
Connecting ADHEAR to external devices ADHEAR can be connected to different external devices, such as FM systems, Telecoil receivers or smartphones. Connect the audio input cable to the external device and the audio processor. Take care that the dots on the cable and on the... -
Page 17: Adhear Accessories
ADHEAR accessories Retention clip ADHEAR sleeve The retention clip can be connected to The ADHEAR sleeve offers additional the audio processor with a loop. The clip protection, particularly for younger can be attached to clothing. A retention users. It is simply pulled over the audio clip is recommended during physical processor. -
Page 18: Basic Care Of The Adhear System
ADHEAR Basic care of the ADHEAR system Follow these basic yet important care instructions to maintain your ADHEAR system. Cleaning The housing may be cleaned on the outside with soft baby wipes. Do not clean the housing in or under water, to prevent water from entering the audio processor. - Page 19 If you live in a humid climate or perspire heavily, the audio processor should be placed in a drying container (sold separately) instead of in the case when it is not being worn. Refer to your instructions for use for more information about cleaning, storage, handling and disposal of the ADHEAR system.
- Page 20 MED-EL Elektromedizinische Geräte GmbH Fürstenweg 77a, 6020 Innsbruck, Austria office@medel.com medel.com...


Need help?
Do you have a question about the ADHEAR and is the answer not in the manual?
Questions and answers