
Related Manuals for Biddle IndAC2


Summary of Contents for Biddle IndAC2
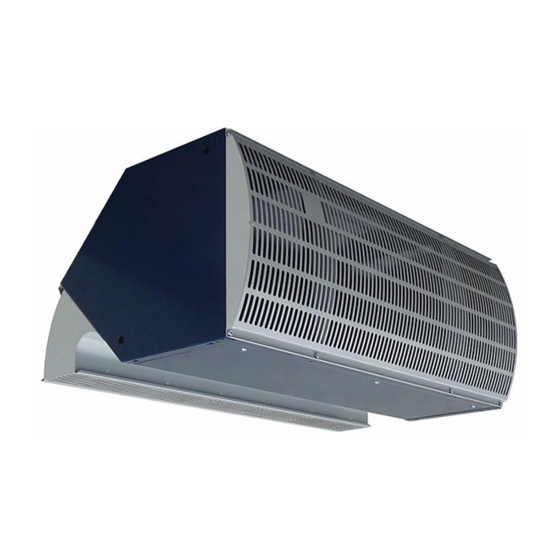
- Page 1 Manual Industrial air curtain Model IndAC2 English Version 7.0 - North America Original Manual...
-
Page 2: Table Of Contents
NDUSTRIAL AIR CURTAIN . . . Contents Introduction About this manual How to read this manual About the unit Components and accessories Safety instructions Installation Inspection on delivery General working method Suspending the unit horizontally Installing the unit vertically Connecting the unit to the central heating system Connecting the unit to the mains supply Installing the b-control continuously variable controller Installing the b-touch control panel... - Page 3 Connecting the control circuit board Fuses LEDs Setting the unit code Resetting the PIN code 7.10 Copying the settings 7.11 Updating the software 7.12 Composition of the Biddle control cable Dismantling Addresses Keywords Manual version 7.0 - North America (21-03-2017) en-3...
-
Page 4: Introduction
. . Introduction About this manual This manual describes the installation, operation and mainte- nance of , the industrial air curtain model IndAC . The manual also provides instructions and information for servicing activi- ties. How to read this manual 1.2.1 Designations used in the manual The following symbols are used in the manual: Note:... -
Page 5: About The Unit
AC2 M ANUAL NTRODUCTION Danger: Is used to designate actions that are not permitted. Ignoring this prohibition may lead to serious damage or to accidents resulting in physical injury. 1.2.2 Symbols used on the unit and in the manual The following symbols indicate possible risks or hazards. The same symbols will also be found on the unit. - Page 6 Warning: Applications other than those described above are deemed to be usage other than for the intended purpose. Biddle is not liable for damage or loss resulting from usage other than for the intended purpose. Usage for the intended purpose also entails observance of the instructions in this manual.
- Page 7 AC2 M ANUAL NTRODUCTION The automatic CHIPS control Depending on the implementation, the unit may be equipped with an automatic CHIPS control. The CHIPS control automatically adjusts the strength and heat of the unit to changing weather conditions. Thus, in all situa- tions the energy loss is minimal and the comfort maximal.
- Page 8 NTRODUCTION NDUSTRIAL AIR CURTAIN Door response The unit and the automatic control have been developed for situations in which the door stands open. If the door is not continuously open, the operation can be adjusted to this: • Normal operation: the unit is always discharging air. •...
- Page 9 AC2 M ANUAL NTRODUCTION Explanation of the type code YPE CODE ELEMENT ESIGNATION EANING product series IndAC general designation for the series capacity default range (door height 3-6 m) maximum range (door height 5-8 m) length 150, 200, 225 or 250 discharge length in cm battery type water heating...
- Page 10 NTRODUCTION NDUSTRIAL AIR CURTAIN NSTALLATION POSI XAMPLE TION horizontal, above door vertical, next to door, on left, at right angle to wall vertical, next to door, on right, at right angle to wall vertical, next to door, on left, along the wall vertical, next to door, on right,...
- Page 11 AC2 M ANUAL NTRODUCTION 1.3.5 Type plate The type plate is located next to the discharge grille. Designations on the type plate ESIGNATION EANING Type complete type code of the unit Code configuration code serial number, production week and year weight of unit Medium medium...
- Page 12 Note: Consult Biddle if you want to connect a unit to a water flow-path with higher temperatures and higher pressure. Warning: The air curtain may not be used in potentially explosive environments.
- Page 13 Basics per Auto 2 units 2 units Note: Consult your Biddle advisor if you wish to connect more units. 1.3.7 Modifications and changes Without the approval of Biddle, no changes or modifications may be made to the unit that could adversely affect safety.
-
Page 14: Components And Accessories
Operating package for basic control • b-control continuously variable controller. Operating package for automatic CHIPS control • b-touch control panel; • Biddle control cable; • outdoor temperature sensor; • door contact switch; • water-side control (valve and drive). 1.4.3 Accessories •... -
Page 15: Safety Instructions
AC2 M ANUAL NTRODUCTION Note: For models with automatic CHIPS control, the door contact switch is part of the control package as standard. 1.4.4 Components not supplied The following components required for installation must be obtained from third parties: • threaded rods(M12) •... - Page 16 NTRODUCTION NDUSTRIAL AIR CURTAIN 1.5.2 Safety issues relating to installation, mainte- nance and servicing Danger: The unit may only be opened by qualified technical staff. Warning: Perform the following actions before opening the unit: 1. Switch the unit off,using the control panel. 2.
-
Page 17: Installation
See also: "Components and accessories" on page 14 General working method 2.2.1 Sequence of operations Biddle recommends working as follows when installing the unit: 1. Hang the unit up. (horizontal models) 2. Position the unit. (vertical models) 3. For water-heated models (type H): connect the unit to the central heating system. - Page 18 NSTALLATION NDUSTRIAL AIR CURTAIN 4. Connect the unit to the mains supply. Caution: Make sure that the unit’s power supply voltage matches the local mains voltage. The unit’s power supply voltage is displayed on the type plate. 5. Install the control panel and (any optional) connections to external controls.
-
Page 19: Suspending The Unit Horizontally
Position the discharge side of the unit as close to the door- way as possible, to ensure optimum operation. Note: If the distance is greater than 5 cm.(2”), Biddle recommends that you seal off the openings at the side. For this purpose, you can order a side shield of plastic strips from Biddle. - Page 20 NSTALLATION NDUSTRIAL AIR CURTAIN • In the case of an assembly with automatic CHIPS control and several units, only one of which is equipped with a control circuit board, position the unit with the control circuit board in the middle of the row. •...
- Page 21 AC2 M ANUAL NSTALLATION 2.3.4 Adjusting and securing 1. Position the units against one another, in one line, by plac- ing the suspension rails 6 against one another. 2. Attach the suspension rails to the auxiliary structure. Warning: Make sure that the suspension rails can never come loose from the auxiliary structure.
-
Page 22: Installing The Unit Vertically
5 cm., you are advised to seal off the openings at the side. For this purpose, you can order a side shield of plastic strips from Biddle. 1. On both sides of the unit, mount a tubing profile, reaching to the wall 1. - Page 23 AC2 M ANUAL NSTALLATION 2.4.1 Method of erection This manual makes the assumption that the unit is to be placed on a base plate (accessory). The units are stacked on top of one another. Caution: If you do not use a base plate, you must ensure that the surface underneath is horizontal and completely level.
- Page 24 NSTALLATION NDUSTRIAL AIR CURTAIN 2.4.3 Positioning the units 1. Position the base plate 1 and fix it to the floor. Caution: Ensure that the base plate is level. 2. Position the first unit on the base plate. 3. Fix the unit to the base plate with coupling plates 2. Caution: Mount the coupling plates on both sides of the unit.
-
Page 25: Connecting The Unit To The Central Heating System
SYMBOL SYMBOL FEED PIPE RETURN PIPE arrow points towards the arrow points away from the connection connection Caution: Biddle recommends the inclusion of a valve in both pipes. Manual version 7.0 - North America (21-03-2017) en-25... - Page 26 NSTALLATION NDUSTRIAL AIR CURTAIN Danger: Take measures to limit the discharge temperature. Take account of the critical discharge temperatures and water flow-paths. The application limits for this are shown in section 1.3.6 Field of application. Note: The central heating system must be fitted with an overpressure cut-out with an initial pressure not exceeding the permitted pressure of the unit.
- Page 27 Consult Biddle if you want to connect more control valves in an assembly with a single control circuit board. Control valves that are not supplied by Biddle must, in any case, comply with the following: • 24V power supply.
- Page 28 NSTALLATION NDUSTRIAL AIR CURTAIN 2. Remove the inspection panel 1. 3. Remove the cover of the electronic housing 2. 4. Connect the cord to the drive, in accordance with the wir- ing diagram. Note: Use a cable of at least 0.5 mm 5.
-
Page 29: Connecting The Unit To The Mains Supply
AC2 M ANUAL NSTALLATION 2. If the temperature of the discharged air falls to below 2 ºC(36 ºF) and the temperature of the intake falls below 8 ºC (46 ºF): the control panel will temporarily display error mes- sage E6; the fans will be switched off, but the valve of the water- side control will stay open. - Page 30 NSTALLATION NDUSTRIAL AIR CURTAIN Warning: Each unit must be fused in accordance with the table below. Fuse ratings OTAL MAXIMUM AMPER AGE OF ALL UNITS ON A SINGLE MAINS POWER CA AXIMUM FUSE VALUE PER UNIT INDICAT L1, L2 ED ON TYPE PLATE ≤...
- Page 31 AC2 M ANUAL NSTALLATION 2.6.2 Connecting the unit General Note: For IndAC MX models with automatic CHIPS control2 mains power cables must be connected. Warning: Before you begin: read the special points regarding the mains supply. See also: 2.6.1 "Special points regarding the mains supply" on page 29 Connecting the unit Connecting the unit is carried out in the same way for each installation position.
- Page 32 NSTALLATION NDUSTRIAL AIR CURTAIN cabling in the case of horizontal installation position 1. Fit an isolation switch between the mains supply and the (type 0) assembly. For the specifications of the isolation switch, see 2.6.1 Special points regarding the mains supply.
- Page 33 AC2 M ANUAL NSTALLATION 6. Connect the mains power cable to terminal block X01 5, in accordance with the wiring diagram. Caution: Keep the length of the cable within the electronic housing as short as possible. Ensure that the cable does not come into the vicinity of the other cables in the electronic housing.
- Page 34 NSTALLATION NDUSTRIAL AIR CURTAIN Connecting the control circuit board Only for IndAC MX models with automatic CHIPS control The control circuit board for the automatic CHIPS control must be separately connected to a power supply of 230V. 1. Fit an isolation switch between the mains supply and the assembly.
-
Page 35: Installing The B-Control Continuously Variable Controller
Indicated in the table is the maximum permissi- ble total length of an assembly with 1 controller. AXIMUM TOTAL LENGTH APACITY PER CONTROLLER IndAC IndAC 7.5 m Note: Consult your Biddle advisor if you wish to connect more units. Manual version 7.0 - North America (21-03-2017) en-35... - Page 36 NSTALLATION NDUSTRIAL AIR CURTAIN Setting output voltage The controller can adjust the strength of the unit in a continu- ously variable manner. The output voltage can be set between Vmin and Vmax. This is done after the complete installation of the unit and all connections.
- Page 37 AC2 M ANUAL NSTALLATION 2.7.3 Connecting the controller to the unit Warning: The unit must be earthed. 1. Lead the cable to the electronic housing in the unit. In the feed-through hole to be used 1, fit a cable gland for pull relief.
- Page 38 NSTALLATION NDUSTRIAL AIR CURTAIN Daisy chaining multiple units with a single controller Note: Check in 2.7.1 Special points regarding the controller to see how many units can be connected to the controller. 1. Lay the cable between the electronic housings of the units to be connected Feed the cable through the feed-through holes 1.
-
Page 39: Installing The B-Touch Control Panel
AC2 M ANUAL NSTALLATION You can attach the extra controller to the wall, to a standard junction box or at a spot near the unit. 1. Position the controller in a logical place. Note: Ensure that there is a clear difference between the extra controller and the controller that is used for the operation of the unit. - Page 40 As a result, the magnetic fields will cancel each other out to an important extent. Note: Use Biddle control cables only. Standard modular telephone cable is NOT suitable. Multiple units operated from a single control panel •...
- Page 41 AC2 M ANUAL NSTALLATION Operation without control panel The unit can be operated without control panel. In that event, only remove the control panel after complete installation. 2.8.2 Mounting and connecting the control panel 1. Lay the control cable. 2. (20 AWG) 3.
- Page 42 NSTALLATION NDUSTRIAL AIR CURTAIN 2. Feed the cable into the electronic housing 2. Make the grommets in the electronic housing to meas- ure. Feed the cable through the wall of the electronic hous- ing. Caution: Ensure that the grommets fit so tightly around the cable that they remain watertight.
-
Page 43: Installing External Controls
AC2 M ANUAL NSTALLATION 2. Feed the cable into the electronic housings of both units. Make the grommets in the electronic housing to meas- ure. Feed the cable through the wall of the electronic hous- ing. Caution: Ensure that the grommets fit so tightly around the cable that they remain watertight. - Page 44 NSTALLATION NDUSTRIAL AIR CURTAIN Outputs on the unit o1, o2, o3 Only for models with automatic CHIPS control On terminal block X510, the unit has three signal interfaces for an output signal. These can be used, for example, for con- trolling the central heatingor for transmitting status reports to a BMS.
- Page 45 AC2 M ANUAL NSTALLATION Position of the outdoor temperature sensor Mount the outdoor temperature sensor on the outside wall: • at least 3 . (1 metre) to the side of the door opening or at least 6 . (2 metres) above the door opening; •...
- Page 46 45. Extra frost protection of the control panel is active, heated water is always flowing through the unit. Biddle recommends installing a room sensor in these situa- tions. 1. Mount the room sensor in the room where unwanted cold or draughts are felt first.
- Page 47 AC2 M ANUAL NSTALLATION 2.9.4 Connecting the door contact switch For models with basic control 1. Mount the door contact switch. 2. Connect the door contact switch to terminal block X60, in accordance with the wiring diagram supplied. For models with automatic CHIPS control 1.
- Page 48 NSTALLATION NDUSTRIAL AIR CURTAIN Connecting the alarm signal to the unit For models with automatic control (Auto type) The alarm signal can be received via an output, ModBus or another building management system. Establish the required connection. For models with basic control (Basic type) 1.
- Page 49 Leave the bridge in place on the final unit 2. 2.9.6 Connecting the unit to Modbus Opmerking: A detailed manual for the connection and usageof ModBus (and possibly BACnet) is available at: www.biddle.info. Communication parameters The Modbus system must comply with the following communi- cation parameters: COMMUNICATION PARAMETER...
- Page 50 NSTALLATION NDUSTRIAL AIR CURTAIN Wiring A twisted-pair cable must be used for connection to the Mod- bus system. The cable must also have a third core for the GND (grounding). Normally, a four-pole, twisted-pair cable is used; one pair is used for communication and one core from the other pair is used as the GND.
-
Page 51: Finishing The Unit
AC2 M ANUAL NSTALLATION Note: For a more reliable signal, it is possible to connect a 120 Ohm resistor. For this purpose, place a bridge between positions 1 and B of terminal X382 on the control circuit board in the unit. Note: The b-touch control panel is no longer necessary for purposes of operation. -
Page 52: Switching On And Checking Operation
NSTALLATION NDUSTRIAL AIR CURTAIN 2.11 Switching ON and checking operation For all models: 1. Check the following connections: power supply; control cable(s) between control panel and unit(s); If applicable: external control components. For all models: 1. Switch the mains supply on. Caution: Make sure that the unit’s power supply voltage matches the local mains voltage. - Page 53 AC2 M ANUAL NSTALLATION 8. Fit the shut-off cap. 9. Fasten the hexagonal nut. 10. Fit the adjustment button: Press this on firmly and set to position ‘0’. 2. Turn the unit on, using the controller. For models with an extra controller 1.
- Page 54 NSTALLATION NDUSTRIAL AIR CURTAIN During the first start-up, the installation guide is initiated. Go through this in order to make the most necessary set- tings. If the installation guide is not displayed, it can be started via menu > Maintenance > Installation.
- Page 55 AC2 M ANUAL NSTALLATION Caution: For models with basic control (type Basic): Ensure that at the lowest fan speed the maximum discharge temperature is not exceeded. For the maximum discharge temperature, see section 1.3.6 Field of application. Caution: In the case of a combination of models with a control circuit board (type Auto) and models without control circuit board (Basic): Adjust all units on the water side.
-
Page 56: Operation With B-Control
. . Operation with b-control Various control units are available for the industrial air curtain IndAC . This chapter describes operation with the b-control continuously variable controller that is used on units having a basic control (Basic type). Introduction This section describes the functions of the b-control continu- ously variable controller which are necessary for the opera- tion of the unit. -
Page 57: Operation With B-Touch
. . Operation with b-touch Various control units are available for the industrial air curtain IndAC . This chapter describes operation with the b-touch control panel, that is used on units having an automatic con- trol (Auto type). Introduction This section describes the functions of the b-touch control panel, which are required for setting up the unit. -
Page 58: The Home Screen
PERATION WITH B TOUCH NDUSTRIAL AIR CURTAIN 4.1.2 Multiple units operated from a single control panel If multiple units are connected to the b-touch control panel, the settings on the panel are the same for all units. 4.1.3 Settings Select to save the settings and return to the previous screen. - Page 59 Recommended setting of the unit To obtain the maximum possible separation effect andthe greatest possible comfort with the least possible energy con- sumption, Biddle recommends use of the fully automatic CHIPS control. Manual version 7.0 - North America (21-03-2017) en-59...
- Page 60 With the manual setting, you can select the strength. To achieve maximum climate separation with minimum energy consumption, Biddle recommends selecting the lowest strength at which no draught occurs. This setting may possibly need to be changed during the course of the day.
-
Page 61: Main Menu
AC2 M ANUAL PERATION WITH B TOUCH If an error has remedied itself, a corresponding message will be displayed. Touch this message to display the Error history and to read out the errors and the times of their occurrence. This list can also be read out via Maintenance >... - Page 62 PERATION WITH B TOUCH NDUSTRIAL AIR CURTAIN Turning the heating on and off The unit’s heating can be switched on and off manually. Switching the heating off disables the room temperature con- trol and any Heating This function can be deactivated via setting 21 in the configu- ration menu.
-
Page 63: Preferences
AC2 M ANUAL PERATION WITH B TOUCH Preferences Preferences The menu Preferences allows you to make settings for the use of the control panel. Set language The control panel offers a choice of languages. Choose your preferred language from the list. Set date and time The date and time are necessary for the timer function and for tracking usage statistics of the unit. -
Page 64: Settings
PERATION WITH B TOUCH NDUSTRIAL AIR CURTAIN Settings The Settings menu allows you to enter settings which influ- ence the day-to-day use of the unit. 1. Select modes The control panel has an automatic mode and a manual mode. With the function Select modes, you can set which of these modes can be selected in the HOME screen. -
Page 65: Configuration
AC2 M ANUAL PERATION WITH B TOUCH Configuration The menu Configuration allows you to enter settings in order to adjust the operation of the unit to the room and the sys- tem. Usually, this menu is used only for installation, mainte- nance and service purposes. - Page 66 PERATION WITH B TOUCH NDUSTRIAL AIR CURTAIN 25. Auto: Door response Door response The unit can respond in various ways to the opening and clos- ing of the door. Configure whether the response should be immediate or gradual. Immediate change: The unit responds immediately to the opening and closing of the door by quickly switching between the fan speeds for the door open situation and the door closed situation.
- Page 67 AC2 M ANUAL PERATION WITH B TOUCH Stand-by heating The control can be set in such a way that heat is immediately available when the door is opened. This is a percentage of the maximum heat available for this function. The maximum heat depends on the outdoor temperature, among other things.
- Page 68 PERATION WITH B TOUCH NDUSTRIAL AIR CURTAIN 41/42/43 Operation at higher outdoor As the outdoor temperature rises, the need for climate sepa- temperatures ration and heating changes. In functions 41, specify at what outdoor temperatures the heating and the fans must react to this.
- Page 69 AC2 M ANUAL PERATION WITH B TOUCH 44. Outdoor temperature The automatic CHIPS control needs an outdoor temperature in order to calculate the optimal setting. Without tempera- ture data from a sensor, the outdoor temperature is esti- mated on the basis of the month of the year and your country. Climate data are used for this.
- Page 70 PERATION WITH B TOUCH NDUSTRIAL AIR CURTAIN 50. Installation height In order to use the automatic control as efficiently as possible and with minimum energy consumption, it is necessary to set the installation height of the unit correctly. Note: Use values in metres. The installation height is the distance from the floor to the underside of the unit.
- Page 71 AC2 M ANUAL PERATION WITH B TOUCH The function of input 3 is set via other functions in the b-touch control panel. In addition, the function of this parameter (60.3) is controlled via the settings file or via Modbus. Values for input 3 ALUE PTION ESCRIPTION...
- Page 72 PERATION WITH B TOUCH NDUSTRIAL AIR CURTAIN ALUE PTION ESCRIPTION Error local – NO The contact is closed as soon as an error occurs in the unit in question. Fan active – NO The contact is closed when the fans are running. Heating on The contact is closed when the unit requires heating.
-
Page 73: Maintenance
AC2 M ANUAL PERATION WITH B TOUCH Maintenance The menu Maintenance contains information on the use of the unit and offers a number of functions which are necessary for remedying errors. Status The status screen displays general information about the installation and specific information per group and per unit connected. - Page 74 PERATION WITH B TOUCH NDUSTRIAL AIR CURTAIN Check door contact switch With this function, you check the operation of a door contact switch connected to the unit. For this purpose, you have to open and close the door, so that the control panel can detect the switch.
- Page 75 Software update Biddle is working continuously on improving its products and recommends that you update the software of the control panel when updates become available. Consult www.bid- dle.info/software to see if updates are available.
- Page 76 PERATION WITH B TOUCH NDUSTRIAL AIR CURTAIN Export/import settings For copying settings between control panels. See also: 7.10 Copying the settings Exporting system info Export the file ‘system_info’ for an overview of all connection control circuit boards and control panels with corresponding software versions.
-
Page 77: Errors
2. Allow the unit to cool down. 3. Turn the unit on and check whether it is now working again. Contact Biddle if this error occurs repeatedly. Manual version 7.0 - North America (21-03-2017) en-77... - Page 78 RRORS NDUSTRIAL AIR CURTAIN ROBLEM ROBABLE CAUSE HAT TO DO The unit is switched off but the fans An extra connected controller is This is not an error. continue rotating slowly. providing power to the fans, so that these start up immediately when the door opens.
- Page 79 AC2 M ANUAL RRORS ROBLEM ROBABLE CAUSE HAT TO DO The unit discharges cold air and the The heating has been switched off Turn the heating on via airflow on the display is blue. manually. menu > Heating. The heating has been switched off This is not an error.
-
Page 80: Error Messages On The Control Panel
RRORS NDUSTRIAL AIR CURTAIN Error messages on the control panel 5.2.1 Reading out errors Current errors Current errors are displayed on the Home screen. If an error has remedied itself, a corresponding message will be displayed. When the error message is touched, the screen displays an explanation, together with a list of the actions to be taken. -
Page 81: Remedying Errors That Are Accompanied By An Error Message
AC2 M ANUAL RRORS Remedying errors that are accompanied by an error message For models with b-touch control panel: Try to remedy errors that are accompanied by an error message, making use of the error codes table. Technical expertise is required for this. ROBABLE CAUSE HAT TO DO The control panel does not communicate with... - Page 82 RRORS NDUSTRIAL AIR CURTAIN ROBABLE CAUSE HAT TO DO Fan error. 1. Clear the error message 2. Check the fans. If one or more fans do not work, then check: • the fan wiring; • the connections on the control circuit board (X344);...
- Page 83 AC2 M ANUAL RRORS ROBABLE CAUSE HAT TO DO The temperature sensor in the unit’s discharge 1. Check the sensor’s wiring and connection section does not work. (connector X350). 2. Replace the sensor. The temperature sensor in the unit’s inlet section 1.
-
Page 84: Remedying Errors That Are Not Accompanied By An Error Message
RRORS NDUSTRIAL AIR CURTAIN Remedying errors that are not accompanied by an error mes- sage If you suspect an error but no error message is displayed: 1. Referring to the preceding sections, check whether you can easily resolve the problem. 2. - Page 85 AC2 M ANUAL RRORS ROBLEM ROBABLE CAUSE HAT TO DO The fans do not The connection to the rele- 1. Check the transformer connections. work at a partic- vant branch is not good. 2. Check connector X60. ular speed level. The extra controller is not Check that the bridge has been removed from between posi- connected properly...
-
Page 86: Maintenance
. . Maintenance Introduction This chapter comprises those maintenance activities that the user himself can perform. Maintenance activities and repairs that must be performed by an installer are described in chap- Servicing. Cleaning the unit You can clean the inside and the outside of the unit with water and household cleaning products. - Page 87 AC2 M ANUAL AINTENANCE For units with water heating: • Check for water leakage; if this should be the case, then switch off the unit so that it is electrically dead and repair the leakage. • Check whether the water piping system contains air; if necessary, vent the air out of the system.
-
Page 88: Servicing
. . Servicing Warning: Servicing activities may only be carried out by personnel who are technically qualified to do Warning: Before you begin: read the safety instructions. See also: "Safety instructions" on page 15 en-88... -
Page 89: Removing The Fans
AC2 M ANUAL ERVICING Removing the fans With horizontal installation position type 0 and with vertical installation position type 1: 1. Remove the discharge section: Loosen the bolts 2. Unhook the discharge section 1. 2. Disconnect the wiring: Remove the inspection panel 3. Open the terminal box. - Page 90 ERVICING NDUSTRIAL AIR CURTAIN With vertical installation position type 2: 1. Disconnect the wiring: Remove inspection panel 2. Open the terminal box. Disconnect the wiring of the relevant fan. 2. Remove the fan: Loosen the bolts 3. Take out the fan along with bracket 4. See also: 2.6.2 "Connecting the unit"...
-
Page 91: Accessing The Heating Element
AC2 M ANUAL ERVICING Accessing the heating element For units with water heating: 1. Remove inlet grille 1. Electronics module Only for units which have automatic CHIPS control The unit contains one electronics module. Depending on the version, one can find on this such things as: •... -
Page 92: Removing The Control Circuit Board
ERVICING NDUSTRIAL AIR CURTAIN Removing the control circuit board 1. Switch the unit off using the control panel. Warning: Shut off the mains supply. The unit is fitted with 2 mains power cables. Ensure that the power supply to the control circuit board is also shut off. -
Page 93: Fuses
AC2 M ANUAL ERVICING Note: With a new control circuit board, an E1 error may occur because the old control circuit board can no longer be found. Resolve this by reconfiguring the system via menu > Maintenance > Reset system Note: If you are asked to designate a new master unit, then preferably select a unit whose control circuit board... -
Page 94: Leds
ERVICING NDUSTRIAL AIR CURTAIN LEDs The LED lights 1 on the control circuit board indicate the fol- lowing: • continuous green: The control circuit board is receiving a power supply. • flashing green: The unit code can be entered. • continuous red: There is a local error. -
Page 95: Resetting The Pin Code
AC2 M ANUAL ERVICING 7.8.2 Setting the unit code via the control circuit board and the control panel 1. Connect the mains supply (insert the plug into the socket or move the isolation switch to ON). Warning: Do NOT touch any live parts. 2. - Page 96 7.11 Updating the software Biddle is working continuously on improving its products and recommends that you update the software of the control panel and of the control circuit board when updates become available. Consult Biddle’s website for availability.
-
Page 97: Updating The Software
7.11.3 Step 2: Download the most recent software 1. Connect the USB flash drive to a USB port on your PC. 2. On your PC, go to Biddle’s website and look under Down- loads. 3. Look for your product and the available software for your unit. -
Page 98: Composition Of The Biddle Control Cable
3. When this has been completed, disconnect the USB flash drive from the control panel. 7.12 Composition of the Biddle control cable The control cable for the control system is constructed as fol- lows: • The plugs are modular connectors of the type 6P4C. -
Page 99: Dismantling
. . Dismantling The dismantling of the installation and the handling of the coolant, oil and other components must be done by a quali- fied fitter in conformity with the relevant local and national legislation and regulations. By ensuring that this product is disposed of in the correct manner, you are helping to prevent potential negative conse- quences for the environment and public health. - Page 100 ISMANTLING NDUSTRIAL AIR CURTAIN en-100...
-
Page 101: Addresses
. . Addresses If you have any comments or queries relating to this product, please do not hesitate to contact your Biddle branch. Biddle bv Biddle Air Systems Ltd. P.O. Box 15 11 King St. Unit #3 9288 ZG Kootstertille... -
Page 102: Keywords
NDUSTRIAL AIR CURTAIN . . . Keywords accessories ......14 finishing ......51 addresses . - Page 103 AC2 M ANUAL removing fan ..... . . 89 room sensor ..... . . 46 safety instructions installation.
- Page 104 It helps us to improve the documentation still further. For more information If you have any comments or queries relating to this product, please do not hesitate to contact Biddle. You will find the contact information for your Biddle branch in chapter Addresses.
Need help?
Do you have a question about the IndAC2 and is the answer not in the manual?
Questions and answers