
Subscribe to Our Youtube Channel
Related Manuals for Milton Roy MILROYAL G


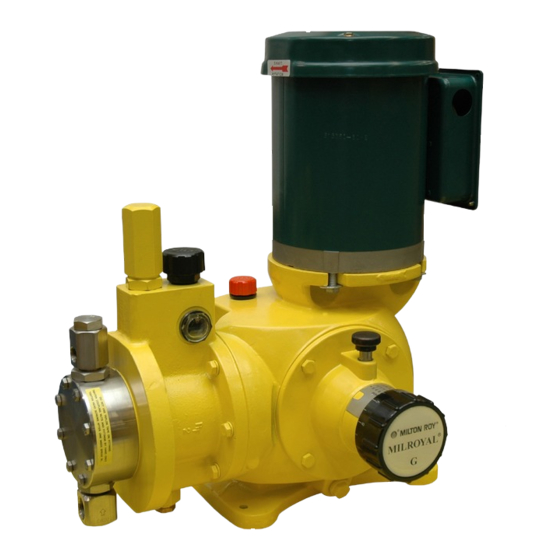
Summary of Contents for Milton Roy MILROYAL G
- Page 1 MILROYAL G Pump ® Instruction Manual Manual No : 53942 Rev. : 01 : 05/2019 Rev. Date...
- Page 2 PRECAUTIONS The following precautions should be taken when working with metering pumps. Please read this section carefully prior to installation. Protective Clothing ALWAYS wear protective clothing, face shield, safety glasses and gloves when working on or near your metering pump. Additional precautions should be taken depending on the solution being pumped.
-
Page 3: Table Of Contents
TABLE OF CONTENTS SECTION 1 - DESCRIPTION . . . . . . . . . . . . . . . . . . . . . . . . . . . . . . . . . . . . . . . . . . . . . . . . . . . . . . . . . . . . . . . . . 1 1.1 GENERAL . - Page 4 SECTION 4 - MAINTENANCE . . . . . . . . . . . . . . . . . . . . . . . . . . . . . . . . . . . . . . . . . . . . . . . . . . . . . . . . . . . . . . . 15 4.1 RECOMMENDED SPARE PARTS .
-
Page 5: Section 1 - Description
Stroke length can be adjusted while the pump is first for most metering pump applications. running or stopped by turning the stroke adjustment Milton Roy’s HPD liquid end overcomes the knob (330). net positive suction head (NPSH) restrictions The drive motor transmits rotary motion to a... - Page 6 (760) opens, allowing hydraulic oil from performance of the pump. If you suspect the possibility of cavitation, contact your Milton Roy the reservoir to enter through the refill valve Representative for assistance. (740 in Figure 8) and replenish the lost oil. In this...
-
Page 7: General Specifications
SECTION 1 - DESCRIPTION 1.3 GENERAL SPECIFICATIONS Maximum Capacity Range 20 GPH (76 LPH) to 130 GPH (492 LPH) Maximum Pressure Range 100 PSIG (7 Bar) to 600 PSIG (41 BAR) Hydraulically Actuated Diaphragm with Mechanically Actuated Refill Liquid End Design System (MARS). -
Page 8: Product Code
SECTION 1 - DESCRIPTION 1.4 PRODUCT CODE MILROYAL G pumps are available in a variety of different configurations. The complete product code ® is composed of the pump “model number” + “product code”. For a breakdown of the options included in a specific pump, compare the pump model number and product code found on the pump nameplate with the model/product code breakdown shown in Figure 1. -
Page 9: Section 2 - Installation
If equipment is to be shipped directly from and install the equipment with a view toward Milton Roy into long term storage, contact ensuring safe operation. Follow the instructions Milton Roy to arrange for factory preparation. -
Page 10: Electrical Equipment
For more indicated in step 3 below. information on converting between different liquid end models, please contact the Milton Roy factory 2. Dismount electrical equipment (including or your local authorized representative. motors) from the pump. -
Page 11: General Piping Considerations
SECTION 2 - INSTALLATION 2.6.2 General Piping Considerations 3. MILROYAL G pumps are intended to be ® operated with process liquid supplied at or 1. Use extreme care in piping to plastic liquid above atmospheric pressure. Although these end pumps with rigid pipe such as PVC. If any pumps can move liquids supplied at less stresses or vibration are unavoidable, flexible than atmospheric pressure, in these negative... -
Page 12: Discharge Piping Considerations
2.6.5 Back Pressure Valves A Milton Roy Back Pressure Valve should be installed in the discharge line near the pump to ensure sufficient discharge head pressure for proper pump metering action. -
Page 13: Safety Valves
2.7 ELECTRICAL CONNECTIONS install a Milton Roy pressure relief valve in the pump Ensure that the electrical supply matches the pump discharge line. This valve is designed and sized to motor nameplate characteristics. -
Page 14: Section 3 - Operation
SECTION 3 - OPERATION 3.1 INITIAL START- UP 3.1.1 Start- Up for New Pump For pumps received from the factory, the Check that all mounting bolts are tight, piping is displacement chamber (600) is already filled with installed properly, and the discharge line is open. oil. -
Page 15: Start- Up Of Pump Containing No Oil In Casing And Displacement Chamber
SECTION 3 - OPERATION 3.1.2 Start- Up of Pump Containing No Oil 3. Fill the opening in the displacement chamber in Casing and Displacement Chamber (600) through the port uncovered by removal The following instructions assume that both the of the 3- function valve in step 1 with the same pump casing and liquid end (displacement chamber) oil used to fill the pump casing. -
Page 16: Refill Valve Adjustment
SECTION 3 - OPERATION 3.2 RELIEF VALVE ADJUSTMENT 2. Start pump and set capacity at 100%. If a drain valve is present in the discharge line, pump All MILROYAL G liquid ends have a built in relief ® process liquid to drain or other safe point to valve which allows hydraulic fluid to return to the establish proper pumping action. -
Page 17: Relief Valve Adjustment (Without An Adjustable System Back Pressure Valve)
SECTION 3 - OPERATION 3.3 USE OF AIR PURGE BUTTON 3.2.2 Relief Valve Adjustment (Without an Adjustable System Back Pressure Valve). Refer to Figure 7 & 8: If no adjustable back pressure valve is present As with any hydraulically actuated diaphragm in the discharge line, use the following simplified pump, dissolved air will come out of solution procedure to check and/or set the relief valve... -
Page 18: Manual Capacity Control
Milton Roy test-tube Calibration Columns are available for convenient and accurate calibration of any pump. The pump can also be... -
Page 19: Section 4 - Maintenance
All inquiries or parts orders should be addressed to 4. P u m p s e r i a l n u m b e r ( f o u n d o n p u m p your local Milton Roy representative or distributor. nameplate). -
Page 20: Check Valves
(if compatible with liquid being pumped) for Milton Roy recommends an annual tune up using 15 minutes, followed by flushing with water. a Routine Preventive Maintenance (RPM) Kit. - Page 21 SECTION 4 - MAINTENANCE 1-1/4” Plunger;Plastic Single Ball Check 1-1/4” Plunger; Metallic Double Ball Check Valves: see Figure 12 Valves: see Figure 13 1. Unscrew the valve body (445). The metallic check valves used on the 1-1/4” plunger size pumps are precision assembled at 2.
- Page 22 SECTION 4 - MAINTENANCE B. Reassembly (refer to figure 13) 1-3/4, 2-1/2, and 3”Plungers: Plastic Single- Ball Check Valves: see Figure 11 1. To install the cartridge, position the lock nut (435) toward the shoulder of the cartridge so A. Disassembly that the recess on the face of the lock nut is 1.
- Page 23 SECTION 4 - MAINTENANCE 7. Inspect the balls carefully. If they are smooth, 4. Position the union end (445) onto the correct round and free of deposits or pits, they are end of the ball guide. Refer to Figure 11 as the suitable for continued use.
-
Page 24: Oil Strainer Replacement
SECTION 4 - MAINTENANCE Inspect the balls carefully. If they are smooth, (445) onto the check valve assembly, trapping round and free of deposits or pits, they are a new O-ring (419) between the coupling and suitable for continued use. Examine the ball the check valve assembly. -
Page 25: Corrective Maintenance
(810, 820). should be limited to inspection and cleaning only. Repairs of this critical component should only be NOTE: carried out by an authorized Milton Roy repair When reinstalling, make certain that new facility. O-rings and retaining rings are installed on MARS assembly. -
Page 26: Refill Valve Assembly
Repairs of this critical component A. Removal of Diaphragm (Figures 7 & 8): should only be carried out by an authorized Milton Roy repair facility. BEFORE BEGINNING DISASSEMBLY PROCEDURES, RELIEVE The valve is designed to be easily removed through... -
Page 27: Removal Of Pump Liquid End
SECTION 4 - MAINTENANCE B. Installation of New Diaphragm A. Disassembly: (Figures 7 & 8): 1. Disconnect both the suction inlet and discharge 1. Make sure the contoured diaphragm support outlet from the piping system. surface and O-ring groove machined into 2. -
Page 28: Section 5 - Troubleshooting
• High suction lift (Insufficient NPSH). Most common with long suction lines, small diameter suction lines, acid pumping, polymer (viscous) liquids, or drawing from a source lower than pump. Consult your local representative or the Milton Roy Factory Aftermarket Department. - Page 29 SECTION 5 - TROUBLESHOOTING • Low discharge line pressure. Increase line pressure Excessive Delivery (e.g., install a back pressure valve). • Normal operating temperature of both motor and pump body is frequently uncomfortable to the touch. However, neither should exceed 200°F (93°C). •...
-
Page 30: Section 6 - Part Numbers
SECTION 6 - PART NUMBERS 6.1 BASIC PARTS LIST- PUMP DRIVE (Refer to Figure 5 & 6) Item No. Description Qty. Req. Housing O-ring Drain Plug Gear Thrust Flange Bearing Bearing Cup Gear (144/173 spm) Gear (72/86 spm) Gear (43/36 spm) Gear (180 spm) Connecting Rod Sliding Crank... - Page 31 Lock Washer (8mm) Displacement Chamber Screw (M8x30mm) Note 1: Worm Assembly (343) includes worm, coupling (346), spring (360), and bearing cone (340). Note 2: For part numbers not listed, consult local Milton Roy representative or Milton Roy Aftermarket Department (215-441-0800). Instruction Manual...
-
Page 32: Basic Parts List- Liquid End
SECTION 6 - PART NUMBERS 6.2. BASIC PARTS LIST- LIQUID END (Refer to Figure 7-9) 6.2.1 MARS VALVE (see Figure 9) Item No. Description Qty. Req. 775(Note 1) Valve Assembly 750(Note 2) Valve Body 760(Note 2) Poppet 770(Note 2) Valve Stem Button (1-1/4”... -
Page 33: 3- Function Valve
SECTION 6 - PART NUMBERS 6.2.3 3- FUNCTION VALVE (see Figure 8) Qty. Item No. Description Req. Valve Cap Purge Button Purge Button Spring Relief Valve Adjustment Screw Relief Valve Locking Nut Relief Valve Adjustment Nut O-Ring Purge Stem Washer O-Ring Relief Valve Spring (1-1/4, 1-3/4”... -
Page 34: Pvc Liquid End
SECTION 6 - PART NUMBERS 6.2.5 PVC Liquid End (see Figures 10-13) 1-1/4” plunger: Single Ball Check Valve (see Figure 12) Item No. Description Qty. Req. Check Valve Assembly Tubing Conn: includes Cartridge Valve Assembly Tubing Connector Valve Body-Tube Check Valve Assembly NPT Conn. includes Cartridge Valve Assembly Valve Body- NPT 4 Function PVC Bleed Valve (see Figure 14) -
Page 35: Metallic Liquid End
SECTION 6 - PART NUMBERS 1-3/4, 2-1/2, 3” plungers: Single Ball Check Valves, (Figure 11). Item No. Description Qty. Req. Check Valve Assembly Assemblies include two seals (419), seat (420), ball (422), ball guide (424) Seal, PTFE Encapsulated Rubber Seat, PVDF Ball;... - Page 36 SECTION 6 - PART NUMBERS Alloy 20 Liquid End, 1-3/4, 2-1/2, 3” plungers: Double Ball Check Valves (Figure 10) Item No. Description Qty. Req. Check Valve Assembly Check Valve assemblies include two seals (419), seat (420), balls (421, 422), ball guide (424) O-Ring, viton Ball Stop Ball, 14mm...
-
Page 37: Remaining Liquid End Parts
SECTION 6 - PART NUMBERS 6.3 REMAINING LIQUID END PARTS (see Figure 8) Item No. Description Qty. Req. Diaphragm, 1-1/4” Diaphragm, 1-3/4, 2-1/2, 3” plungers Plunger Sleeve, 1-1/4” plunger Plunger Sleeve, 1-3/4” plunger O-Ring (1-1/4”, 1-3/4” plungers only) Screw, M6 x 18mm (1-1/4, 1-3/4” plungers only) Lock Washer Screw, M8 x 30mm O-Ring... -
Page 38: Figure 2. Sample Nameplate
X.X GPH @ XX PSI Motor XXX PSI MA WP Tag No. 12345678 41/2” XXXXX12345678 (114.3 mm) Liquid End C L Milton Roy Company Made in USA 0.354” (9 mm) Dia. Mounting Holes Figure 2. Sample Nameplate Figure 3. Mounting Hole Dimensions Pressure Relief... -
Page 39: Figure 5. Pump Drive Parts- Side View
MOTOR 182TC EC80 MOTOR MOTOR Figure 5. Drive Parts- Side View Instruction Manual... -
Page 40: Figure 6. Pump Drive Parts- Top View
SEE LIQUID END Figure 6. Drive Parts- Top View Instruction Manual... -
Page 41: Figure 7. Liquid End- Top View
1020 PLASTIC ONLY 1050 PLATE IS USED ON 1-1/4” PLUNGER ONLY. LARGER PLUNGER SIZES USE WASHERS TORQUE TO 1025 40 IN-LB FOR METALIC 20 IN-LB FOR PLASTIC View for 1-1/4” PLUNGER Size. 1040 1030 1035 SEE DRIVE HOUSING TORQUE TO 125 IN-LB FOR PLASTIC HEAD 1025 250 IN-LB FOR METAL HEAD... -
Page 42: Figure 8. Liquid End- Cutaway View
3- FUNCTION HYDRAULIC VALVE 1015 1005 1010 SEE CHECK VALVE 1000 1020 TORQUE TO 125 IN-LB MARS VALVE SEE FIGURE NEXT SHEET REFILL VALVE Figure 8. Liquid End- Section A-A Instruction Manual... -
Page 43: Figure 9. Mars Value
MARS VALVE Mechanically Activated Refill System (MARS) Valve assembly. Except for O-rings, the valve may only be purchased as an assembly. Figure 9. MARS VALVE The MARS Valve is located between the plunger and the diaphragm. Instruction Manual... -
Page 44: Figure 10. Double- Ball Check Valve Parts (1-1/4"-Plastic;1-3/4, 2-1/2"-Pvc & Metallic)
DISCHARGE SUCTION PVC and Metallic Double Ball Check Valve Parts- 1-1/4” thru 2-1/2” Plunger Sizes Metallic Double Ball Check Valve Parts- 3” Plunger Only Figure 10. DISCHARGE SUCTION PVC Single Ball Check Valve Parts Figure 11. Instruction Manual... -
Page 45: Figure 12. Plastic Check Valves For 1-1/4" Plunger
SUCTION DISCHARGE SHOWN WITH TUBE CONNECTIONS DISCHARGE SUCTION SHOWN WITH NPT CONNECTIONS Figure 12. Plastic Check Valves, 1-1/4” Plunger Size Instruction Manual... -
Page 46: Figure 13. Metallic Check Valves For 1-1/4" Plunger
METALLIC CHECK VALVES Figure 13. Metallic Check Valves, 1-1/4” Plunger Size Instruction Manual... -
Page 47: Figure 14. Pvc 4- Function Bleed Valve For 1-1/4" Plunger
PVC LIQUID END FOUR FUNCTION BLEED VALVE 1.25” PLUNGER FOUR FUNCTION BLEED VALVE NPT CONNNECTION SHOWN Cartridge Valve Assembly SPACER(0.040”) SPACER(0.020”) Cartridge Valve Assembly Suction Valve Assembly NPT CONNNECTION SHOWN Figure 14. Four Function Bleed Valve Instruction Manual... - Page 48 We are committed to a world of sustainable progress and enduring results. Info@miltonroy.com MILROYAL is a registered trademark of Milton Roy, LLC. www.miltonroy.com ® © 2019 Milton Roy, LLC.
Need help?
Do you have a question about the MILROYAL G and is the answer not in the manual?
Questions and answers